This will be the first blog I post here. I don't aim to spend too much time on writeups but to record and manage a knowledge database for PWN. But as a start user of blogs, I now practice to use blog to write articles.
0x1 USER.TXT
The runner box is the first and a linux machine for Season 5. Let's start the usual schedule to perform Port Scanning & Dir Enum.

A classis piece of port combination, we have port 20, 80, 8000. And 8000 is the open-source Nagios monitoring system, which we had used a CVE to break Nagios XI last season. And I will skip the part of Dirsearch here that the outcome won't help us to go further. Even the 80 port returns a '403 Forbidden' response to shut us out of the door.
So we will think of DNS Enum. I use ffuf in ctf to dig subdomains that we cannot write it into /etc/hosts in advance.
ffuf -c -w /usr/share/seclists/Discovery/DNS/n0kovo_subdomains.txt -u "http://runner.htb" -H "Host: FUZZ.runner.htb" -fc 302You may wonder why we use this dictionary. It's actually Trial & Error. We need to use a large and custom dictionary for the outcome:
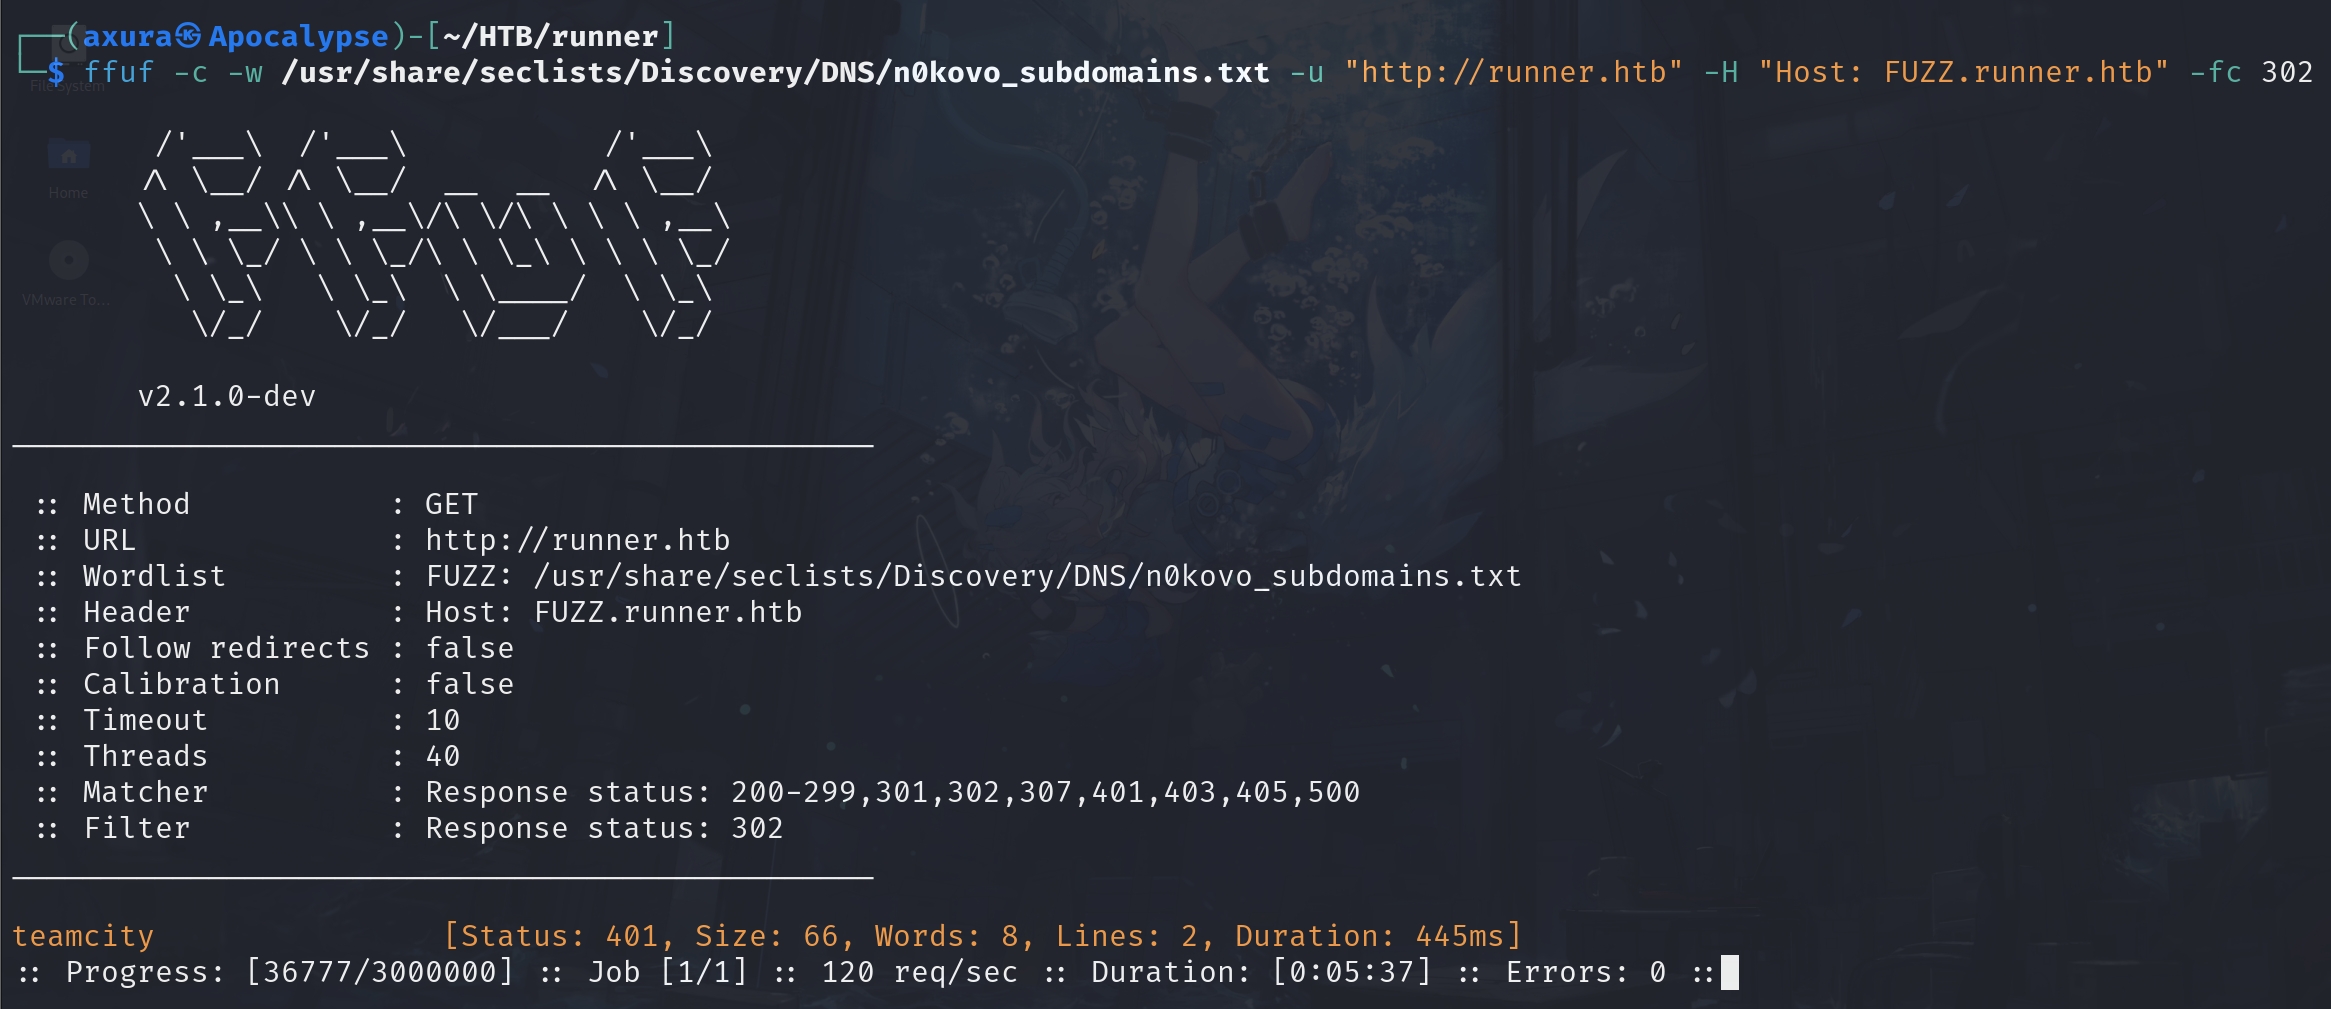
As we already got a suspicous result from the start, we can save some time to try the subdomain Teamcity first. It's not that common in our usual case, so it did cost us some time to find it out. And since then I have added it to my BugBounty program scripts.

Use the browser to open http://teamcity.runner.htb. The answer is straight forward that our version is 2023.05.3. The JetBrains TeamCity 2023.05.3 has a CVE-2023-42793 at exploitdb. We can simply save the EXP script and run to get a pair of username & password with admin priviledge:

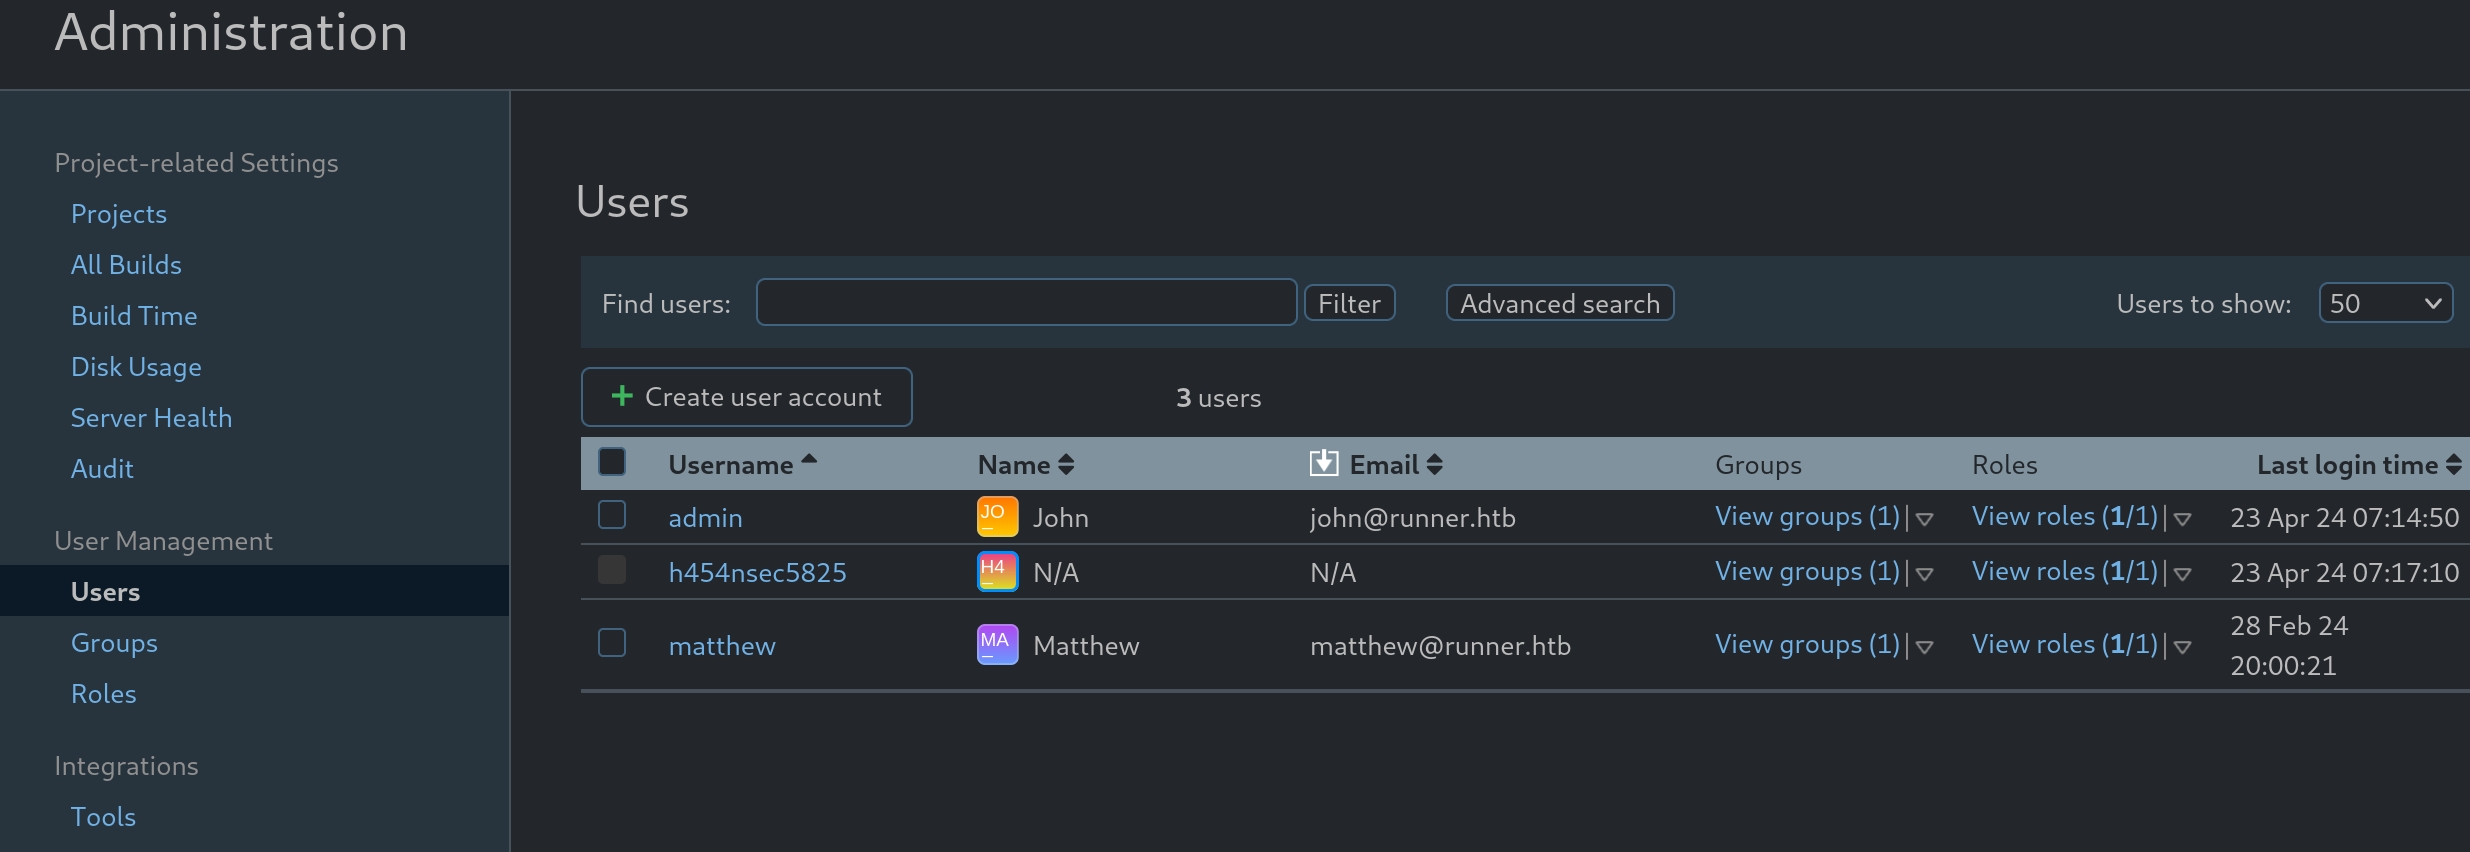
Once we get into the admin panel with the creds, we can do some infomation gathering. As here below we can discover there are two accounts beyond the one we just created. They are john and matther.
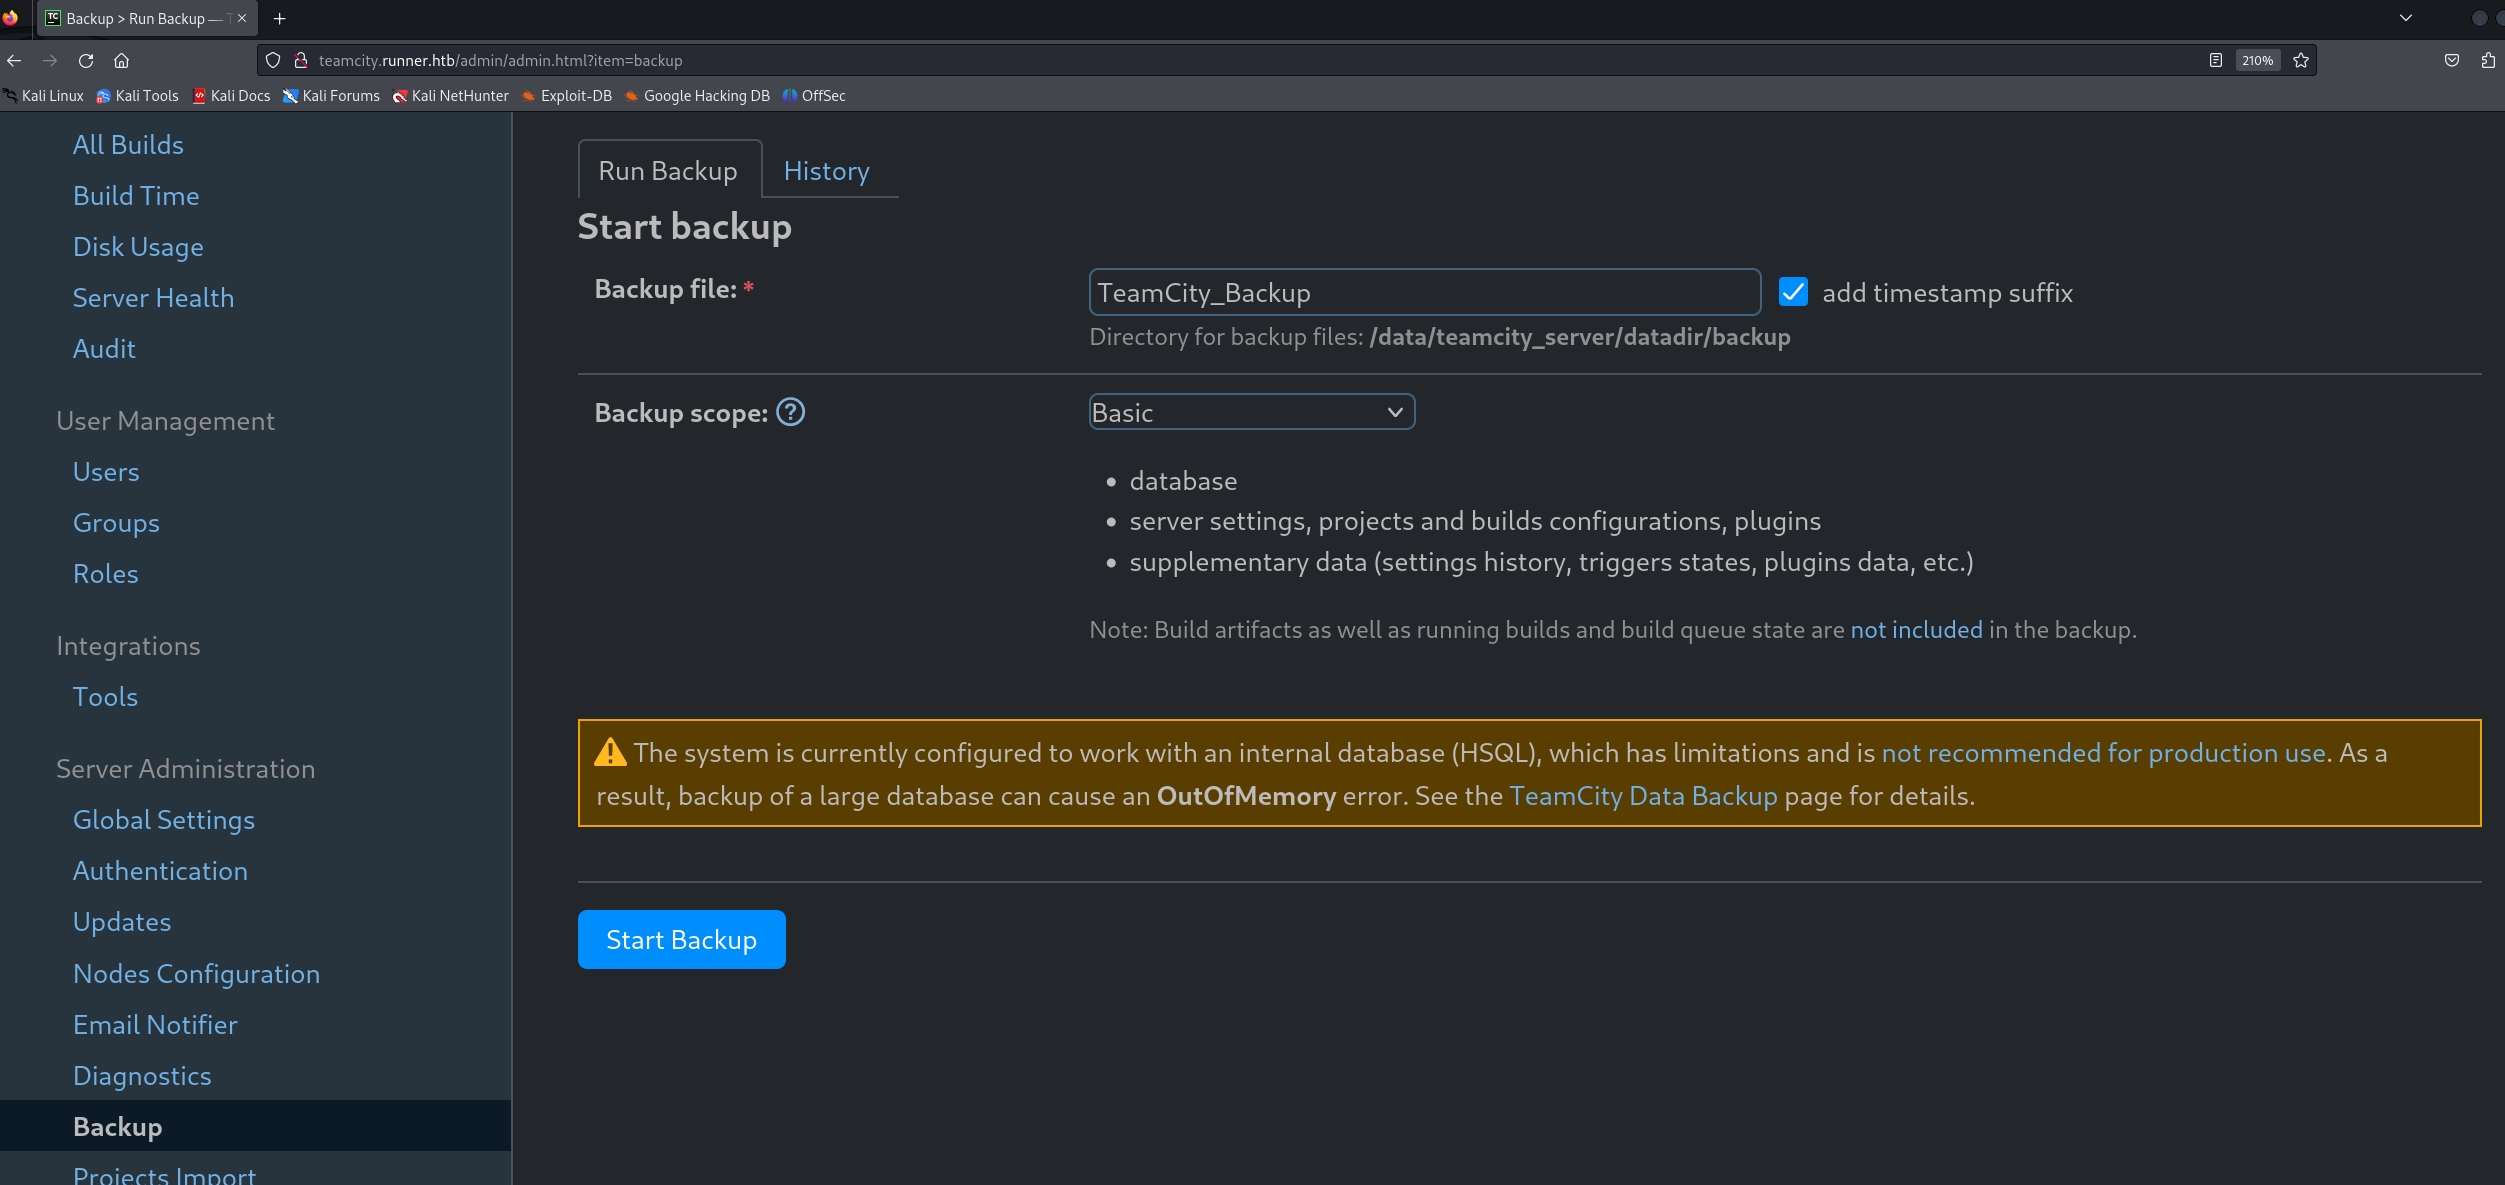
Then we continue to look up the admin panel. We discover there's a backup option here. Just run it and download the backup files.
We can then continue enum more information, aiming some login credentials or vpn configurations.

Wow, 2 password hashes found! But the john's hash is uncrackable, while matthew's hash is cracked as piper123 but we cannot use it to ssh login our target machine. So we continue to enumerate the backup files.

There are a lot of files in it. At last we found a private key named id_rsa, which can be used to ssh login as john.

Got User flag. That's easy.
0x2 ROOT.TXT
Then we will find a way to get root. Since we have already found another user's credential, we can find some way to lateral to our friend matthew.
Remember when found the port 8000 open when we did the Port Scanning? And when we type http://runner.htb:8000/version into the browser, we got a response of 0.0.0-src, while browsing http://runner.htb:8000 gives us a not found response.
This is likely to be a docker container (as well as for port 5000 open sometimes). We instantly check out the netstat of the linux machine:

We see some ports listening, which means they are probably listening for some services. Test them, talk to them. And we know port 9000 is our next target.
Now we need to visit port 9000 listening on localhost. There are tons of ways to perform Portforwarding, like chisel, msf, etc. Recently I favour ligolo-ng a lot. I am not going to explain here in the article for how to do it, we can simply refer to various documentation to complete the Portfowarding process.
Victim Side:

Attacker:
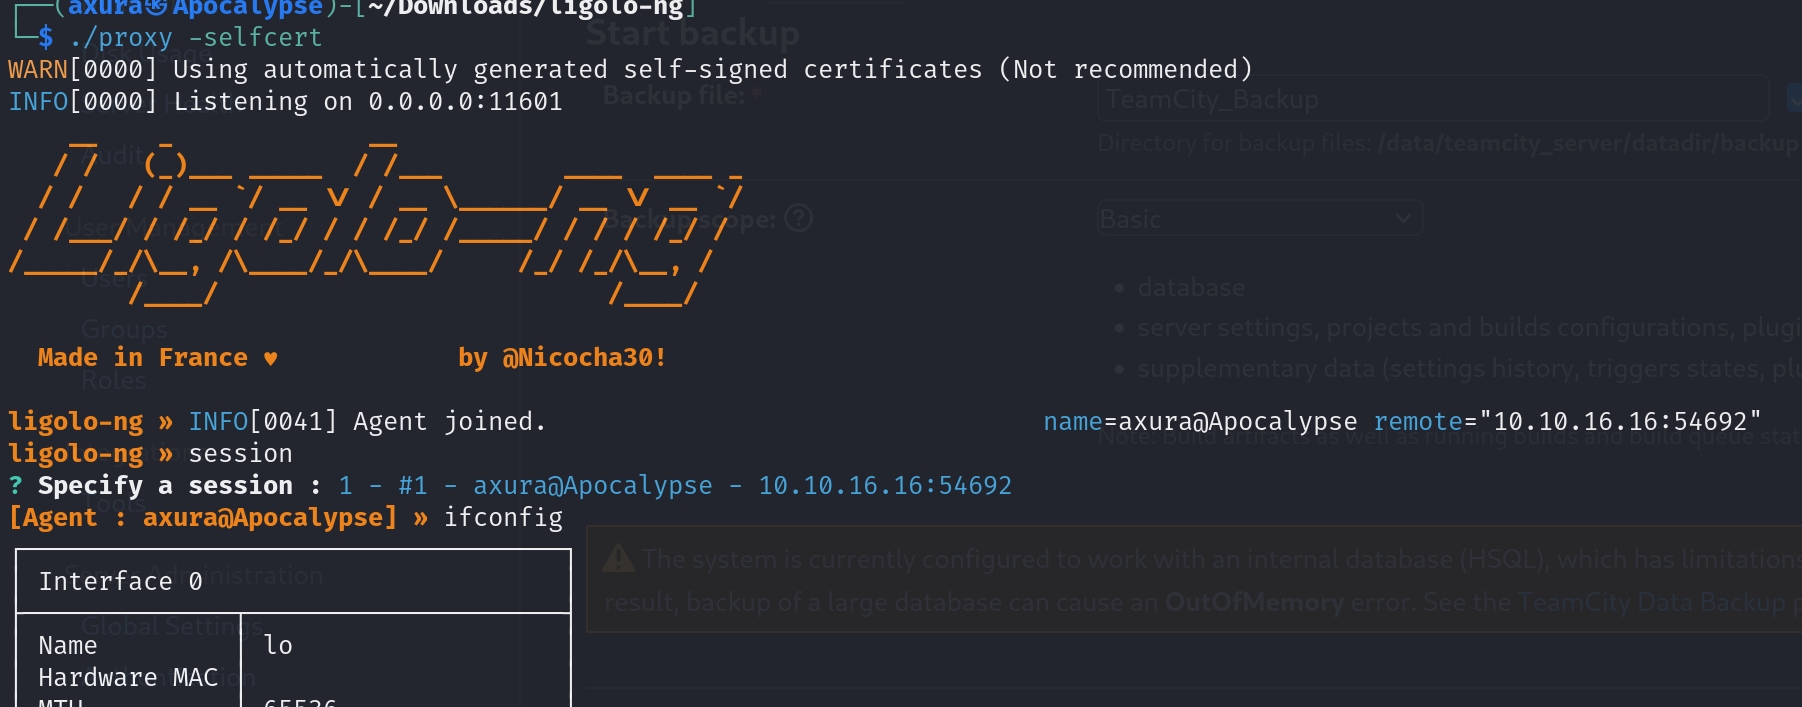
So after some set up we are now availble to visit 127.0.0.1:9000 through the browser on our local machine:
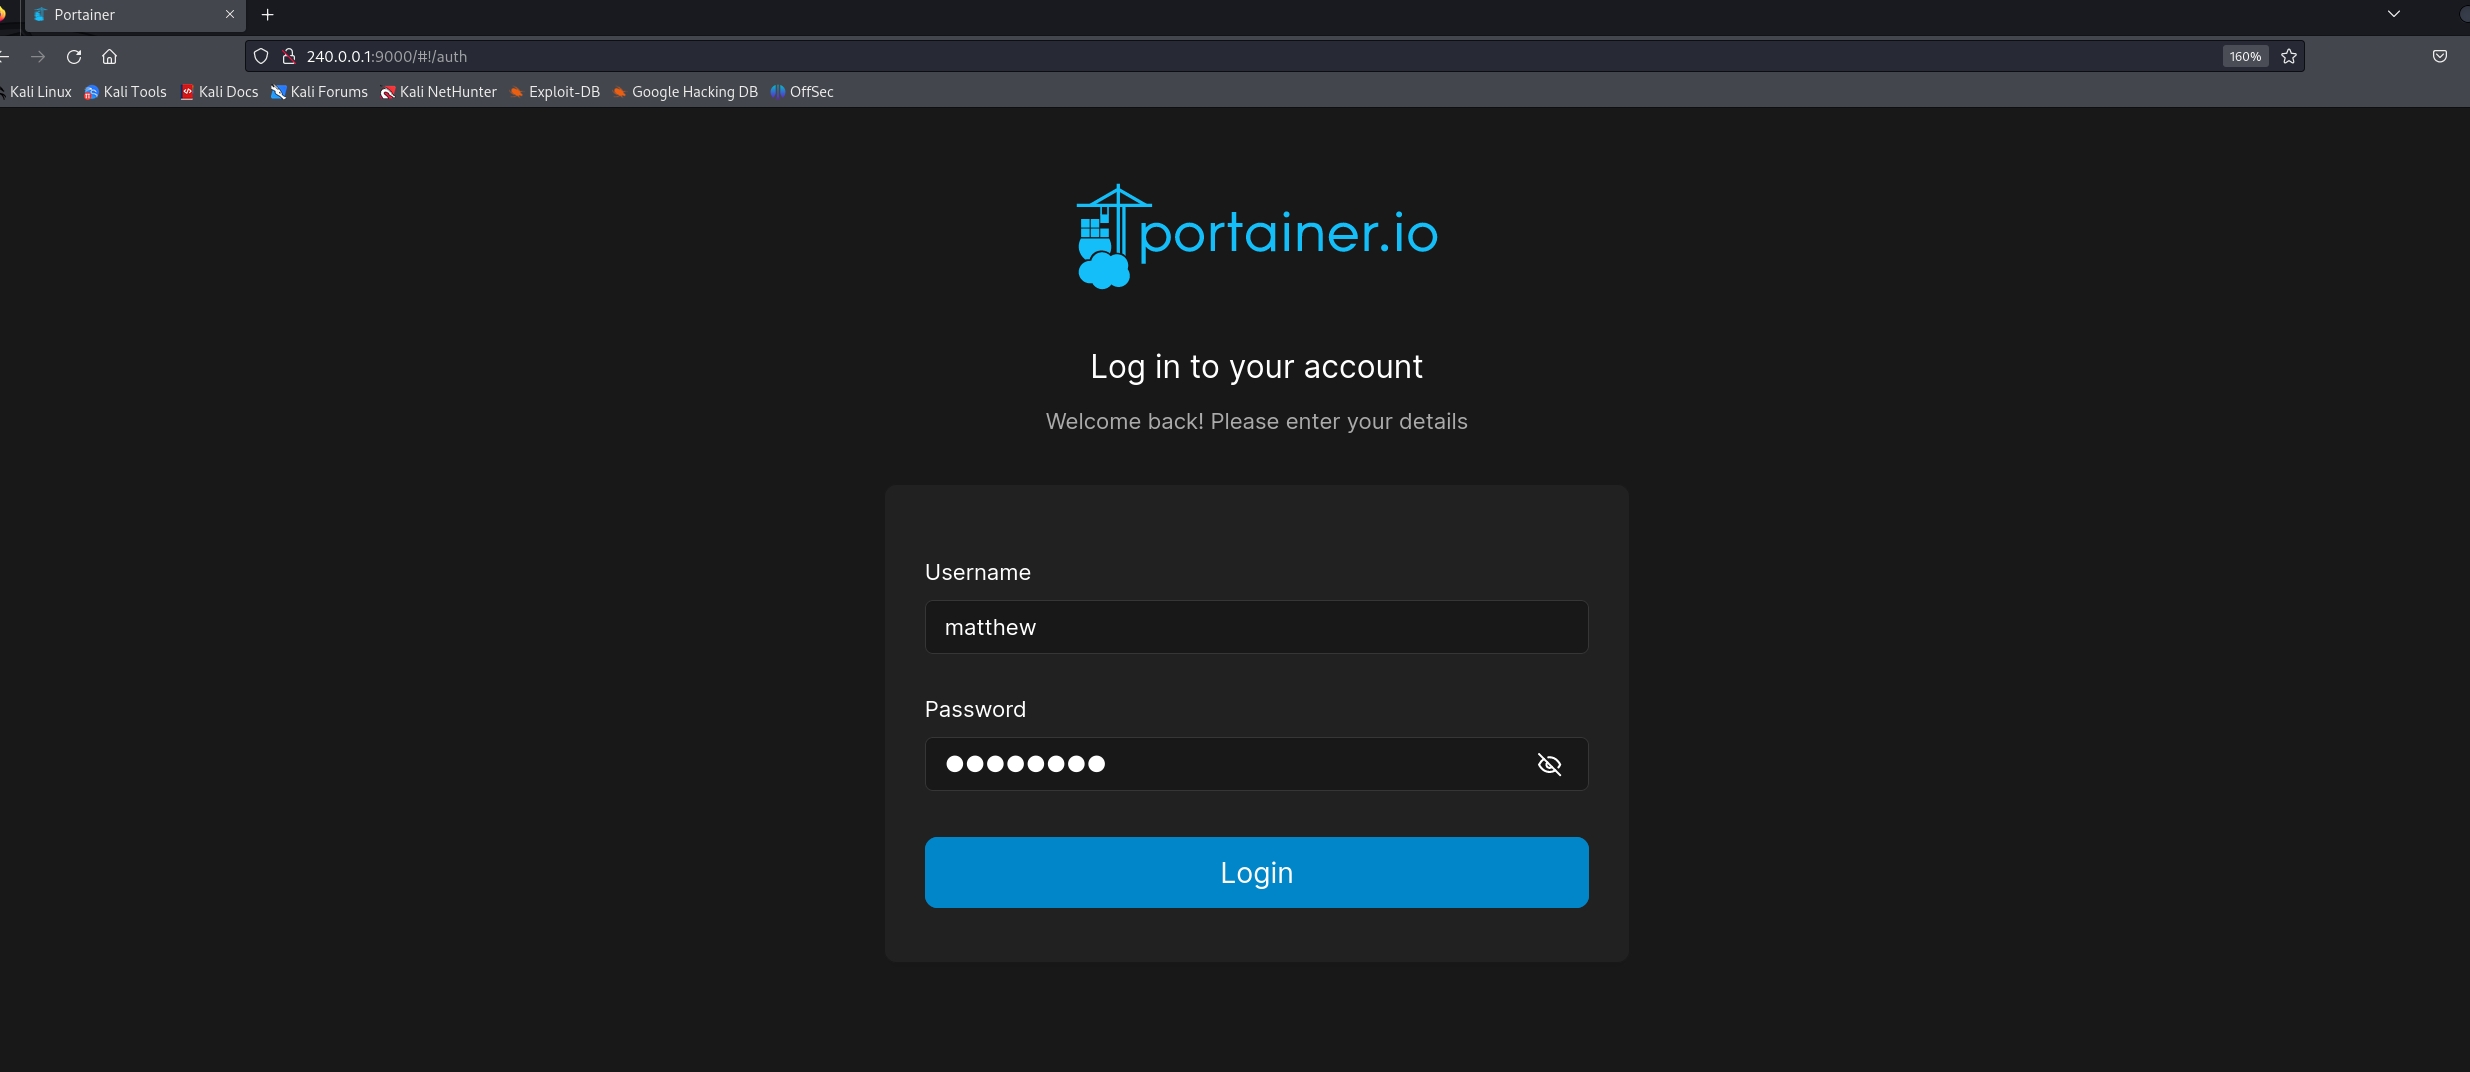
Bang! It's the portainer docker management system. We use matthew's creds (matthew:piper123) to login. Bingo!
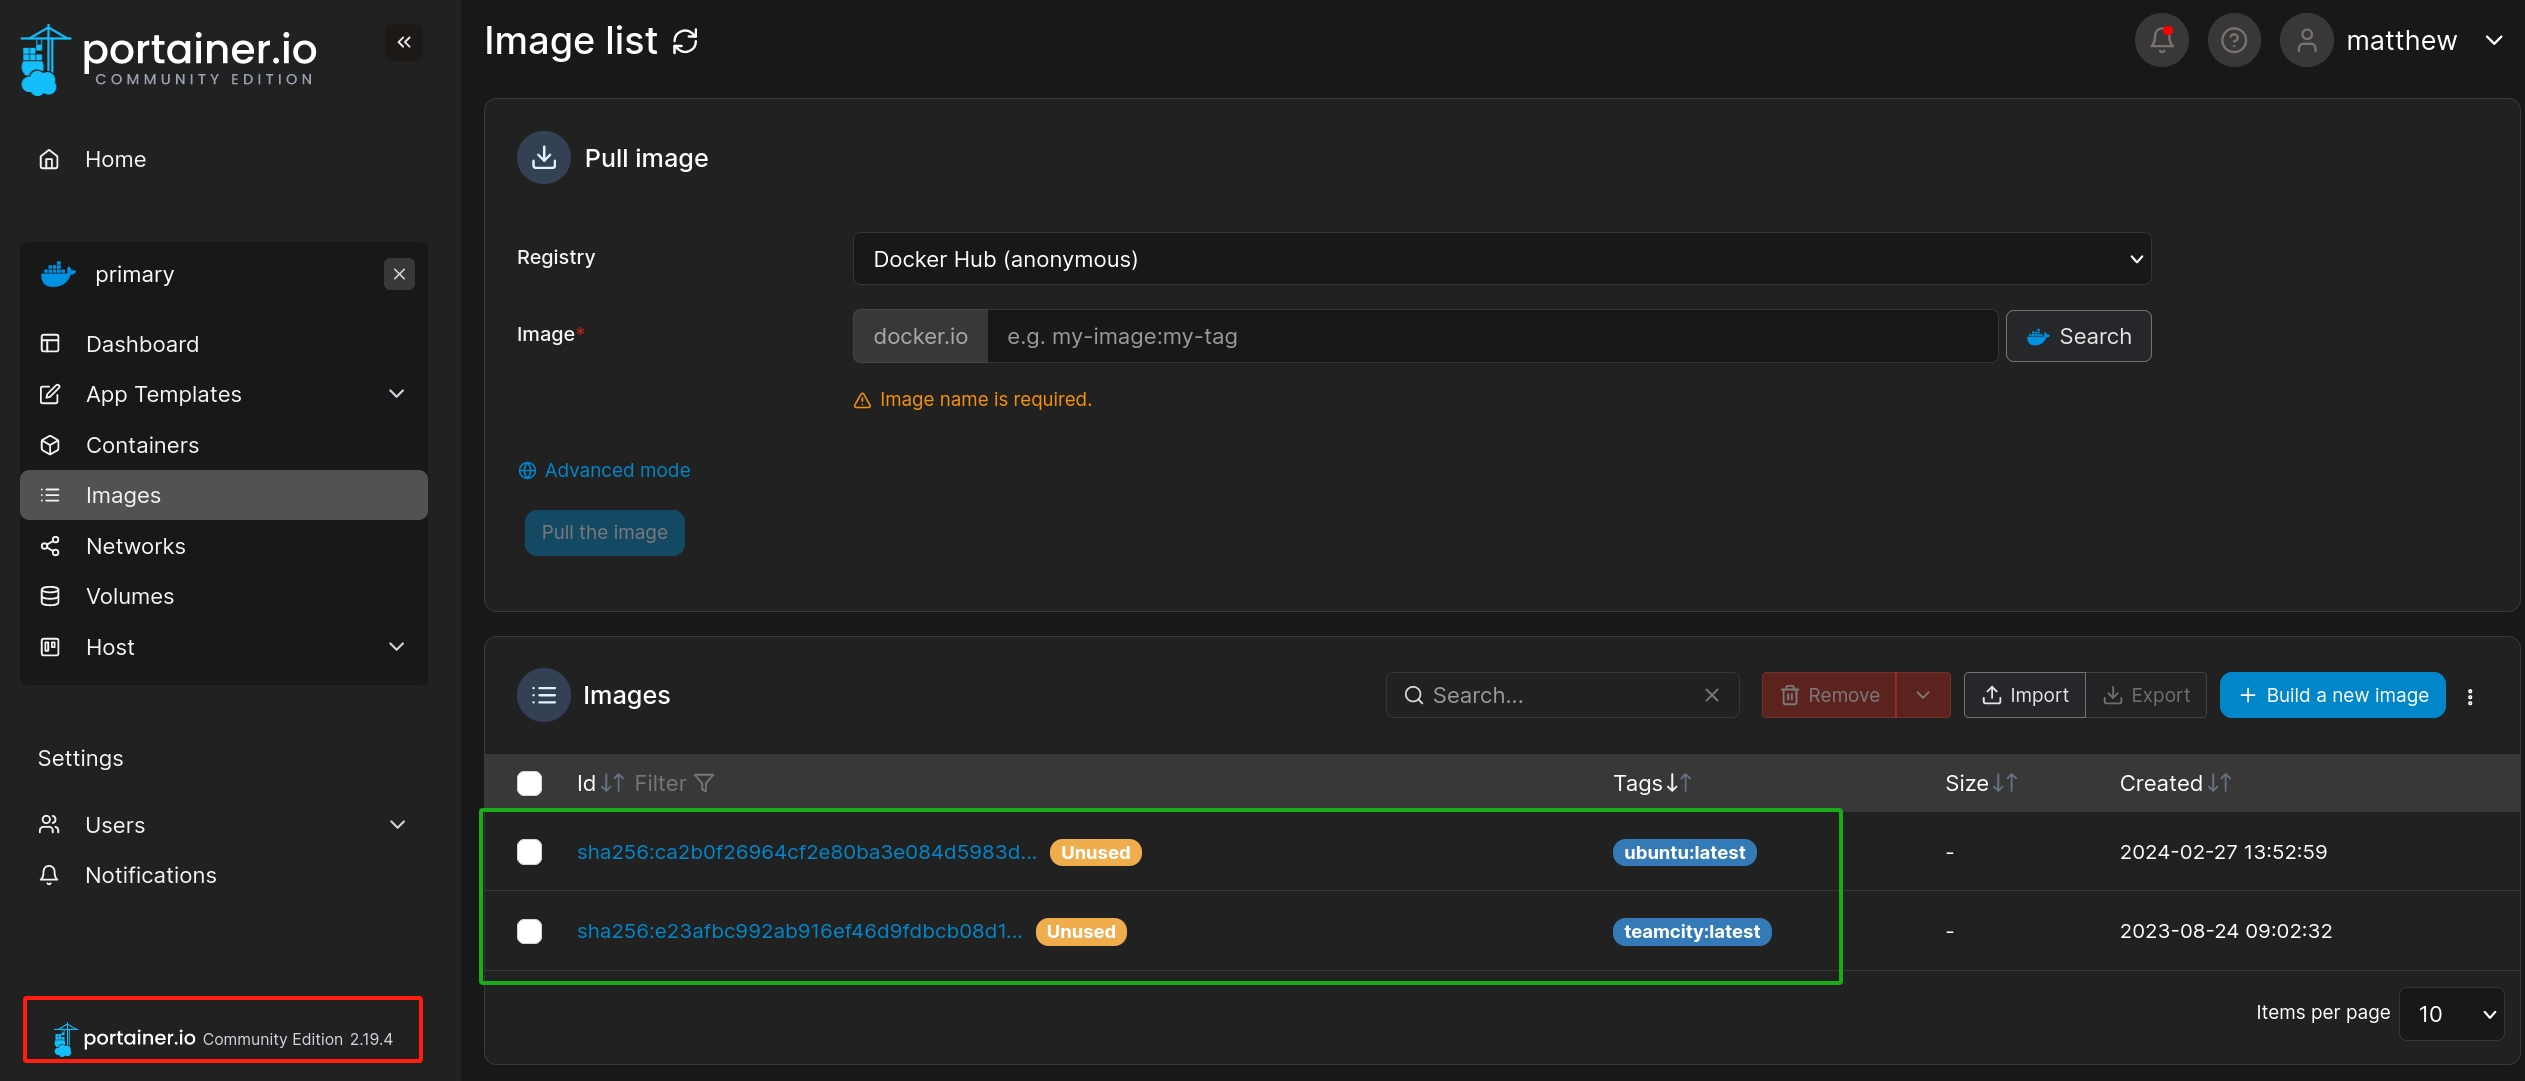
We can see the version of portainer is 2.19.4, which is vulnerable. And two images are installed, which means we probaly can add new containers on this system to run with these images.
From here I found two ways to root.
- Intended way:
As there are 2 images, one for 'ubuntu:latest' and another 'Teamcity:latest'. And we are going to need the 'ubuntu' one. Because the 'teamcity:latest' image don't have the priviledge to allow us to visit the root folder with the console.
Before starting the new docker container, we need to set up to add a volume first. Volumn stores data for us when we run and initialize the docker container. And we need to config the driver option so that we can later mount the root path into our docker container. There's an official documentation of portainer.io, but it does NOT really tell us what values we need to set in the volumn.
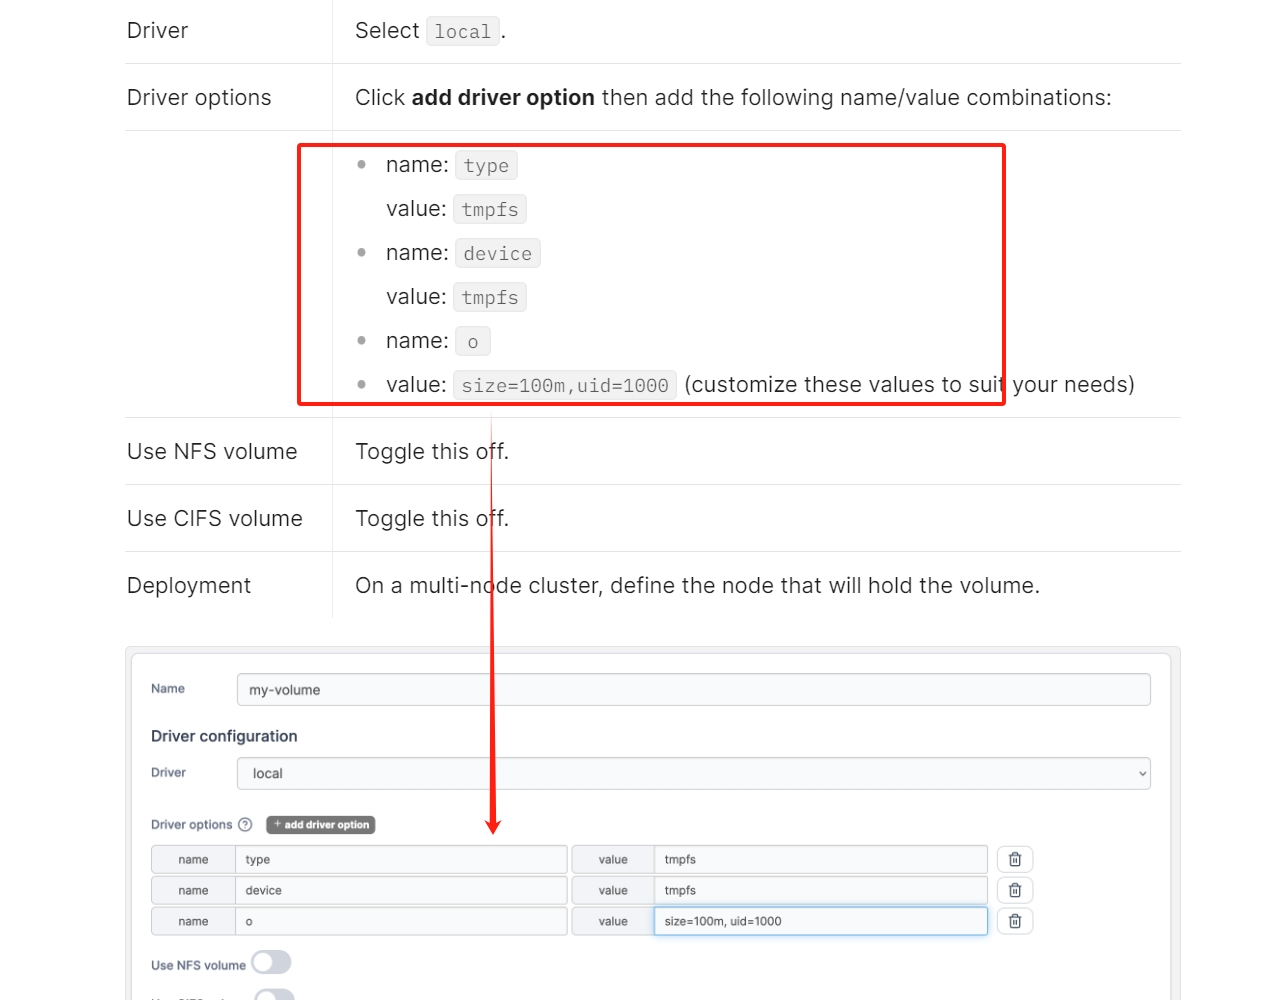
Well, that's something we need to figure out by ourselves. We need to look into /etc/fstab in the victim machine to find the answer. Our target is to emulate a storage device behavior like sda (a common identifier for a primary disk in Linux). I am going to explain this for a bit.
The /etc/fstab file in Linux is used for mounting filesystems automatically at system boot. It contains information about where various filesystems or storage devices should be mounted, and with what options. Each line in the file describes a particular filesystem.
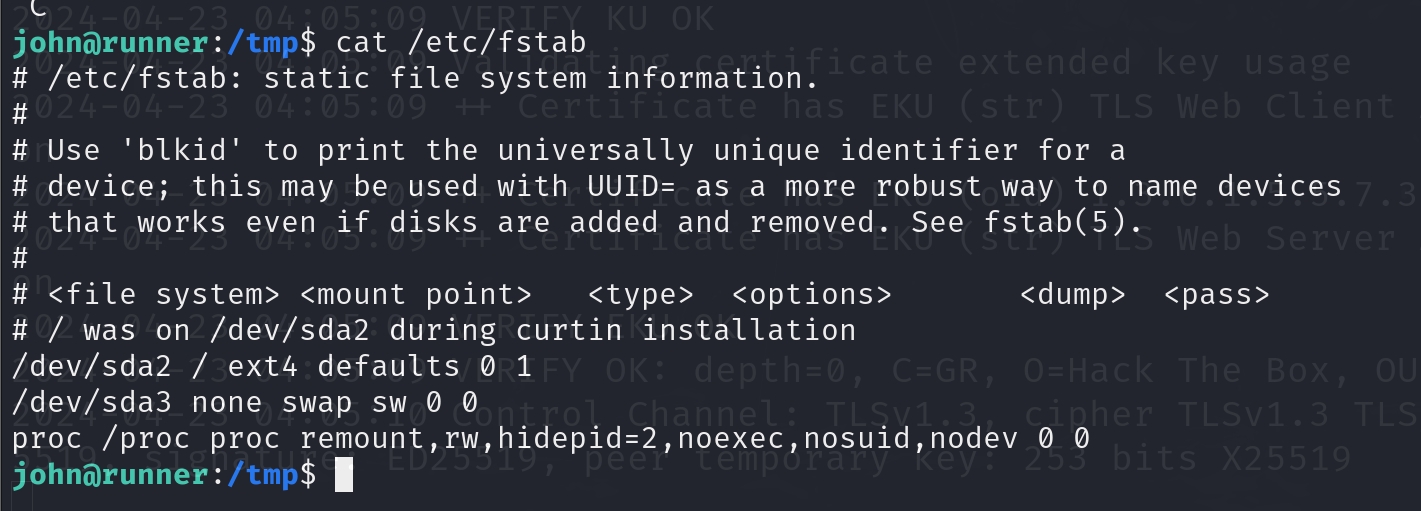
When we're talking about emulating sda within a Docker container, we need to mimic the behavior or properties of a primary disk inside a container. This can be particularly useful for testing or development purposes where we need a consistent storage environment similar to a physical or virtual machine.
And that's why we would set up the driver option in the volume . Docker volumes can be configured to behave in specific ways using driver options. When we set up a Docker volume, we can specify options that affect how the volume behaves. To emulate something like an sda device, we might then be considering options that influence how the volume is mounted or managed within the container.
So we need to config this key values as follow to create the volumn:
- Name:
device, Value:/ - Name:
o, Value:bind - Name:
type, Value:none
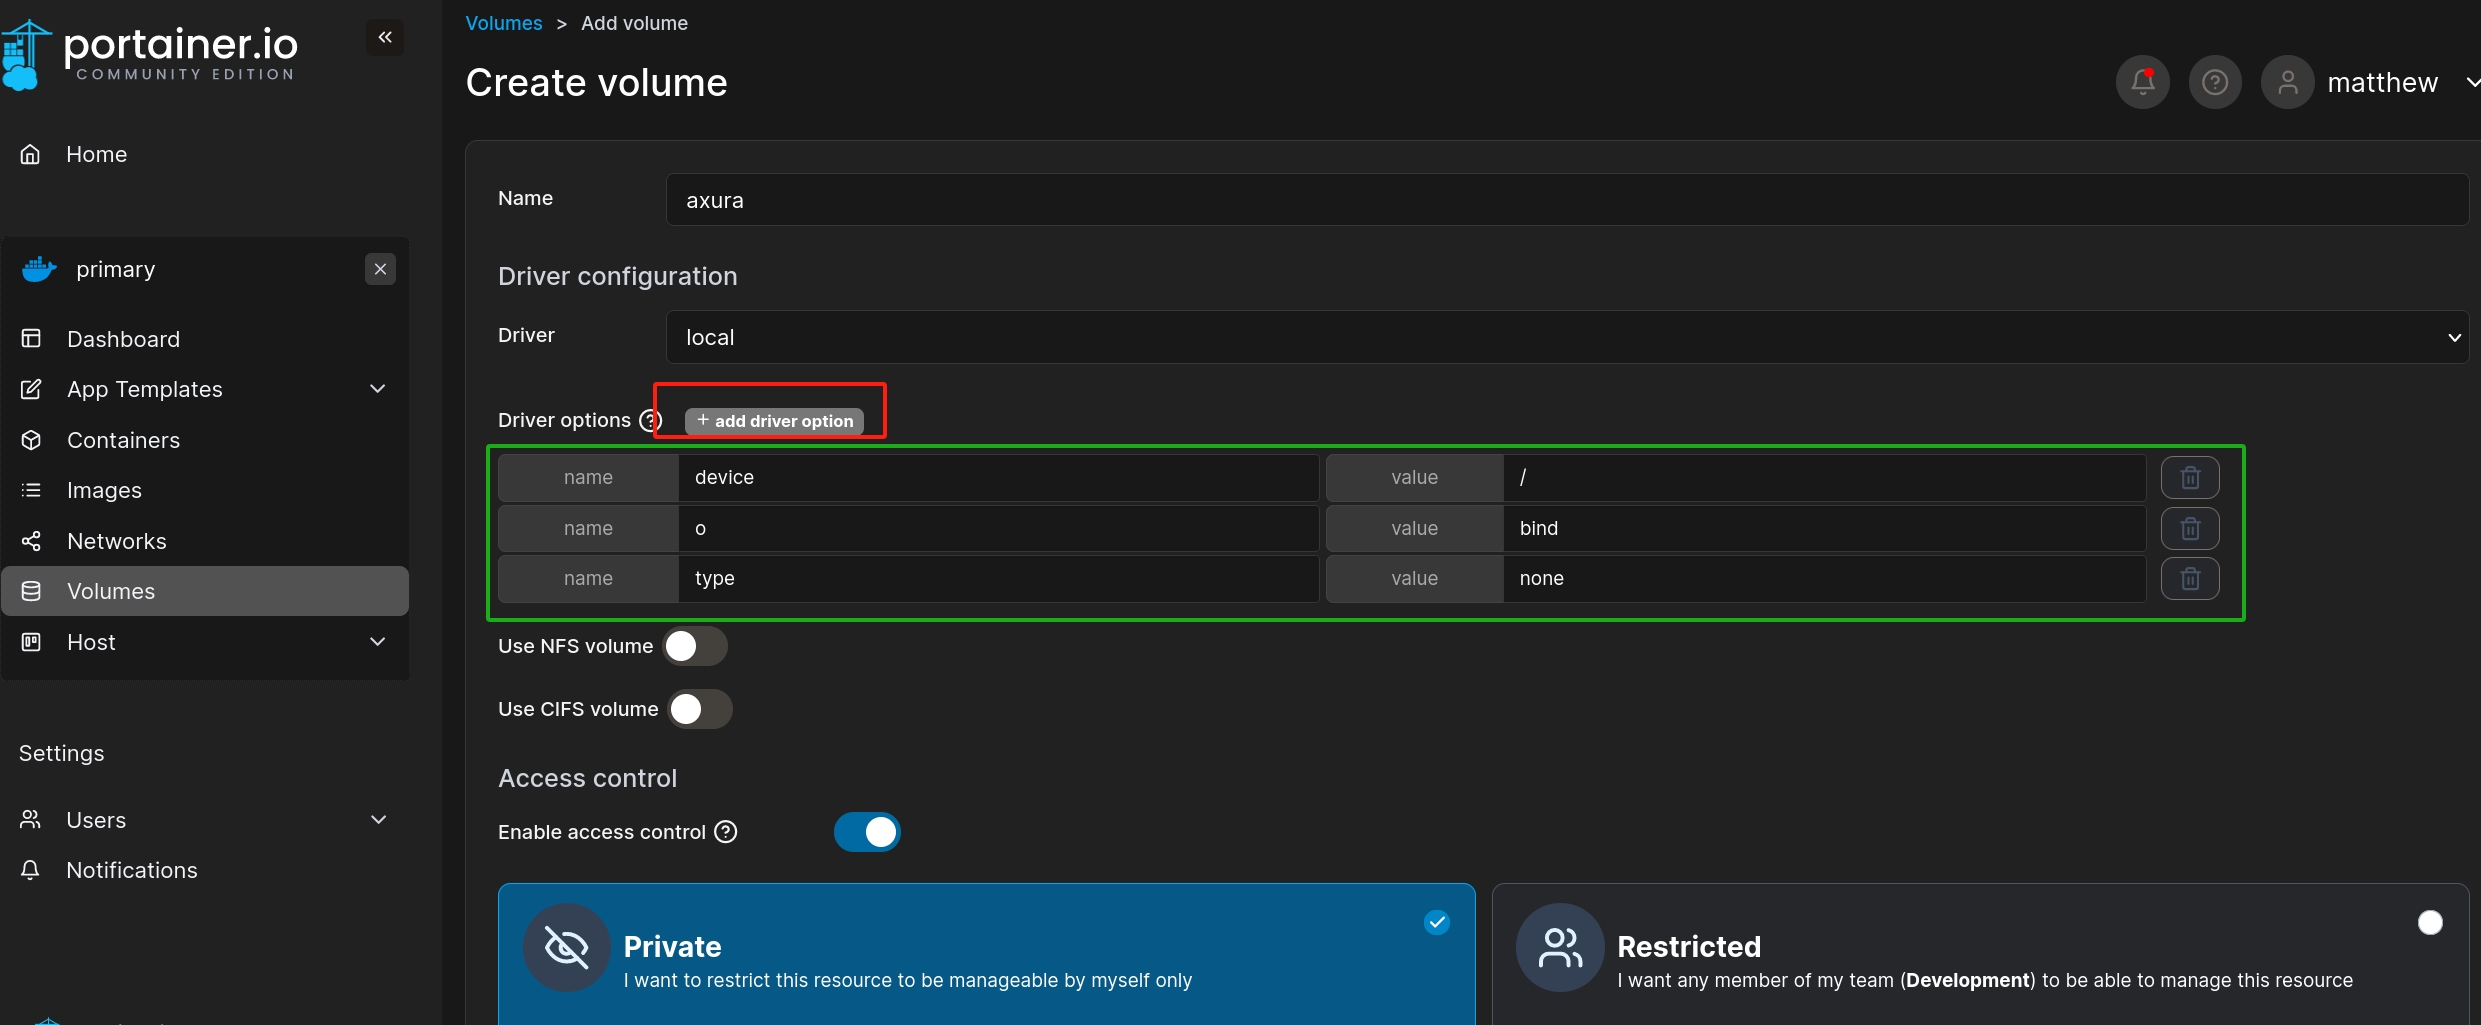
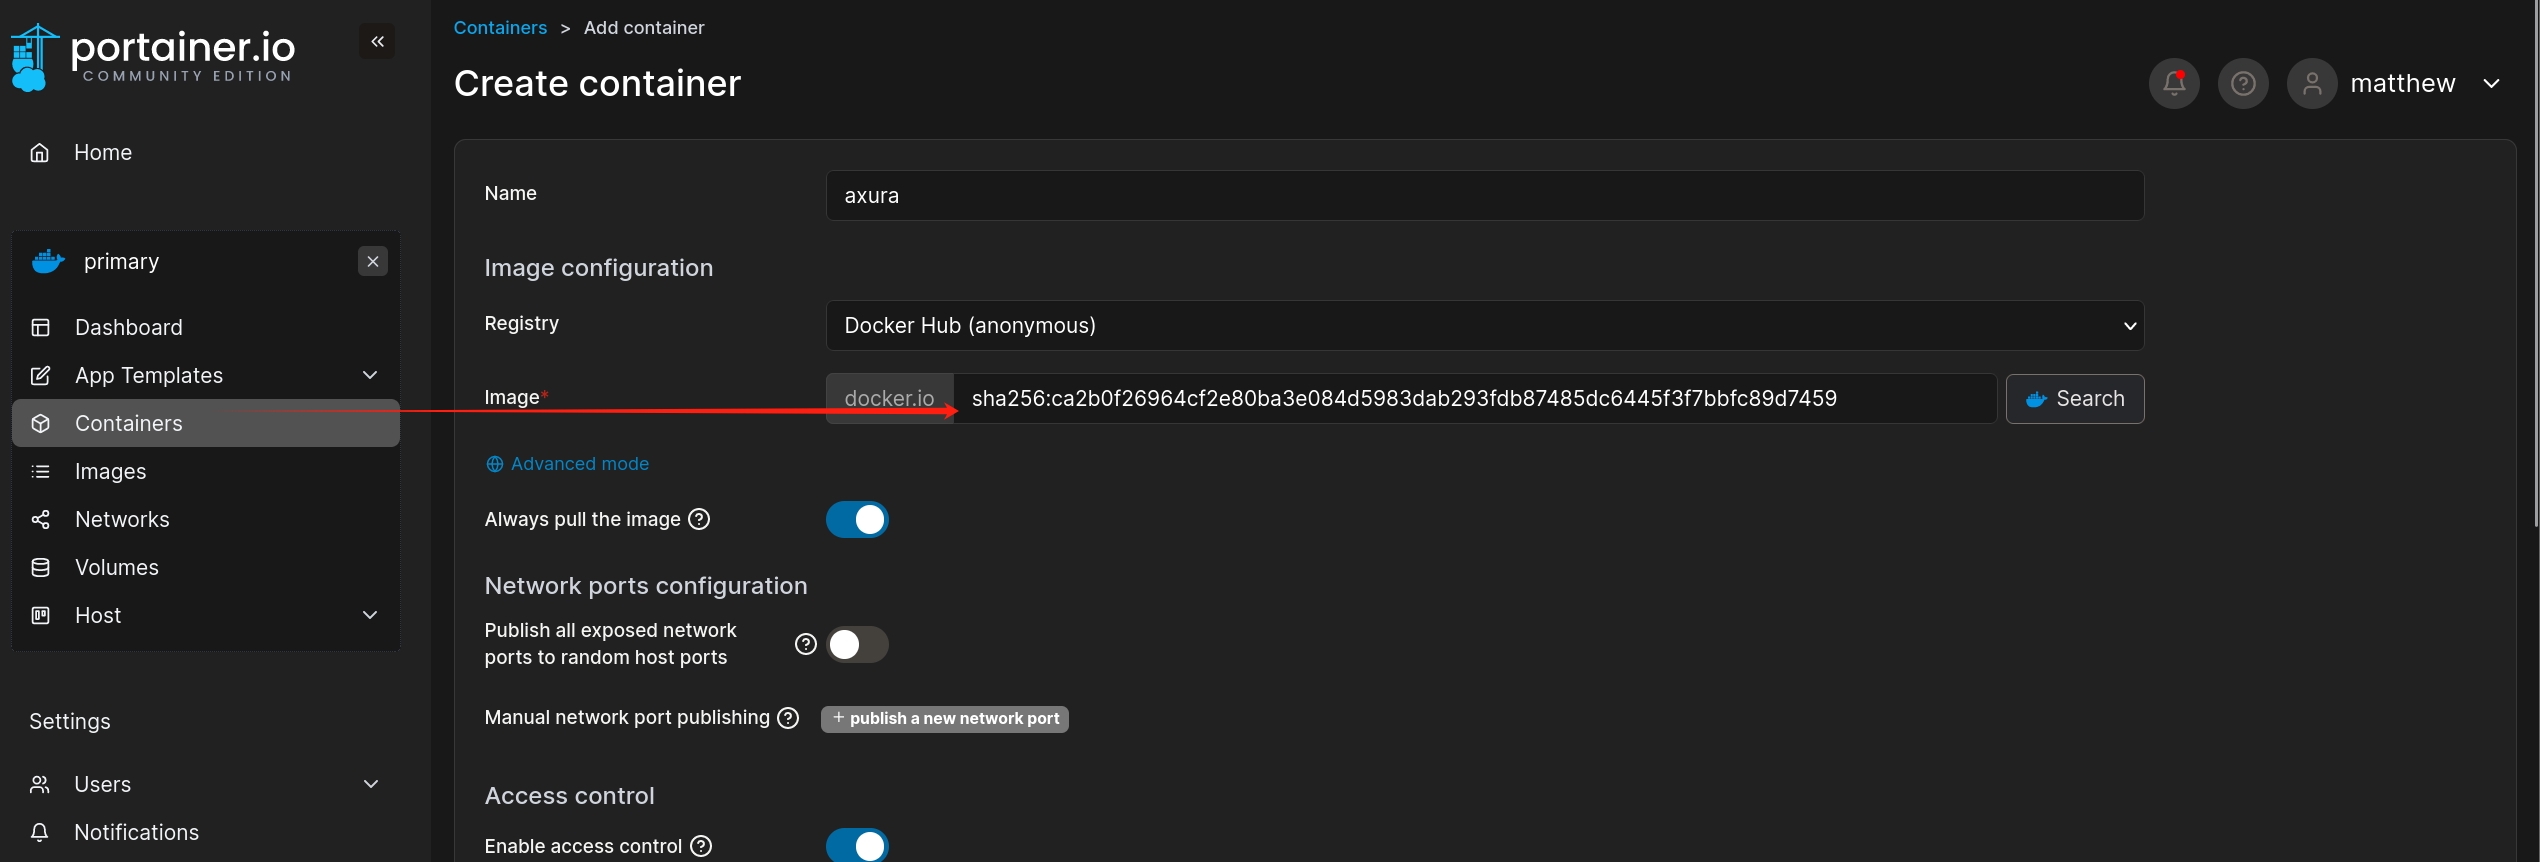
Once we finish the set up to create the volumn, we can then add a container with the image ID of ubuntu:latest.
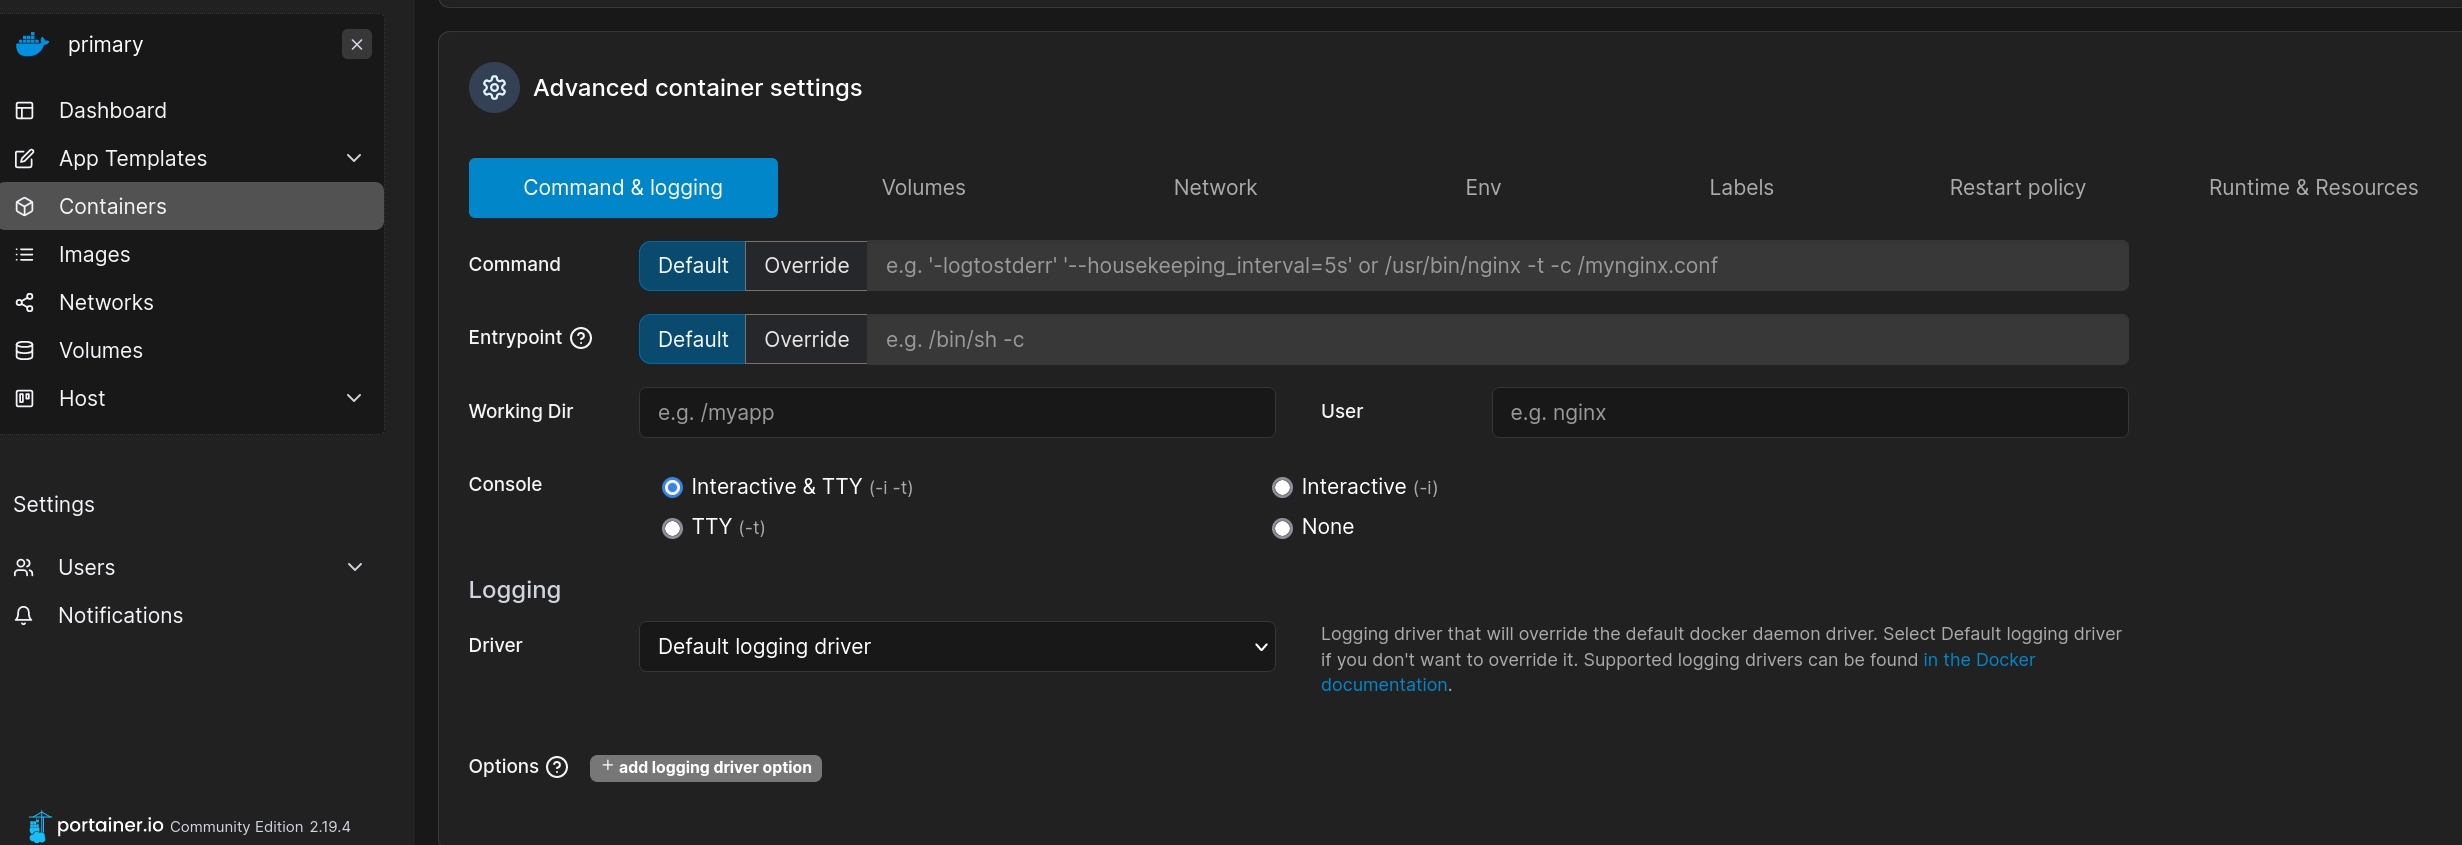
And set the option Console to be Interactive & TTY:
We also need to config the Volums option. Choose map additional volumns. Input the path of the container and mapped volumn we just created:

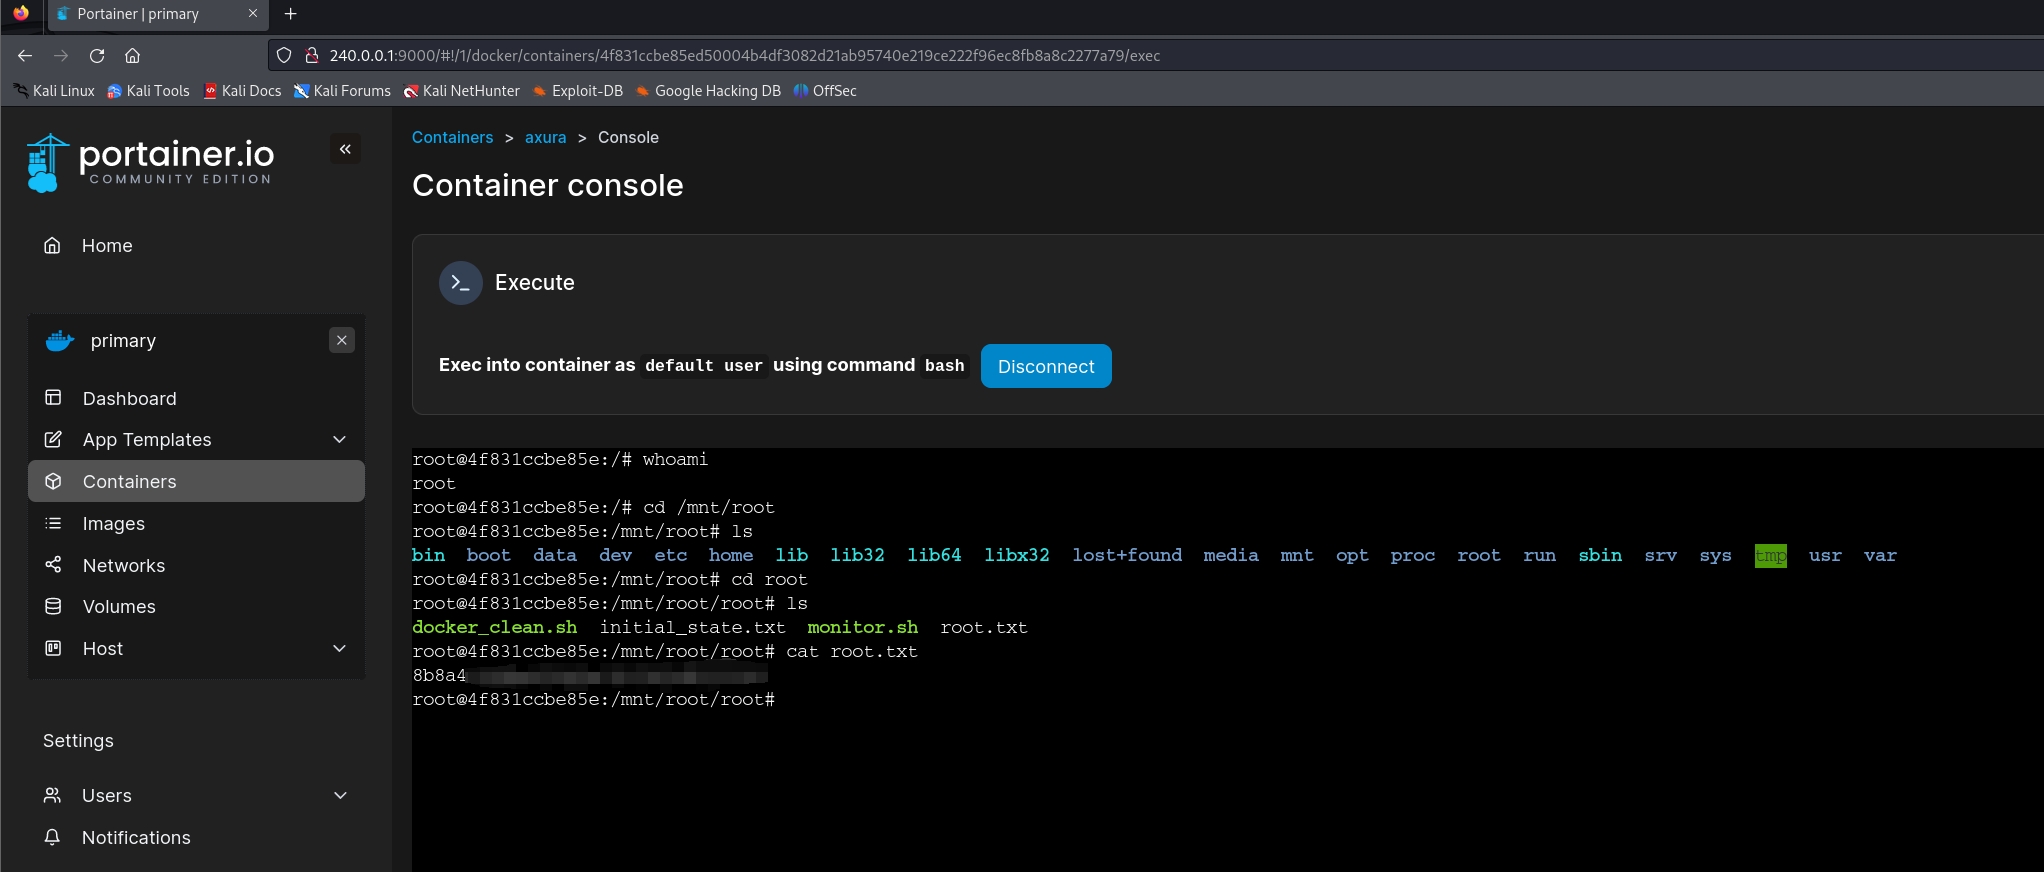
At last, hit Deploy the container, we will finish our set up. Once we go back the container list, we can run the console and access the /root path of the ubuntu image with the mounted path on the docker container (/mnt/root)

We are rooted.
- Unintended way:
As for the 'unintended way', it is about a sandbox escape for docker container, named as cve-2024-21626. I am not going to explain it in this article, it's actually way beyond a medium machine difficulty to understand. But when we have time, we should really read Ritro's Blog: https://nitroc.org/en/posts/cve-2024-21626-illustrated/#exploit-via-setting-working-directory-to-procselffdfd.
With this method, The idea is 'escaping' the docker container restriction to interact with the victim. So we don't need to care if we are running the newly added container with ubuntu:latest or teamcity:latest.
We can set working dir: /proc/self/fd/8.

Even without creating the volumn, we can then start the new docker container with /bin/sh. Finally in the console, run:
cat ../../../../../../../root/root.txtWe got the root flag.

Have taken 3 cups coffee to finish this writeup. If you think this is helpful, it will be generous for you to tip !


Comments | 2 comments
Great content. Your explanation is so good. Concise when it need to be, but without skipping any useful steps. Wish there was more.
I really hope you keep it up!
@Stranger Welcome to be the first comment of this blog, Stranger :)